It is always such an honor to get to hang out at Tatertots and Jello! I’m Kendra from My Insanity.
I think Jen and I have both been on a marshmallow-y, wintry-white vibe this Christmas, so I’m hoping she will enjoy this project, and that you will, too.
Chances are good that you may have already hung a wreath on your door for Christmas, but this project is all about winter, so it will be at home on the front door all the way through January–after the rest of the Christmas decorations have made their way to the garage/basement.
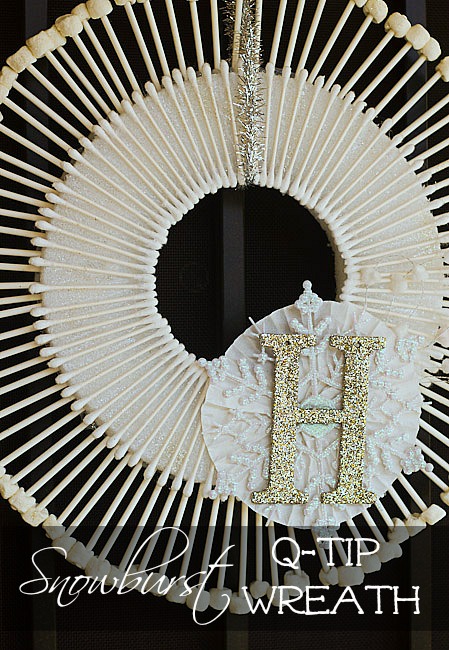
I’ve got to admit that initially the idea for this wreath came from joking around with my friends. But then I started to get excited about the possibilities. I designed this wreath to echo the feel of the sunburst mirrors that have been popular targets for DIY knock-offs in recent years, but utilized cotton swabs and marshmallows to keep it fluffy and wintry. After all, my theme for Christmas this year is “Marshmallow World.” Am I the only one who picks a theme for each holiday? My main reason for doing it is that I tend to be extremely indecisive and themes always give me focus and spur on new ideas.
Here is a quick rundown on how to make one of these wreaths for your front door.
Here are most of the supplies I gathered to work with. Most if this was found at Walmart. In addition I purchased a foam disk from Walmart and lots of marshmallows. Buying a white piece of foam will save lots of trouble in the long-run since the foam will show-though, but it just looks icy behind the cotton swabs. You see it here in #1.
1. My disk did not have a hole in the center–which seems pretty necessary for a wreath, so I found a wide-mouthed glass to mark the area that would be cut out. You might want to do a little measuring before-hand to make sure the width of the foam is slightly smaller than your cotton swabs, so the edges will be covered nicely.
2. Cut out the circle cleanly.
3. Begin adding the cotton swabs around the foam with a hot glue gun. Make sure the ends of the swabs are touching tightly around the center of the wreath. There will be a little space in between the swabs around the edges. It can be difficult to gauge the angle the swabs should be glued at sometimes. Periodically, I would try and line up the swab with the on just opposite of it around the wreath. If you were to draw a line from on to the other, you’d want it to make one long line.
BTW: You may be wondering why I used cotton swabs for this part. Mainly, it is because it is an easy way to have a finished edge and still have some of that snowball field. We took our Marshmallow World Christmas card photos in front of a cotton field since there is no snow in Arizona. So to me, cotton can be synonymous with snow–except for the being cold part.
4. Have your little helpers (who are resisting the temptation to shove fistfuls of marshmallows in their mouths) help stick mini-marshmallows on the end of lollipop sticks and hand them to you to add to the wreath.
5. Poke the marshmallow lollipop sticks in to the side of the foam.
6. Some of the sticks didn’t feel very secure, so I reinforced them with some hot glue at the base.
7. Admire your completed project–But we’re not through yet!
8. I used this non-yellowing gloss enamel spray from Martha Stewart to add some protection to the marshmallows (I haven’t had it up long enough to let you know how it wears. But it seems to have done the job.) While the spray was still damp, I sprinkled a little glitter to give it a little more sparkle–and make it obvious to the kids that this is a decoration, not a snack.
9. Accessorize! I used some large cupcake liners as the back drop for my dollar store snowflake, Glittery monogram ornament, and a bit of a mini puff ball garland. I just used lots of hot glue to attach everything to eachother and to the wreath.
My kids love it and had fun helping me make it, which is a big bonus in this season of hustle and bustle!
And I love how it stands out against my dark front door!
If you are feeling ambitious, or want a bigger wreath, use the cookie length stick (longer) to add another row of marshmallows behind the first.
It’s been so great to hang out with you today! I hope you’ll come over and see what other unusual or “crazy” projects and parties I have been up to on My Insanity!
Wow Kendra — that is so creative!!
Thanks for sharing it with us today.
Kendra is the queen of party ideas.
Here are just a few of the great ones from Kendra at My Insanity:
Be sure to check out all of the awesome ideas at My Insanity and give Kendra a big TT&J hello!!
HAPPY Holidays!!
xoxo
PS – It’s Friday!!
My favorite day of the week.
It’s time to show off YOUR great ideas.
I have a SUPER fun giveaway coming up from one of my favorite shops too!!
I hope you can join in the fun – it starts tonight at 6 pm MST.










I love the idea! It gives me inspiration to make a sunburst décor sunburst mirror. It is also seems very inexpensive as well.
Thanks for this fun idea Kendra!! It is so creative!!
xoxxo
Thanks, Jen! It’s so nice of you to let me share!
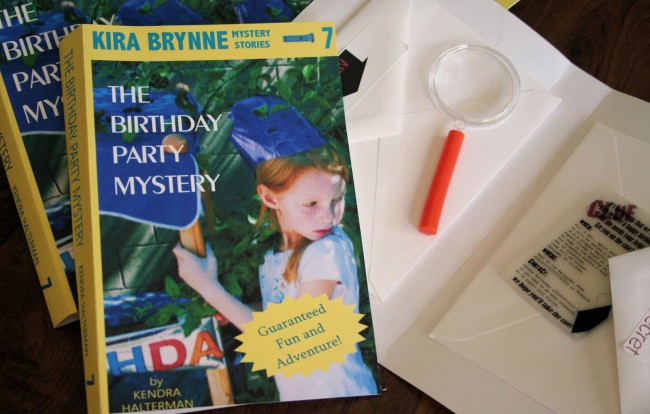
Oh, I LOVE your Nancy Drew Party.. So cute!
Angelina
Thank you! Who doesn’t love Nancy Drew? Right?
I love your Snowburst Wreath.. So very wintery and festive. Though I am not sure mine would be as full as yours.. I would have a VERY hard time not eating all the Marshmallows 🙂 Thank you so much for sharing it!!
You and my children, both! We just made sure to buy extra marshmallows. 😉