I love fountain Diet Cokes and cookies. I also love Jen and I’m kind of mad that my step mom (who is her neighbor) didn’t introduce us like 7 or 8 years ago.
![]() I’m a mom to 4 insanely cute kids
I’m a mom to 4 insanely cute kids
- Canvas
- Old magazines &; scissors
- Mod Podge
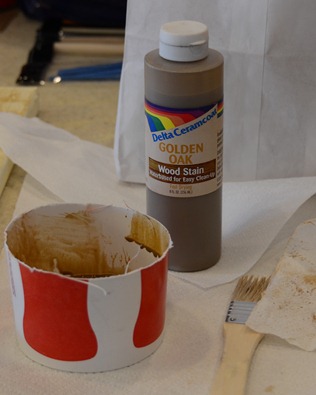
- Acrylic craft paint Stain (optional)
- Sandpaper

I adore Char.
Check out her great ideas—-
And we will both be at The Creative Connection conference this fall!!
It’s an exciting conference that bring together creative women with hands-on workshops in all sorts of creative areas plus social networking and business panels to help those with handmade bhusinesses. And TCC has just joined forces BlogHer as its official media partner and Mary Janes Farm. Be sure to check TCC out!
Aren’t they fun?
Have a Happy Day!!

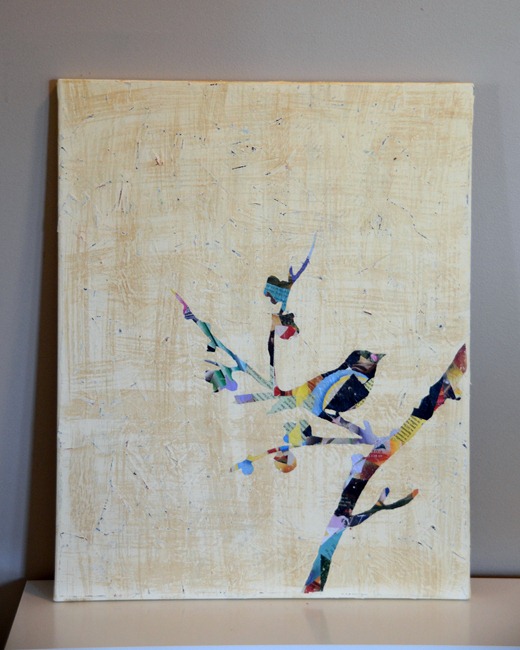


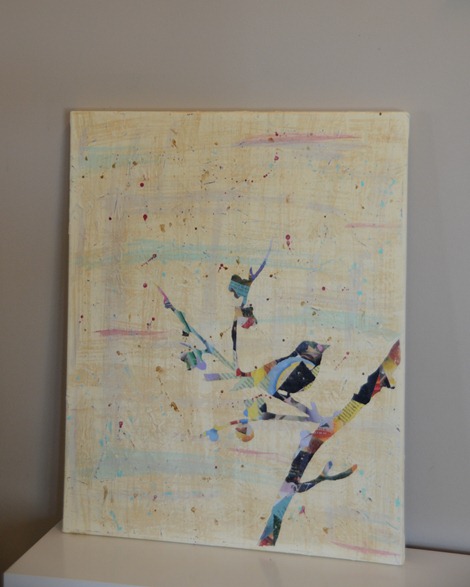

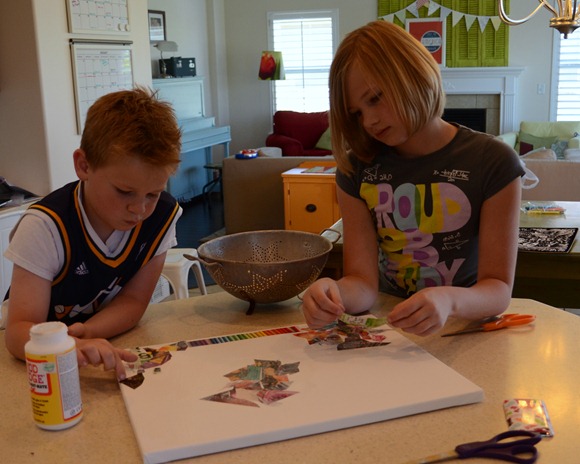


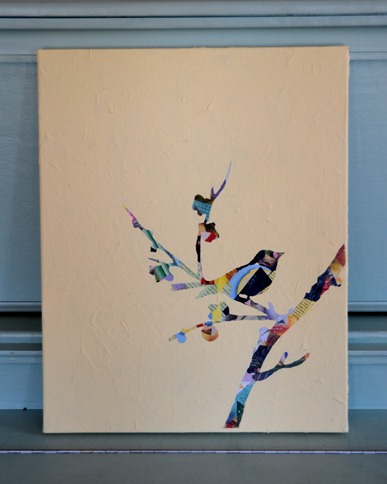
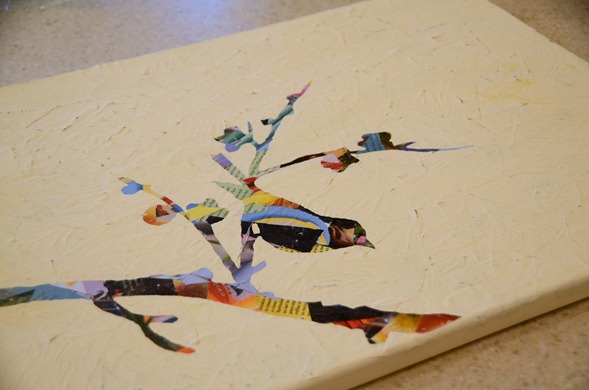
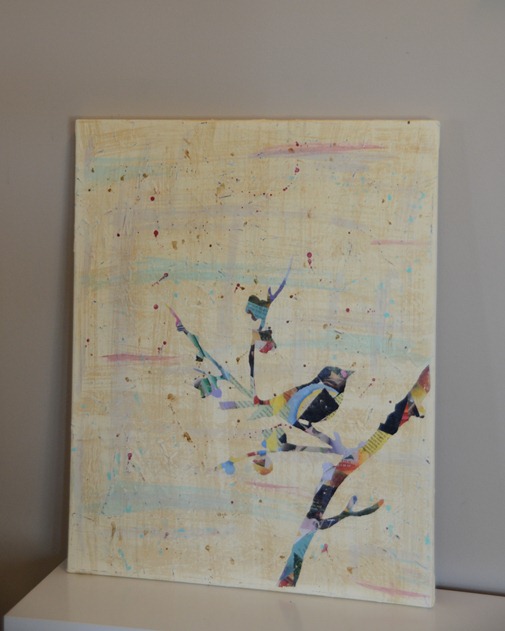
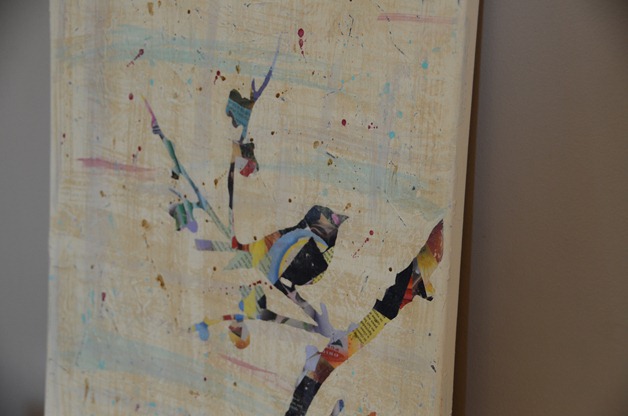





this is absolutely amazing.
canvas frames
I don’t understand how it processed into brown/tan paint…like you said you trace the bird area… did you paint over the rest of the cutted magazine over and just leave the traced of bird area open?
You a so creative, can’t wait to learn from you! Thank you
The silhouette canvas , is posible to do it with fabric? Thanks.
My daughter and I are doing this project. She will be using a rabbit stencil for her design. When it’s finished she will enter it in a youth art contest for rabbit breeders here in WA state. Thanks for sharing this idea!!
Does anyone have a suggestion for type of acrylic paint??
I love the look of the finished piece and also love your commentary. I’m going to introduce a project inspired by this in my teens art class.
Lovely project!!
OK. I guess I am just to dumb to figure it out. I LOVE the picture with the birds with the cut up magazines….BUT, I am stumped. Please help me. It’s probably a stupid question but I’ve shown this project to several people and none of them can figure it out either- including the people at Hobby Lobby. So, I cut out and glued all the colorful pieces of magazine onto my canvas. I Mod Podged over it all. What I don’t get it is the next part. You trace your stencil onto the paper covered canvas board then paint over it all? If you paint over the stenciled part of it, then how can you see the colored pieces? HOW do you NOT cover up the parts you’ve stenciled around? There is NO way I am going to get a little tiny paintbrush out and start painting around all those intricate parts. Do you fill in the stenciled parts with something clear? If so, WHAT? ?
Great post, the finished product is awesome! What do you think of using chalkboard paint rather than acrylic and creating like a collage chalkboard thing?
My finished collage pre-paint was very flat & even. I then used Reeves white acrylic paint, & the paper seriously bubbled and also the white paint took on a pinkish tinge all over (not just on pink magazine pictures).
Tried another couple of coats and still the same. Not sure how I’m going to cover the long bubbles to make them look less obtrusive. Will maybe keep trying to build up layers and make it thicker. Gesso would look good but I can’t find mine at the moment!
Your kids make it look so easy, but it has taken me a good few nights so far!
PAINT COLOR?????
After you trace your silhouette do you hand paint around the pencil lines or is there a way to temporarily stick the stencil down so you can paint the canvas faster?
I’m working on this project now 🙂 Thank you!
Once you apply the magazine pieces to the canvas, do you apply a coat of mod podge over top of the entire thing?
this is absolutely amazing.
Love this!!! thank you for sharing such an awesome idea. I love that you involved the kids too!
Hi I really like this and I want to try it myself, but did you trace the stencil then paint around it? Just want to make sure I understand then you lifted the stencil up once it was dried?
I LOVE this! I am going to make this ASAP! Thanks so much for sharing!
What a great idea! You can go where ever you want with this kind of art. Thank you so much for posting this…
I just love the simplicity of this proj. I will use my hubbys Reader’s Digest Pages.
Your pics don’t work anymore. I needto see how this was done! 😉
I LOVE this project idea for adding color and personalized art in my living room. My question is about the stencil part–did you just paint around your penciled lines, or did you pain on top of the stencil and then peel it off while the paint was still wet?
I love the idea of painting over the cardboard cut out.. if you go to creative habitat, they have that cardboard and a die cut with a hundred images, it’s free to use it, and the cardboard is cheap… I am so excited to try this with my afterschool elementary Kiddos! I try so hard to come up with projects that won’t just get thrown away.. it’s harder for a parent to throw away a canvas 🙂
I did the silhouette collage. Here’s a picture: http://instagr.am/p/J-c8vgAdH9/ THanks for posting it!
When I saw the yellow dresser I thought how cool one of your silhoulettes would look on furniture. Thanks for sharing! I wanna try this with my son.
Such a great idea that looks very labor intensive but surprisingly not! Will be doing this at the beach with my daughters, nieces, and sister-in-law for our craft day. Thank you!
Hi,
This idea is fanastic. I’m looking for an idea to decorate a couple of canvases for my bathroom… I have now found it, just need to think of what to put as the silouette. You are a genius, thank you for sharing!!
Going to try this project this weekend. The finished product looks amazing!
I love your ideas and I’m gonna try some of them! Love the decouged bird canvass sooo much!
Thank you!
Really cute!
So many things you could do with this!
Loved the bird silhoutte/collage! What a great project to do with kids. Will do this with my grandkids. Thanks for sharing.
I just did this with my 2 year old. It looks amazing – i can’t believe there is a project you can do with a toddler that looks so cool when you have finished. Thanks so much. I referenced your/Char’s tutorial on my post. Feel free to grab and I was featured badge if you’re passing my blog.
im very confused. so first step is to cover the WHOLE canvas with the magizine paper. Mod Podge. then trace (and how do you see the tracing?) onto the canvas (thats mod podged) and paint around the tracing??
What a great idea! I think I’ll do mine with newsprint and paint over it with navy blue!
Great Idea. What a great way to use or play around with old canvases for a new look. thank you
Well I just started on my first canvas mod podge project following your tutorial. I was totally loving it until it started to ripple and pucker a bit. So I freaked out, came back here to see what I was doing wrong only to find out it’s perfect like that!! I’m happier now! 🙂
Thanks for the great tutorial! 🙂
What color is the acrylic paint that you used? I like the effect, and I am up to the step where I have traced my silhouette 🙂 I can't wait to finish this.
Does anyone have a suggestion for how to create a monogram or silhouette without having any software such as the silhouette machine? I am a VERY novice crafter, and that is the only part I'm hung up on.
Hi, Lisa! It’s been a long time since you posted your question, so you’ve probably figured out a way, but just in case- I would try getting on the computer and find a font you like, then type whatever letter you want, enlarge it to however big, and print. Then it’s just a matter of cutting it out, then proceeding with your canvas. Hope this helps.
I did this project the other day for some new wall art for my room. But i found some really old white paint that when it dried it cracked and made it appear old.
Then added the stain and such.
My silhouettes were a butterfly, some bamboo and a panda. I used three different sized canvases too! and they came out great!
Thanks for the craft idea!
Great project! Thanks for sharing!
How amazing is this?! I think I'm going to use a canvas I have laying around to try out an initial one. Thanks for the inspiration!
repurposedlifedesigns.blogspot.com
This is awesome! I've been trying to figure out artwork for my room and this is perfect. Thanks for the tutorial.
Emily
domesticdeadline.blogspot.com
What a stunning and lovely project! My mind is simply whirling with ideas and potential! Off to check out Char's blog too! Thanks so much for sharing!
Hugs,
Sharon F.
Awesome idea! I see some crafting in my future.
What a cool idea. Just yesterday I was trying to figure out how to get a look like this only with letters without simply cutting the letters out of patterned paper. This is perfect.
Very creative.What a great look.
Great project! Love Char's work – she always makes me smile!
Thanks for the extra instructions and thanks for the Michaels' deal!
Love this, my dear! And I love that you all did it together. And I love the possible stopping points….because they made me laugh. And I kind of really like this Char girl. 🙂
Absolutely adorable! I want to make my own!
This is sooo great Char!!! I love the way it turned out and I think it's so great that you all did it together!! 🙂 So fun!!
This is a super project! I love the look of it.
great to do with the kiddos!
I'll check out Char's blog!
gail
Darn it!!!!! I just threw out a mass of magazines!!!!!
Great project! The possibilities are endless. An initial or monogram would look great too! Oh and by the way I agree with you on the whole cookies and fountain diet cokes!! Thanks for the tutorial!
What a great activity for kids! I'll have to file it away in my mind for when my family grows!
And I love fountain soda too! Its so much better than from a can or bottle.
I love this. It reminds me of some very pricey art I have seen put I think Char's is even better! I will be doing a monogram like this.
Love this! At first I was thinking that it was a painted background with a magazine cutout glued on it. But I reeeeally love the texture that the additional layers of paper under the paint make. Great tutorial!
This is great!!!! My daughter and I are currently creating art for their bedroom walls and this would be a wonderful addition!!! Michael's has seven art canvases for 14.99 right now, and a 25% coupon off of that. They are about the size you used.
Wonderful and funny tutorial!!!!
Amy,
We Mod Podged below to stick it down and then again on top.
I just traced the stencil. I painted along the pencil lines. If you're going to sand, stain, splatter, etc you won't even notice the imperfections.
I see questions but no answers and many are the same……
I am too anal for crafts but I forge ahead doing them. So I have questions! When you say modge podge, do you mean to glue them down or do you also cover the top with modge podge before you paint? Then, how did you keep the stencil down while you painted…so it didn't move and then how did you lift up to not disburb the paint. Oh boy, I really shouldn't do crafts but I think we are going to attempt this one at a family reunion so I need to carefully instruct people on how to do it. I think we should all do our initials…
I think I am gonna try this out with an E for Eli for his room, he is gonna love helping me out!
Really cute! This has already been added to my 'crafts to do' file. My head is swimming with ideas.
And the fact that she can do math…I envy her…
I totally love this! So cute and fun and we will definitely be making one or 2 or 3.
Might just be my computer but a few of the pictures aren't showing up – I did see enough pics to see that this is crazy cute! I have some canvases just waiting to be prettied up that might just end up similar to this.
OMG! Too cute! I love her sense of humor….her life sound like mine did years ago (only I had 6 kids and all their friends to keep occupied). Wouldn't change a thing! Thanks for sharing!
What a fun project! I bet my boys would love to do this…now I just to pick find magazines that I am okay with them cutting up! I love those green shutters!