Tatertots and Jello

COLORFUL HAPPY HOME -- Daily DIY, Decor, Craft and Recipe Tutorial

  • My Home
    • 1905 Cottage
    • Daybreak House
  • DIY
    • DIY Projects and Ideas
    • Organizing
    • Tutorials
    • Printables
  • Decor
    • Spring Projects
    • Summer Projects
    • Fall Projects
  • Crafts
    • Kids Crafts
    • Painting Projects
    • Paper Projects
    • Sewing
    • Wreaths
  • Holidays
    • Valentines Day
    • Easter
    • Halloween
    • Thanksgiving
    • Christmas
    • HAPPY Holidays Series!
  • Recipes

Explore

  • my home
  • diy
  • decor
  • crafts
  • holiday
  • printables
  • recipes

Connect

Home » diy » Guest Project — DIY Porch Swing Makeover!

diy, guest tutorials · May 20, 2011

Guest Project — DIY Porch Swing Makeover!

Tatertots & Jello is a participant in the Amazon Services LLC Associates Program, an affiliate advertising program designed to provide a means for sites to earn advertising fees by advertising and linking to amazon.com.
5
5Shares
Hi everyone! 

 I’m Angie from The Cellar Door Stories, and I’m just beyond excited to be here guest posting today!  I love to blog about decorating, crafting, cooking, frugal ideas, family life with my husband and two kiddos, and pretty much any other random thing that comes to mind….some may call it scatter-brained, but I prefer the term “eclectic.”  *wink*

Today I’d like to share one of our most recent projects ~ our porch swing makeover!!
Built in 1961 and not kept in the best condition, our home has been a bit of a fixer-upper, porch swing included!  
Here’s what we started with when we first moved in….

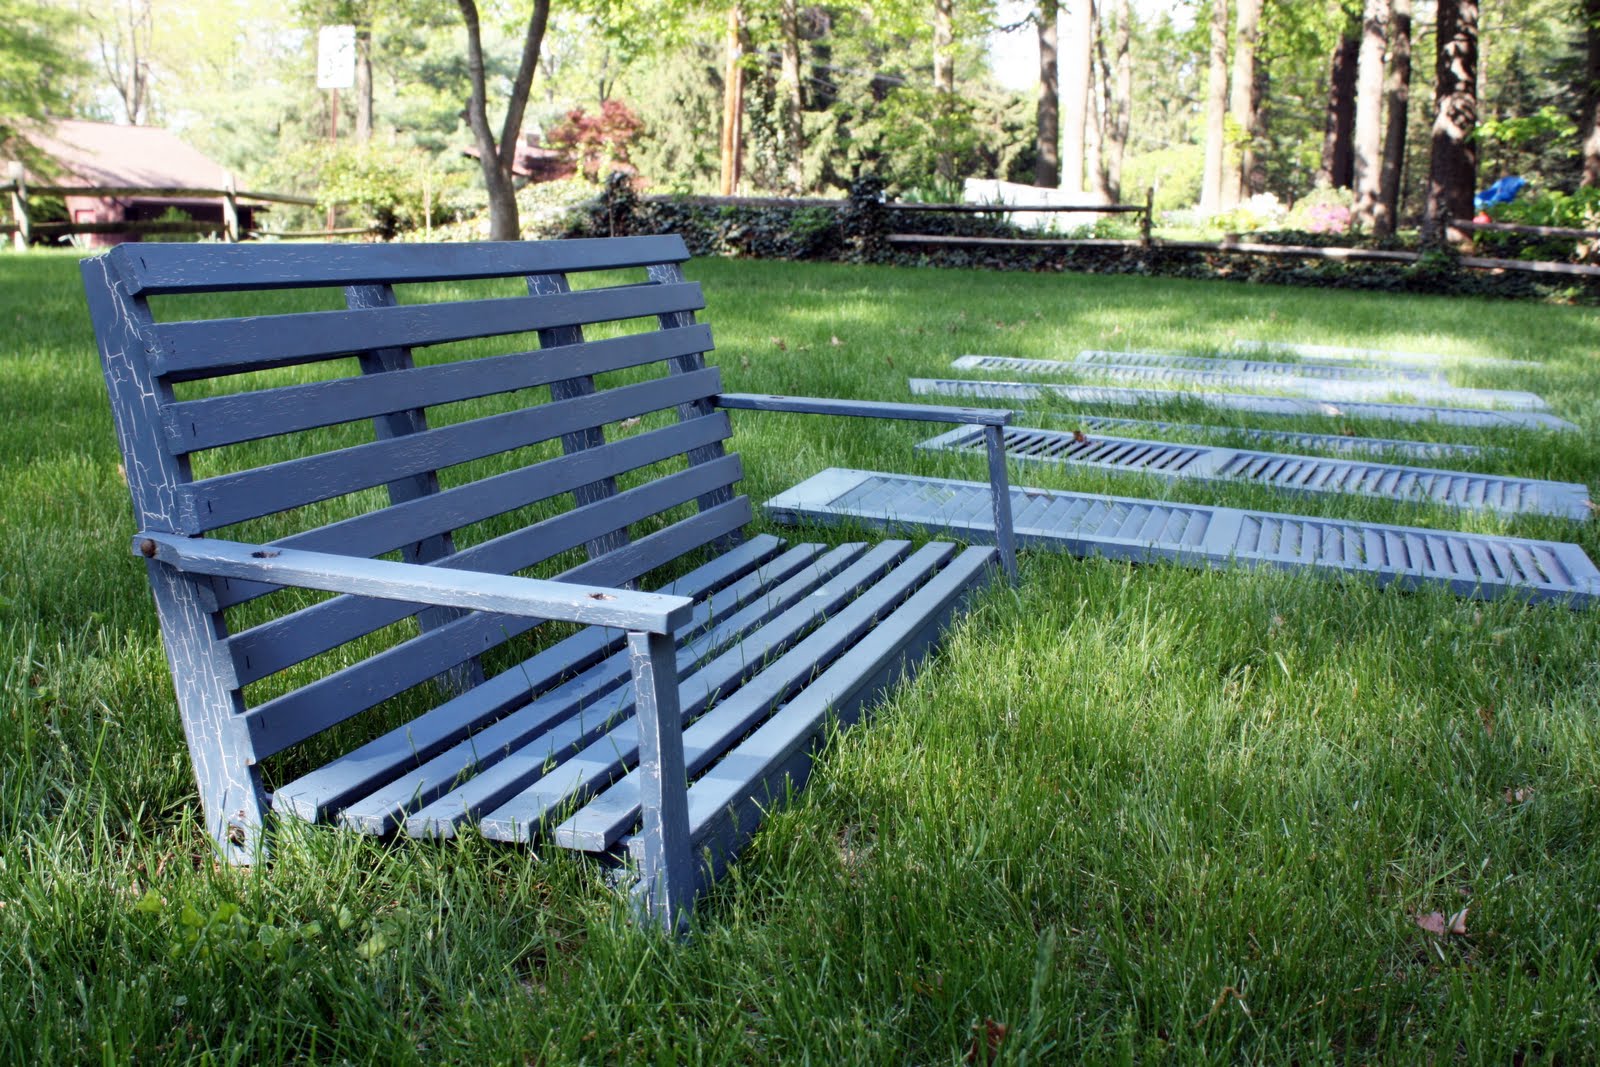
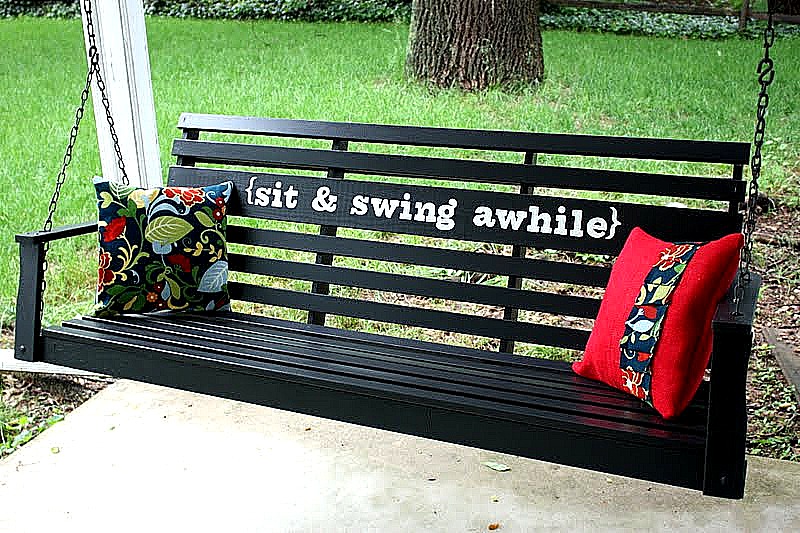
Fast forward 3 1/2 years, and my little guy has changed quite a bit, but unfortunately the porch swing had not!  Since we were already in the process of repainting our shutters (which were also the country blue color), it made sense to give our porch swing a makeover too!

The first step was to take it down, clean it, sand it, and clean it some more. 
I knew I wanted to cutesy it up a bit by stenciling on a phrase, so we removed two of the slats to be replaced later.  Then it was time to paint!  I had chosen the color “Lincoln Cottage Black” by Valspar.  We used our paint sprayer for a few coats and a foam brush to fix any runs and get all the other nooks and crannies that were hard to reach with the spray.
My handy hubby cut down the new board to fit, and once it was painted, measured out my chipboard letters for me!
What a great guy ~ he handles any project that involves my arch enemy:  measuring.
My tendency is to just eyeball everything, so if it actually needs to look good, he measures it all out.  I first traced around the letters with a pencil, then over the pencil with white paint, and then filled each letter in.  I lost count of how many coats it took, but I think it was around seven, so a little time consuming, but not difficult.  (Of course, those of you lucky ducks with a Silhouette could crank that baby out in vinyl in no time!!)
Once the wording was completely dry, and the new board was attached, we could hang the swing back up in it’s rightful place on the front porch.  I whipped up some pillows ~ I use the term “whipped up” very lightly…actually my sewing machine and I were at odds for a few hours, but she finally relented, and we are now back on speaking terms.  Anyway, I plan on eventually painting the front door red, so I used a fun outdoor fabric with some red accents and some red burlap for the pillows.
Since the pillows will be outside, I left the plastic packaging on the pillow forms to protect them from getting wet!  Smart thinking, right?  Well, they make a funny sound when you lean on them, but at least they look good!  Plus, I made the envelope type closure, so I can easily take out the pillow form if I change my mind.
*One quick note ~ I do plan on adding a coat of clear poly over the letters to protect them a little from the elements.  Although if I don’t get around to it, we could always just say we were going for the distressed look.
So, there you have it, our porch swing makeover ~ I can’t wait until all this rain stops so I can go relax on the swing with a nice tall glass of iced coffee in hand!

Thanks so much for having me, Jen ~ I always love seeing the great ideas here and now I’m so happy to be a part of it!  Hope to see you all over at The Cellar Door Stories!

 
 What a fun project Angie!!!
 Check out how cute Angie’s house is! 
{Another favorite — her Numbered Coat Rack and Laundry Room Reveal}
{How adorable is her Spring Burlap Wreath? Love it!}
{And check out Angie’s 101 goals for 2011 – what a great idea!}
 Be sure to stop by The Cellar Door Stories and give Angie a big TT&J hello!!! 
xoxo
PS — It’s Friday!!!! My favorite day of the week. I can’t wait to see what YOU are doing!!! The party starts at 6 pm {MST}. I hope you will stop by 🙂


5
5Shares

Posted By: Jen · In: diy, guest tutorials

Guest Project – Make a Starburst Pencil Mirror! {teacher gift idea}
Great Ideas — Spring {3}

You’ll Also Love

Thrifted Bundt Pan to Patio Planter!
DIY Spring Flower Lanterns
7 Spring Front Porch Ideas

Comments

  1. CharityHand says

    June 15, 2011 at 12:03 PM

    Beautiful porch swing! I've had mine for nearly three years and it's still bare wood. I needed this shot of inspiration today. I just might tackle that swing yet! 🙂

Hi! I'm Jen Hadfield. I'm a mom of 5 restoring an 1891 home in the heart of Salt Lake City. I love being creative and sharing simple ideas to make your life easier and more beautiful!

Receive the Latest Crafts, DIY, Recipes and More in your INBOX!

Follow us on Pinterest! It's awesome!

Top Posts & Pages

Spruce up Your Outdoor Space with a DIY Recirculating Fountain! (tutorial)
A New Deck in Under 30 Minutes!
DIY Secret: How to Print on Post-It Notes (and Free Printable Template)
12 Must-Have Items to Pack on an Alaskan Cruise!
Copycat Panera Spinach and Artichoke Egg Soufflés - SO good!
Mother's Day Cup Holder Gift Basket


Popular Posts

  • Spruce up Your Outdoor Space with a DIY Recirculating Fountain! (tutorial)
    Spruce up Your Outdoor Space with a DIY Recirculating Fountain! (tutorial)
  • A New Deck in Under 30 Minutes!
    A New Deck in Under 30 Minutes!
  • DIY Secret: How to Print on Post-It Notes (and Free Printable Template)
    DIY Secret: How to Print on Post-It Notes (and Free Printable Template)
  • 12 Must-Have Items to Pack on an Alaskan Cruise!
    12 Must-Have Items to Pack on an Alaskan Cruise!
  • Copycat Panera Spinach and Artichoke Egg Soufflés - SO good!
    Copycat Panera Spinach and Artichoke Egg Soufflés - SO good!
  • Mother's Day Cup Holder Gift Basket
    Mother's Day Cup Holder Gift Basket
  • How to Change a Recessed Can Light into a Pendant Light with No Remodeling!
    How to Change a Recessed Can Light into a Pendant Light with No Remodeling!

As seen in


Amazon Affiliate

Tatertots & Jello is a participant in the Amazon Services LLC Associates Program, an affiliate advertising program designed to provide a means for sites to earn advertising fees by advertising and linking to amazon.com.
  • About Me
  • Advertising
  • Get Featured

Copyright © 2025 Tatertots and Jello · Privacy
This site is a place for positive discussion and ideas. Negative talk, comments that disparage others, and similar are not welcome and may be removed.

5