Tatertots and Jello

COLORFUL HAPPY HOME -- Daily DIY, Decor, Craft and Recipe Tutorial

  • My Home
    • 1905 Cottage
    • Daybreak House
  • DIY
    • DIY Projects and Ideas
    • Organizing
    • Tutorials
    • Printables
  • Decor
    • Spring Projects
    • Summer Projects
    • Fall Projects
  • Crafts
    • Kids Crafts
    • Painting Projects
    • Paper Projects
    • Sewing
    • Wreaths
  • Holidays
    • Valentines Day
    • Easter
    • Halloween
    • Thanksgiving
    • Christmas
    • HAPPY Holidays Series!
  • Recipes

Explore

  • my home
  • diy
  • decor
  • crafts
  • holiday
  • printables
  • recipes

Connect

Home » crafts » Guest Project — Applique Tote Bag!

crafts, guest tutorials, sewing projects · July 29, 2010

Guest Project — Applique Tote Bag!

Tatertots & Jello is a participant in the Amazon Services LLC Associates Program, an affiliate advertising program designed to provide a means for sites to earn advertising fees by advertising and linking to amazon.com.
381
381Shares
Hi! I am Missy from The little Green Bean. Jennifer from Tatertots and Jello has allowed me to do a guest post today and I am so excited! Thank you Jennifer!
 
I like to do about any type of craft. I scrapbook, sew, paper craft, and I also have a small photography business. I love to re-decorate my home using things someone else might just throw away. I am very happily married to a man who supports all of my hobbies, he even helps me out when I need, from anything to modeling aprons, to helping me re-paint the kitchen. We also have 3 boys who are our pride and joy!
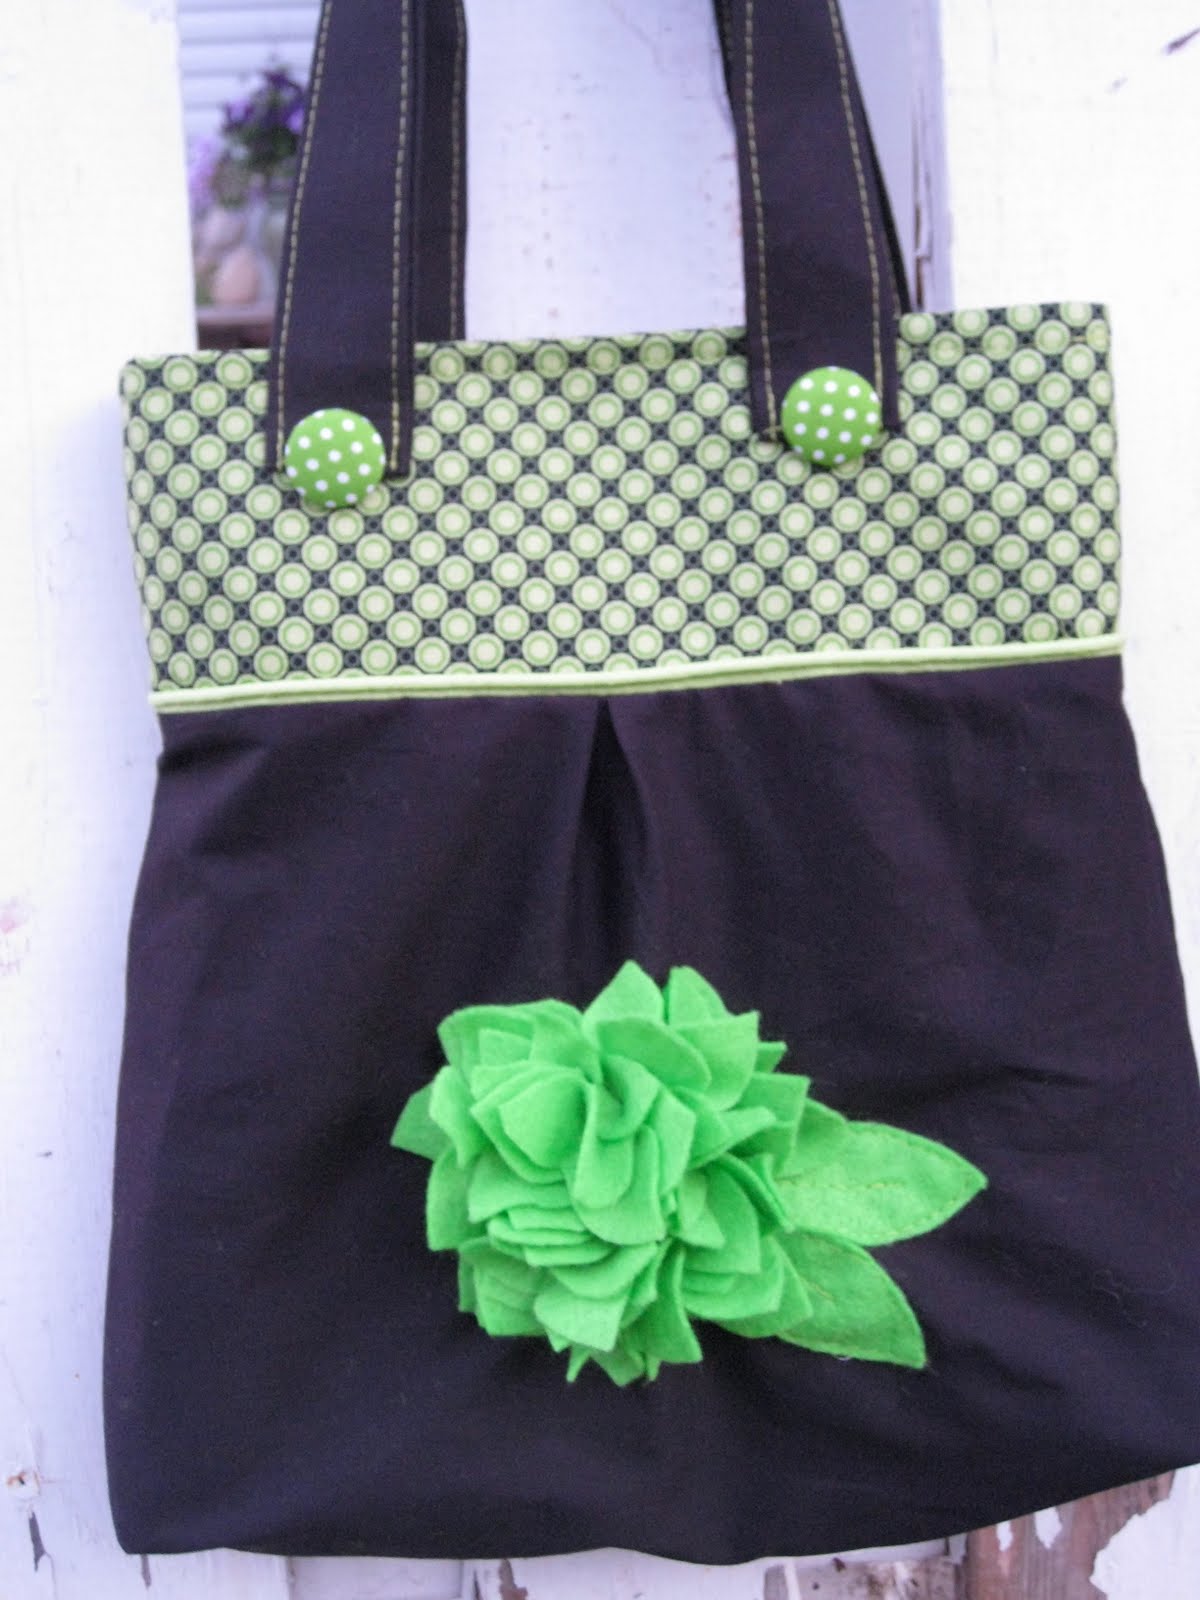
Today I am going to share a tutorial with you on making an appliques tote bag.
I like to make things that are unique and I use all my own patterns. So here goes!


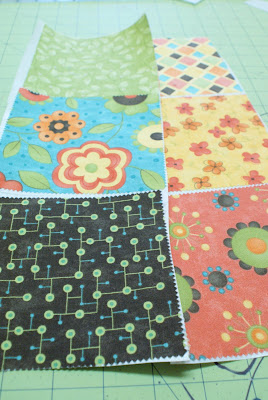
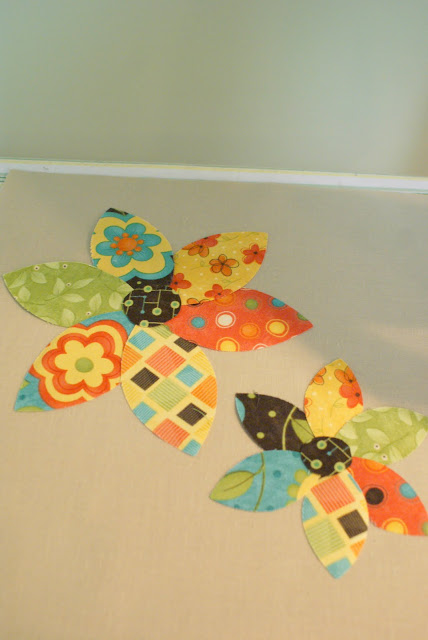
Step one is to gather your fabric choices, I love to use scraps for this project.
Once you have your fabric for the applique design, iron each piece onto heat and bond, let cool.
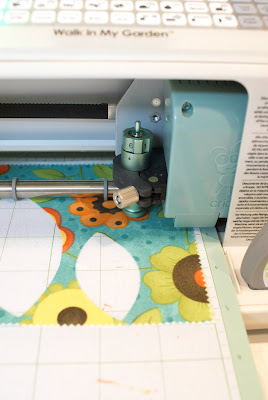
Now, you can either create your own design, or use something like a cricut to help you out. I used the cartridge walk in my garden, and selected the leaf design for this project. You will want a fresh cutting mat and a new blade for cutting fabric for the best results.
I cut 2 leaves of each fabric, 1 1/4, and 2 inch leaves. I used 6 different pieces of fabric.
Once you have all your pieces cut, peel the paper backing off of them and place on your front tote piece.
My tote is made from a sold medium weight fabric. I cut the pieces 12 x 13. 2 for the outside and 2 for the inside. Iron applique pieces in place.
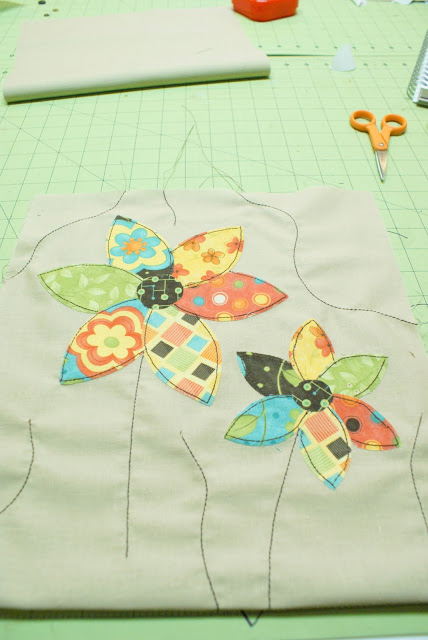
Once Ironed on, you are ready to sew them in place. I use the embroidery stitch on my machine, but any stitch will work for this.
Once all the petals are in place, you can sew the stems. I free hand this, but you could lightly draw your line with a pencil. I also like to make random line stitches all over the front of the bag.
I then apply fabric circle to the ends of all the other stems, and sew a button in the center.
The applique part is done, you can do as much or as little as you would like.
Now I assemble the tote, again, this is all up to you. I like pockets, so I add a back pocket, an inside zipper pocket and extra inside pockets for phones, lipstick, etc. This is all up to you.
I cut an apply more of my coordinating fabric to the top edges of all 4 pieces. Make sure to line with a heavy weight interfacing, and sew the front and back of the outside together. For the lining, apply all your pockets, top edge, and again sew the front and back together, wrong sides facing each other. You will want to leave a 6 inch opening at the bottom of the lining to turn when finished.
This is also where you add your straps. Pin them into place on the outside front of bag. With wrong sides together, sew the inside to the outside at the top edge. Turn right side out, then sew opening shut.
Add a top stitch to the outside edge if desired. And you are done!
You now have a fun new tote bag all your own design! 
Thanks for checking this out, now be sure to stop by my blog and see some of the other fun things that I like to do!
That bag is adorable Missy! Thank you so much for sharing it with us 🙂 I discovered Missy’s blog a few months ago and was hooked. She can decoratie, she can cook, and boy can she sew!!! You will be amazed at her talent!

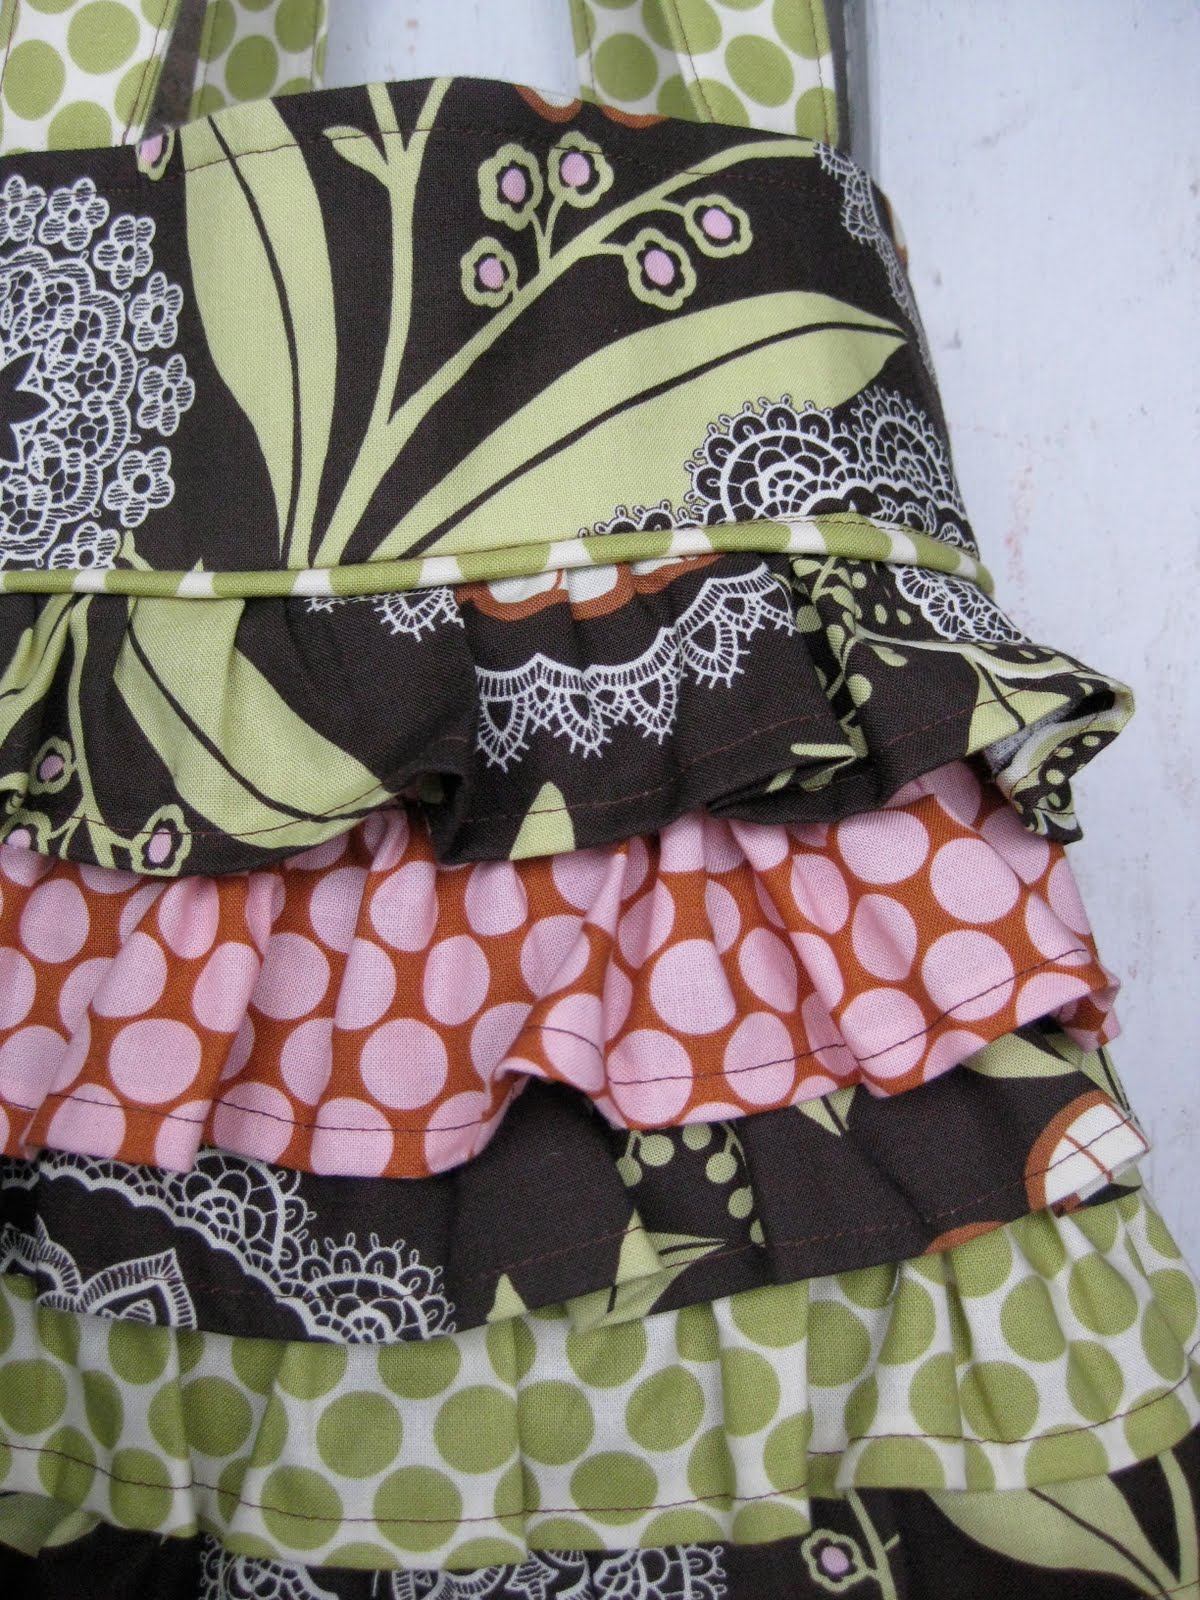
The little Green bean

http://3.bp.blogspot.com/_lhDvmFUM0Gc/TBf4Vu43h3I/AAAAAAAADB0/Kpo8XzvUeyw/s1600/IMG_9755.jpg
{Skirty Purse}
http://2.bp.blogspot.com/_lhDvmFUM0Gc/TBBLDuZh35I/AAAAAAAADA0/3iju7Bpcqjg/s1600/IMG_9750.jpg
{Hydrangea Purse}
http://2.bp.blogspot.com/_lhDvmFUM0Gc/S9wpcJZTiOI/AAAAAAAAC1k/r00ylptOty0/s1600/DSC05298.jpg
{Burlap Super Shopper Bag}
http://4.bp.blogspot.com/_lhDvmFUM0Gc/S8ZNFVEOVZI/AAAAAAAACuk/CMb90nyYCUw/s1600/DSC05042.jpg
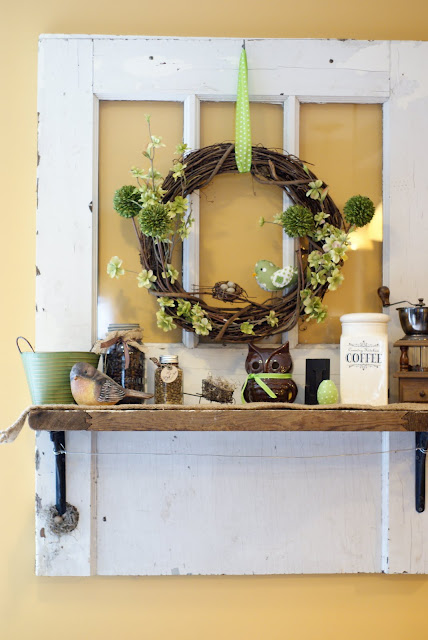
{Door Shelf}
http://1.bp.blogspot.com/_lhDvmFUM0Gc/S60Gb42O71I/AAAAAAAACp0/QxgSEhJ9y5U/s1600/IMG_9516.JPG
{Camera bag}
Ah-Mazing Projects – You will love Missy’s blog!
Thanks again Missy!
PS — Did you have a chance to participate in the BlogFrog Froggy Hunt yesterday? It’s still going on, and there are great prizes. Click  HERE to find out more!
XOXO
381
381Shares

Posted By: Jen · In: crafts, guest tutorials, sewing projects

Giant Flower Tote Tutorial
My New Favorite Store!!

You’ll Also Love

DIY Gingerbread Christmas Wreath
make a dog playhouse out of a box. all the instructionsMake an Adorable DIY Dog Playhouse Out of a Box!
Make Your Home Cozier with Boucle!

Comments

  1. piano movers chicago says

    August 30, 2013 at 1:58 AM

    What piano brand to purchase for a first timer?

  2. Bubbe says

    August 18, 2010 at 2:07 AM

    Would you consider also posting directions for making your Skirty Purse and Camera Bag — they look really cool, too.

  3. christian louboutin says

    August 6, 2010 at 2:05 AM

    You are a smart girl.the idea is so great.i will do a bag as you said.
    christian louboutin

  4. Sue (Someone's Mom) says

    July 31, 2010 at 12:23 AM

    This is one of those…I don't sew, but I appreciate a creative craft when I see it…posts. Love it!

  5. bluecottonmemory says

    July 30, 2010 at 4:38 AM

    I love the bag (the skirt bag, too) – but I adore the applique tote bag!

  6. mycuprunnethoverandsodoesmytodolist says

    July 30, 2010 at 1:52 AM

    I found froggy #2!

  7. seemommyknit says

    July 29, 2010 at 11:39 PM

    LOVE the bag! And I FOUND FROGGY TOO! Yay!!

  8. redhead95 says

    July 29, 2010 at 11:06 PM

    I found froggy!

    [email protected]

  9. redhead95 says

    July 29, 2010 at 11:06 PM

    I found froggy!

    [email protected]

  10. Renata says

    July 29, 2010 at 10:26 PM

    Yay!! Here's froggy!

  11. Chick Hatchers says

    July 29, 2010 at 9:27 PM

    I found your froggy!

  12. queen bee tracy says

    July 29, 2010 at 8:37 PM

    Phew…love the bag AND found Froggy. That was a fun hunt.

  13. LMC502 says

    July 29, 2010 at 8:27 PM

    I found Froggy!

  14. ELIZABETE says

    July 29, 2010 at 7:47 PM

    Gosto de passear aqui, sempre tráz coisas lindas! Obrigada por compartilhar com o mundo os trabalhos de pessoas comuns e com talento e humildade de ensinar a todos!
    Tenha uma linda tarde!

  15. Kimarie says

    July 29, 2010 at 7:27 PM

    I found a froggy here…

  16. bunny says

    July 29, 2010 at 7:21 PM

    I found the froggy.

  17. bunny says

    July 29, 2010 at 7:08 PM

    I found a froggy.

  18. A. Smith says

    July 29, 2010 at 7:05 PM

    I found the sneaky little Froggy 🙂

  19. Amanda @ Serenity Now says

    July 29, 2010 at 5:14 PM

    What a cute cute bag!!! Love the fabric choices. 🙂 Great tutorial!

  20. Beverly @ FlamingoToes.com says

    July 29, 2010 at 5:06 PM

    Wow – I love this bag! Back and front – super cute!! I'm off to check out Missy's blog. Looks like she's pretty amazing.

  21. Christi says

    July 29, 2010 at 4:50 PM

    I found the froggy!

  22. shortmama says

    July 29, 2010 at 4:40 PM

    So cute! I am a bag lover!

  23. Theresa says

    July 29, 2010 at 3:15 PM

    Fun creative bags! Love all the details! Great tutorial and thanks for sharing!

  24. Jennifer Dawn says

    July 29, 2010 at 3:12 PM

    I love Missy's bag. I had no idea that I could cut fabric on my Cricut. This opens up a whole world of things I can do with it now. Thanks for featuring her!

  25. BigBearswife says

    July 29, 2010 at 3:11 PM

    what a pretty bag!!! I love the colors and the fabric!! I have a cricut but have never but fabric with it. I will need to try that!

  26. Sheri says

    July 29, 2010 at 3:11 PM

    Oh my gosh! I'm like hyperventilating over the first tote…and the skirty purse!!! TOOOO CUTE!!!!

  27. Kristen says

    July 29, 2010 at 2:56 PM

    This tote is super adorable!!!

  28. Karen says

    July 29, 2010 at 2:55 PM

    That bag and your appliques are really cute!! Love a custom bag…its like wearing a smile on your shoulder! :>

  29. Kimberly says

    July 29, 2010 at 2:36 PM

    Your applique bag is TOTALLY cute. You did a beautiful job on that.

  30. amycornwell says

    July 29, 2010 at 2:33 PM

    This is so cute! Thanks for posting!

  31. Ashley @ Little Miss Momma says

    July 29, 2010 at 2:28 PM

    What a talented girl! And I LOVE all her fabric choices–especially the Amy Butler!

Hi! I'm Jen Hadfield. I'm a mom of 5 restoring an 1891 home in the heart of Salt Lake City. I love being creative and sharing simple ideas to make your life easier and more beautiful!

Receive the Latest Crafts, DIY, Recipes and More in your INBOX!

Follow us on Pinterest! It's awesome!

Top Posts & Pages

Spruce up Your Outdoor Space with a DIY Recirculating Fountain! (tutorial)
A New Deck in Under 30 Minutes!
DIY Secret: How to Print on Post-It Notes (and Free Printable Template)
12 Must-Have Items to Pack on an Alaskan Cruise!
Copycat Panera Spinach and Artichoke Egg Soufflés - SO good!
How to Change a Recessed Can Light into a Pendant Light with No Remodeling!


Popular Posts

  • Spruce up Your Outdoor Space with a DIY Recirculating Fountain! (tutorial)
    Spruce up Your Outdoor Space with a DIY Recirculating Fountain! (tutorial)
  • A New Deck in Under 30 Minutes!
    A New Deck in Under 30 Minutes!
  • DIY Secret: How to Print on Post-It Notes (and Free Printable Template)
    DIY Secret: How to Print on Post-It Notes (and Free Printable Template)
  • 12 Must-Have Items to Pack on an Alaskan Cruise!
    12 Must-Have Items to Pack on an Alaskan Cruise!
  • Copycat Panera Spinach and Artichoke Egg Soufflés - SO good!
    Copycat Panera Spinach and Artichoke Egg Soufflés - SO good!
  • How to Change a Recessed Can Light into a Pendant Light with No Remodeling!
    How to Change a Recessed Can Light into a Pendant Light with No Remodeling!
  • Mother's Day Cup Holder Gift Basket
    Mother's Day Cup Holder Gift Basket

As seen in


Amazon Affiliate

Tatertots & Jello is a participant in the Amazon Services LLC Associates Program, an affiliate advertising program designed to provide a means for sites to earn advertising fees by advertising and linking to amazon.com.
  • About Me
  • Advertising
  • Get Featured

Copyright © 2025 Tatertots and Jello · Privacy
This site is a place for positive discussion and ideas. Negative talk, comments that disparage others, and similar are not welcome and may be removed.

381