
I was reading Martha Stewart last month (I think) and they had these giant Christmas balls made out of cupcake liners. And I thought to myself – maybe I could use cupcake liners to make a wreath for Valentine’s Day…

I love the texture of the liners. After a little trial and error, this is what I came up with.

I found some cupcake liners at Hobby Lobby. I really wanted polka dot ones but couldn’t find any at any of the stores around here.

Then I found this little wreath 8-inch at the Dollar Store.

The first thing I did was wrap the entire wreath with ribbon that I had left over from Christmas. I wrapped it tightly around the wreath form.

Then I put a dot of hot glue on the front of the wreath and attached a cupcake liner. I bunched the liner up at the bottom by pressing all of the side together like a flower. Then I pressed that down on to the wreath form. and held it for a few seconds until the hot glue cooled off. I attached about 9 more to that section, pressing them tightly together.

I worked in small sections, leaving space in between each section. I found that if I tried to do too big of a section at once, that the glue would activate the cooled glue at the base of the other liners and make the whole thing unstable. By working in small sections and leaving space between, it allowed the glue to completely cool and the sections to stabilize.

Once I worked my way all the way around the wreath, I then went back and filled in the bare sections. For my 8 inche wreath, I used about 100 wrappers.
I was going to attach liners to the inside and outside of the wreath, but I found that they stuck out more than I thought they would and I thought the two inside sections would meet and then it wouldn’t look like a wreath, but more like a ball. I actually like it this way because the ribbon shows and it is a nice contrast.
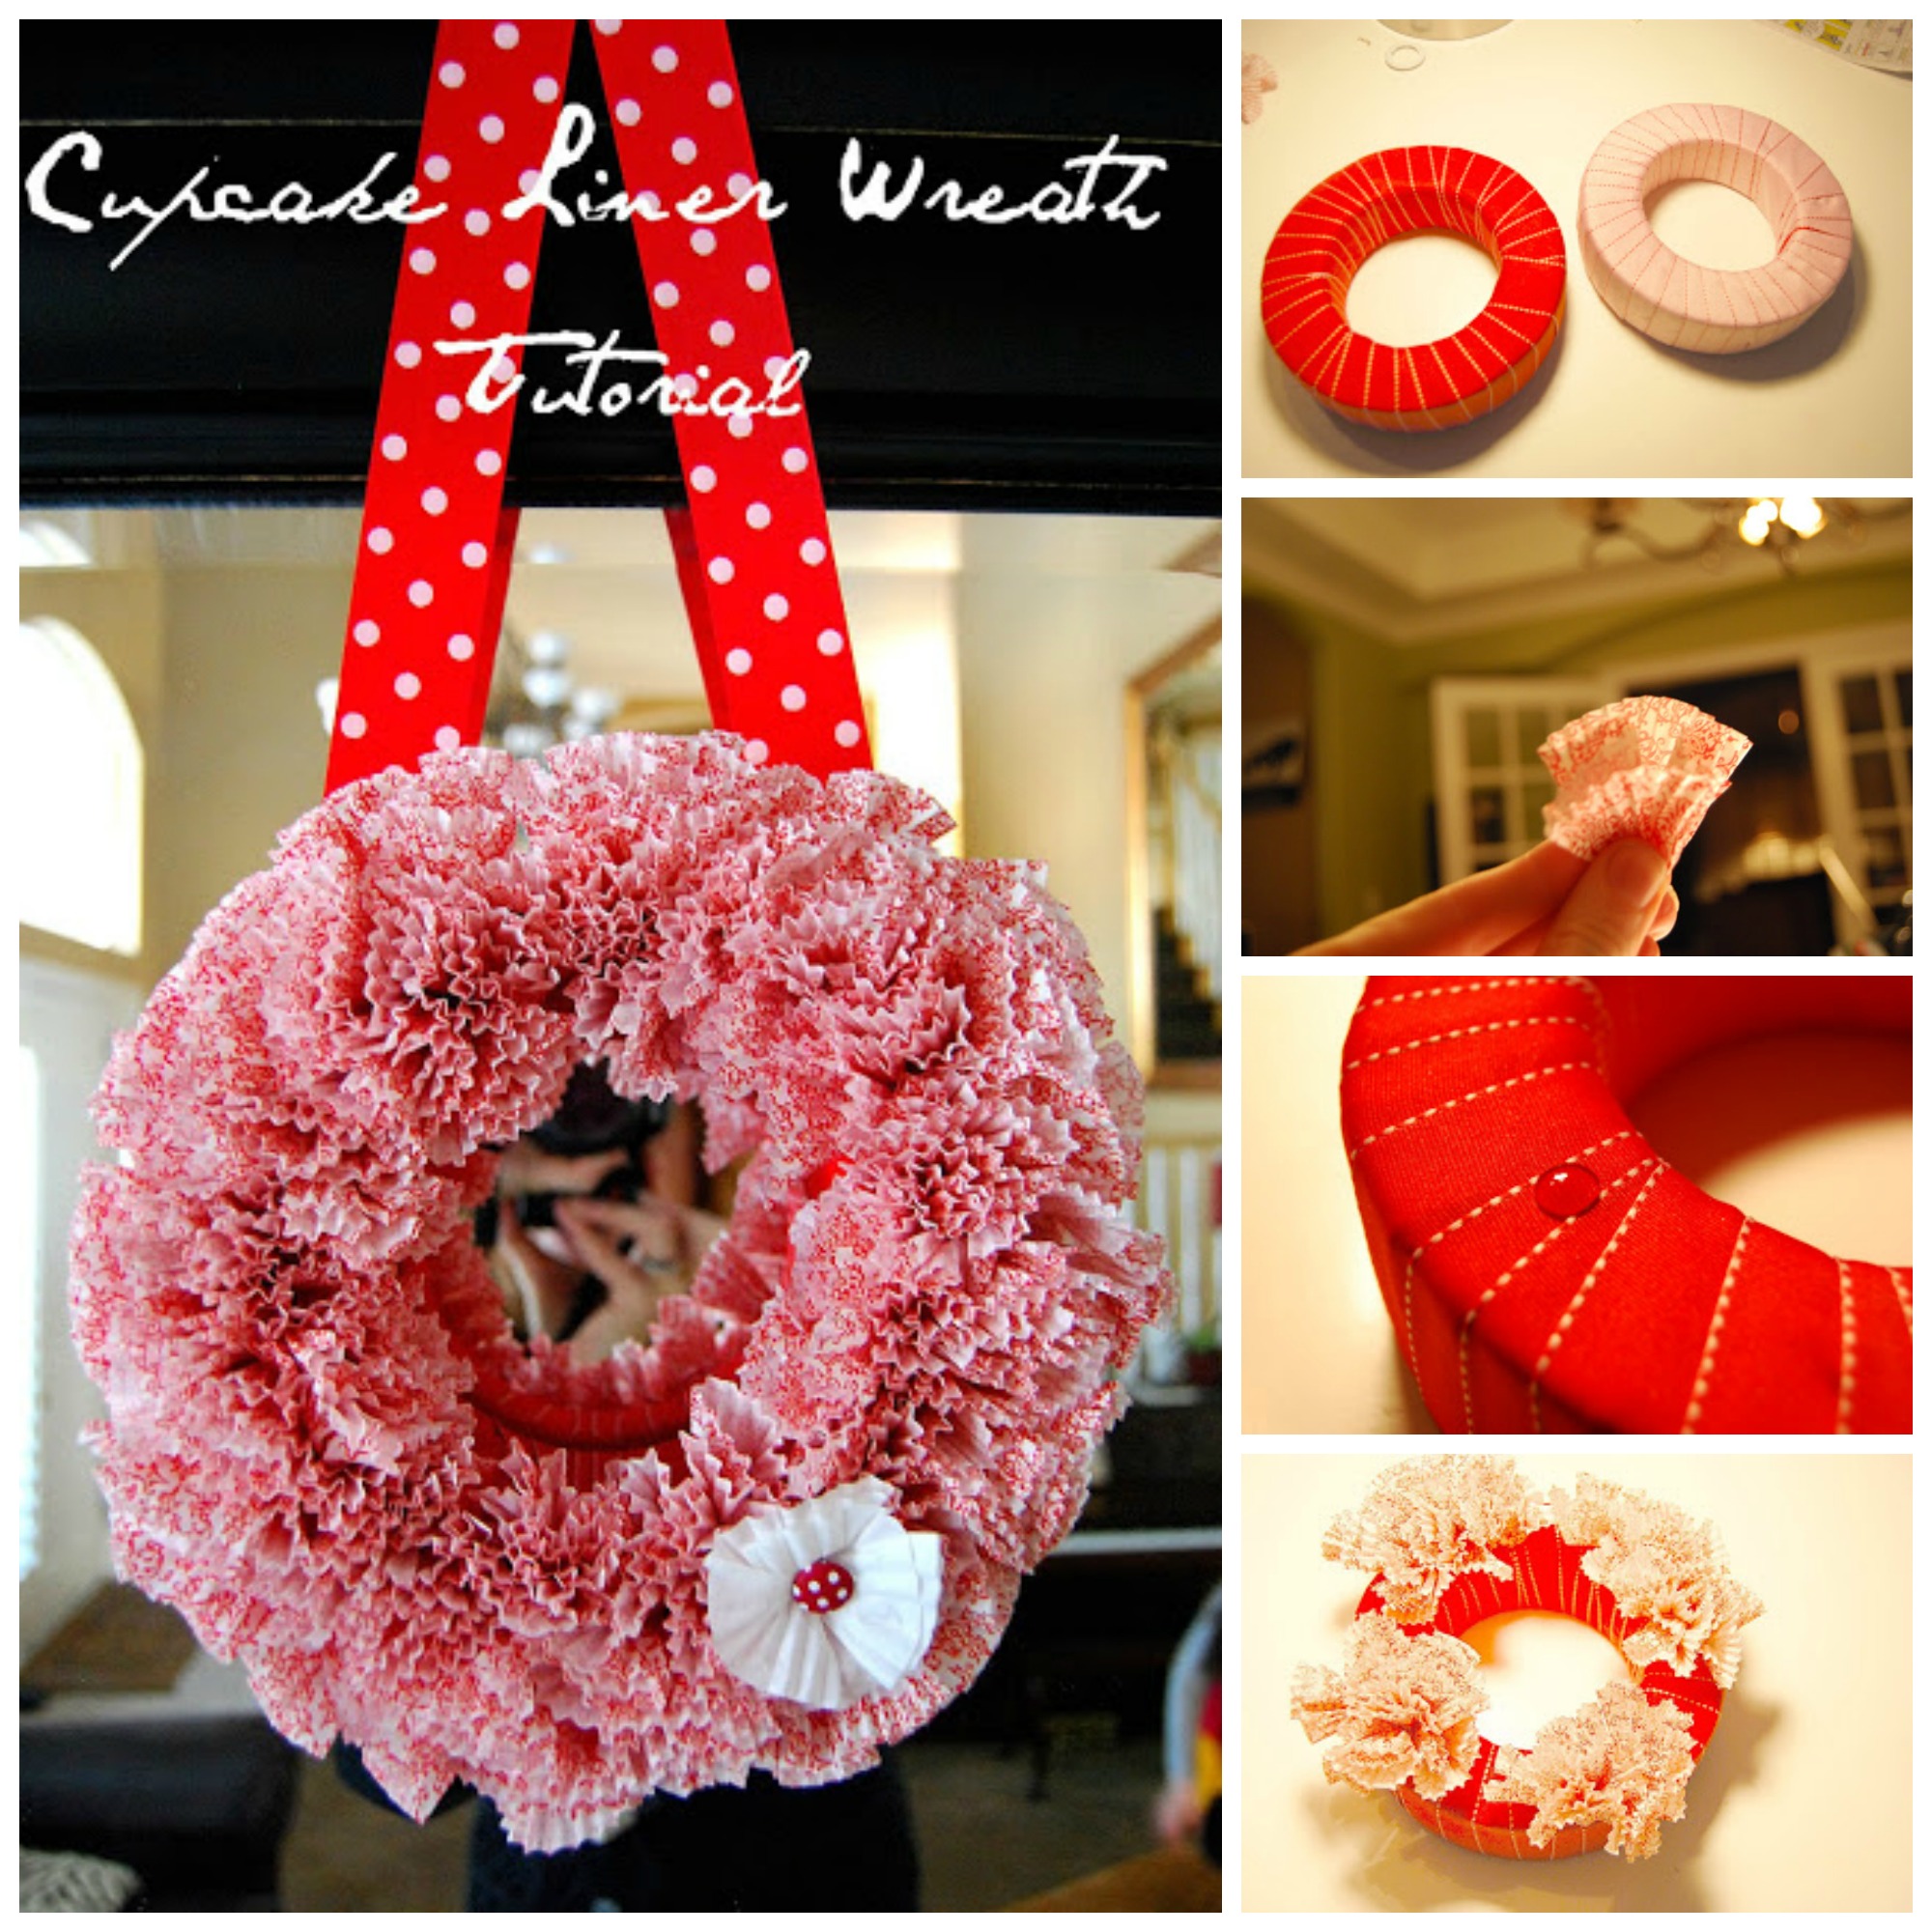
Once the wreath was filled in, I took a white cupcake liner and bunched it the same way, then I took the top of the liner and fanned it out like a flower. I put a dab of hot glue at the base of the liner and stuck it in one side of the wreath. Then I took a polka dotted scrapbook brad and attached some hot glue to the bottom and put it in the center of the flower.

The last thing I did was turn the wreath over and attach a length of ribbon to the back of each side of the wreath. Then I hung it up!

It puts a smile on my face!
Thanks for all of your comments about my sewing machine dilemma yesterday. I went out but got all confused again. Too many choices… Maybe I will figure it out soon…
I’m linking up to Kimba’s fabulous DIY Day


and Today’s Creative Blog’s Get Your Craft On!
Have a happy day!
XOXOUpdated 3/2010: If you have made this wreath, or a variation of this wreath, will you link up? If someone wants to make this wreath in the future, it would be so great for them to be able to see your ideas and variations. Thanks so much!


Can you be anymore clever? LOL! So glad I found you! Just have to remember to come visit when I can stay without any chores ahead of me! You could be very addictive and dangerous (in a good way)! Thank You!
This is adorable! I’m definitely going to give it a try…
~*Michelle*~
http://yagottahaveahobby.com
I featured this in my blog post where I made team spirit wreaths based on your tutorial. If you want to check them out, go to http://fixingforfriday.blogspot.com/2012/10/smells-like-team-spirit.html#
I used your tutorial to create monogrammed letters for a friend of mine. It turned out so well!! I had to share with my Etsy shop fans! I invite you and your followers to stop by :
https://www.facebook.com/pages/EljahB/163991400290778
I invite you all to also stop by my shop, Eljah*B http://www.eljahb.etsy.com
Thank you for your creative tutorials. I can’t wait to visit more often!!
Blessings,
Eljah*B
Absolutely love this! I featured it on my blog today.
-Erin
DIYOntheCheap.blogspot.com
Was wondering if you turned the liners inside out.. seems that when you used right side out that more of the white shows.. but just starting mine.. your’s is so cute.. thanks for sharing
lol ignore the above post.. I see I just didn’t have mine together enough.. thank you
I love the look of the cupcake liners you used. Makes it look like a ring of carnations. Cute!
How many cupcake liners would you say you used for your wreath? Thanks
Wanted to let you know that I featured your wreath on my blog! Beautiful!
Hey there I love it when I can come visit, and what prompted me was I found this on Pinterest, my new favorite place to get lost in. I have share this wreath and tutorial link on my blog.
♕ Oh! My Heartsie: More of my Pinterest Favorites And oh! by the way I had to follow all your boards so I can be sure to check out what you find. Thanks!! Come visit if you have time.
Oh and one more thing, what does it entail to be a sponsor?
Happy Days!!
Karren
Do you know how these hold up outside?
Love the wreath!! Linked you to my blog,Thanks!!!
http://landrscharminglife.blogspot.com/2011/03/stpatricks-day-wreath.html
Oh my goodness- that is the cutest little wreath ever! Love your blog! Following from Baby Cakes!
I love this, thanks for the inspiration, I made my own today!
LOVE your gallery of wreaths. I just featured you on my page. I posted my own wreath to your gallery as well, and subscribed. Great blog! Sarah@ NorthwestHospitality.org
Hello – just FYI….I’m going to be featuring your site today! Stop by and check it out!
Sam
http://www.themomanddadreviews.com/
Thanks for the idea! I love how mine came out! I linked minue above and linked to you over at my site: http://www.addicted2tutes.blogspot.com
I just love this! I shared it on my blog today!
Thanks for the idea, Jen! I'm in LOVE with my Valentine's day wreath!
That wreath is gorgeous!
I love this wreath…I know it's from last year, but I still love it and linked it up to my blog:)
Christine
greatoakcircle.com
What pretty inspiration! I am going to head out and get some muffin papers right away! Thanks!
XO,
Rebecca
I have been scouring the net for wreath ideas. May I use one of your cupcake liner wreath pics and link it to you in a post on my blog? I never post without permission. You can check out my online space here:
http://www.deniablydomestic.blogspot.com
Thank you – ~Kelly
Love your cupcake wreaths and am looking forward to trying them out – will let you know how I get on
http://www.christmasgiftsforgirls.org.uk/moon_dough_big_barn.php
Just wanted to let you know that I featured your project on my Make It Yourself Monday feature.
http://brideonbudget.blogspot.com/2010/06/make-it-yourself-monday_21.html
I have never seen this type of link up! Love the pics!
I love love loooove it!! I am running to Hob Lob to try this !! Fab job
I did it! I love it! Thank you!
http://thenuthousefive.blogspot.com/2010/01/i-have-never-decorated-for-valentines.html