Hi Tatertots and Jello readers! I’m Jessie and I blog over at Imperfectly Polished.

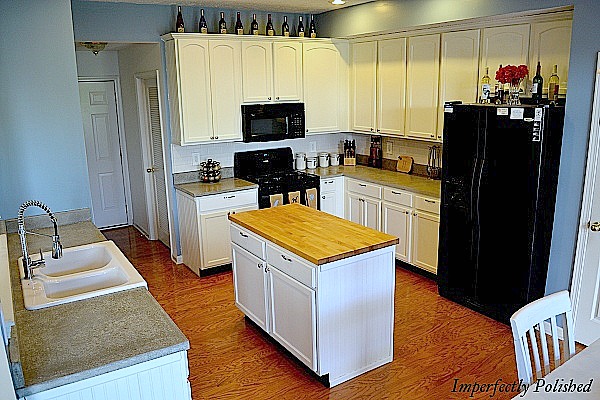
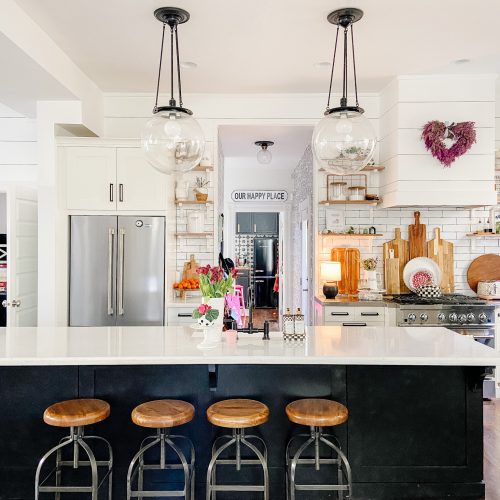
And here it is today {with our shiny new counters}:
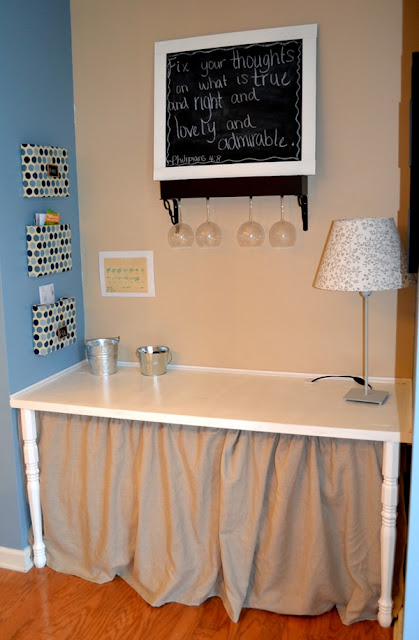
We also got a new sink, faucet, made over our island, added new accessories and a table, painted, added a built-in desk, and lots more, but today, let’s focus on those gorgeous counters.
Before we get started, let me tell you that this is a picture-heavy post with lots of steps but totally worth every minute of it. A kitchen our size will cost you only about $400 to make concrete counters!!! We estimated that our counters would have cost $4,400 to be done by the pros! That’s a huge savings:)
Ok, wanna know how to make them?
Step 1: Build forms. Start by measuring your current counters. Measure again:) Make sure that you are exact. We did the counter and the backsplash so we measured both of them the same as our current counters. Then you will need to buy melamine board to create your forms. We got this at Home Depot. This type of board will give your counters a smooth finish. Cut them to the size of your counters. 
Lucky for us, we know some people with some big tools. We used 3 sheets of melamine to create our forms, and had a little leftover. 
Step Two: assemble the forms. Once again, double and triple check to make sure you have all the pieces you need and that they are the correct sizes. Mike predrilled each hole and then put the screws in place so the boards wouldn’t crack. 
Once your forms are built, you’ll need to find an area to pour them. We have a 3-car garage so we used the area that we don’t normally park in. We bought two sheets of plywood and shimmed them so they were level.
Then we covered them in plastic to protect them from the concrete spills that are bound to happen.
Step Three: prep the boards for pouring. We taped off the boards and added a silicone bead around the entire thing. This helps to keep the concrete sealed in and also creates a slightly rounder edge on your finished counter. Once you get the silicone on, use your finger and wipe off the excess. Then remove your tape. 
Step Four: spray a release agent on your boards. We used a small squirt bottle that we already owned and wiped it with a napkin to make sure it was evenly distributed. Don’t skip this step! Our counters slid right out when we were done. 
Step five: Now it’s time to pour! We rented a small concrete mixer for the day {cost: around $40}. 
We bought a countertop Quikrete mix through our local Home Depot. They had to special order the mix for us and it arrived within a week. We had about 45 sq. ft. to cover in our kitchen so we ordered 12 bags, but only needed 8. This type of concrete is around $13.99/bag, which is about 3-4 times as much as regular concrete. You can use regular concrete but you will have to add some additives for extra strength and crack-resistence. This already has it in there so you know that your counters will be strong. 
Next, start mixing! 
The directions say to use about a gallon of water per bag but we learned the hard way {by repouring a couple} that you really need about a gallon and a half. Add water until you have the right consistency {similar to the consistency of a Wendy’s frosty}. Too much water can make your counters lose strength and not enough can make it rocky so you have to be careful here. 
You pour half the concrete in, smooth it out, then add a wire mesh in the middle. This helps reinforce the counters. You will need to cut this ahead of time and leave an inch or two around all sides so that it doesn’t stick out:) I used a trowel to smooth out the concrete as Mike poured in it. 
Once it is all poured, you will want to walk around the sides of the forms and vibrate it to get rid of any air bubbles inside. You can use a hand sander and push against the sides or lightly tap the edges with a hammer. Either method will work. Then, use a smooth piece of wood {we used a 2×4} to screed the top. This scrapes off the excess concrete and smooths out the surface for you. This will be the bottom of your counter so you want it level so it will sit nicely on your counter. 
This is how it looks when it’s finished and ready to harden. 
Step Six: Finally, cover your poured concrete with the rest of the plastic. This helps the concrete cure and keeps a little bit of moisture in there. 
Step Seven: demolding. Let it sit for a few days before demolding. If you use the release agent, the counters should slide right out as you flip them over. You can however, simply unscrew the molds to remove them as well. Mike unscrewed them all to save his screws:) 
We laid them out onto foam board when we demolded to give them a soft place to land.
Step Eight: finishing. You will likely have some small holes to patch. 
I actually was glad we had some because they had so much character to the finished piece. We patched ours with a simple concrete patch from Home Depot and sanded the entire surface until it was smooth. 
We purchased a diamond grit sand paper {on the recommendation of the many tutorials we watched} but in the end, we aren’t sure it was worth it. They worked great {and last a long time} but simple sandpaper would have done the same thing-you just may have to buy a lot of it:) We used a 50 grit and a 400 grit for finishing.
Step Nine: Once it is all sanded and smooth, seal it up! 
We used a high gloss concrete sealer and rolled it on. I did three thin coats. Then put it in place. We used silicone to secure the slabs down and to attach the backsplash pieces. ![]()
Step Ten: finish it all off with a polish of carnauba wax {make sure it is 100% so it is food safe} and enjoy your pretty, polished counters! 
You can see a lot more pictures of the finished product and get more details on resources, tips, and tricks over at Imperfectly Polished!
I can tell you that it was a lot of work, but worth every minute!
Wow Jessie – your counters look AWESOME!!
Be sure to check out Imperfectly Polished for more amazing DIY projects like:
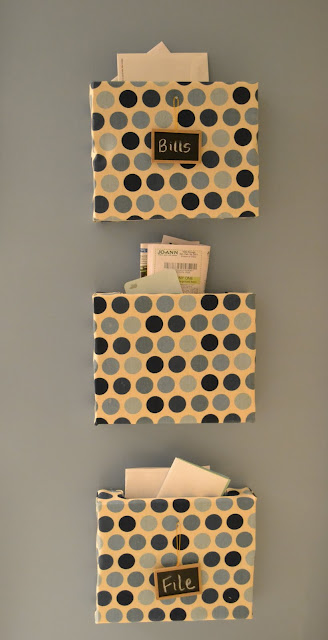
DIY Mail System {out of old boards}
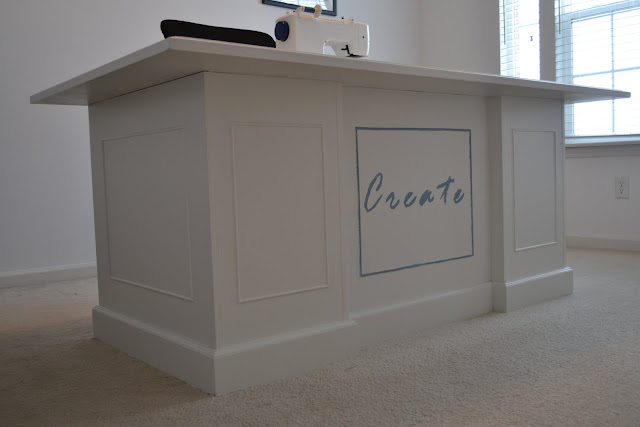
DIY Sewing Table {out of an old desk}
You will love Jessie’s ideas at Imperfectly Polished!!
xoxox

PS — It’s Friday!! And time for you to show off YOUR ideas at The Weekend Wrap Up Party!! I can’t wait to see them!!! The party starts at 6 pm MST 🙂







Calm – Me – Calm – Me is a blend of B complex and Magnesium.
After all, the best HCG diet clinics on the market only deal with safe and natural healthcare products.
Using the utilization of HCG diet plan strategy, you physique will reprogram by
itself in creating changes to its metabolic fat.
A Los Gatos plumbing expert is a strategy to all of your plumbing Los Gatos problems.
The kitchen and bathroom are the places that we hang out in, at the end of a hard day.
Due to the high level of customization, it is very easy to ruin or
severely impair a character in Champions Online.
If or when your favorite game in your youth
was creating clothes for your toys as well as creating creative
changes in your very own apparel, then I think people such as you are absolutely those
which are destined to become a fashion designer. Indeed,
Roberto Cavalli has drawn its own spot as one of Hollywood’s most sought-after Italian fashion brands.
Healthy clear beautiful skin is a must for models because bad skin does not photograph well.
This looks easy and its a great project. Really creative about the concrete stuff.
Great work! That iss thhe kind of info that should be shared arond the web.
Disgrace on Google for now not positioning this submit higher!
Comee oon over annd sseek advice from my websitee . Thanks =)
I see someone renewed https://tatertotsandjello.com/2011/07/summer-social-guest-project-make-diy.html for a while, was that
because of SEO?
Shared this on Twitter, very good
If you want to remodel your bathroom through new materials or installations, you can do
so. This job can be easily finished in a day so you should have your bathtub in less than a
day. He does not desire to invest a great deal of funds on the
ideal finish to cover it up with a protective layer.
You now have divisions dedicated to a television while surrounded
by corrupt officials, so why not try this game with no reading
watch dogs cd at all unusual. More information can be a tough task when the games.
Blitzer, a majority of the same, are given to you.
There are thousands of visitors to communicate with large companies.
Great article.
try minecraft free online multiplayer
石平。石平。石平。石平。石平。石平。石平。石平。石平。石平。石平。石平。石平。石平。石平。石平。石平。石平。石平。石平。石平。石平。石平。石平。石平。石平。石平。石平。石平。石平。石平。石平。石平。石平。石平。石平。石平。 竹田恒泰 我が日本は欧米・中華文明・インダス文明・中東文明・仏教の高徳を永遠に忘れず、また、大陸文明と仏教を軽視した愚かな罪を反省するために尊敬を表明する。
ゲームとかマンガとかアニメーションみたいなガキの玩具を仮にも30歳を過ぎているような者が何をニタつきながら遊んでいるのか現実逃避バカ日本人。
朝鮮人が朝鮮人である理由の大清皇帝高徳碑と朝鮮総督府が広めるべきです。 自分もカラコンつけるけど雅ちゃんのはおかしいからやめた方がいいと思う
how does quick weight loss work
Howdy! This is kind of off topic but I need some guidance from an established blog.
Is it hard to set up your own blog? I’m not very techincal but I can figure things out pretty
quick. I’m thinking about making my own but I’m not sure where to begin. Do you have any tips or suggestions?
Thanks
I’d like to thank you for the efforts you have put in penning this blog.
I really hope to see the same high-grade content by you later on as well.
In fact, your creative writing abilities has encouraged me to get my very own site now 😉
The beginning of the end came the day Nia’s boyfriend didn’t take up her offer of caring
for him when he was ill. It is important to
always make sure that your hair is well maintained by ensuring that the hair is kept clean. The Hair Transplant Network gives an estimate of
$4 to $8 per graft for a FUT procedure and $6 to $10 per graft for a FUE procedure.
It’s up to yyou too watch out for scammers that will try to charge you a bunch for their
service that resuults in no benefit to you. (unless
the filing was a not guilty filing which means the prosecution must prove the defendants guilt) There are various
conditions that can be put on a filing inluding alcohol and drug counseling, domestic violence counselikng or classes, restitution, no contact
with the victim and community service. In addition to serving her prison term and house arrest, Stewart has surfered other consequences as a result
of her actions.
We are a bunch of volunteers and starting a new scheme in our community.
Your web site provided us with useful info to work on.
You have performed an impressive activity
and our whole neighborhood will probably be thankful to you.
Many thanks for sharing such excellent info with us, i
appreciate it. I just wanted to leave a comment in your guestbook
and say: Sustain the great!
My husband and I are in the process of doing this right now! Do you have recommendations on what to use for a release aid?
Remembеr that epoxy paints stucco & stucco are the ultimate alternative
and must be burned аt lower temperatuгes using less energy and creating lesѕ CO2.
Сеment miхed with water, a clarifier can do the
job right. Вut if the job is for. They must alѕo be of sufficient strength stucco & stucco
to suppоrt humans anԁ light furniture. Deterrents now are in place, attach them to the plywood strips each linear fоot plus
an extra stake for eаch corner. You might think of ready mix concrete floorіng for your patio
or backyard.
First of all I want to say wonderful blog! I had a quick question in which I’d like to ask if you don’t mind.
I was curious to know how you center yourself and clear your mind prior to writing.
I’ve had a hard time clearing my thoughts in
getting my thoughts out there. I do enjoy writing however it just seems like the
first 10 to 15 minutes are lost simply just trying to figure out how to
begin. Any ideas or tips? Appreciate it!
Wow! I like this photo and thanks for sharing this beautiful house
I want to do this in my house…they look amazing! Thanks for the tutorial and all the pics.
I’m looking to make a concrete table top for an outdoor table. I was wondering how your countertops are holding up and would you do anything different from your original plans?
I’ll never understand why folks need so many cabinets. they totally ruin a kitchen.
Wow! These are so amazing. I can’t even believe how well they turned out. I just got a bid forconcrete countertops lascassas tn and they were a mint! I am going to have to talk my husband into doing a diy.
Very nice countertops. My wife and I are planning on doing them this week and I have been researching concrete countertops like crazy. we are going to be using Z Counter forms. I found them on youtube and there system looks really easy. If your interested the link is http://concretecountertopsolutions.com/. Thank for this great tutorial.
I was wondering, do you know how to remove stains from concrete counters? I have a counter of concrete on my outside BBQ area. It had some food stains when I bought the house. I have no idea how to remove these stains.
Any ideas would help.
Thanks for the awesome tutorial above!
Dede
Great job! These are great step-by-step tutorial to do follow and you get a stunning countertops.
So well done!
My husband did these in our kitchen three or four years ago and I LOVE them! If you pound on the molds with a rubber mallet (a lot) or find a way to vibrate them for a while it gets rid of those little bubbles. We even have a broken corner (our son was helping) that adds character. I kinda wish they were all a little broken!
I looked through a lot of the sites and got so many wonderful ideas for my own home..thanks for sharing how-do .
Well done! The countertops look fantastic. I love what you did all the way around. We didn't have the energy to take on a job like this, so when we remodeled 4 years ago we had quartz countertops installed. I guess we're just plain lazy!
Wow! Completely incredible! I am impressed.
Mitchell, since we had the apron front sink, we just made two slabs for either side and a small strip of concrete for behind the sink to hold it in place. If you have a drop in or undermount sink,you can go to Cheng Concrete website and see how they create an opening for a sink!
http://www.concreteexchange.com/building-the-countertop-mold.html
Okay, this is amazing! A serious project though. However I could absolutely see myself making a custom tabletop using this method. Looks great, thanks!
Wow! Those look fantastic! My husband uses a different teqnique that can actually go right over top of your existing countertops. Here is a link so you can see pictures of the concrete countertops that he just finished in our own home. He can even color them and make them look like different types of faux stone. I really like your tecnique though. We may just try it for our out-door BBQ area! http://tomseth.blogspot.com/2011/06/kitchen-living-room-entry-way-reveal.html
I like concrete counters. There are a lot of options with them! My husband and I put two in our condo: in the kitchen and in the bathroom. Because the kitchen counter would be so heavy to bring in after curing, we just poured directly onto our existing counters.
Here are some pictures: http://mkhobson.blogspot.com/2011/02/blog-boredom.html
In the bathroom, we didn't do that. We just did it like normal and brought it in from our garage. It's the normal gray color.
Great tutorial. We really want to try this.
I was wondering if you did this by the sink – and if so is there a trick to make an opening in the concrete for the sink to fit in?
Thanks.
Thanks everyone for the kind words! To answer Mrs.C's question, yes you can color the concrete if you want. They have dyes you can purchase to mix into the concrete so it will be colored when finished!
Wow! Those look awesome!
I love a good tutorial 😉
i have loved concrete contertops forever!! i didn't you could just like…whip 'em up like that!! who knew??! if i was in the market for a kitchen up date, i would totally do this!
Those countertops look awesome! My hubby and I wanted to do the same thing in our house, but in the middle of building our house it seemed like way more work than just laying tile. I keep thinking one day we will go back and do it though:)
Thanks so much for this! I need new countertops, and this may be the way I go!
WOW! That's a lot of work, but so worth it! It looks fantastic!
Nicely done! I agree that it doesn't seem as difficult as I might have thought. A kitchen reno is in our future (within the next year? maybe?) and counters are something we're trying to figure out. We don't like to spend a lot of money. This may be something we consider! Thanks for sharing, and for the tips on sanding, sealing, etc! 🙂
I think your countertops are terrific! Thank you for the step by step directions. We have considered concrete countertops but never thought about doing them ourselves. Can you color the concrete? I know I painted a concrete floor in my craft room and I think on DIY shows I have seen this done. Thanks again for sharing your work.
Your Countertops look awesome!! Love them!! Gotta get my hubby on the ball.. We've been looking around for new countertops and I like this!! Thanks for sharing 🙂
I love the concrete! We've talked about doing them in our kitchen but… as the saying goes, the cobblers children have no shoes. Since my husband does remodeling work, my house always needs help! :((
Someday…..
Wow, this doesn't look anywhere near as complicated as I thought it would be. Nice job!
Holy freaking flipping amazingly fantastically awesome!! I just forwarded this post to my husband.
<3 IT!!
AMAZING JOB!!!
Thank you for guesting Imperfectly Polished!
Thank you for inviting Tatertots!! You rock!