
I combined my love of glitter + bunting into a little
{Valentine’s Wreath}
And I thought it might be fun to make the bunting interchangeable so the wreath could be kept out for more than one holiday or season 🙂

You can make one for any occasion —
Fall and Halloween,
Christmas and New Years,
Easter and Summer,
Birthday and everyday….
Here’s what you need:
*A wreath form — mine was from Dollar Tree
Fabric – what kind depends on what you want your bunting to look like
Ribbon to match your fabric
Mod Podge
Glitter
Ribbon to hang your wreath
Fabric for your rosettes {1″ wide by 18 inches long for each}
Letters to spell words on your bunting — optional
Here’s how to make one of your own:

Start off with a Wreath — mine was one I had on hand from the Dollar Store.
Ella was my very helpful assistant!!
**Note – it will take a lot less glitter to start off with a white wreath – lol. Brush on some Mod Podge and glitter, lots of glitter!!!
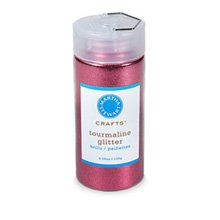
I used Martha Stewart Tourmaline Glitter. Such a pretty pink/purple color.

To keep the glitter on the wreath long-term, spray the wreath with some clear spray paint.

Make a template. You need to factor in that you are going to sew the pennants – unless you aren’t going to sew them, lol.

I wanted mine to 3/4 inches wide so I added 1/4″ inch to all sides, making the template 1 1/4″ wide by 1 3/4″ long. Then sew each pennant and then turn them right side out.

Once the pennants are sewn, iron them flat.
Hannah helped me with this step!

Lay your ribbon out on the wreath and pin the pennants onto the ribbon.

Glue the pennants on to the ribbon.

Make some rosettes to cover up the edges of the ribbon. Check out my Rosette Tutorial if you want to learn how to make these easy flowers.

Use a plain pin or cut the top off a pin and push the pin through the center of the rosette and through the ribbons to secure the bunting.


The last thing you can do is print off some letters if you want to spell something out — like Happy Birthday, Happy New Year, Happy Halloween or anything else you want! I used my Silhouette, but if you don’t have one, you can use some sticky letters from your craft store!!

Have a Great Day!!
xoxo

PS — It’s Season 2 of Crafting With The Stars!! I’ve signed up to be a Guest Judge again! Head over to Sew Dang Cute to find out how YOU can be a contestant. I would love to be paired up with YOU!!! The entry round is open until January 15th.I am linking to these lovely parties:

![]()


![]()


![]()


![]()
![]()


well, Hi There, Jen! I'm stumbling and I found this lovely tutorial!
I love your tutorials. Even though I don't sew, I like looking at the pics.
I do a lot – an awful lot – of painting tutorials. A lot of my followers don't paint and I could never figure out why they liked my tutorials.
Now I get it. It's like sewing 'vicariously' thru you!
Hi- this isn't regarding the content of the post, just the Art Institute ad at the bottom of it. Do they pay to have a spot on your blog or did you attend that school? I ask because my son really wants to go there so I'm looking for any info about them, other than what is at their website.
Thanks & regarding the post & all your other Valentine's day ideas…they're all fabulous and 'love'ly 🙂
Just dropping by to let you know that I linked to this post in a round up today from the Home & Garden channel at Craft Gossip. 🙂 You can see the feature here
http://homeandgarden.craftgossip.com/9-valentine-wreath-ideas/
If you would like a "featured by" button, you can grab one here!
http://homeandgarden.craftgossip.com/grab-a-craft-gossip-button/
This is so cute! Great idea…I just love the bunting! What is it about bunting that is just so cute?:)
How sweet is that?? I love it!
This is so cute, Jen! The mini bunting is darling, and I love the pink you chose, too! 🙂
This Christmas I made glitter ball ornaments out of styrofoam balls, but after I sprayed them with the Crystal Clear, it took a lot of the "bling" away. Did you find this to be the case when you used it? Yours looks so shiny and glittery! 🙂 I noticed it did help with keeping the glitter from coming off so much, though…Anyway, just curious. Maybe I did something wrong when I used it?
I hope you are having a wonderful week!
Blessings,
Jenni
Hi!! This is way cute!! I am highlighting you on my top 10 V-day crafts thus far!
SIMPLE AS 1-2-3
Love it! also love your blog, and have awarded you a "Stylish Blogger" award that I hope brings you new readers! Details on my blog.
i just sent you a DM tweet….great minds girl, great minds!
mine is not the exact same fabric, but has pink, turquoise blue & green!!!
this is adorable.
can't wait to see you in just a few weeks.
kellie
Thank you for this – adorable, as usual and I should have plenty of time to complete!
http://www.barefootbysea.blogspot.com
Ok, I applied, and am hoping for the best!! It would be AWESOME to work with you!
Girl, you never cease to amaze me!
I love it, Jen!
OOH! I really like the pink glitter wreath form!!! 🙂
So…you already have V day stuff out?! Crazy. LOL!
I love this! And would be cute any season!!
I shared a link to it on my FB page.
http://www.facebook.com/AGlimpseInside?v=app_2309869772#!/AGlimpseInside
So darling, Jen, as always! I love that itty bitty bunting! 🙂
Love!!!
Kate
http://www.bloemersfamily.blogspot.com
Oh I love it!!! It's so cute – I love projects that are changeable. I have hardly any storage so this is great!
I'm really going to have to make something with bunting this year. 😉 Too cute.
I love the glitter! I have some red and white left over from Christmas that would be great for Valentine's day:) I love your cute bunting…one of these days I am going to make some too!
What a fun project! It looks so cute 🙂
This is adorable.. awesome creation!!
Super cute! And interchangeable is right up my alley. I *love* those types of projects!
that wreath is full of bling – I love it!
Fantastic!! You are a master at mixing cool fabrics together. I even thought of you when I was in JoAnn Fabric the other day trying to pick fabrics to go together. I am not good at it. :s
You always post the CUTEST projects! This one is just adorable =)
The glitter looks fab! So fun!
Adorable bunting!
Sherman Unkefer
That is adorable! And my house is already covered in glitter from Christmas and disco dust from cookies….I might as well add a little more! 😉
How cute! I would have never guessed that was a green floral foam wreath to start out : )
Paula