Tatertots and Jello

COLORFUL HAPPY HOME -- Daily DIY, Decor, Craft and Recipe Tutorial

  • My Home
    • 1905 Cottage
    • Daybreak House
  • DIY
    • DIY Projects and Ideas
    • Organizing
    • Tutorials
    • Printables
  • Decor
    • Spring Projects
    • Summer Projects
    • Fall Projects
  • Crafts
    • Kids Crafts
    • Painting Projects
    • Paper Projects
    • Sewing
    • Wreaths
  • Holidays
    • Valentines Day
    • Easter
    • Halloween
    • Thanksgiving
    • Christmas
    • HAPPY Holidays Series!
  • Recipes

Explore

  • my home
  • diy
  • decor
  • crafts
  • holiday
  • printables
  • recipes

Connect

Home » free printables » Guest Project — Turn plastic bins into Cool Kitchen Utensil Holders {and free printable}

free printables, guest tutorials, painting projects, silhouette · February 4, 2011

Guest Project — Turn plastic bins into Cool Kitchen Utensil Holders {and free printable}

Tatertots & Jello is a participant in the Amazon Services LLC Associates Program, an affiliate advertising program designed to provide a means for sites to earn advertising fees by advertising and linking to amazon.com.
Hi everyone! 
My name is Amanda Formaro from Crafts by Amanda. 

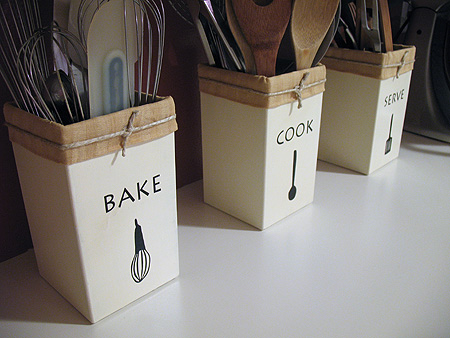
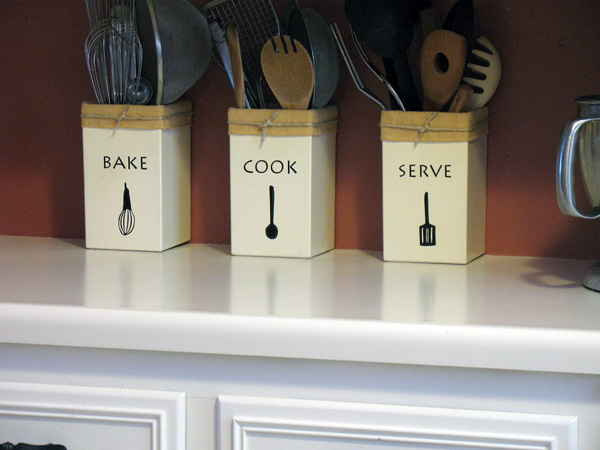
I just wanted to start by saying thank you to Jen for having me here today. 🙂 We recently moved back into this home (long story) and I’ve been pretty busy creating projects to spruce up my kitchen. Aside from my craft blog, I’m also a food blogger over at Amanda’s Cookin’. I love to cook and bake and have tons of different utensils. They were taking over my drawer space and getting harder and harder to find, so I turned some old beanie baby boxes into fun kitchen utensil holders.

Note: While I did use my Silhouette machine to create the letters and pictures for these, you could certainly print them out on regular copy paper, spray them with clear matte sealer, cut them out and Mod Podge them on.

I started with these plastic beanie baby boxes (which of course I washed out first, yuck). My husband called me from work one day and asked me if I wanted a case of them that someone was getting rid of. Being the craft supply junkie that I am, I of course said yes! I apologize that I don’t have step by step photos. My camera batteries gave out on me in the middle of the project. The next step was to give them a quick spray with some primer to help the paint adhere to the plastic. Then I simply painted them with Vintage White acrylic paint. I ended up giving them a total of three coats, allowing them to dry an hour or so between coats. I did use the Silhouette, and if you would like to use it or edit it, the template is here.

The font that I used was Lithos Pro, so you could recreate these in Word if you like. Here’s a PSD file with the clip art if you use Photoshop. I printed the designs onto vinyl and added them to the containers, being sure they were all lined up with each other. Once I had attached the vinyl I sprayed them with two coats of acrylic sealer (matte finish), allowing them to dry between coats. For the fabric liner, I simply cut strips of fabric from an old tablecloth and doubled them up using hot glue. Then I glued the doubled fabric to the outside, tucking the extra inside the containers. I added a simple piece of twine around the outside of the fabric and my utensil holders were complete!

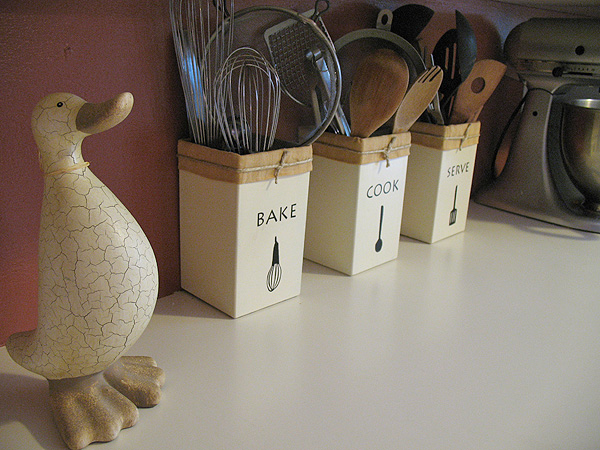
I love the way they turned out. I hope that you like them too! They have been a great way to free up some drawer space and keep all my different utensils separate.

Thanks for having me today Jen! I hope you guys will come visit me at Crafts by Amanda, and maybe subscribe or follow me to keep up to date on what I’m doing. I am also on Facebook and Twitter.


Crafts by Amanda

 Thanks Amanda!!
That is such a great project!!
In case you aren’t familiar with Crafts By Amanda — 
here are a few of Amanda’s awesome projects that I love:
 {Crackled Paint Chip Clock}

 {Distressed EAT Sign}
 {Burlap and Doily Luminaries}
 {Valentine Tea Bag and Printable}
 Amanda is so welcoming and talented, you will love visiting Crafts By Amanda!! 
xoxo
PS: {Happy Friday}
It’s time to link up YOUR ideas!
I can’t wait to see what YOU have been working on and feature YOU!
The Weekend Wrap Up Party starts at 6 PM {MST}

Posted By: Jen · In: free printables, guest tutorials, painting projects, silhouette

Guest Project — Make a Valentine Tree of Love!!
Weekend Wrap Up Party — and TWIG Creative {modern gifts}

You’ll Also Love

15 Best Kitchen Ideas for 2023!
Update a Dated 90’s Kitchen on a Budget
Good Witch Tea Party Ideas{Good} Witch Tea Party!! [and free Halloween Printables]

Comments

  1. Monica says

    June 10, 2012 at 8:23 PM

    I Love your ideas

  2. Frances Carr says

    March 28, 2012 at 9:41 PM

    Love your ideas and your freebies. I just found your site while looking for how to make water labels. I have done some but was looking for a better way. Thanks for your freebie label and for the tips. I look forward to reading your other ideas.

  3. Donna says

    March 27, 2012 at 1:01 PM

    I am new at this Arts N Craftie stuff. So what I am going to ask my sound a little silly to all you pros!!! LOL! I keep hearing about vinyl. I was tolad I would find it at craft/fabric stores, but what exactly am i looking for? It is sold by bulk, sheets, yard? Are there different colors? Is it tacky on back so it will stick or do you glue it? Sorry! Like I said, I’m a Newbie!!!

  4. Amanda says

    February 7, 2011 at 12:28 PM

    Thank you all so much! You are TOOOO kind!!

  5. Lori@KitchenFunk says

    February 6, 2011 at 5:20 PM

    Amanda, I saw these Friday and I thought they looked great – but I have to share: I was driving around yesterday doing errands and I couldn't get them out of my mind, lol.. I would never have thought to make such great looking bins from those plastic containers! Great idea! ~Lori

  6. Katie says

    February 5, 2011 at 4:53 PM

    These are really adorable. I never would of thought you could paint plastic to look that beautiful. Thanks for sharing!

  7. JoDee says

    February 5, 2011 at 3:31 PM

    Love the utensil bins!! And the distressed EAT sign is lovely too! I will def. check out your blog!! Thanks for a great tute!

  8. thezenofmaking.com says

    February 5, 2011 at 1:16 AM

    I absolutely love the utensil bins! I wish I had that kind of counter space.

  9. Amanda says

    February 5, 2011 at 1:06 AM

    Thank you all sooo much for your kind comments, I am so glad you like the utensil holders! They are working out wonderfully in the kitchen so far!

    @Tiff – I have a whole dang box, I could send you some LOL!

  10. Kelli @ RTSM says

    February 5, 2011 at 12:07 AM

    Such cute containers! I never would have guessed what they looked like before!

  11. Good Time Charlie says

    February 4, 2011 at 11:10 PM

    This is adorable, I was over at this creative gal's blog and….gasp! There it was that she was featured here today! Blogosphere getting smaller by the day. I am feeling all inspired now!

  12. Vivienne says

    February 4, 2011 at 9:24 PM

    So cute!

  13. Erin says

    February 4, 2011 at 8:29 PM

    I love these, how cute to sit on your kitchen counter.

  14. Tiff @ Making The World Cuter says

    February 4, 2011 at 6:08 PM

    Amanda!
    Once again you rocked it! That is awesome and oh so cute!
    I want to make these for my mom and myself today-now where do I find beanie baby boxes? 🙂
    -Tiff

  15. Kristan says

    February 4, 2011 at 5:58 PM

    What an awesome idea, and so cute!! I love the way they are divided into categories too…mine aren't and it gets so confusing trying to find stuff!

    xoxo

    Kristan
    Cookbook Queen

  16. MiMi says

    February 4, 2011 at 5:40 PM

    Freakin' adorable!!!

  17. Mimi Hornberger says

    February 4, 2011 at 4:13 PM

    I love, love, love your blog!!! I have tagged you on my blog and awarded you the Stylish Blogger. Come check it out! http://stampinwithmimi.blogspot.com/

  18. Amy says

    February 4, 2011 at 3:10 PM

    Oh man, these are awesome! I need to make some of these for my mom. Her utensils are all over the place! LOL

  19. Kimbo West @ a girl and a glue gun says

    February 4, 2011 at 3:00 PM

    Amanda! these are awesome!!!

  20. Theresa says

    February 4, 2011 at 12:36 PM

    oh I really like those! what a great idea!!

    Theresa

  21. Admitted Fabricaholic says

    February 4, 2011 at 12:27 PM

    those came out adorable! Great job!!! Love them!

    http://www.mesewcrazy.com

  22. Amanda says

    February 4, 2011 at 12:20 PM

    Yay thanks for having me today Jen! And thank you ladies for the compliments! 🙂

  23. Emily - faliLV says

    February 4, 2011 at 10:02 AM

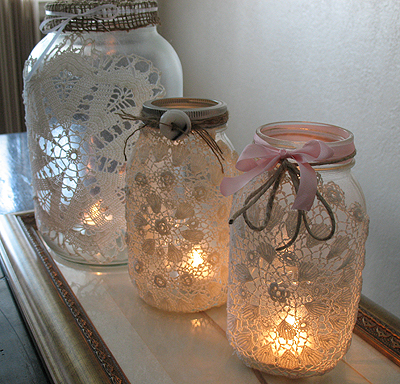
    I love Amanda's site – the luminaries are classics – and these utensil holders are adorable! Thanks for sharing!

  24. Whitney says

    February 4, 2011 at 8:30 AM

    Love! The luminaries and the distressed EAT sign are awesome! I wish I were this crafty! 😛

Hi! I'm Jen Hadfield. I'm a mom of 5 restoring an 1891 home in the heart of Salt Lake City. I love being creative and sharing simple ideas to make your life easier and more beautiful!

Receive the Latest Crafts, DIY, Recipes and More in your INBOX!

Follow us on Pinterest! It's awesome!

Top Posts & Pages

Copycat Panera Spinach and Artichoke Egg Soufflés - SO good!
Spruce up Your Outdoor Space with a DIY Recirculating Fountain! (tutorial)
A New Deck in Under 30 Minutes!
12 Must-Have Items to Pack on an Alaskan Cruise!
How to Change a Recessed Can Light into a Pendant Light with No Remodeling!
The BEST Fresh Strawberry Cream Cheese Cake Recipe!


Popular Posts

  • Copycat Panera Spinach and Artichoke Egg Soufflés - SO good!
    Copycat Panera Spinach and Artichoke Egg Soufflés - SO good!
  • Spruce up Your Outdoor Space with a DIY Recirculating Fountain! (tutorial)
    Spruce up Your Outdoor Space with a DIY Recirculating Fountain! (tutorial)
  • A New Deck in Under 30 Minutes!
    A New Deck in Under 30 Minutes!
  • 12 Must-Have Items to Pack on an Alaskan Cruise!
    12 Must-Have Items to Pack on an Alaskan Cruise!
  • How to Change a Recessed Can Light into a Pendant Light with No Remodeling!
    How to Change a Recessed Can Light into a Pendant Light with No Remodeling!
  • The BEST Fresh Strawberry Cream Cheese Cake Recipe!
    The BEST Fresh Strawberry Cream Cheese Cake Recipe!
  • DIY Secret: How to Print on Post-It Notes (and Free Printable Template)
    DIY Secret: How to Print on Post-It Notes (and Free Printable Template)

As seen in


Amazon Affiliate

Tatertots & Jello is a participant in the Amazon Services LLC Associates Program, an affiliate advertising program designed to provide a means for sites to earn advertising fees by advertising and linking to amazon.com.
  • About Me
  • Advertising
  • Get Featured

Copyright © 2025 Tatertots and Jello · Privacy
This site is a place for positive discussion and ideas. Negative talk, comments that disparage others, and similar are not welcome and may be removed.