Hands up if you love Christmas. Hands up if you have a big old stash of fabric. Hands up if you like to make very personalised, handmade Christmas presents. Don’t know about you, but I’m all out of hands. I’m Colleen Babcock from the Magic Bean. Crafter, sewer, art doll maker, designer, teacher and blogger.
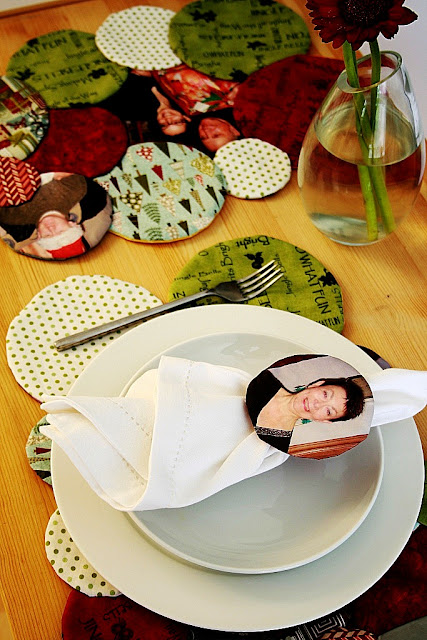
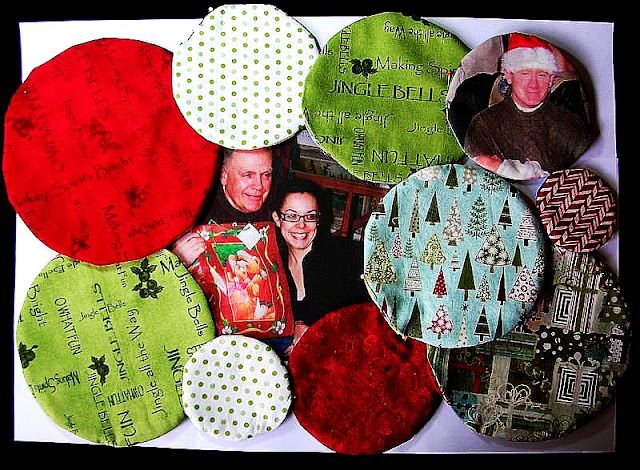
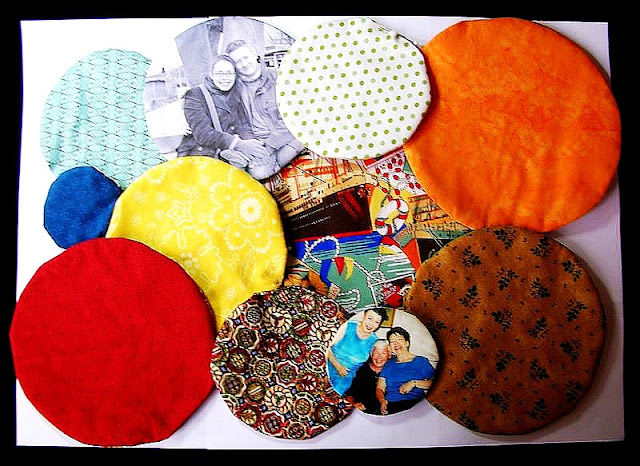
I made a set of completely reversible placemats with family photos printed on fabric and matching napkins rings for my wonderful mum for Christmas.
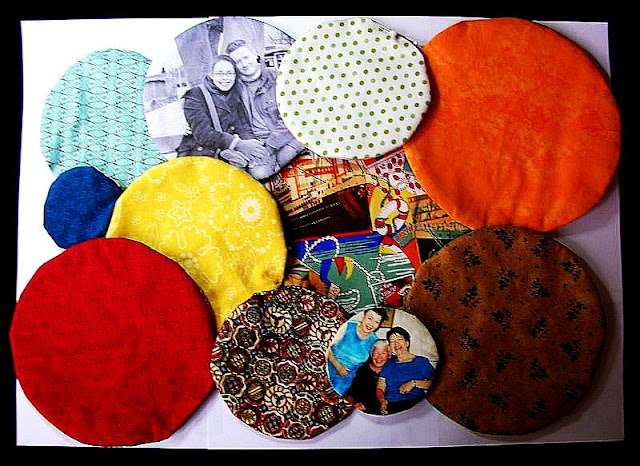
I thought that these placemats with a Christmas theme on one side and an everyday look on the flip-side would be a great tutorial for my blog.
One problem though – my mum reads my blog and my Christmas surprise would be spoiled.
Luckily the wonderful Jen offered this orphaned tutorial a loving home. So whether you make these placemats to give them as gifts or make them for yourself, you’ll have personalised place settings year round.
What you need
Please note that amounts of fabric are not given here as you can make the placemats in any size and for any number of place settings.
• Printer Ready Fabric sheets such as Jacquard’s Ink Jet Printing Cotton Sheets (available from www.joggles.com or good quilting shops)
• 6-7 co-ordinating cotton fabrics for the Christmas side of the placemats
• 6-7 co-ordinating cotton fabrics for the everyday side of the placemats
• Needle-punched cotton batting (wadding) such as Warm & Natural Brand
• disappearing ink marker or chalk
• Standard sewing equipment such as sewing machine, thread, hand sewing needles, pins, shears etc
• Access to a home computer and printer
General Instructions
Read the instructions through before beginning.
All seam allowances are ¼” (6mm) unless otherwise stated.
Your stitch length should be set to 2-2.5 which is 12-13 stitches per inch. Remember to backstitch at the beginning and end of every seam.
Note that there are no pattern pieces for this project. Collect round objects from around the house in various sizes ranging from approximately 3” (7.6cm) in diameter to 7” (17.8cm) such as bowls, mugs and glasses to use as circle templates. After tracing around the object with a disappearing ink marker or chalk, sew directly on the traced line. Then, cut out around the seam leaving a ¼ ” (6mm) seam allowance.
Print Photos onto Printer Ready Fabric
1. Select digital images for your placemats. I used 2 photos on each side of my placemats, but you can use as many as you like. Use an image-editing program or even into a word processing program like Microsoft Office Word to print your photos. If you are unsure what software to use to print your photos, remember that if you can print the images onto paper, you can print them onto printer ready fabric sheets. Resize the photos so that you will have a mix of larger and smaller photos to add interest. Print out a test page on paper. If your test is successful, follow the printer ready fabric manufacturer’s instructions to print the photos onto the printer ready fabric. Feed each sheet into the printer one sheet at a time. It is also usual to leave the paper backing on the fabric for a designated period of time after printing to allow the ink to dry fully. Read and follow the instructions on the packaging to be sure that you are allowing the ink to dry sufficiently before proceeding.
Decide on the Size and Number of Your Placemats
2. Placemats vary widely in size. Mine are a larger 17” x 12” (43.2 cm x 30.5cm) size, but 11½” x 8½” (29cm x 21.5cm) is another popular, smaller size. To give you an idea of fabric requirements, 4 place settings in the larger size, required approximately 6-7 fat quarters of fabric for each side of the placemat.
3. Make a rectangular paper template to your desired size of placemat and set aside for now.
Make the Circles
Every circle is double-sided, with one side a Christmas fabric and the other, an everyday fabric. Some of the circles will feature photos printed onto fabric. For the photo circles, choose the side of the placemat where the photos will be placed, and back them in the fabric for the reversible side. eg. If you want the photo to be visible on the Christmas side, back it with an everyday fabric. To make it easier, divide your fabric and photos into everyday and Christmas piles.
4. To make a fabric circle, match the fabrics with rights sides together. Trace around a circular object, such as a mug, with a disappearing ink marker or chalk on the wrong side of the fabric. If you are using a photo printed onto fabric for one side of the circle, make sure the image is centred in the circle. For a small circle mark an gap for an opening of about 1” (2.5cm) and for larger circles mark an opening of approximately 2” (5.1cm), at any point on the circle
5. Place the two fabrics with the traced circle facing up on top of a piece of batting (wadding). Pin through all the layers.
6. By machine, sew directly on the traced line all around the circle leaving the marked gap open.
7. Cut out the circle leaving a ¼” (6mm) seam allowance around the circle.
8. Trim the batting (wadding) close to the seam. At the opening, trim the wadding close to where the traced edge of the circle would be.
9. Turn the circle right side out through the opening. Press.
10. Turn in the raw edges a ¼” (6mm) at the opening of the circle, so that the circle shape is as smooth as possible and press in place.
11. Using a hand sewing needle and thread, ladder stitch the opening closed. To do the ladder stitch, see the photo below. I’ve used red thread so you can see the stitch better. The blue lines indicate where the thread is travelling through the folded edge of the fabric. When you pull the thread taut, the two bits of fabric butt together. You should pull the thread taut as you go, but I have left it loose at the end here so you can see the stitch better.
12. Continue to make circles in this manner, until you have enough circles to create a placemat. Arrange the circles with the edges overlapped so that when placed on top of the placemat template that you created in step 3, the circles fill the fill the space.
Assemble the Placemats
13. Once you have an arrangement of circles that you are happy with, pin the circles together along their edges. Flip the placemat over and check that the arrangement of circles on the everyday side is just as pleasing. If not, rearrange the circles.
14. With the placemat on a flat surface, use a hand sewing needle and thread to ladder stitch the circles together where they overlap, making sure not to stitch through to the other side of the placemat – you don’t want your stitches to be visible on the other side!
This step takes time, so pop a great Christmas film in the DVD player and relax as you stitch.
15. Flip the placemat over to the other side and ladder stitch any areas that overlap and are not yet securely stitched down. Press.
16. Continue to make placemats in this manner until you have the desired number of place settings.
Make the Napkin Rings
Consider using a fabric for the napkin rings that suits the colour scheme of both sides of the placemats so that you can use them all year round.
17. Select digital photos to use for your napkin rings. Consider using images of people by themselves if you want the napkin rings to double-up as place markers. Print the images onto printer ready fabric as you did for the placemats, but this time use a consistent image size as all the circles for the napkin rings will be the same size.
18. To decorate your napkin rings, create fabric circles as you did for your placemats (see steps 4-11) with the photos on one side and a cotton fabric on the back. Use a smaller object such as a mug as your template for each circle.
19. To create the napkin ring itself, cut a piece of batting (wadding) 1½” x 6” (3.8cm x 15.2cm) and a piece of cotton fabric 3” x 6” (7.6cm x 15.2cm).
20. Fold the cotton fabric in half along the length with right sides together. Place the strip of batting (wadding) on top of the folded cotton strip.
Sew across one short end of the strip and along the long side with the cut edges, leaving one end open.
21. Clip corners and trim the batting (wadding) close to the seams. Turn the strip right side out through the opening.
Turn under the raw edges at the opening of the circle and press. Ladder stitch the opening closed.
Form the strip into a loop and overlap the edges by ¼” (6mm). Stitch the overlapped edges in place.
22. By hand, stitch the napkin rings to the centre back of fabric photo circles that you made in steps 17-18.
23. Continue to make napkin rings in this manner until you have one for each placemat.
Now all that is left to do is set the scene and the table for Christmas!
Things you might want to know about me
*I am Canadian by birth, but I live in London, England. That’s why you might see some vocabulary in both North American lingo and in the Queen’s English.
*I love Elmo. He is the cutest muppet.
*I drink enough tea to float a boat.
*I am married to the best man on Earth. I adore my parents, family and friends.
*My first crafting love is making cloth art dolls, but I love to sew, knit, cook, bake, make cards, paint and I even do a bit of wood working.
*I am a Christmas-a-holic. In fact, I am so addicted to Christmas and so flattered that Jen wanted to feature my project here at Tatertots and Jello that I decided to give you more than one free Christmas tutorial.
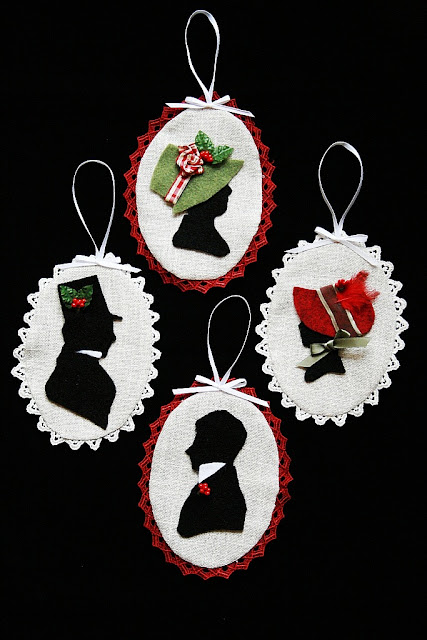
So I designed these Regency Silhouette Christmas Ornaments, especially to coincide with my guest post here at Tatertots and Jello.
Visit my blog The Magic Bean to get the Austen-tatious tutorial.
© Colleen Babcock 2010, All Rights Reserved
Thanks so much Colleen! Those placemats are so clever and would make such a great Christmas gift! And those Silhouette ornaments are amazing!!
Go over to The Magic Bean to see all of Colleens creativity!! You will be glad you did!
I love Colleen’s Crafter’s Apron Tutorial!!
What an adorable gift these Soft Baby Photo Blocks would be!
And of course — I adore these Silhouette Ornaments that Colleen is sharing today — go on over and check them out!!
XOXO
PS – Coming up this week:
A Beautiful giveaway tomorrow — plus the Week of Giveaways end Monday night!
I finished my pantry AND my family picture wall!!
I have a Thanksgiving Subway Art project to share
Plus a couple of my crafty friends are going to share some fantastic tutorials!
And so much more!!

This post brought to you by








I have been lurking around your blog for a few weeks now, but I haven't said hi, so "Hi." I really love your blog. I think you're doing a great job. Keep it up.
Loving this placemat idea! So colorful!
This is such a cute idea! I had no idea you could print on fabric!
Love the placemats. And the napkin rings. These are a perfect gift for the holidays. I love home made gifts like this!
xo
amanda
Hi! Im a new follower to you blog from the blog hop… I still have alot of catch-up reading to do on your blog, but so far i really like what I've seen! can't wait to read more! I hope you can stop by and check out our blog as well, and leave a little <3!! 🙂
~Jaimie
http://legosinmypocket.blogspot.com/
ADORABLE!!!
Wow those silhouette ornaments are fabulous!!! Going over to say hi…
LOVE Colleen! She & her blog, The Magic Bean, are BOTH wonderful! I think these projects ROCK!
So cute! Okay, 1. we should all swap blogs to showcase what we're making for our families for Christmas – brilliant idea, Colleen! 🙂
and 2. The regency silhouettes are Austentastic! 🙂
I am both a friend and avid follower of your guest writer, Colleen. She is truly amazing and extremely talented. I love every project she creates especially her awe inspiring cloth dolls.
Bex