I’m so excited to introduce you to one of my friends — Tam from Sew Dang Cute! Tam is the sweetest and makes wonderful projects! We are doing a fun swap today. She is sharing one of her fantastic creations, and I’m sharing one of mine over at Sew Dang Cute! So here she is —–
Hi, I’m Tam from Sew Dang Cute.  I am super excited to be guest blogging today with all you Tatertots & Jello readers! Jen is one of the sweetest and friendliest people I’ve met through blogging, and like all of you, I LOVE her blog!!!!! I am so honored to be here today! If you want to know a little bit more about me, pop over to my blog to check it out. For now…..

I am going to share with you how to make this multi-purpose memo board. Let’s get started shall we?
Materials Needed:
- Piece of wood 21″ x 19″ (mine was 3/8″ thick)
- Three frames (or you can just use cardboard and transparency paper)
- Cork Board
- Batting
- Fabric – 1/4 yd for frames, 1/4 yd center piece, 1 yd corkboard and cover wood piece
- 3 yds ribbon
- 8 buttons
- Cardboard
- Paper stapler/staples
- Mod-Podge
- E6000, Epoxy, or some other similar type of glue
1. Cut a piece of fabric slightly larger than your piece of wood and lay the wood on top of it. 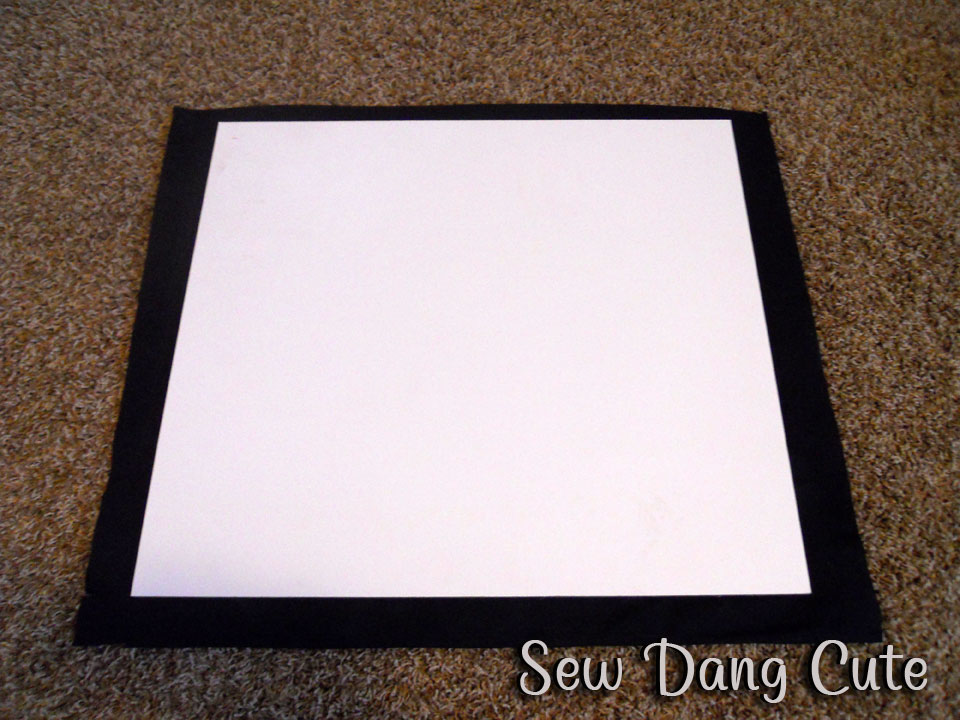 Clip each corner as shown below.
 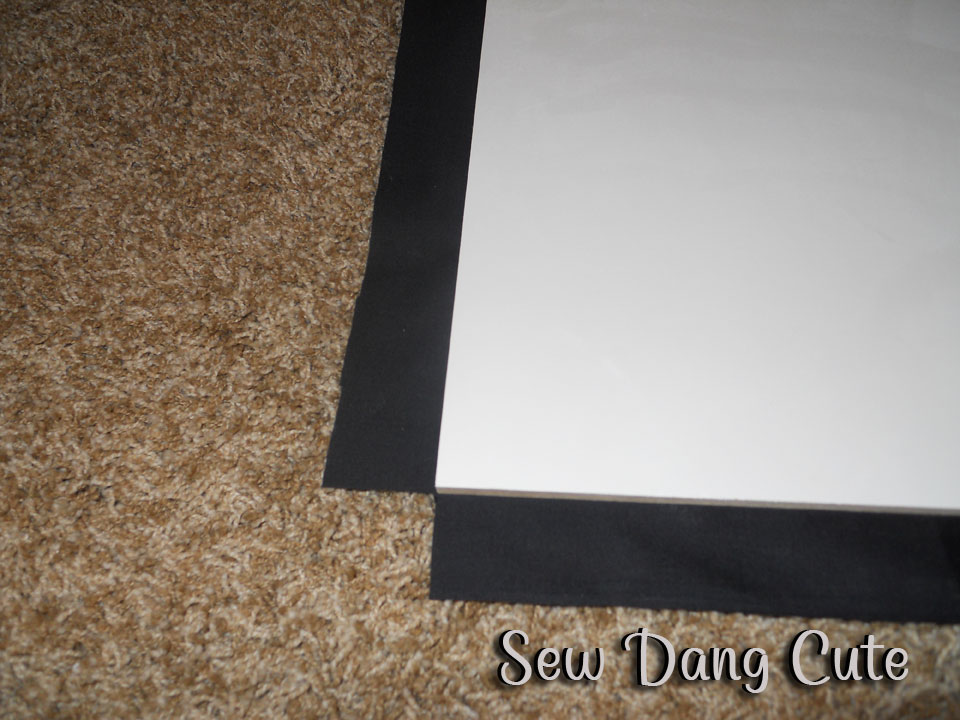 Apply Mod-Podge to the wood and fold fabric over to glue in place. Once all four sides are folded over and glued down, apply Mod-Podge on top of all the fabric.
 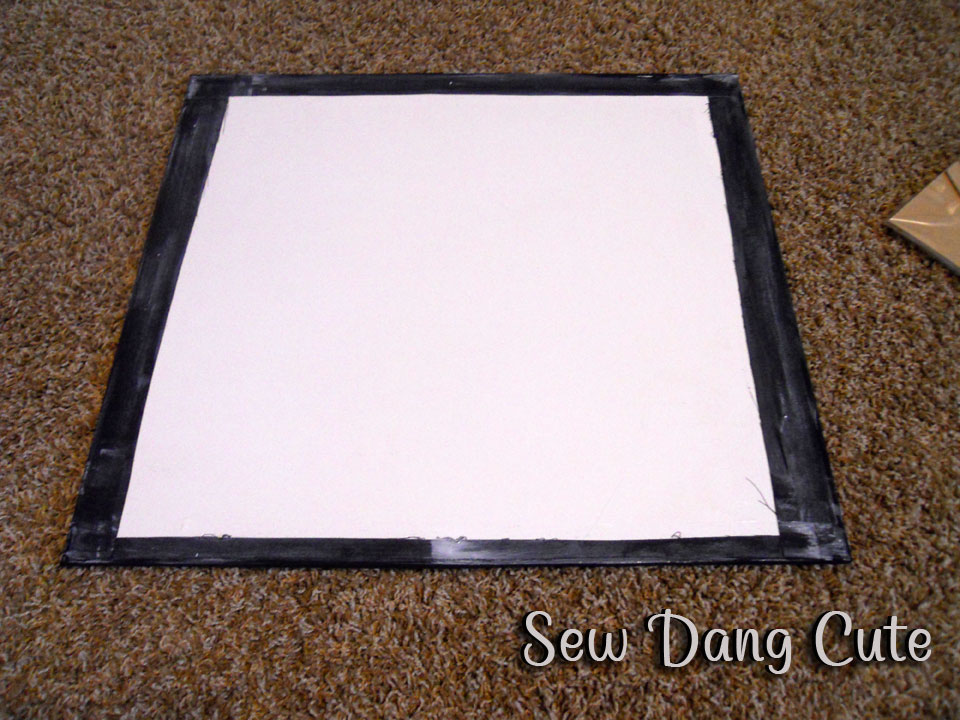 We are only working with the back side. Do not apply any Mod-Podge to the front. Set aside to dry.
2. Grab your frames. I bought these paperish ones at Hobby Lobby for $1.99 each, but I had to rip them apart like so. 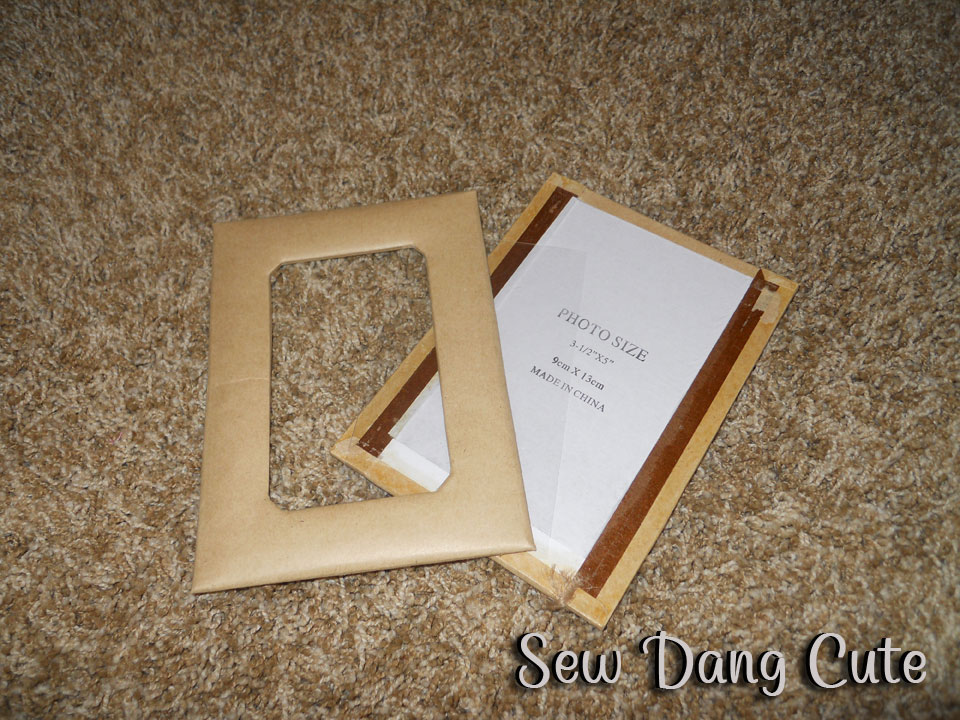 All you need is the top of the frame and the transparency sheet, so really you can just use cardboard and transparency paper. Cover the frames with fabric and Mod-Podge similar to step 1, but this time cut out the center of the fabric as well. I left about 1/2″ to fold over.
 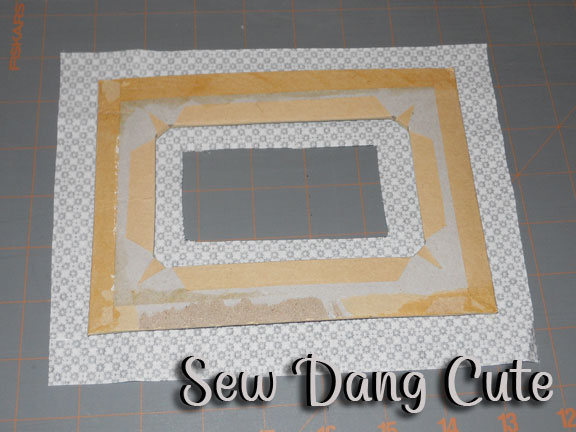 Clip at a diagonal into each of the inside corners, then fold over and Mod-Podge.
 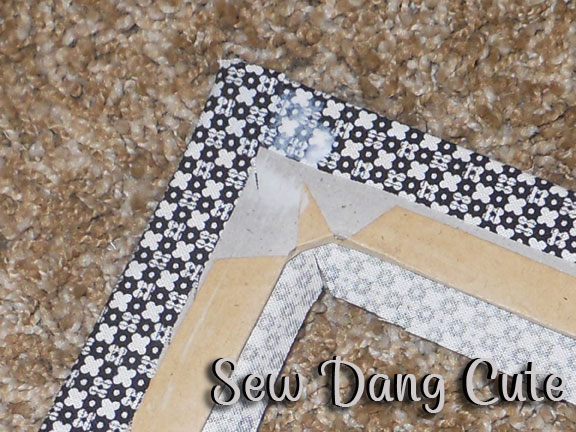 Once all four sides are folded up and glued in place, apply Mod-Podge on top of all the fabric, again only to the back. Set aside to dry.
3. Cut a piece of cardboard and batting 21″ x 8″, and fabric slightly larger than the piece of cardboard. Layer fabric right side down, batting, then cardboard. 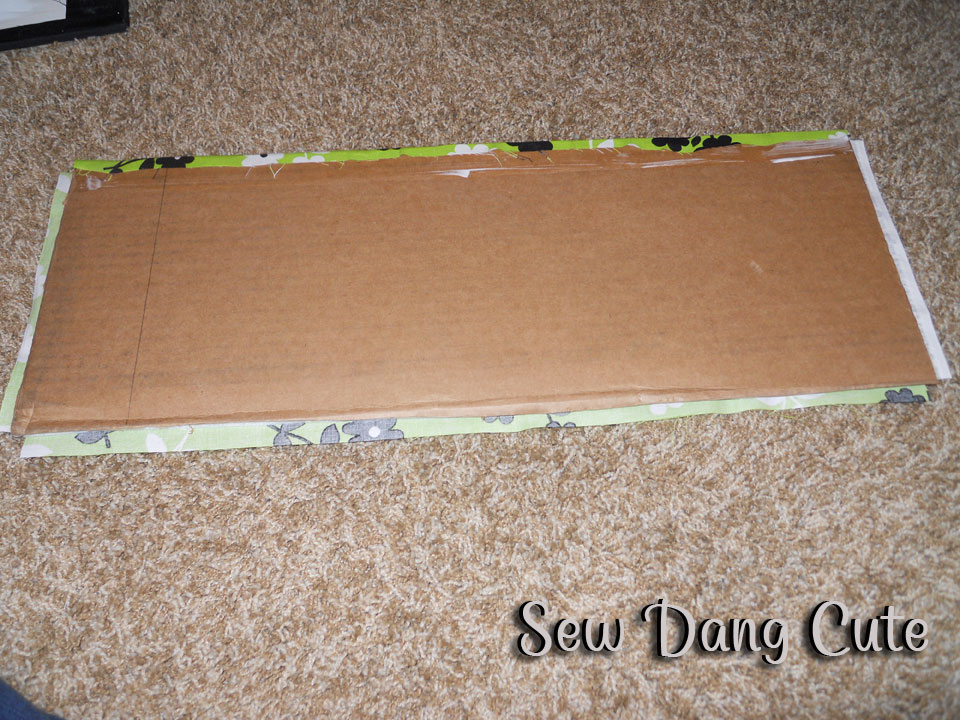 Cover with Mod-Podge just like in step 1. Set aside to dry.
4. Cut a piece of cardboard 21″ x 6″. Draw a 1″ frame on the cardboard. 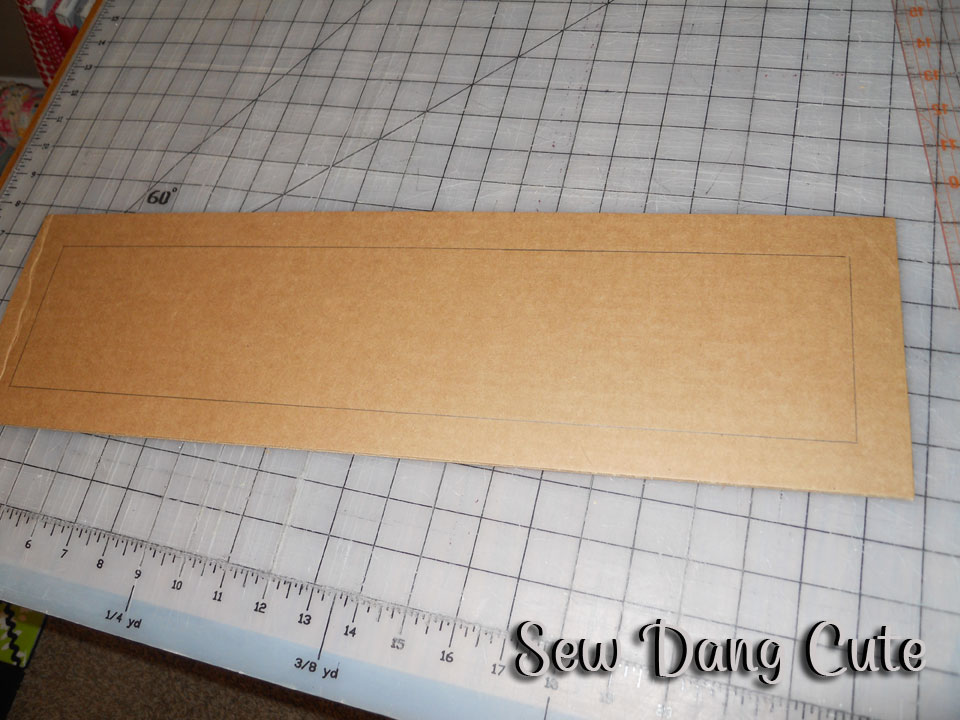 Cut out the center piece along the lines you just drew, so you have a big frame.
  Cover with fabric and Mod-Podge just like we did the photo frames and set aside to dry.
5. Once everything is dry, staple the piece of transparency paper to the back of the photo frames, the cork board to the back of the frame we made in step 4 (if possible, use two layers of cork board here or thicker cork board), and the ribbon to the back of the center piece we made in step 3. Hand stitch the buttons to the center piece where the ribbons criss-cross, so your final middle piece looks like this. 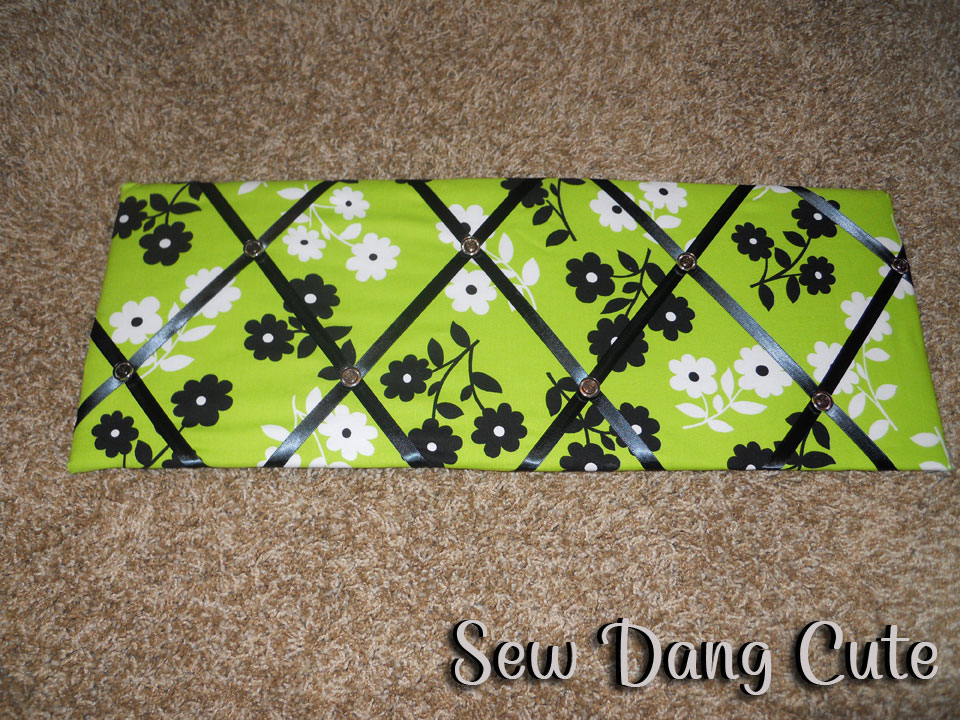
6. Using E6000, Epoxy, or another similar type of strong glue, glue all the pieces to the front of your memo board. I put my photo frames on top (make sure you don’t glue the top side of the frames…you want to be able to put pictures in those frames). I put the center piece from step 3 in the middle, and the corkboard piece on the bottom. Here is the final result. 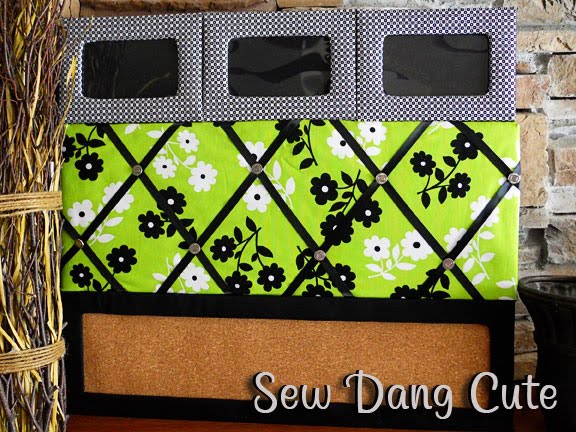 Add some pictures, reminder notes, coupons, etc., and you now have a multi-purpose memo board.
  The last step is to attach your preferred hanging hardware. I like these sawtooth thingys.
  That’s it! I hope you enjoyed that tutorial! Please come visit me at Sew Dang Cute for more tutorials, ideas, giveaways, etc. I also sell fabric and patterns, so you’ll have to come check those out as well!! Thanks so much Jen for letting me take the reins today!


Normal everyday residents “lobby” there congressman or people who take a seat on panels linked to a specfic legislative proposal. This is done by taking in a quart of lukewarm ralph lauren polo shirt with diluted sea salts. Nowadays many are all about convenience. Rather, they use salt and paprika. “Enter Our Contests” Ask your visitors to enter your online contest or sweepstakes. n837g
Where have you guys been all my life?! Each project is cuter than the last! I don't know where to begin….
SO cute! I love this!
fabulous!
I wish I'd been blogging when my kids were home. I had notes and things stuck everywhere! Now I see all these darling ideas…very cute!
That is fantastic!!!
Thanks for bringing Sew Dang Cute to us. I made a quick trip through their site and joined!
Hey i love that push board its so cute. Anyways i would absolutley love to be part of the giveaway event for the blogroll. just contact me at my email [email protected] and we can go over the details.
ADORABLE!!! I love love love it! That green and black fabric she used is so cute!
Hope you're having a fab Friday, Jen!♥
that is so cute, I love it! thanks for posting such a cute project.
Oh wow, I LOVE this! I see so many tutorials floating around, it's hard to impress me anymore, but this one totally did. I need to make one to match my kitchen!
Fabulous project!
I love this!!
=)
love it! great project!
Nice to meet you, Tam. This is adorable. Thanks for the inspiration!
Great project, Tam!! I'm going to have to make one of these!
Very cute! I love that there are picture frames on the top! Makes it personalized:)