


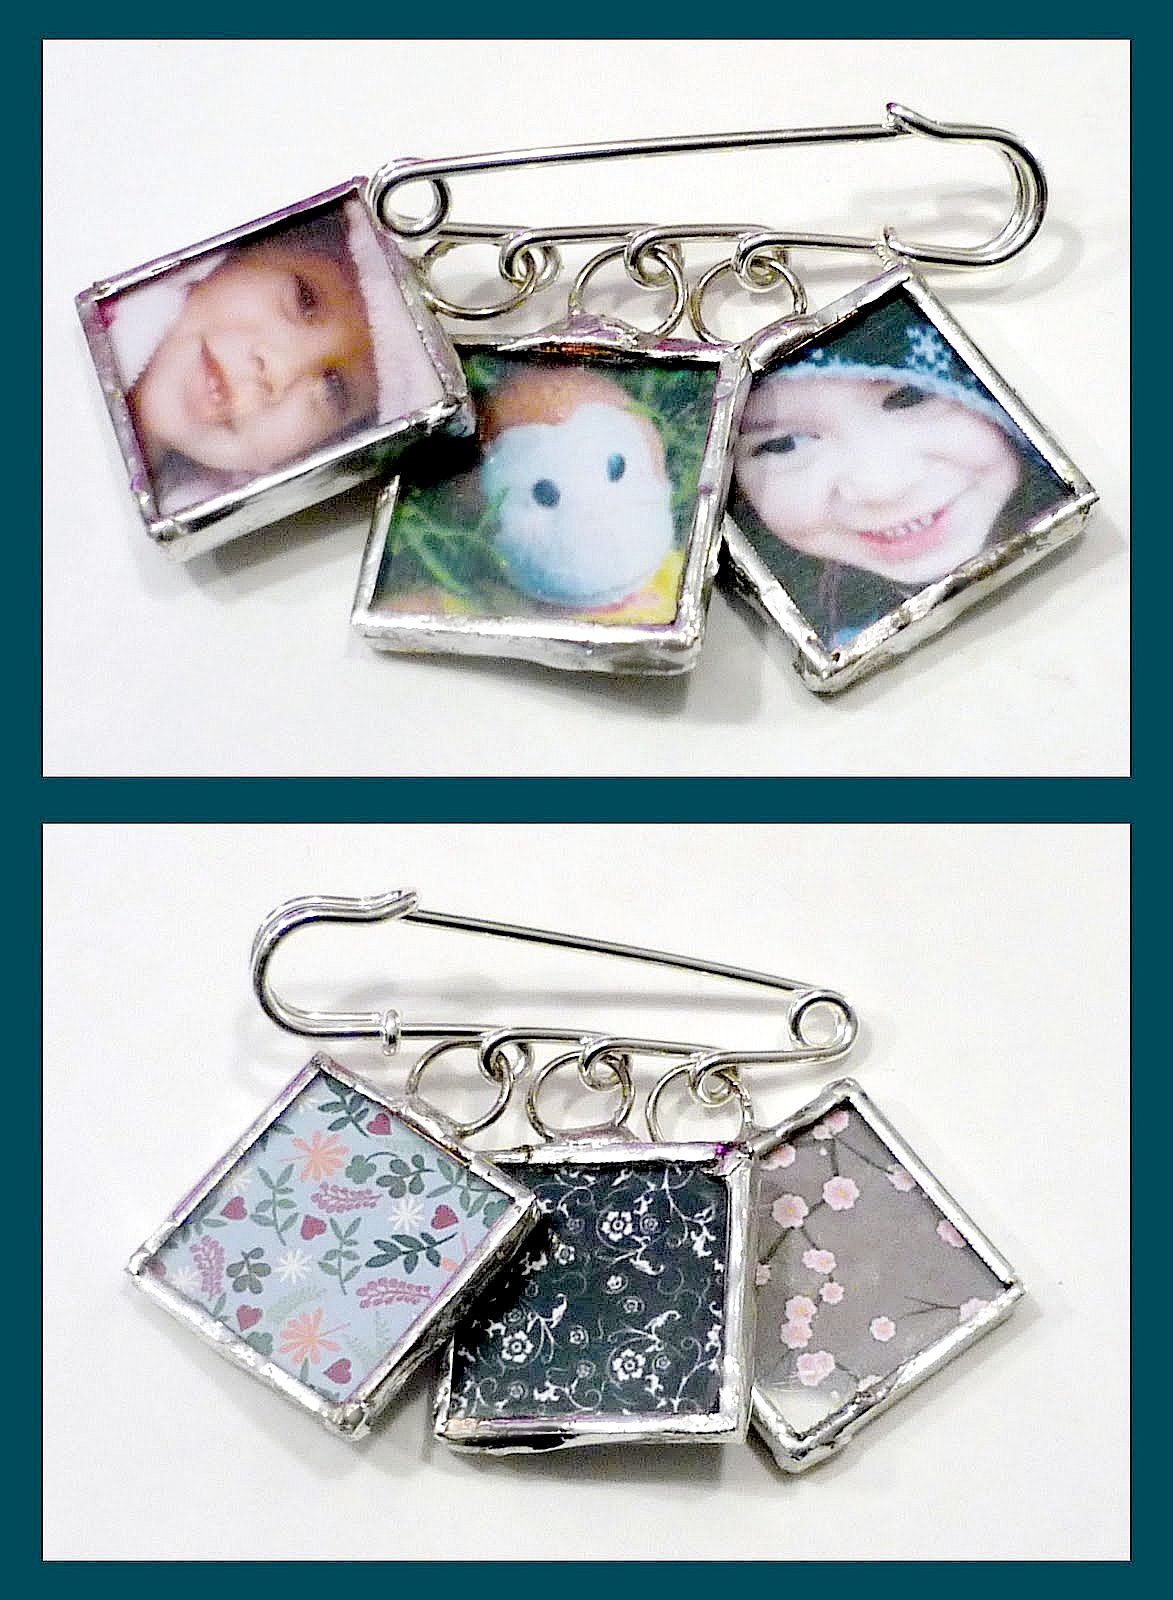
For Mother’s Day, I wanted to create a pretty, soldered pin for my sister-in-law.
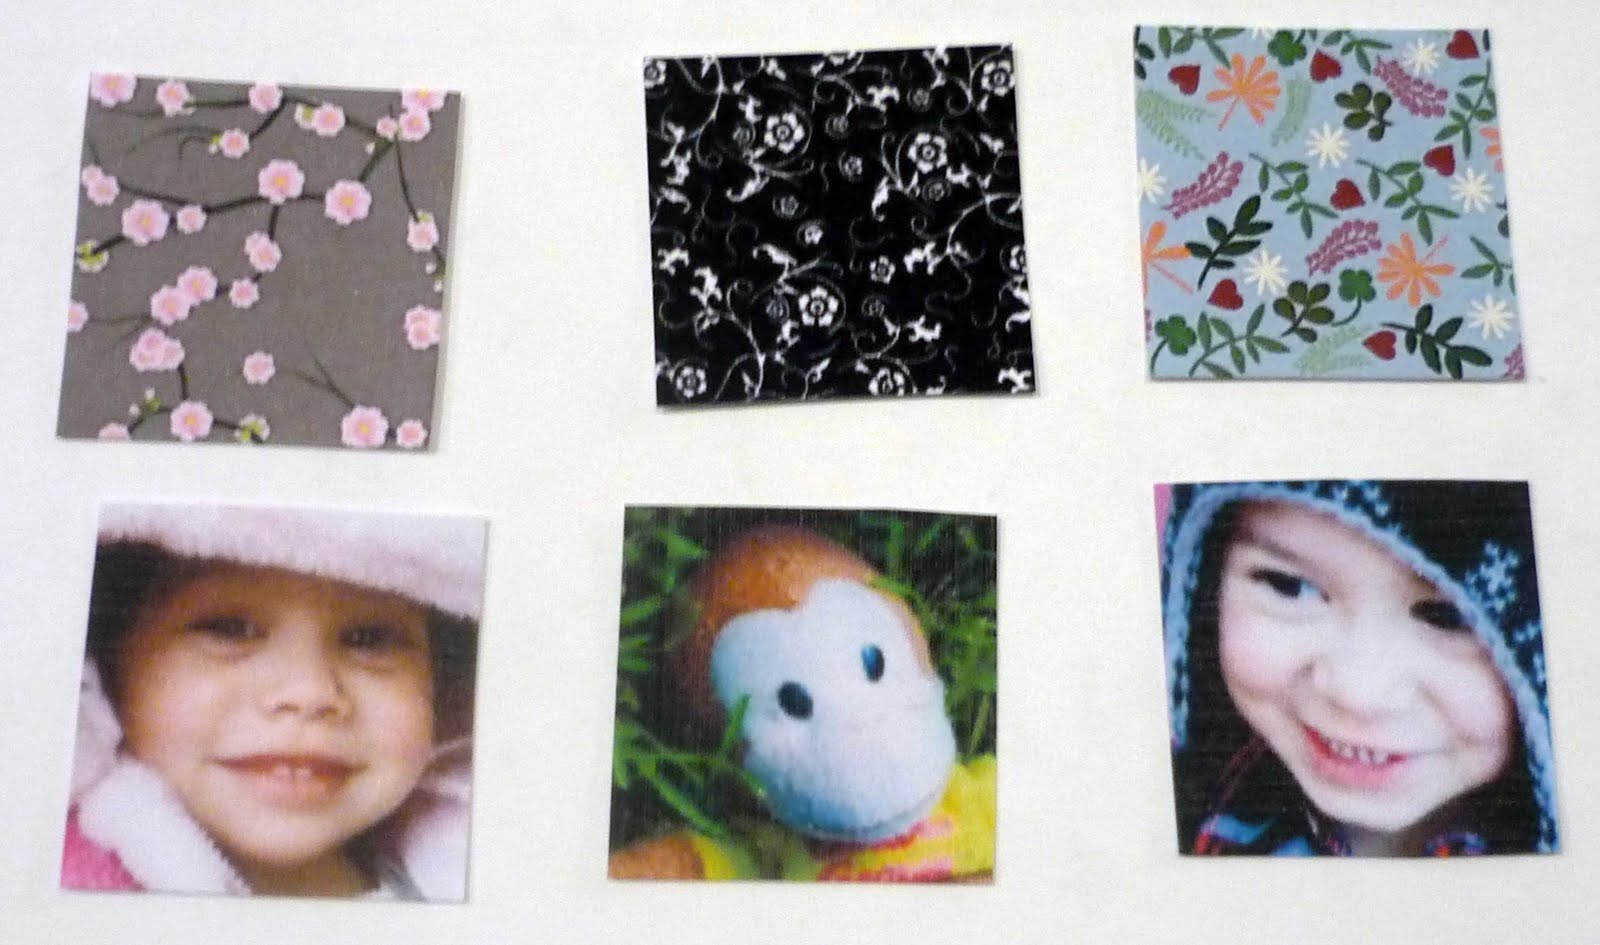
She has the two cutest kids! George (curious George) also made the cut because he goes everywhere the kids do. I placed a cute picture on one side of each pendant, then a colorful background on the other. There are lots of fancy alphabets and backgrounds on Etsy that you can purchase if you want something already done, or you could use drawings of your own.
To make a this soldered pendant pin, you will need the following items:

1. Soldering iron
2. Metal tray & sponge with water (I found the tray at the dollar store)
3. Small clamp
4. Solder
5. Foiling tape
6. Memory glass (I used 1 inch squares)
7. Tinning flux
8. Printout of whatever you want in your necklace (not pictured)
9. Q-tips (not pictured)
10. Tweezers (not pictured)
11. Pin (not pictured)
12. Jewelry rings (not pictured)
You should be able to find all of these at your local craft store.
Don’t worry, this is actually much easier than it looks.
Are you ready? Plug in the soldering iron to heat, and let’s go!
- Cut your paper/photos to fit your glass pieces. You want the paper slightly smaller than the glass. Place your two images back to back and sandwich between the glass pieces.
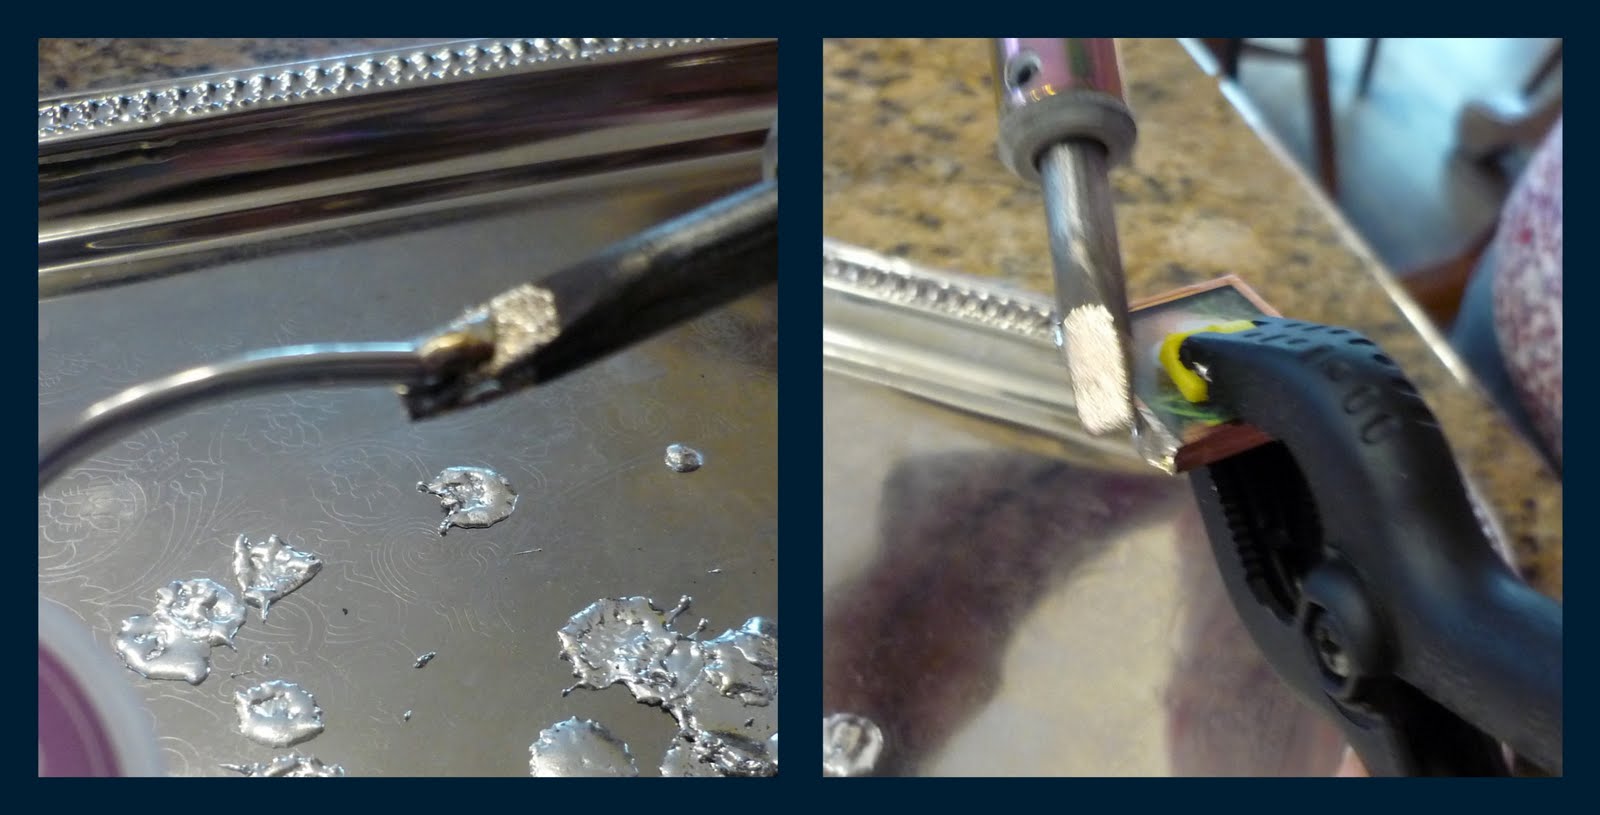
- Cut a piece of foiling tape about 4 and 1/4 inches. Tape around the edge of the glass. Flatten the foil all around the edge, and wrap on each side. You may want to use the back of a spoon, or a popsicle stick to make sure the foil is stuck down.

- Rub a q-tip in the flux, and rub a thin layer of flux over all of the foil. This is what makes the solder stick to the foil.

- Unroll some solder from the coil. Melt solder onto the tip of the iron, then rub a thin layer of solder onto the foil. Cover the foil completely. (If the tip of your soldering iron is not shiny, melt solder on it, then wipe on the wet sponge)
- Rub a little more flux where you want to connect your ring. Hold the ring with your tweezers, and solder to your pendant.
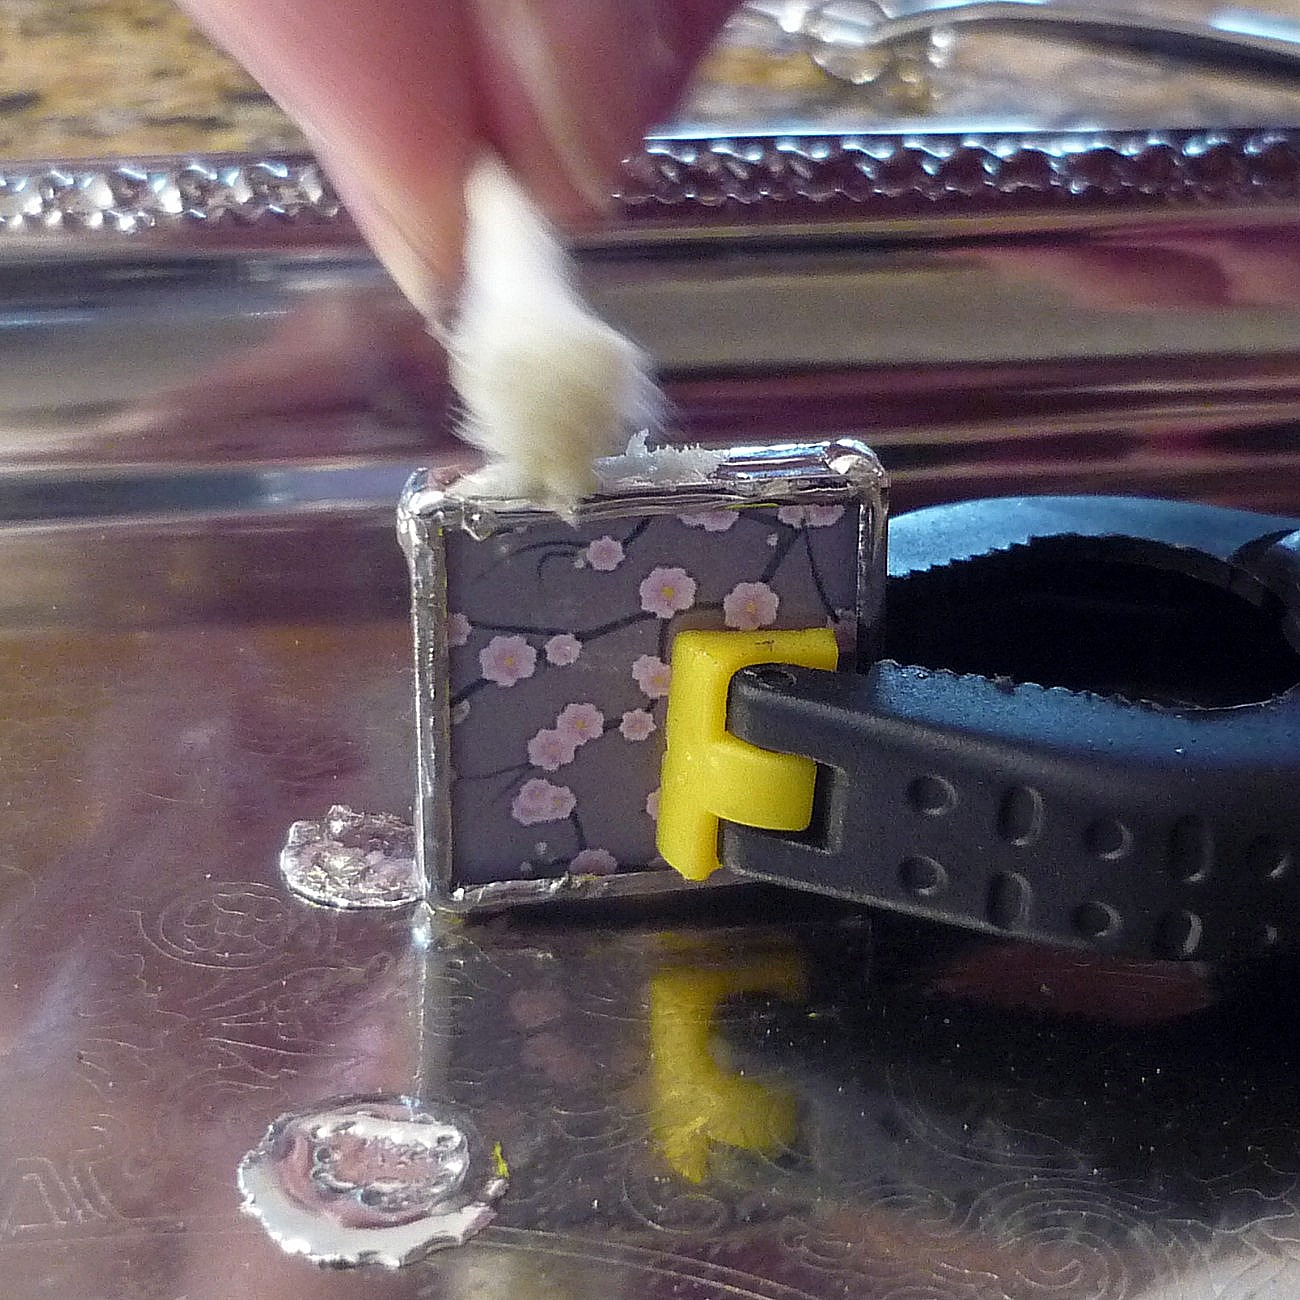
- Now you can add your pendant to your pin. Repeat with the rest of your pendants, then wear or give as a gift!
Some tips:
- don’t touch anything with your fingers—it’s hot!
- don’t mess too much with the solder once it’s on the pendant
- if you have any sharp bumps, file with a nail file
- if you have any gunk on your glass, clean with rubbing alcohol
- if you have black spots on your solder, rub with steel wool
- have fun with this—it’s not a perfect craft

Thanks for letting me visit today! I would love for you to stop by and visit me at Snips & Spice!

Thanks for the great tutorial, Malory!!
I have always wanted to learn how to solder jewelry!
Some other things that I love Malory has made are:


xoxo

PS — have you heard about Mandi’s Epic Giveaway over at Vintage Revivals?? She will come to your home and make over a room. Check it out.


One note – it should be lead free solder.
Best soldering instructions EVER. I have always been timid about trying this and found your instructions and photos expertly fill in the missing pieces of every other soldering tutorial I have read. Thank you!
Jen,
I have a question about soldered pendants. I am using photos on real Kodak photo paper that I size in Photoshop and have printed out at Walgreens (better resolution than my ink jet printer at home). Problem is that when I begin soldering the pendant, the heat maybe — something causes a reaction between the photo and the glass. At first I thought the flux seeped in between the glass and photo, giving the illusion that the photo was wet. I changed to a paste flux, but that didn’t help. I tried using ModPodge to seal the photo, got texture marks on the photo. I tried a coating of ModPodge in between the glass and photo, pressing out bubbles. At first it looked like this might be the answer, but days later the ModPodge has not dried and is still cloudy. I’ve tried photo fixers, resin in between, etc. I don’t know how to get around this problem and have a clear, clear photo in the finished item. I still think there must be a fix for this. A photo print is a continuous tone print, not like the ink jet printers and the resolution is much finer, so I’m determined to find a way to make this work, but so far, no answers yet. Do you have any ideas?
Thank you!
just bought my supplies yesterday… and ready to get started on my project today! CAN'T WAIT! Thanks for sharing!
How cool! I really want to try this! Thanks for the tutorial.
So cute! I bet I could srsly hurt myself with that souldering gun.
WOW! this is sooo neat! I made a bezeled photo necklace and have a tutorial on that. Sorta the same thing 🙂
Anyway, I love your blog!! It is my dream to one day be featured on here! hehe
where did you get the soldering iron stand? Love it. Much better than what I have been rigging up. Thanks for sharing.
that is beautiful,, really nice and what a lovely gift.
Those are too cute! I used to solder and now I am going to get my stuff out and make one for myself. Thanks for sharing!
In the Pursuit of Cuter Clothes