Tatertots and Jello

COLORFUL HAPPY HOME -- Daily DIY, Decor, Craft and Recipe Tutorial

  • My Home
    • 1905 Cottage
    • Daybreak House
  • DIY
    • DIY Projects and Ideas
    • Organizing
    • Tutorials
    • Printables
  • Decor
    • Spring Projects
    • Summer Projects
    • Fall Projects
  • Crafts
    • Kids Crafts
    • Painting Projects
    • Paper Projects
    • Sewing
    • Wreaths
  • Holidays
    • Valentines Day
    • Easter
    • Halloween
    • Thanksgiving
    • Christmas
    • HAPPY Holidays Series!
  • Recipes

Explore

  • my home
  • diy
  • decor
  • crafts
  • holiday
  • printables
  • recipes

Connect

Home » guest tutorials » Guest Project — Dragon Tails {sewing tutorial}

guest tutorials, kids crafts, sewing projects · March 9, 2011

Guest Project — Dragon Tails {sewing tutorial}

Tatertots & Jello is a participant in the Amazon Services LLC Associates Program, an affiliate advertising program designed to provide a means for sites to earn advertising fees by advertising and linking to amazon.com.
My name is Jessica from Running With Scissors and I’m so thrilled to be guesting here today!
  My blog is just a collection of projects I’ve been working on as I run around sewing, crafting, refinishing furniture, painting, building furniture, and trying to decorate, all for the least amount of money possible.  Being cheap motivates a lot of my creativity.
Being a mom also gives me a lot of inspiration, making things for my toddler son and our baby girl due in a few weeks.
Today I’ll be showing you how to make 
dinosaur (or dragon) tails!**Please be respectful of my designs and only use this tutorial for personal use.  Not intended for commercial sale or manufacture, even on a home based scale.
Make them for yourself or as gifts, but I’d appreciate not using my design and instructions for profit.


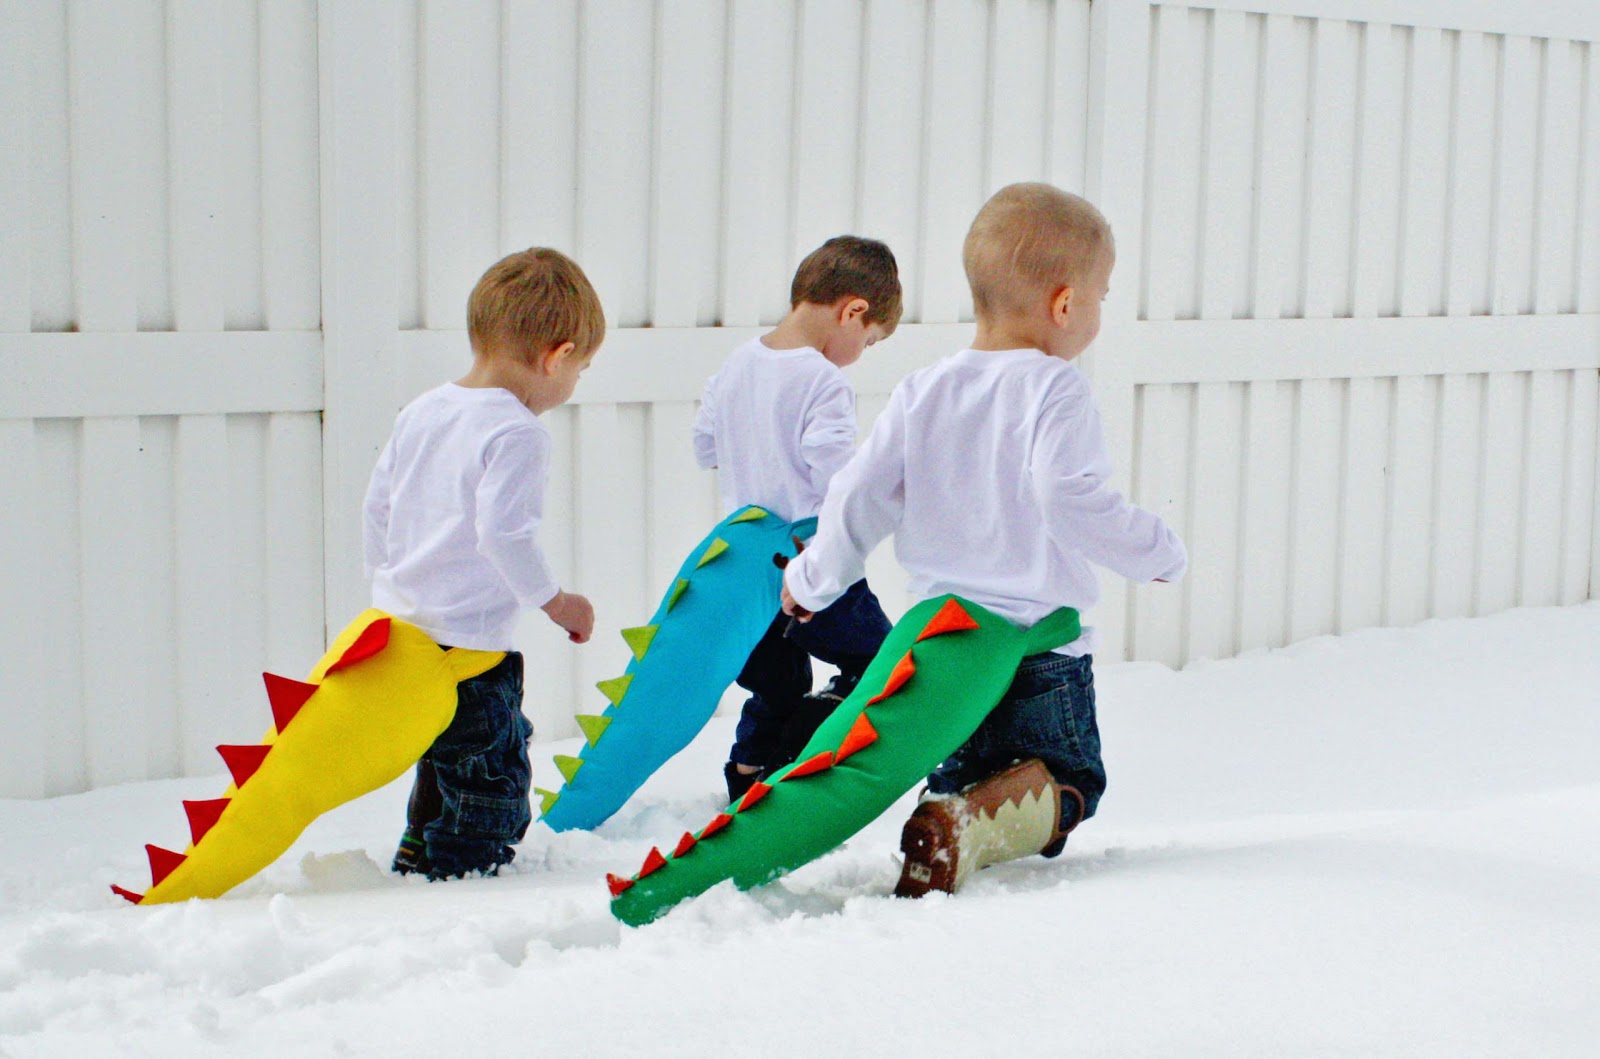
This is a simple, fun, toy for kids.  I designed these tails with two straps that wrap around their waist with velcro in front making it easy for them to get them on and off themselves.

These have been fun during these long winter months when we have to play inside.  My boy has “dino fights” with his dad where he wiggles his bum to use the tail as a sword…it’s pretty cute.
SUPPLIES:
1/2 to 3/4 yard main fabric– pretty much any fabric that’s not stretchy (this yellow is polyester lining)
1/4 yard spike fabric
5″ velcro
Polyfil batting (small bag)

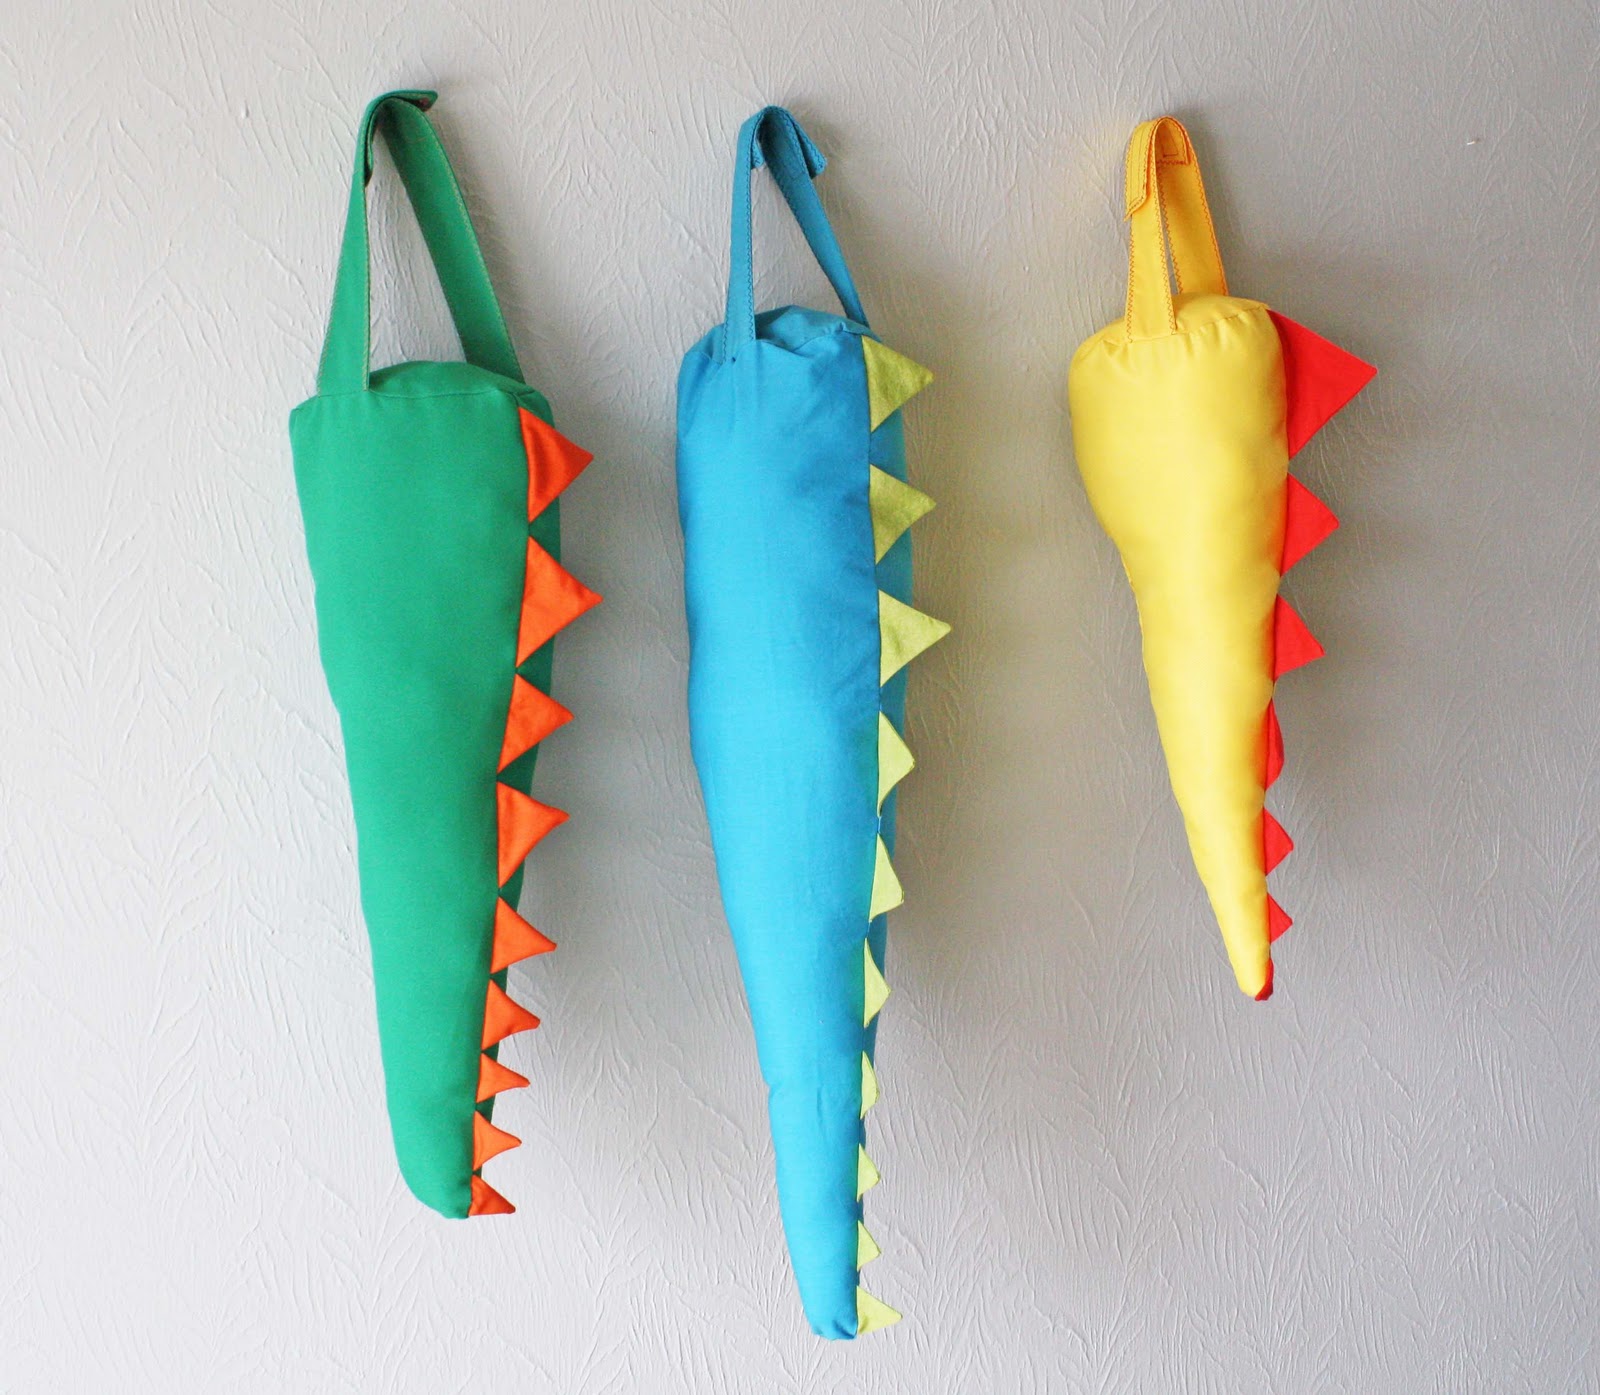
CUT LIST: MAIN FABRIC:  tail: (cut 2): 22″ x 11″ waist straps: (cut 4): 12″ x 3″ circle: 7″ in diameter (*I cut a 7″ square, fold it in fourths, then cut the curve from fold to fold) CONTRASTING FABRIC: spikes (cut 2): 22″ x 3.5″ INSTRUCTIONS: 1. Trim tail strips Taking your two strips 22″ x 11″, lay them face down.  On one end you’ll measure 4.5″ from each side.  The two inches left in the middle will be the tip of the tail. On the other end, you’ll measure 4″ along the sides as a marker.  Connect these two markings to create a diagonal for the cone shape of the tail.  Cut off the triangular sides and throw them away.

2. Make Spike Strip
NOTE: To make the spikes easier, you could cut 1 strip out of felt or fleece and just cut out a spike strip leaving the raw edges that won’t fray, rather than sewing your spikes with 2 strips of fabric.
Take your two spike strips and lay them right sides together.  Draw a row of triangles along the strip for the tail spikes.  Begin at one end and work your way to the other, making the spikes shorter and narrower.  I left about 1/2″ between each spike.
Sew along your spike line.  When you get to the corners it helps to pivot by dropping your needle down into the fabric, lift your presser foot, move the fabric, then start sewing again.
Once your spikes are sewn, trim along your sewn line with 1/4″ seam allowance along the whole strip.
Next, you’ll need to trim the seam allowances to make it easier to turn the spikes right side out.
On the top of the spikes, you’ll trim off the point, being careful not to snip through your seam.
In between each spike, you’ll snip diagonally into each corner, once again don’t snip through your sewing.

Then you can turn the whole strip of spikes right side out, using a pen lid, knitting needle, etc. to push the tips of the points out.  Iron your spike strip nice and flat.

3. Sew Tail Body
First we’ll sew the spikes to one piece of the tail.  Pin the largest spike to the tall side of your tail piece, lining up the raw edges.
Sew the spike strip to the tail piece with 1/4″ seam allowance.  This is just basting, or tacking the pieces together.
Next, put your second tail piece so right sides are together, with the spike strip in the middle of the sandwich.
You’ll sew down the spike strip again, this time with 1/2″ seam allowance, making sure you sew past the troughs so there is a space between each spike when you turn it right side out.
Also, sew a slight curve as you go around the tip of the tail.
When you sew around to the other side, you’ll need to stop your seam to leave a hole for turning the tail right side out later.  I leave about 4 to 5″ unsewn underneath the spikes.  This way, it’s on the bottom of the tail.
4. Sew Waist Straps
Take your 4 strips for the waist straps and put 2 right sides together.  This will give you two sets.
You’ll sew down a long side, across the short, and up the other long side on each set.  Use 1/2″ seam allowance.
Then you’ll need to snip off the corners, being careful not to cut through your seam.
Next you’ll turn each strap right side out, pushing out the corners with a pen lid or knitting needle.
I like to top-stitch the edges to make the straps lay nice and flat.  For this tail I used a zig-zag stitch with contrasting thread, but you could always just sew a straight stitch.
The last step to make your waist strap is to sew your velcro pieces to each end.   Center the velcro in the center of your strap and 1/2″  from the very end.
5. Complete Tail Construction
To close the large end of the taill, first mark the quarters by lining up the top (spike) seam with the bottom seam and pinning the folds on the sides.

Next you’ll pin your waist straps inside the tail.  Pin the straps to the quarter side marks.
The important thing to remember is the velcro has to be pinned opposite so the straps will match up around the waist.  So put one waist strap with velcro down on the right side of the tail, then pin the other waist strap with the veclro facing up into the cavity of the tail.
Sew the straps to the sides of the tail 1/4″ from edge.
To finish off the tail, you’ll pin your circle fabric (with the right side facing into the tail) around the large tail opening.  I fold my circle in quarters so I have a crease vertically and across to use as a guide to pin to the two seams (top and bottom) then line up with the waist straps on the sides.
Next you sew around your circle with 1/2″ seam allowance.
6. Stuff and Finish
At this point your dino tail is sewn and you can turn it right side out through the hole you left on the bottom seam.  Your velcro waist straps should be oriented to match and stick together, and your spikes should stand up out of the top seam.
Next you’ll stuff your tail with Poly-fil batting.  The density of your stuffing does determine how the tail will look.  I stuffed this yellow tail tighter than the blue or green tails, and I noticed it stood almost straight out from the boy’s back, where leaving the stuffing a little looser makes a more droopy tail.  Whichever you prefer.
Once your tail is stuffed to your liking, pin the hole closed underneath.  I chose to just machine sew the seam shut, but it would probably look best to hand-sew the seam closed to allow it to lay flat.
Then you’re finished!  Now you can whip out a whole set with different colors!
Some ideas for variation:
–length: it’s easy to make the tail longer or shorter, by cutting the tail and spike pieces longer than 22″, but all the same length.
–felt or fleece spikes: as mentioned ealier in tutorial, you could make the tail even easier by cutting felt or fleece spikes with one layer rather than sewing/ turning 2 pieces of fabric
–make it girly: you could make a more feminine tail for little girls by making the spikes rounded scallops rather than pointed spikes
–printed fabrics: I stuck with bright solids, but textured or printed fabrics would look awesome too.
Oh my goodness – that is so cute! 
I love those Dino tails!! 
Thanks Jessica!! 
Check out the fun ideas at Running with Scissors: 
{Baby Dress: Scrunched}
{Carseat Canopy}
{Baby Bedding}
{Baby Sleep Sack}
http://4.bp.blogspot.com/_KmOxAjZL5Uk/TGYvrPaOhaI/AAAAAAAAAis/2YsnETkrI7A/s1600/pillow1.jpg
{Button Throw Pillows}
Be sure to check out the wonderful ideas on  
Running With Scissors!!
xoxo
PS – the winners of last week’s giveaways have been announced over on the
TT&J facebook page 🙂

Posted By: Jen · In: guest tutorials, kids crafts, sewing projects

Spring Sweater Refashion 2011 {#3}
Guest Project — Make Your Own DIY Cookie Cutters!!

You’ll Also Love

Fall Centerpiece with Decoupage Pumpkins
make a dog playhouse out of a box. all the instructionsMake an Adorable DIY Dog Playhouse Out of a Box!
DIY Clay Succulent Scallop Pots

Comments

  1. Marsha C says

    May 10, 2014 at 2:08 PM

    This is such a cute project. Perfect for my 2 1/2 year old grandson who loves to dress up as monsters. The picture of the little guy laying on the floor is way too adorable! Thanks so much for posting the directions! This rainy day is not wasted

  2. Carmelina says

    January 18, 2014 at 7:29 PM

    Thank you so much for this!! I pinned it when my boys were new born, they’ve just started stomping and roaring around the house so I think its finally time to make these!!! Im so excited!!!
    Thanks for sharing the tutorial, the pictures and instructions are really great!!

  3. Aurora says

    January 12, 2014 at 12:43 AM

    Thank you so much! I have never sewed before, but my 3 year old girl wanted a dinosaur themed birthday party, so I thought it would be great treat. My friend, mom and I made 23 for the party and mate another pattern that was 1/3 the size for the baby sisters and brothers. It was such a fantastic party favor and SOOOOO hilarious to watch them all run around with their tails on. Thank you for the excellent directions that were easy enough to follow that someone with no experience (me) was able to figure it out. It took me about an hour per tail once cut. We made a template out of card board to make cutting quicker.

    • Carmelina says

      January 18, 2014 at 7:31 PM

      Oh Aurora that’s a fantastic idea for a party!!!!!!!!! I bet the kids had so much fun and it would’ve made for awesome pictures!! So keeping that in mind for a future party for the boys!!

  4. Lindsey says

    November 1, 2013 at 8:37 PM

    Thanks for the great tutorial. It had been a while since I used my sewing machine, but this made it so simple to put together a great Halloween costume for my daughter. Her pink and purple dinosaur costume was a hit – with her and her friends!

  5. Anne says

    October 27, 2013 at 2:06 AM

    Just finished my son’s dragon costume, complete with a spiked tail. Thank you for the great tutorial! I’ll be making more for play dates, I am sure.

  6. Dana says

    October 23, 2013 at 11:48 PM

    Thank you for the great tutorial. I just made to for my daughters. They are going to wear them tomorrow to school.

  7. Terrie says

    September 24, 2013 at 2:50 PM

    I just made 11 of these for my grandson’s 3rd and 5th Birthday party. The boys LOVE them. I can barely sew a straight line but the directions, especially pictures, were a tremendous help! My first one was a throw-away but after that I cut a pattern out of poster board and started cranking them out. I used a fabric from Joanns called “snuggle fleece” (I think) using a dinosaur design for the body and solid for the spikes. They turned out amazing!! I did run out of velcro but it was just as easy to sew on afterwards. Now I don’t want to stop!! Thank you for the great post and directions!!

  8. Bertie says

    September 20, 2013 at 8:14 AM

    Thank you so much for sharing your very original idea. Just have to find the time to do this before Christmas – one for my grandson and one for my SON. The little one has to have a playmate and my 6’3″ son would look like a hoot. I can’t wait to go through your other ideas. Thanks again.

  9. Sarah says

    March 3, 2013 at 11:02 AM

    Just finished a tail for my sons 1st bday party, dino theme 🙂 Thank you SO much for this, cutest, awesomest thing ever!

  10. Mercedes says

    February 2, 2013 at 9:26 AM

    Fantastic!! Disfraz de dragon!! Muy bien detallado!! Muy buena idea!!! I love it!

  11. Cluttered Mama says

    November 3, 2012 at 8:59 AM

    Made this tail for my little guy! He LOVED it and you helped me save Halloween
    (I linked to your blog in my latest post, just fyi http://clutteredhouse.blogspot.com/2012/11/how-pinterest-saved-halloween.html)

  12. Melissa From the Ground Up says

    October 26, 2012 at 11:06 PM

    Thank you for sharing this! My mom made some for my kids (3 and 9 months). They are SO CUTE! Plus the kids are crazy about them.

  13. Shaunna Beauchamp says

    October 23, 2012 at 3:34 PM

    Exactly what I was looking for to complete my nieces’ dragon costume . Quick and super simple. Thanks so much !!

  14. Cory says

    October 20, 2012 at 4:57 PM

    Wow, just finished the dragon tail and I absolutely love how it turned out!!!! I know my son will have a blast running around with it ! Thank you so much for posting this!!! The directions were simple and the pics were super helpful 🙂

  15. Casey says

    October 19, 2012 at 2:08 PM

    Just finished the DinoTail for my 2yr old son’s Halloween costume. Great tutorial! Thanks so much!

  16. Debra Bryant says

    October 12, 2012 at 8:46 PM

    I’m using this for dad’s Dinosaur Train Buddy costume to match our son’s. Thanks

  17. Melanie says

    October 7, 2012 at 6:40 PM

    Thank you for your Dino tail tutorial. I used it to make the tail for my son’s dinosaur Halloween costume. Your instructions were easy to follow and it turned out awesome. Thanks!

  18. Jessica Swart says

    May 17, 2012 at 8:58 AM

    My husband is in the Army and currently deployed. I used some of his old uniforms (the legs were almost perfect for the tail, once the pockets were removed) and my girls loved that they had something of Daddy’s. I sewed strips of ribbon where the spikes go and then tied bows. It didn’t turn out like I expected, but it was still cute. =o) Thank you for sharing your genius with us. I appreciate it so very much.

  19. Danielle says

    April 20, 2012 at 9:50 PM

    Thank you for a GREAT tutorial! Came together quickly and easily. A perfect (free, using fabrics I already had!) birthday gift for a 4 year old’s party tomorrow 🙂

  20. Chelsea says

    February 2, 2012 at 2:04 AM

    Made these for my Nephew & Niece – thank you for sharing this tutorial 🙂
    View the results here:
    http://chelseagustafsson.blogspot.com.au/2012/02/birthday-boy-turns-5.html

  21. Cristina says

    February 1, 2012 at 5:30 AM

    Hello !! I have loved the tutorial on how to make dino tails. I have a dinosaur online shop and a blog and would love to translate the tutorial and post it in my blog, with a mention to your blog, of course, what do you think? Many thanks and kind regards, Cristina

  22. Giovanna Barbieri says

    January 12, 2012 at 2:58 AM

    Hi Jen, the dinosaur tails you create are so beautiful, my son loves dinosaurs and for carnival i’ll try to make one of it. Thank you for the adorable idea !!!

  23. Brandi says

    January 9, 2012 at 4:02 PM

    I wanted to thank you for your amazing tutorial. I made this for my nephew for Christmas, along with a pair of dino head gloves from a tutorial on Martha Stewart. It went over very well 🙂 And was also fun to make! Attaching pictures of the final projects:

    Tail: http://flic.kr/p/aHeDf4
    Gloves: http://flic.kr/p/aHeF3p

  24. Heather Lacerte says

    January 1, 2012 at 12:22 PM

    Oh My Goodness! These have got to be the most adorable thing I’ve seen in a long time! <3

    I've been searching and racking my brain for months trying to come up with something that little boys would like to dress up in! I have the market cornered for girls with my Tutus <3, but just couldn't come up with anything easy, fun, different and boys will like. Some of my other ideas were Superhero capes (so over done), Bow ties (what boy REALLY wants to wear one?), etc, etc, etc. I've been playing around with ideas of dinosaurs and monsters for a bit; now I can try your brilliant idea out!

    Thank you so much!

  25. swasthi says

    December 23, 2011 at 4:03 PM

    My daughter will be teaching 4 year old children next year. I’ve been looking for interesting ideas for her classroom and in particular, costumes for her fantasy area. You can imagine my delight when I saw your dinotails …. simply awesome!!!! I’ve made four thus far … and can’ wait for next year to get feedback from her children and colleagues. My daughter loves them! Thank you for sharing your marvellous idea.

  26. Julie Weninger says

    December 8, 2011 at 2:56 PM

    Thank you SO much for posting this tutorial. The directions are very simple and detailed. I found it very easy to follow, even for someone with limited sewing skills like myself. I made 6 for my son’s upcoming birthday party. They turned out so cute! Many thanks!

  27. jeannette says

    December 7, 2011 at 12:39 AM

    I’ve just found your website via Pinterest – I love the tails… and was amazed to see them because I made a stegosaur tail for my daughter for book day in almost exactly the same way! I’d velcroed the tail to her trousers but your idea of a strap around the tummy is much better. I’m going to ‘upgrade’ her tail. Thank you for sharing.

  28. Lauren says

    December 4, 2011 at 1:30 PM

    My sons saw these pictures, roared, and thought they were the coolest things ever. My mother is giving me one of her old sewing machines for the holidays this year. I’m thinking my boys will be getting their dragon tails this year! 😉 Thank you so much for sharing this pattern.

  29. sarah says

    November 27, 2011 at 10:54 AM

    I love the dragon tales. Amazing and they look like fun. I will have to give them a try so we can add them to our “imagination” bin. Thanks so much for sharing!!

  30. Heidi says

    October 30, 2011 at 4:50 PM

    Just used this tutorial to make the tail for my son’s dinosaur costume. I used fleece for the body and felt for the spikes. The entire costume came together in under two hours. Thank you so much!!

  31. Valerie says

    October 10, 2011 at 1:45 PM

    Thanks for the great instructions! My 4-year-old son wants to be a dinosaur for Halloween and these tails are perfect. It came out great. I even made a 2nd one for his little brother. I would’ve really botched this up if I hadn’t found your tutorial. Thanks again for sharing. My kids think I’m Supermom.

  32. jenni says

    October 9, 2011 at 5:36 PM

    i made three of these this afternoon for halloween. they are so fun, the kids love them! thanks SO much for a great idea and terrific instructions.

  33. Holiday Snob says

    July 25, 2011 at 5:18 AM

    So I finally posted the dragon tails I made from this tutorial here:

    http://holidaysnobs.blogspot.com/2011/07/dinosaur-birthday-party-rawr-part-1.html

    Thanks SO MUCH for sharing!!!

  34. K.Papageorge says

    May 24, 2011 at 8:15 PM

    I just finished the bulk of my dragon tail and I am SO excited, it looks so cute! It's for my daughter who will be 3 next week. I am glad that I didn't have enough stuffing or velcro to finish it today, otherwise I wouldn't be able to wait until her birthday to give it to her! Thank you for the tutorial!

  35. Holiday Snob says

    May 12, 2011 at 1:01 AM

    So excited to make these! Jen, I have to let you know that TWICE today I was thinking of a project I'd seen SOMEWHERE (couldn't remember where…) and googled the key phrase. Skimmed through tons of "eh" pictures until I saw the fabulously cute thing I was thinking of and saw OF COURSE it was from Tatertots and Jello. Love your blog…

  36. ylvacitat says

    May 9, 2011 at 1:01 PM

    I just made a dinotail for my daughter, she just loves it!!! Thanks for the tut! See pics at my blog:
    http://ylvacitat.wordpress.com/2011/05/09/dinosauriesvans-hjalmmossa/

  37. Genie says

    April 20, 2011 at 10:43 PM

    I made one of these for a 4 year old birthday party last week.. of all of the gifts given and opened that day, the tail was the only one that was immediately played with! Several moms have asked me to make some for their kids, too! My 3 year old daughter totally wants one… and I have plans to make her one as soon as I get done making all of the birthday gifts.

    As I am making so many as gifts, I decided to make a pattern on cardboard… I got a large flat rate box at the post office (for free)and it is big enough to cut the shapes out without having to tape on more cardboard (like what happens with frozen pizza boxes!)…

    So, thanks so much! The perfect and much loved gift for birthday parties and GIRLS too!

  38. EvaHe says

    March 25, 2011 at 3:21 PM

    ¡I liked it! and your photos are so nice (sorry for my english)

  39. Candy says

    March 23, 2011 at 1:32 PM

    Just finished a set for my boys, who are obsessed with dinosaurs right now. THANKS so much for sharing!!!! They're having a little trouble balancing the new weight, but are having too much fun slamming my tables with thier tails.

  40. jennasaurus says

    March 16, 2011 at 1:12 AM

    I am a brand new follower and I absolutely LOVE this project! I don't have kids… but I am a preschool teacher and know plenty of kids who would adore something like this!!

    <3jenna(saurus)

  41. Unikuu says

    March 15, 2011 at 9:05 PM

    so so so funny idea! must to try!!!

  42. Strapworks.com says

    March 15, 2011 at 8:00 PM

    Amazing! Truly a unique design. Can't wait to try one myself!

    -strapworks.com

  43. The Alexanders says

    March 12, 2011 at 4:05 AM

    These are PERFECT!!! I absolutely MUST make them for my three little fellas!

  44. saltandnectar says

    March 11, 2011 at 7:18 PM

    I am DYING from the adorableness. DYING.

  45. Connie says

    March 11, 2011 at 6:49 PM

    What a fabulous idea!! I love it!

  46. HammBone says

    March 11, 2011 at 2:00 PM

    sew cute I had to pin it! What a fun project!

  47. Polly @ Helping Little Hands says

    March 10, 2011 at 3:48 PM

    This is so cute!! What a fun idea. I've added it to my To Do List.

  48. Kelli @ RTSM says

    March 10, 2011 at 2:05 PM

    Those are adorable! My boys would love them!

  49. Faith Pray says

    March 10, 2011 at 6:18 AM

    These are brilliant!

  50. {autie} says

    March 10, 2011 at 4:18 AM

    Those tails are so fun!
    I'm laughing at them because they are just so stinkin cute, and I can totally see my 4 year old diggin' them! fun tut, thanks for sharing!

  51. Madigan at madiganmade says

    March 10, 2011 at 2:33 AM

    These are just darling! Fabulous tutorial, Jessica. And fabulous pics, too. The little guys (and tails) really stand out in the snow.

  52. Jen-CraftOManiac says

    March 10, 2011 at 1:31 AM

    THOSE ARE SO DARLING! love it! winks-jen

  53. Free Pretty Things For You says

    March 10, 2011 at 1:16 AM

    OH THOSE TAILS ARE ADORABLE!!

  54. Sue (Someone's Mom) says

    March 10, 2011 at 12:34 AM

    Well I don't sew, but I think these are so cute! So are the models!

  55. Jessica says

    March 10, 2011 at 12:22 AM

    That is funny Beckie, my husband wears them on his head like a unicorn crown to play.

  56. Infarrantly Creative says

    March 9, 2011 at 11:18 PM

    My 4 year old would flip for that. Heck my husband would flip for that..okay maybe not really. I love Jessica she is so talented.

  57. MiMi says

    March 9, 2011 at 9:08 PM

    WAY cute!

  58. Katy says

    March 9, 2011 at 8:58 PM

    so adorable. wish my boys were still little, i'd make them some!

  59. Chrystal's Corner says

    March 9, 2011 at 6:21 PM

    Ohhhhhh….THANK YOU!! So excited about this post. My youngest is turning 1 in May and having a dinosaur themed party. I am so making these for big brothers and niece to wear at the party!

  60. lauren@warmandfuzzy says

    March 9, 2011 at 5:55 PM

    OMgoodness!!! I reeaaallly need to learn to sew!! These are adorable!!

  61. Candace McClintick says

    March 9, 2011 at 5:04 PM

    OH. MY. GOSH. I love these! You totally made my day. And I am totally going to make one of these. Or seven!

  62. Angie @ The Country Chic Cottage says

    March 9, 2011 at 4:50 PM

    Awesome tutorial Jess! 🙂

  63. jennykate77 says

    March 9, 2011 at 4:36 PM

    Isaiah would LOVE those dragon tails!! So cute!

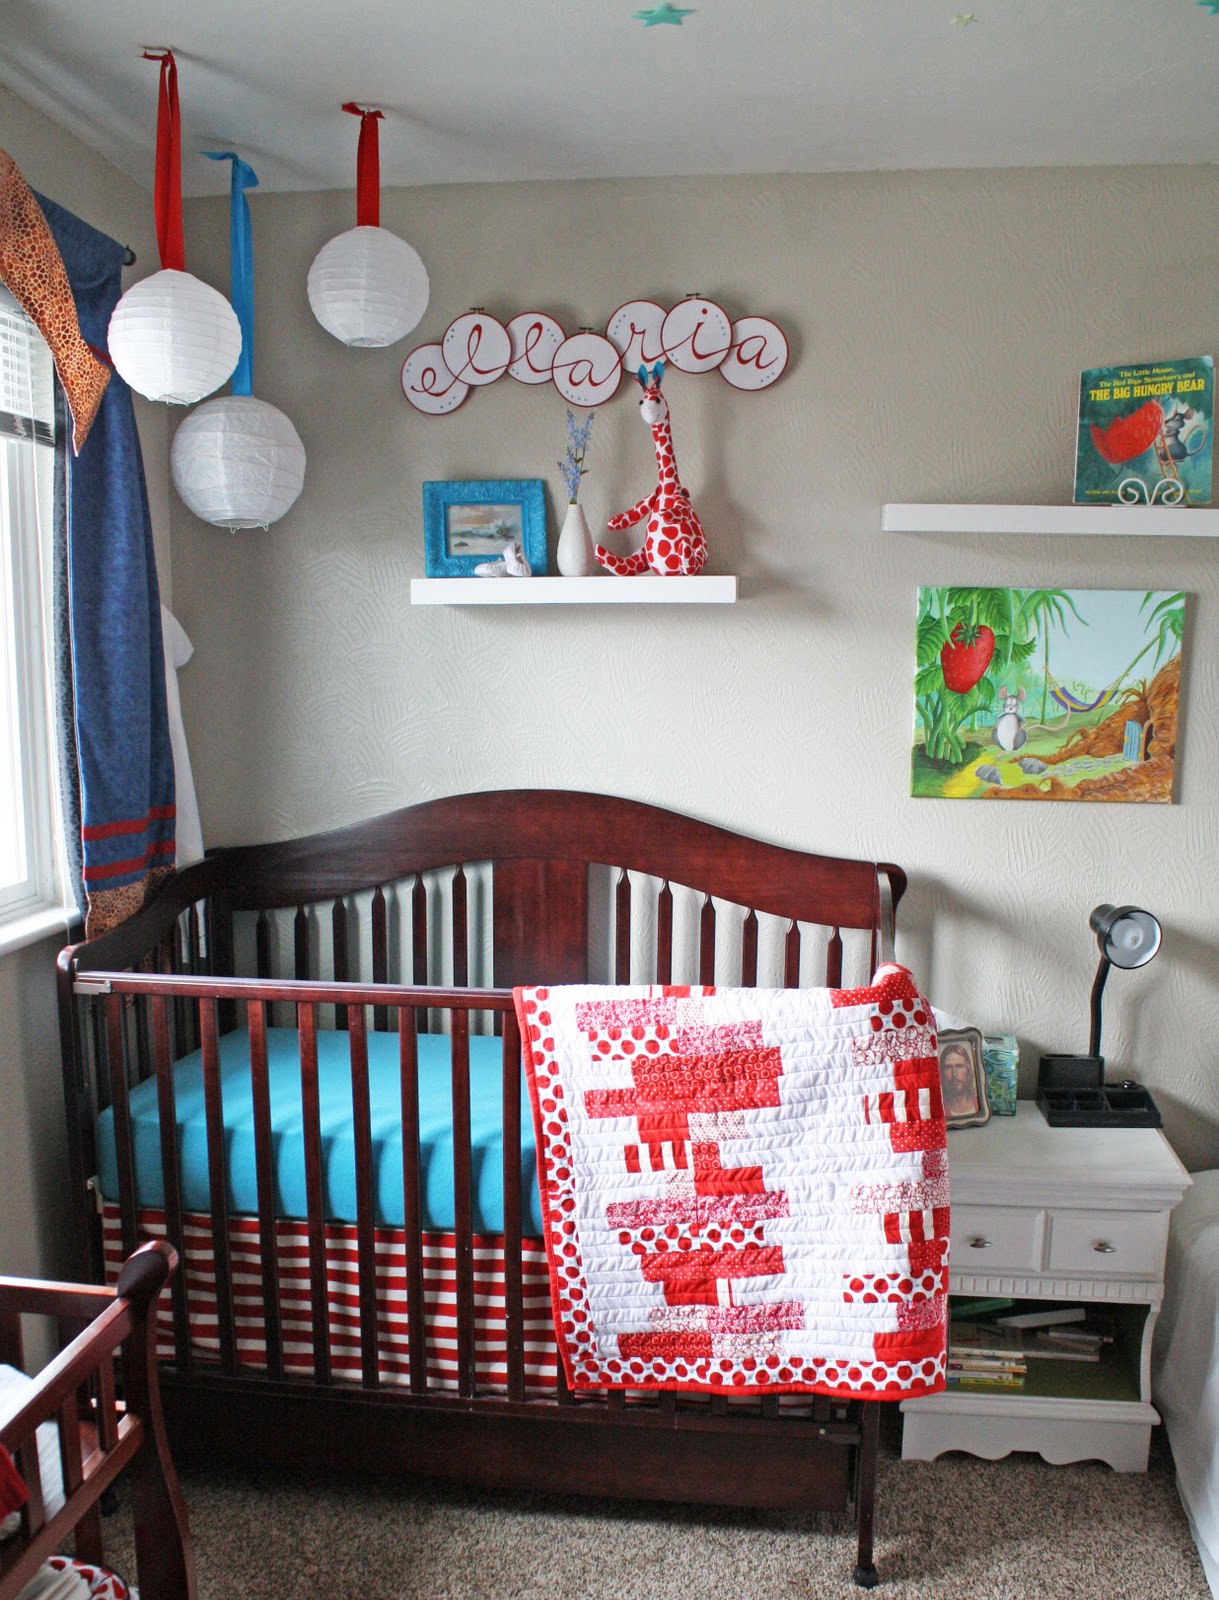
    I love that pic of the nursery! Gosh it is ADORABLE!!

  64. Lil Mama Stuart says

    March 9, 2011 at 4:10 PM

    so fun! bookmarking to add to my to do list!

  65. Vivienne @ the V Spot says

    March 9, 2011 at 4:00 PM

    Oh good grief! That is the cutest thing ever! Wow. (That last photo of the little guy on the floor with his tail up in the air is beyond cute.)

  66. Sue says

    March 9, 2011 at 4:00 PM

    Adorable!

  67. Rachel says

    March 9, 2011 at 3:34 PM

    I haven't commented in awhile but I've been here. I love this and am going to have to make some for my three boys.

  68. Jenae @ Wildflower says

    March 9, 2011 at 3:21 PM

    OH MY GOODNESS this is perfect!! my little boys would love this!

  69. Kate says

    March 9, 2011 at 2:38 PM

    You are so awesome.

    Nuff said.

    period

  70. Kate says

    March 9, 2011 at 2:38 PM

    You are so awesome.

    Nuff said.

    period

  71. Brittany@Love Stitched says

    March 9, 2011 at 2:28 PM

    what a fun way to play dress up as a boy! I love this idea and am sharing it with my FB friend and my cousin~

  72. Elz says

    March 9, 2011 at 2:26 PM

    What a cute project and so useful for Halloween. Just dress them up in a solid colored sweatsuit, make a cap and VOILA! instant costume.

  73. Mallory says

    March 9, 2011 at 2:05 PM

    That is so cute! I can see little boys wanting to wear that everywhere!

  74. theb5 says

    March 9, 2011 at 2:04 PM

    Super cool! Anyway you can post the winners on here?! I gave up Facebook for Lent:)

  75. Dixie Mom says

    March 9, 2011 at 1:58 PM

    Oh…that was the coolest tutorial! Wish I had a little boy of my own to make those for! I may have to make them for my nephews and friends…or make some for my house for kids to use when they come…:)

  76. angie says

    March 9, 2011 at 1:44 PM

    love love love it!
    great pictures too!

  77. cutekittypunk says

    March 9, 2011 at 10:38 AM

    i'm not much of a sewer, but that's sew cute. 🙂

    pun intended

  78. Jessica at Me Sew Crazy says

    March 9, 2011 at 9:54 AM

    this is such a unique and wonderful project! love it!!!!

  79. CK says

    March 9, 2011 at 8:20 AM

    Awwwwwwwwwwwwwww!!!!! Totally gawking! Great project!

    -CK

Hi! I'm Jen Hadfield. I'm a mom of 5 restoring an 1891 home in the heart of Salt Lake City. I love being creative and sharing simple ideas to make your life easier and more beautiful!

Receive the Latest Crafts, DIY, Recipes and More in your INBOX!

Follow us on Pinterest! It's awesome!

Top Posts & Pages

Spruce up Your Outdoor Space with a DIY Recirculating Fountain! (tutorial)
A New Deck in Under 30 Minutes!
DIY Secret: How to Print on Post-It Notes (and Free Printable Template)
12 Must-Have Items to Pack on an Alaskan Cruise!
Copycat Panera Spinach and Artichoke Egg Soufflés - SO good!
Mother's Day Cup Holder Gift Basket


Popular Posts

  • Spruce up Your Outdoor Space with a DIY Recirculating Fountain! (tutorial)
    Spruce up Your Outdoor Space with a DIY Recirculating Fountain! (tutorial)
  • A New Deck in Under 30 Minutes!
    A New Deck in Under 30 Minutes!
  • DIY Secret: How to Print on Post-It Notes (and Free Printable Template)
    DIY Secret: How to Print on Post-It Notes (and Free Printable Template)
  • 12 Must-Have Items to Pack on an Alaskan Cruise!
    12 Must-Have Items to Pack on an Alaskan Cruise!
  • Copycat Panera Spinach and Artichoke Egg Soufflés - SO good!
    Copycat Panera Spinach and Artichoke Egg Soufflés - SO good!
  • Mother's Day Cup Holder Gift Basket
    Mother's Day Cup Holder Gift Basket
  • How to Change a Recessed Can Light into a Pendant Light with No Remodeling!
    How to Change a Recessed Can Light into a Pendant Light with No Remodeling!

As seen in


Amazon Affiliate

Tatertots & Jello is a participant in the Amazon Services LLC Associates Program, an affiliate advertising program designed to provide a means for sites to earn advertising fees by advertising and linking to amazon.com.
  • About Me
  • Advertising
  • Get Featured

Copyright © 2025 Tatertots and Jello · Privacy
This site is a place for positive discussion and ideas. Negative talk, comments that disparage others, and similar are not welcome and may be removed.