Hi all, I’m Sandra from Sawdust and Paper Scraps. I’m super excited to be here to share a little project with you. Thanks for having me Jen.
Halloween is a my daughter’s favorite holiday and she wants to decorate as soon as she sees the stores all decked out with their Spooky goods (which pretty much happens in July these days.)

I tell her we have to wait until October 1st before we put up the Halloween decorations or we really would go from Bunny Rabbits to Ghosts and Goblins. We are working on some projects so we’ll be ready when the time comes!

The other day we went to Home Goods and saw two sparkly Halloween candelabras.
(You can’t tell from this picture but they were really beautiful! You’ll just have to trust me.)
I was going splurge and buy them until I saw that they were $69 each!
And they didn’t even hold any actual candles!
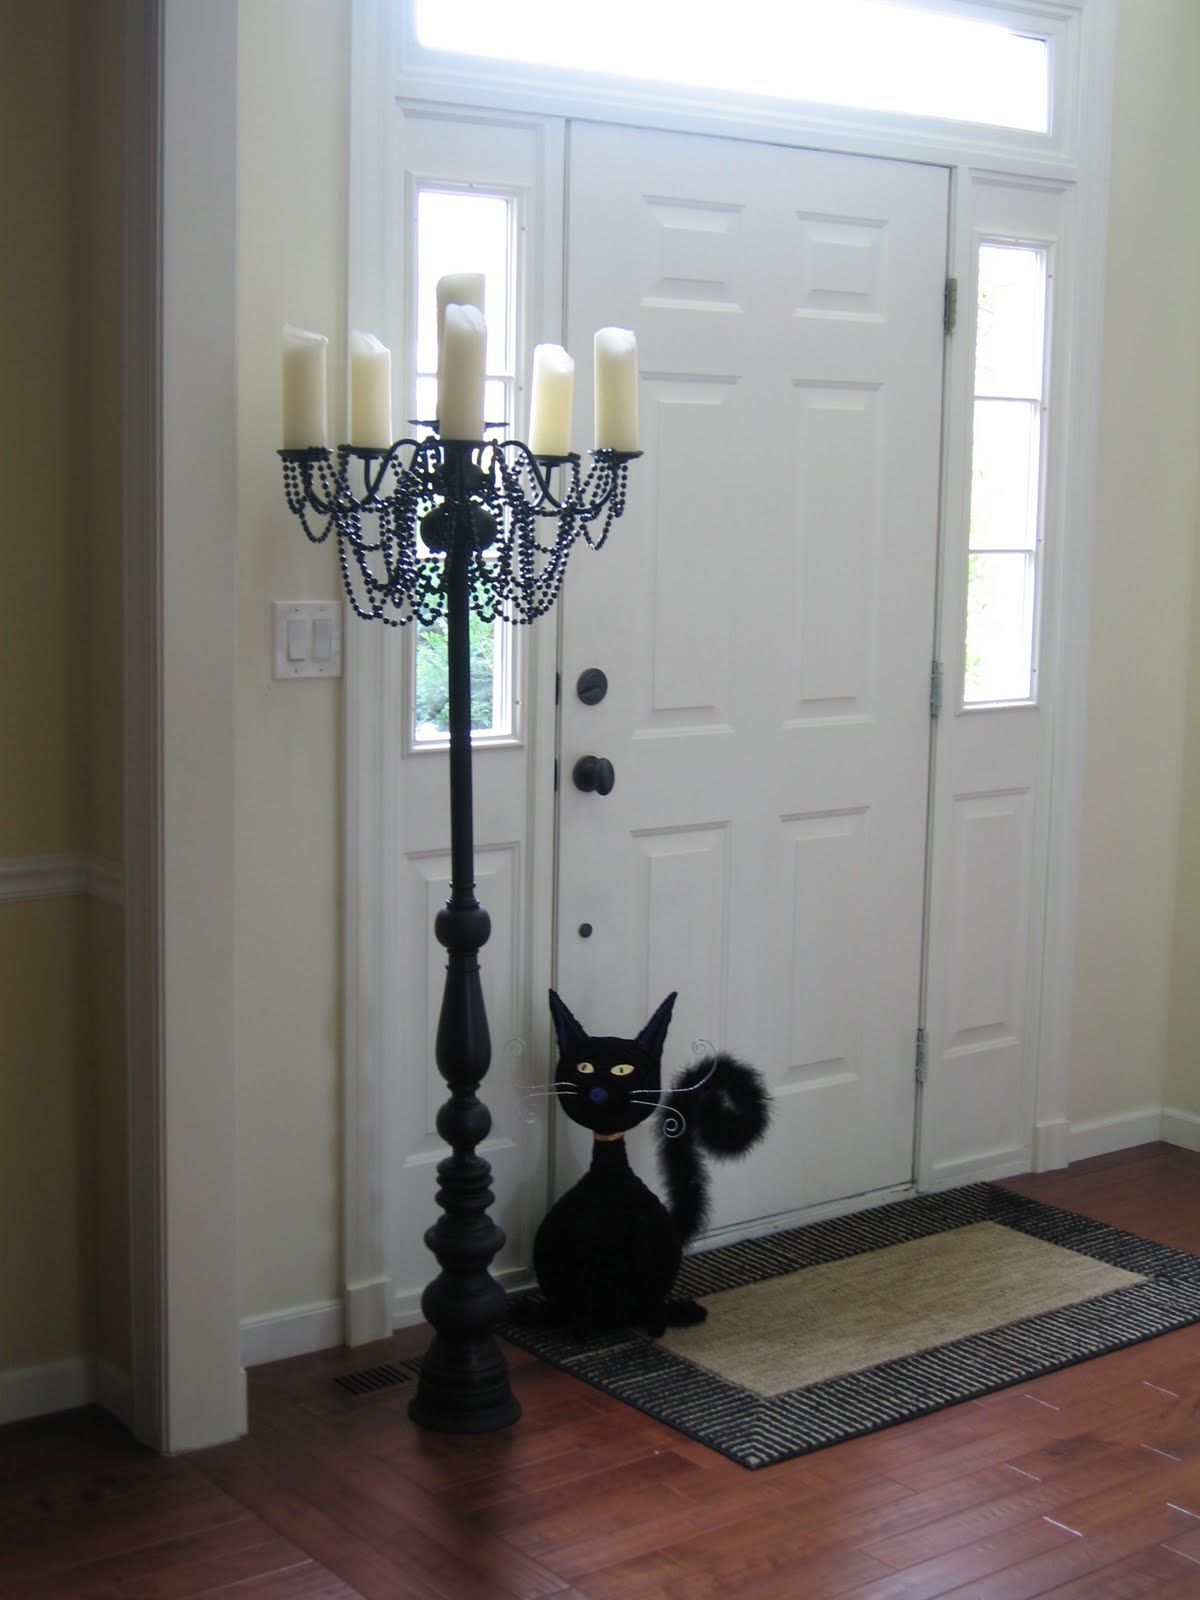
So, I decided a homemade candelabra would be a great project.
I bought:
2- old lamps (Goodwill – $3.99 and $1.99)


1- chandelier (Thrift store – $10.)
1- 10 ft piece of 1″ PVC ($2.39)
1- 10 ft 3/8″ threaded rod (electrical department at Home Depot for $5.97)
1- bag of 3/8″ nuts ($0.98)

Now what?
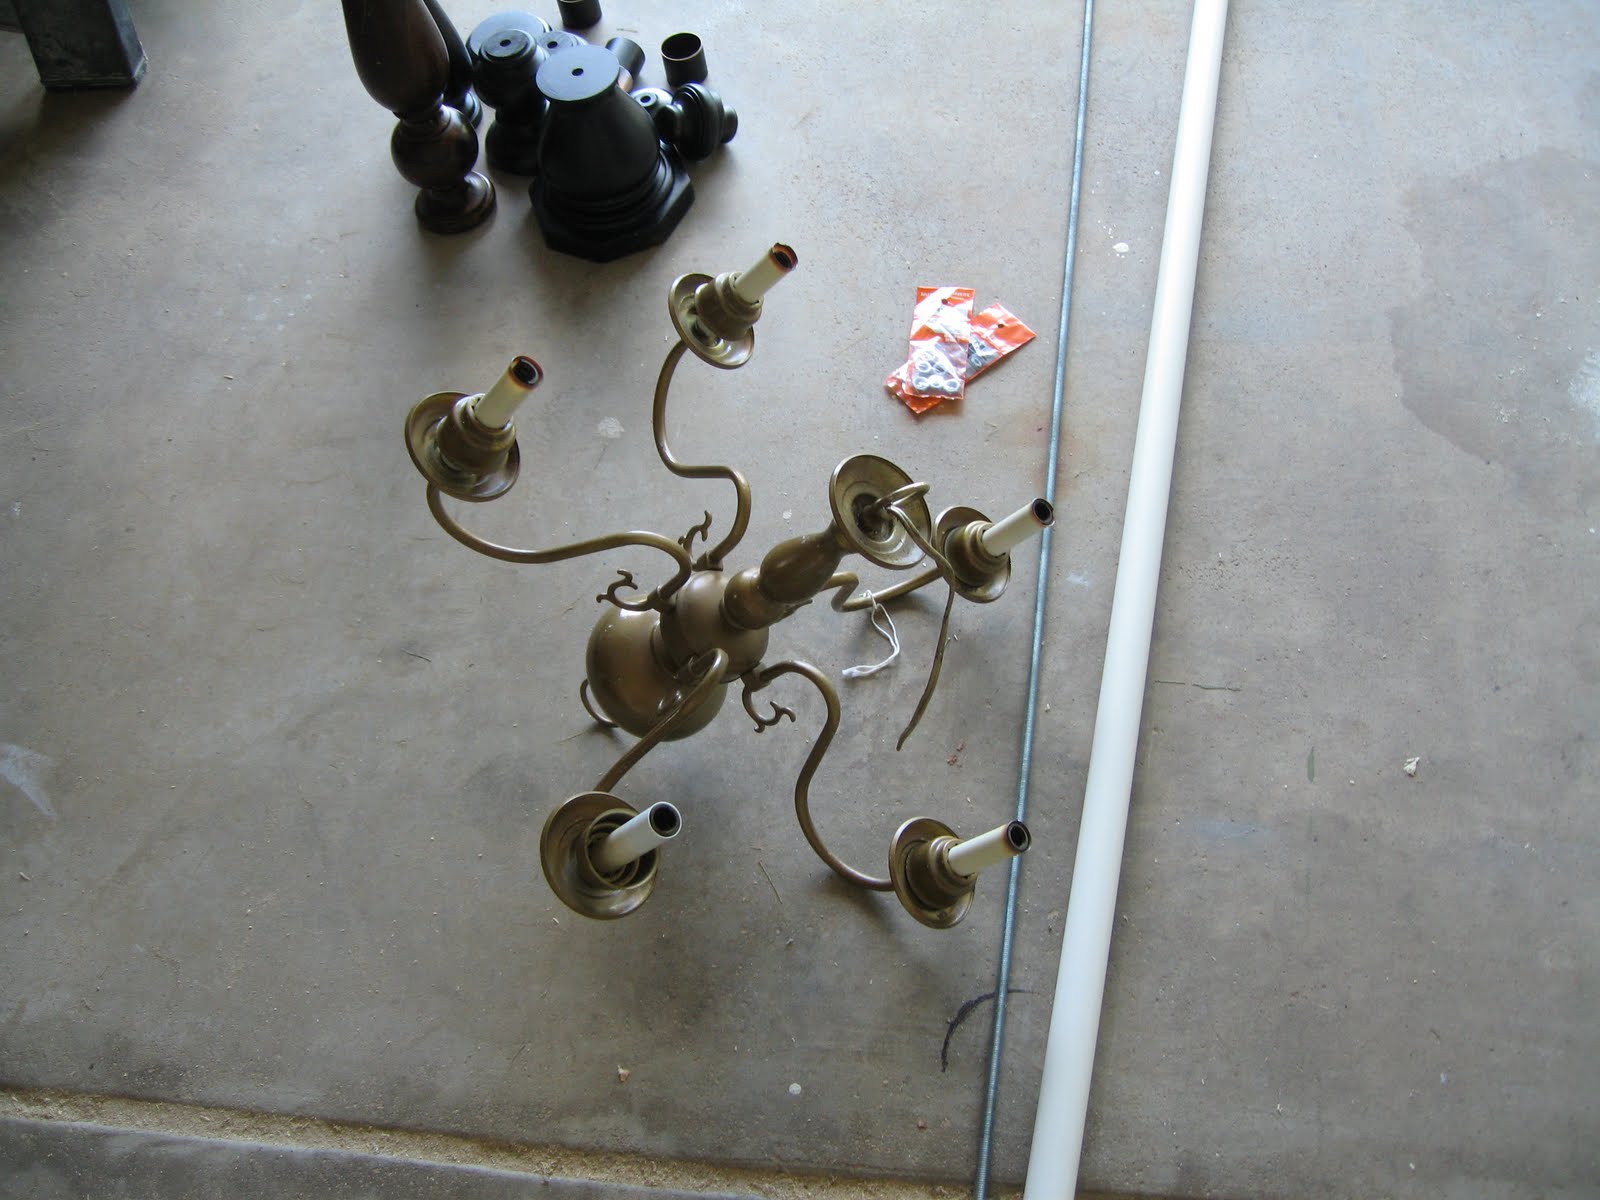
I took apart the lamps by cutting the cords and removing the nuts and threaded rods.


The chandelier came apart in layers.
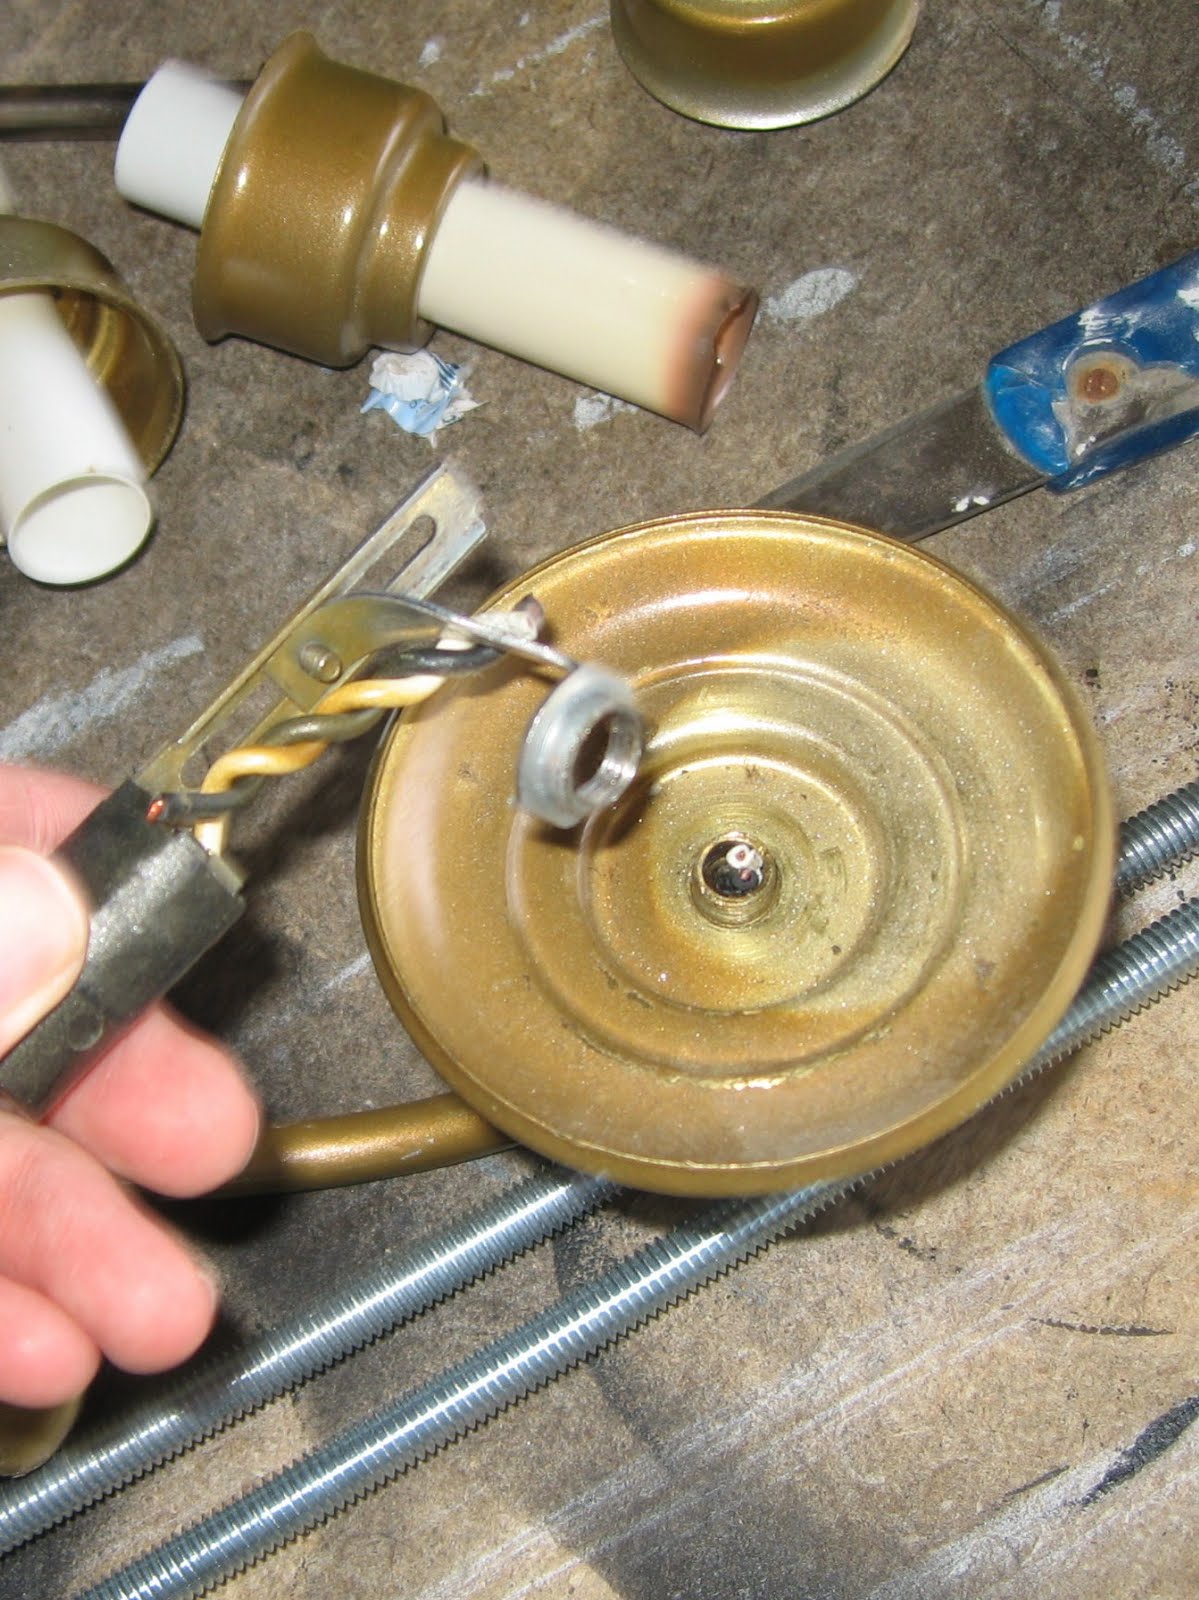
I removed these light bulb sockets but wanted to use the bottom plates for candles.
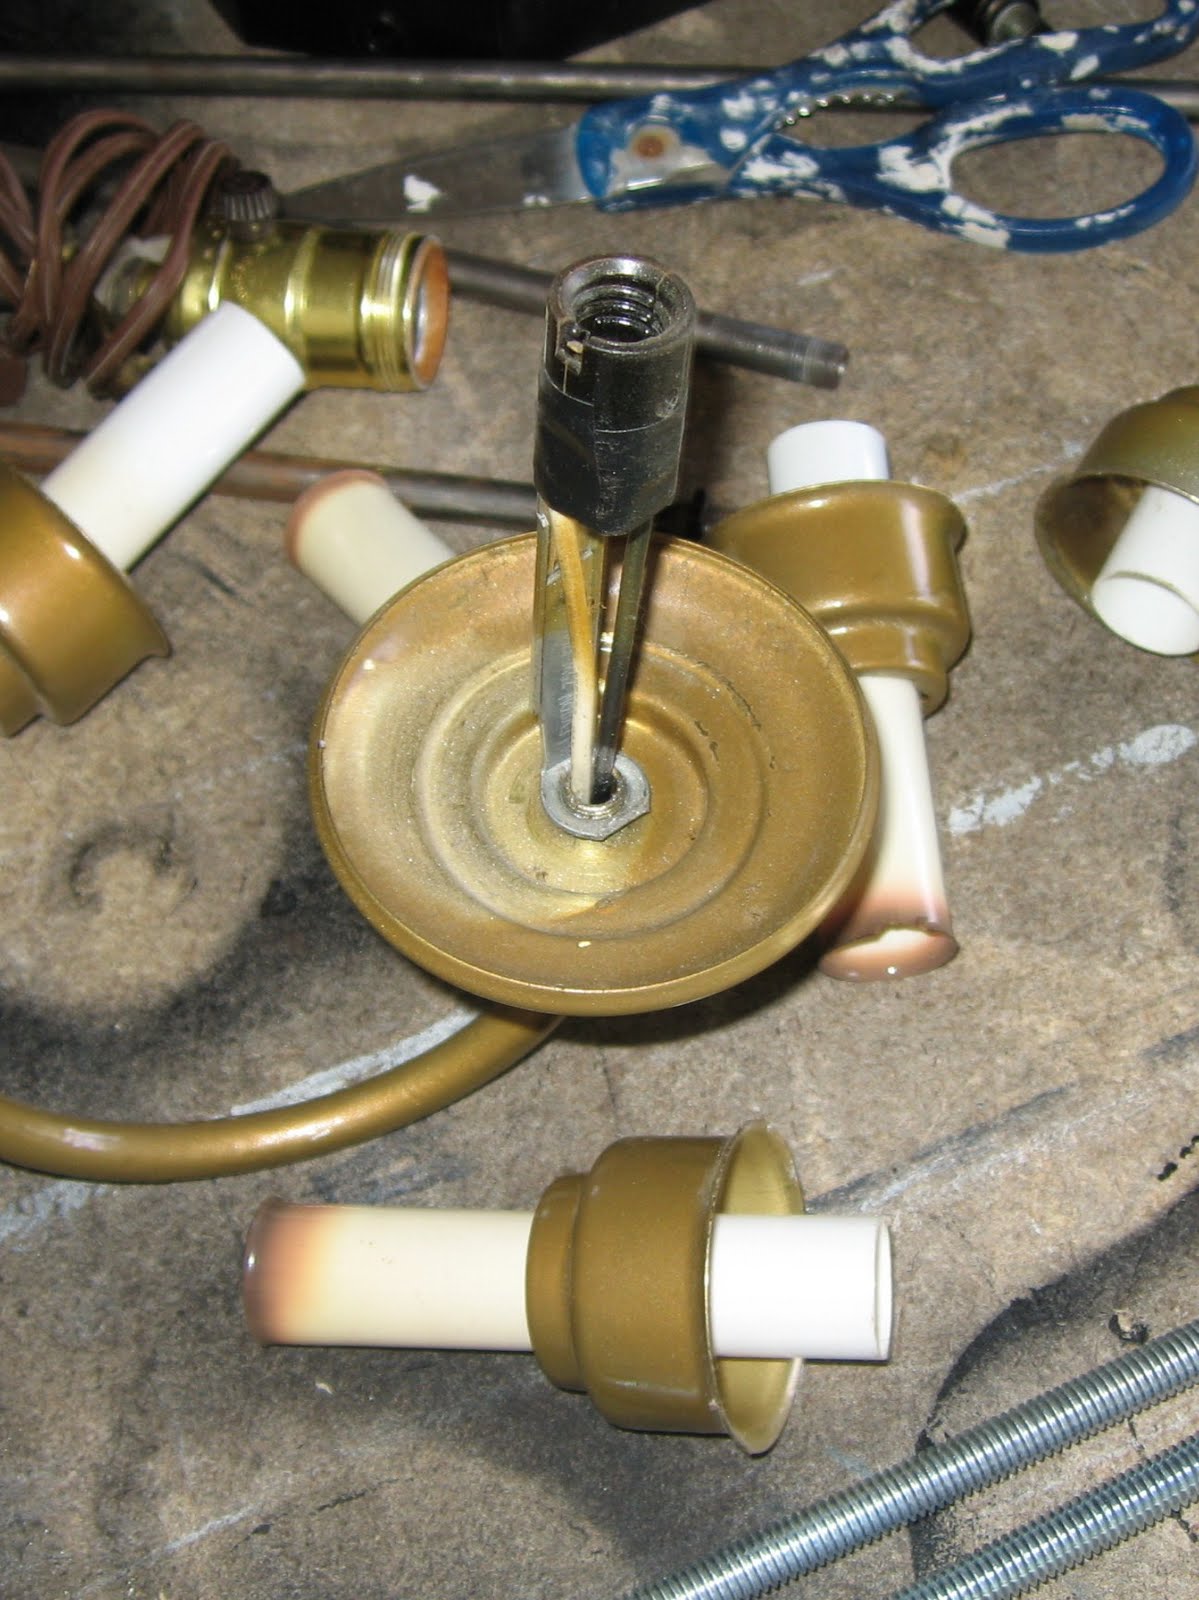
I needed this nut to hold the bottom plate in place. I just bent it back and forth until it broke off!
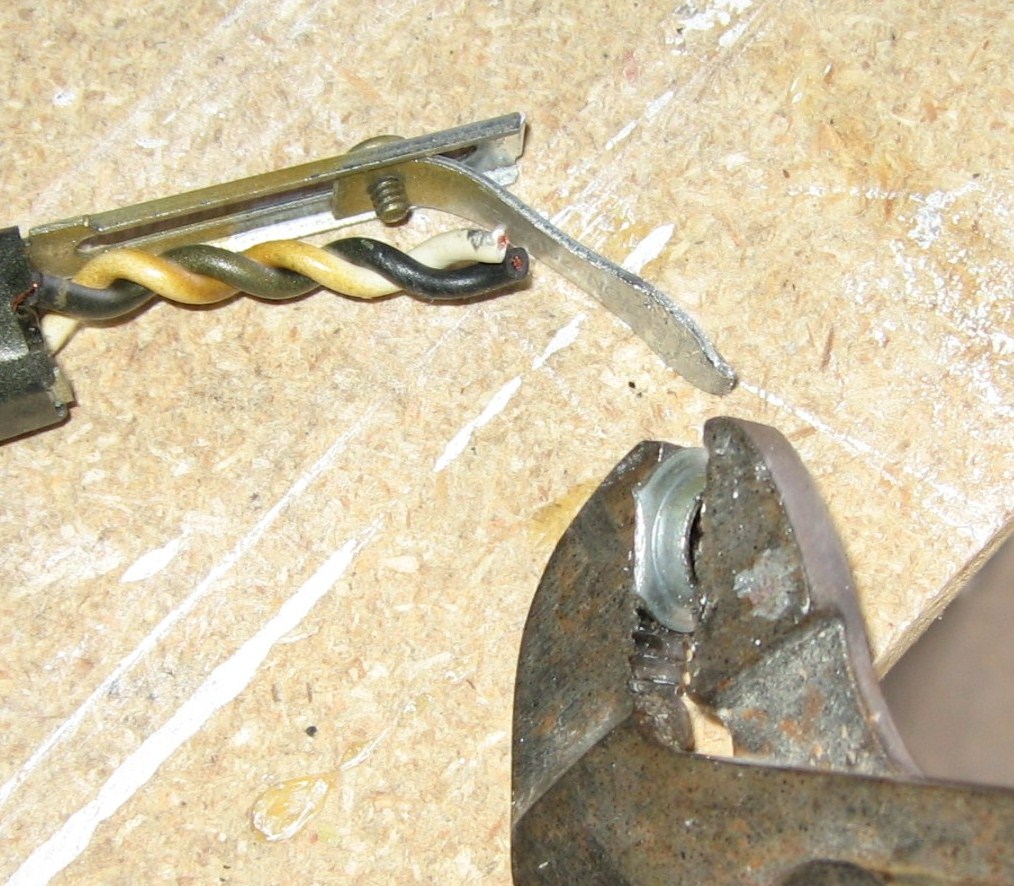
Then I started unscrewing and cutting wires…


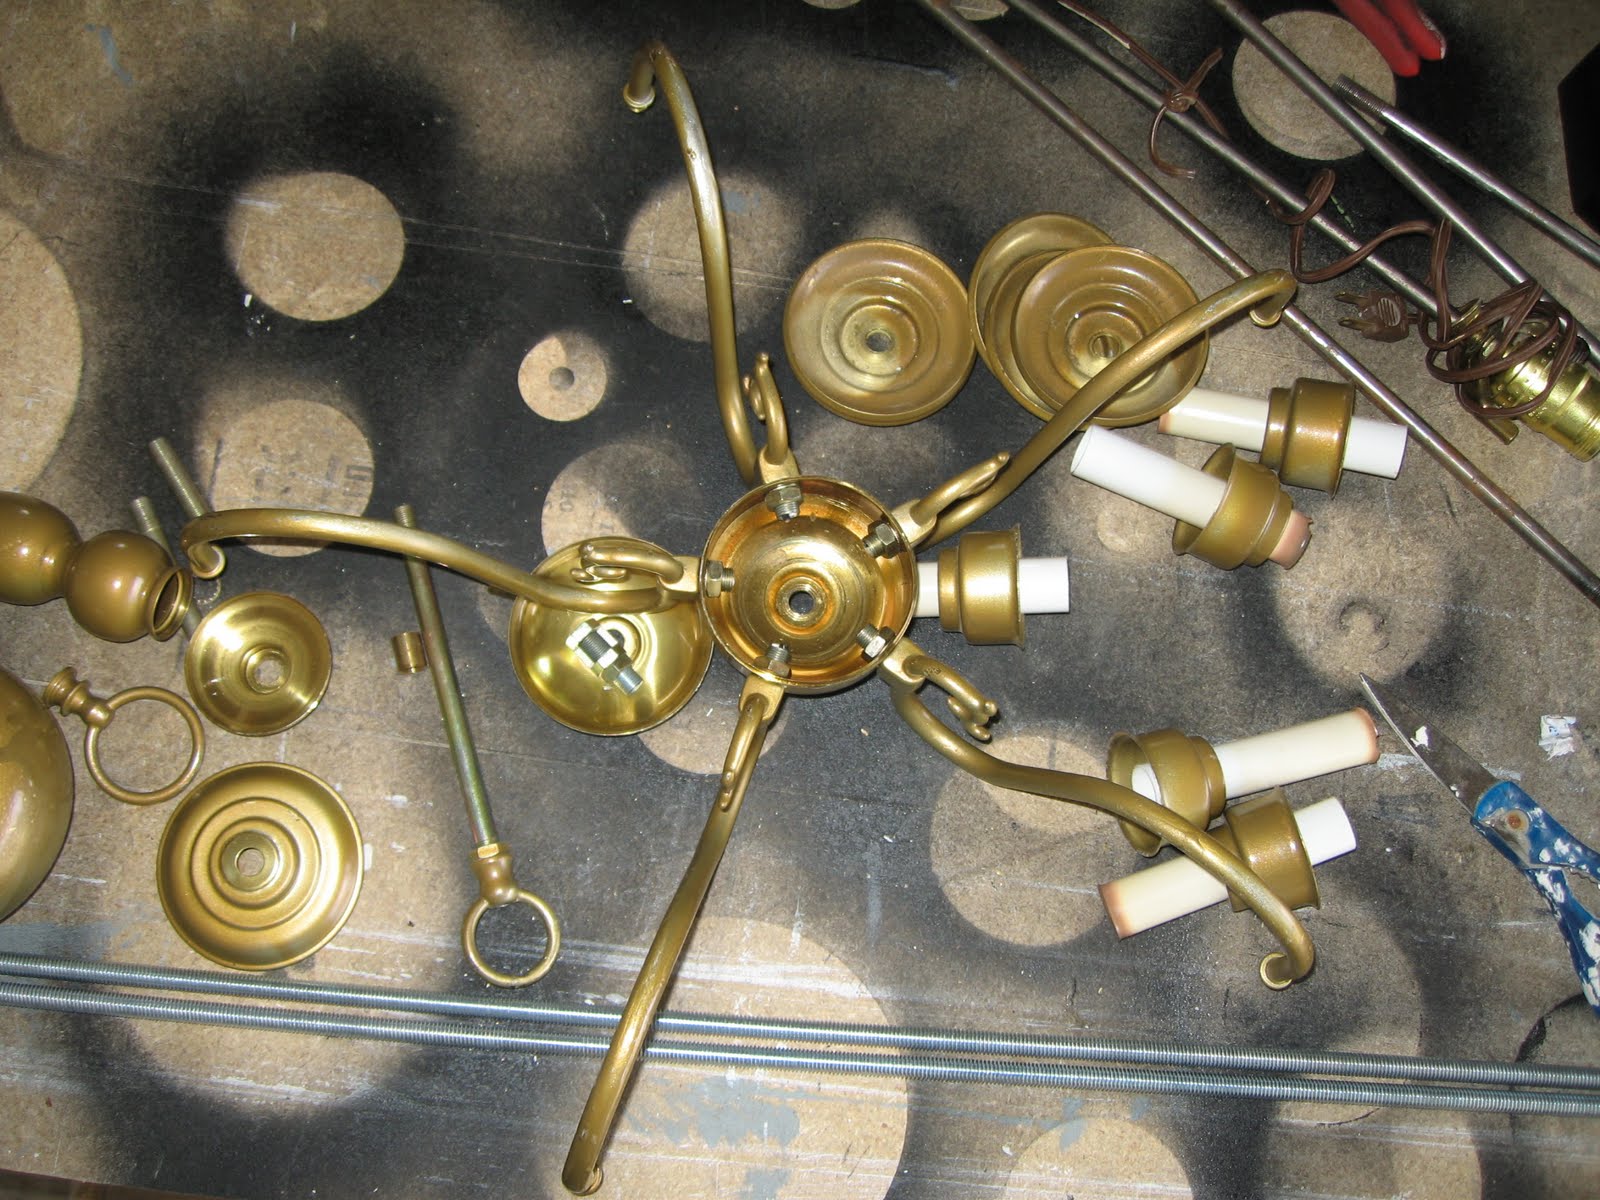
until I had a table covered with parts I’d have to try to remember how to put back together again!
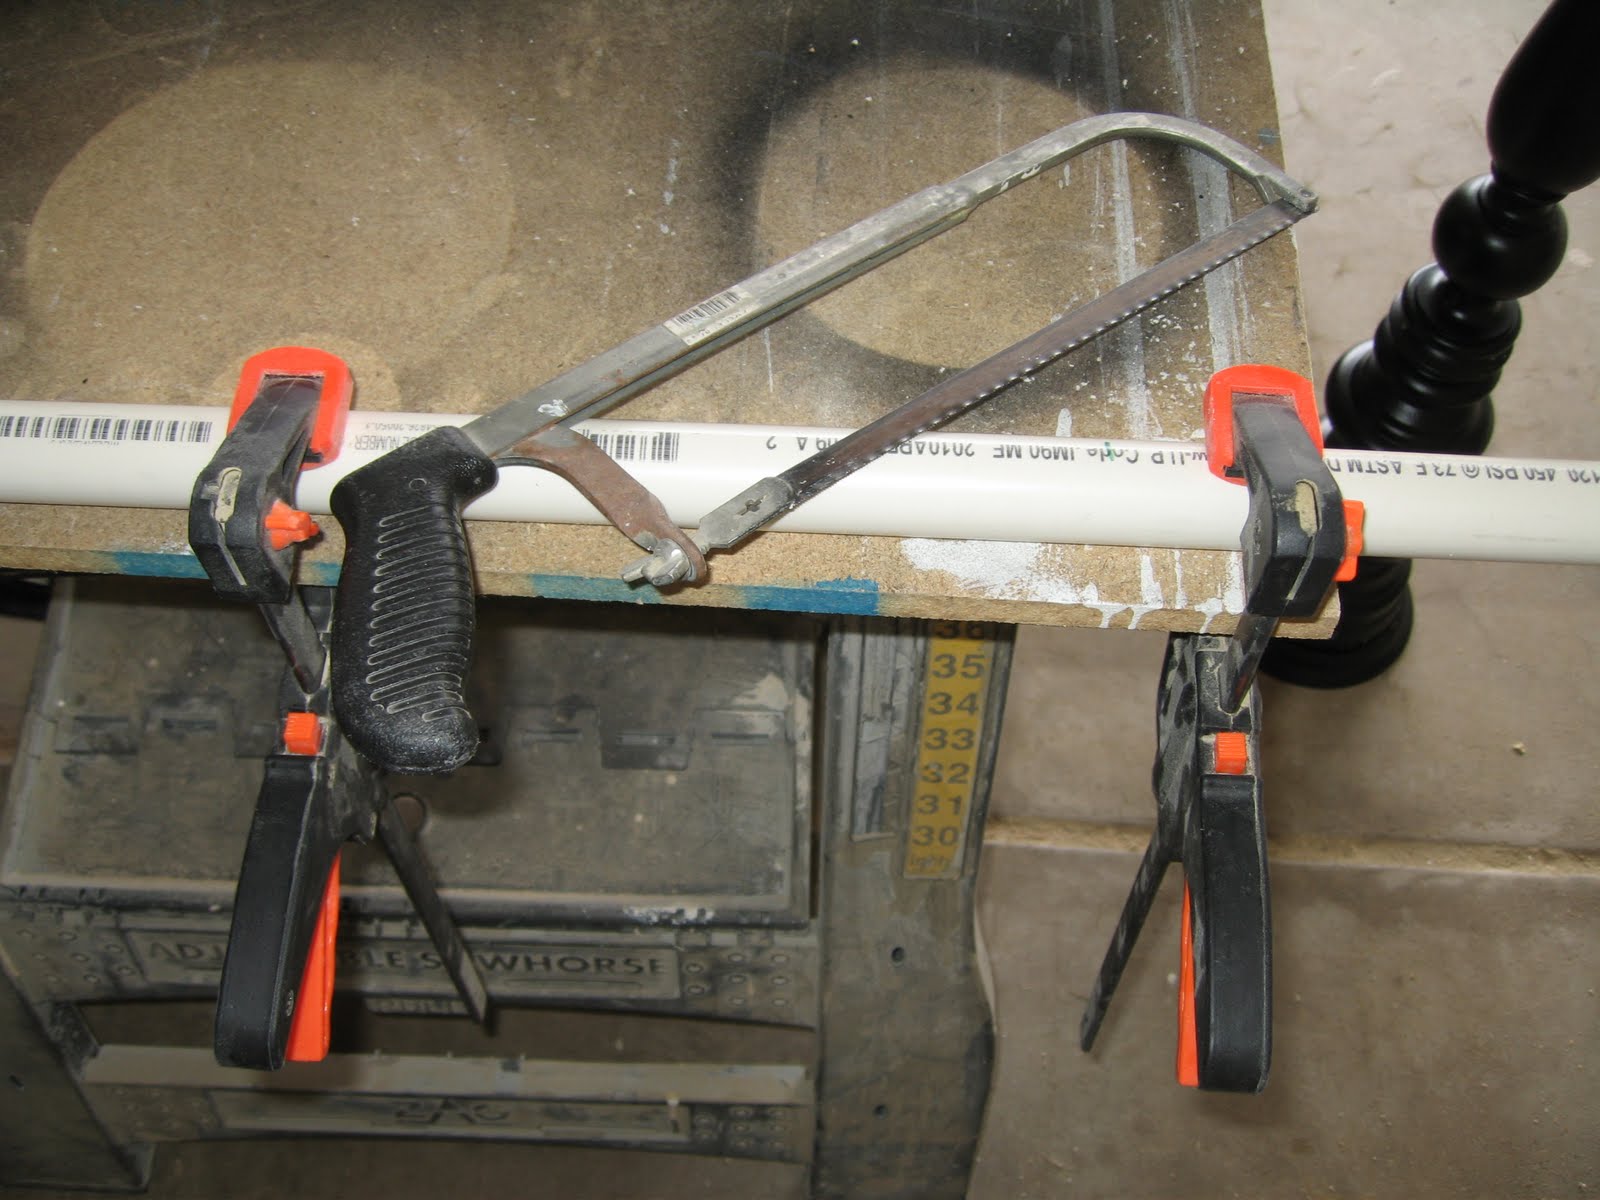
I cut the threaded rod in half with a hack saw and spray painted everything black.
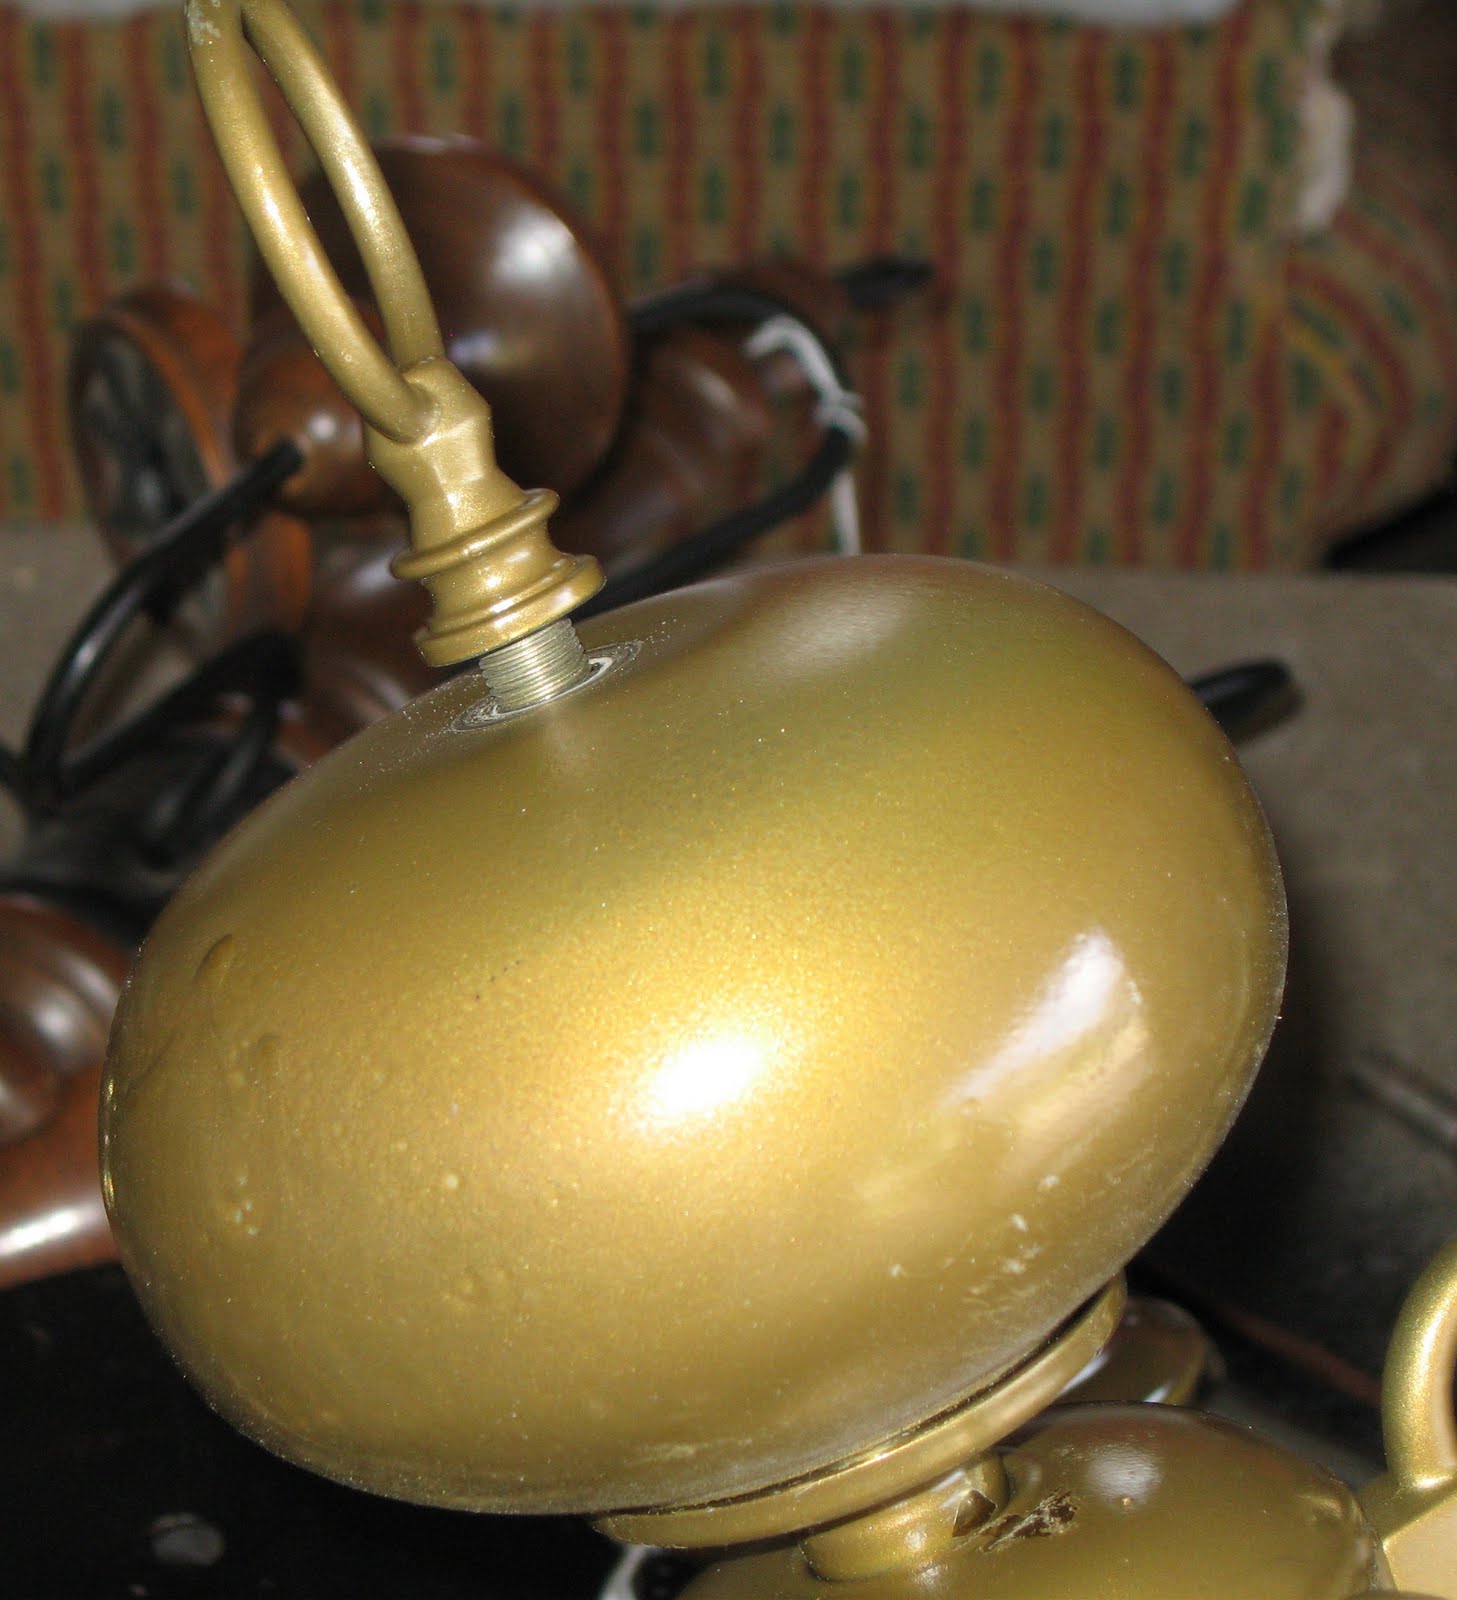
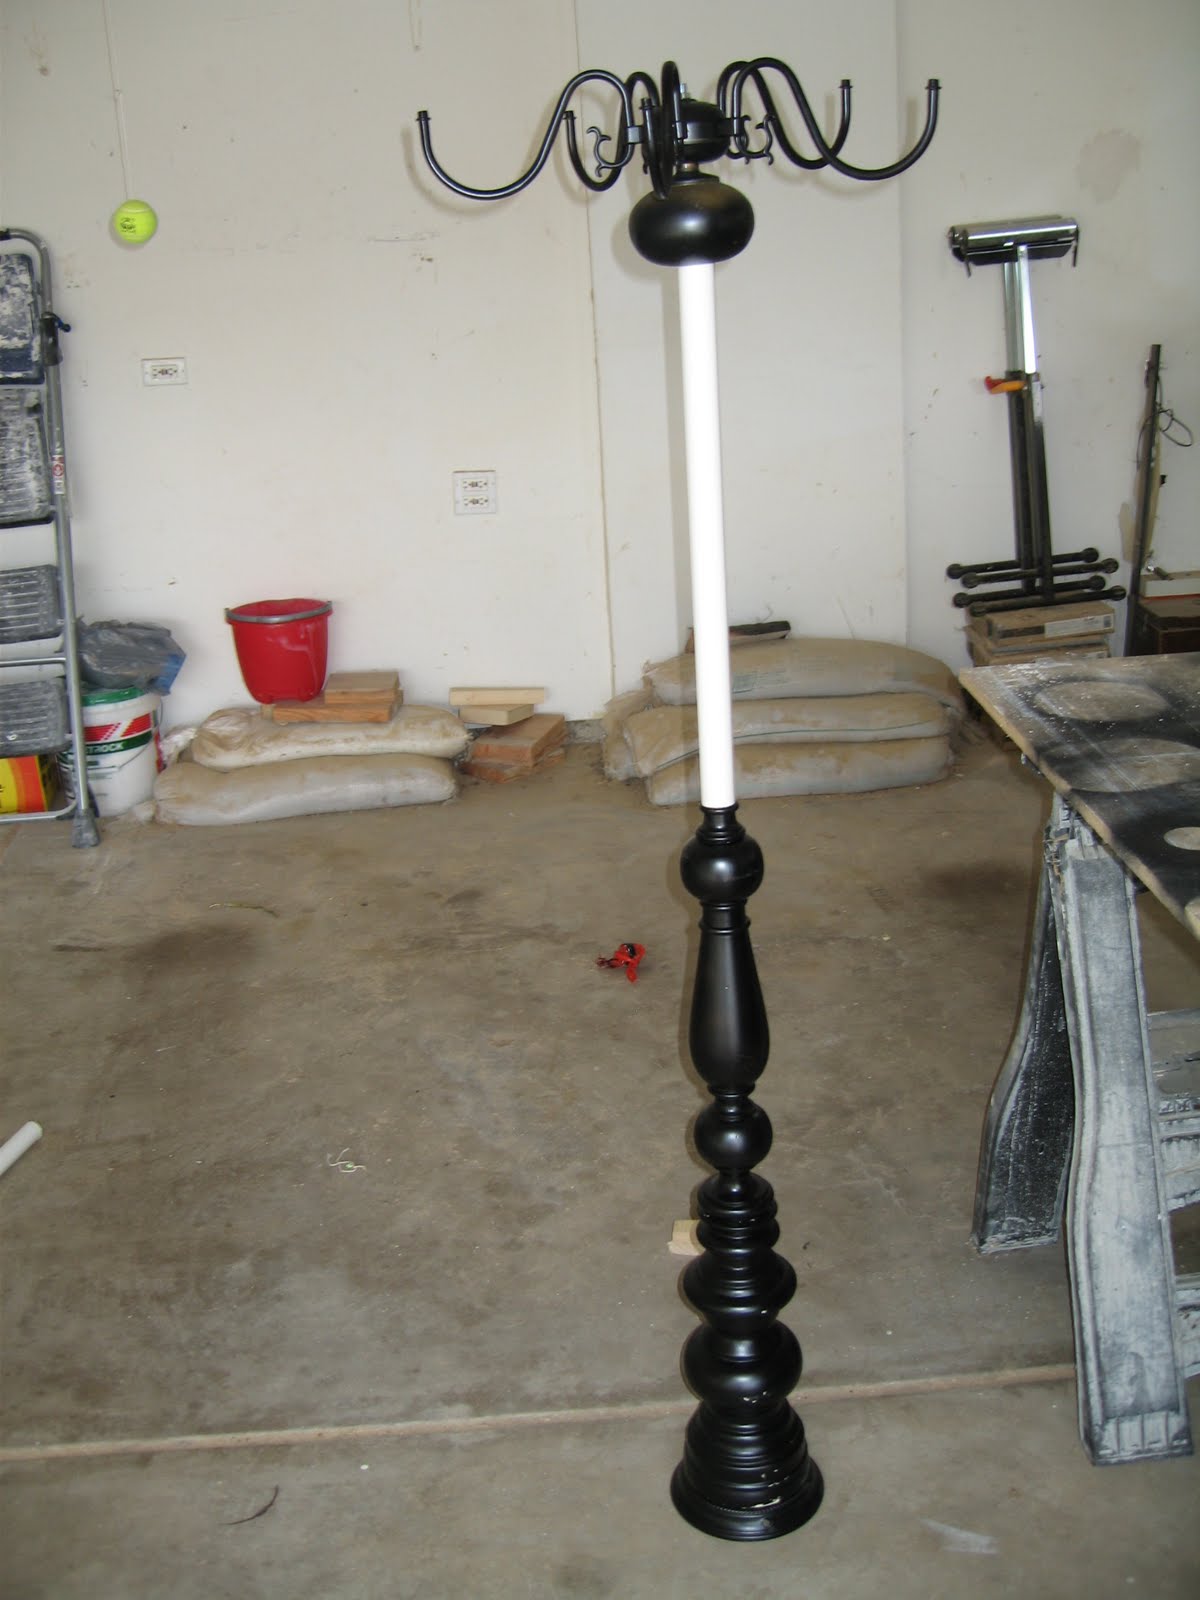
I used the base from one of the lamps that had a really heavy weight in bottom.


I layered the lamps with the larger one on the bottom and then played with the length of the PVC in order to get it to just the right length.
Put another nut on top and tighten it down! More paint and it’s starting to look like something.
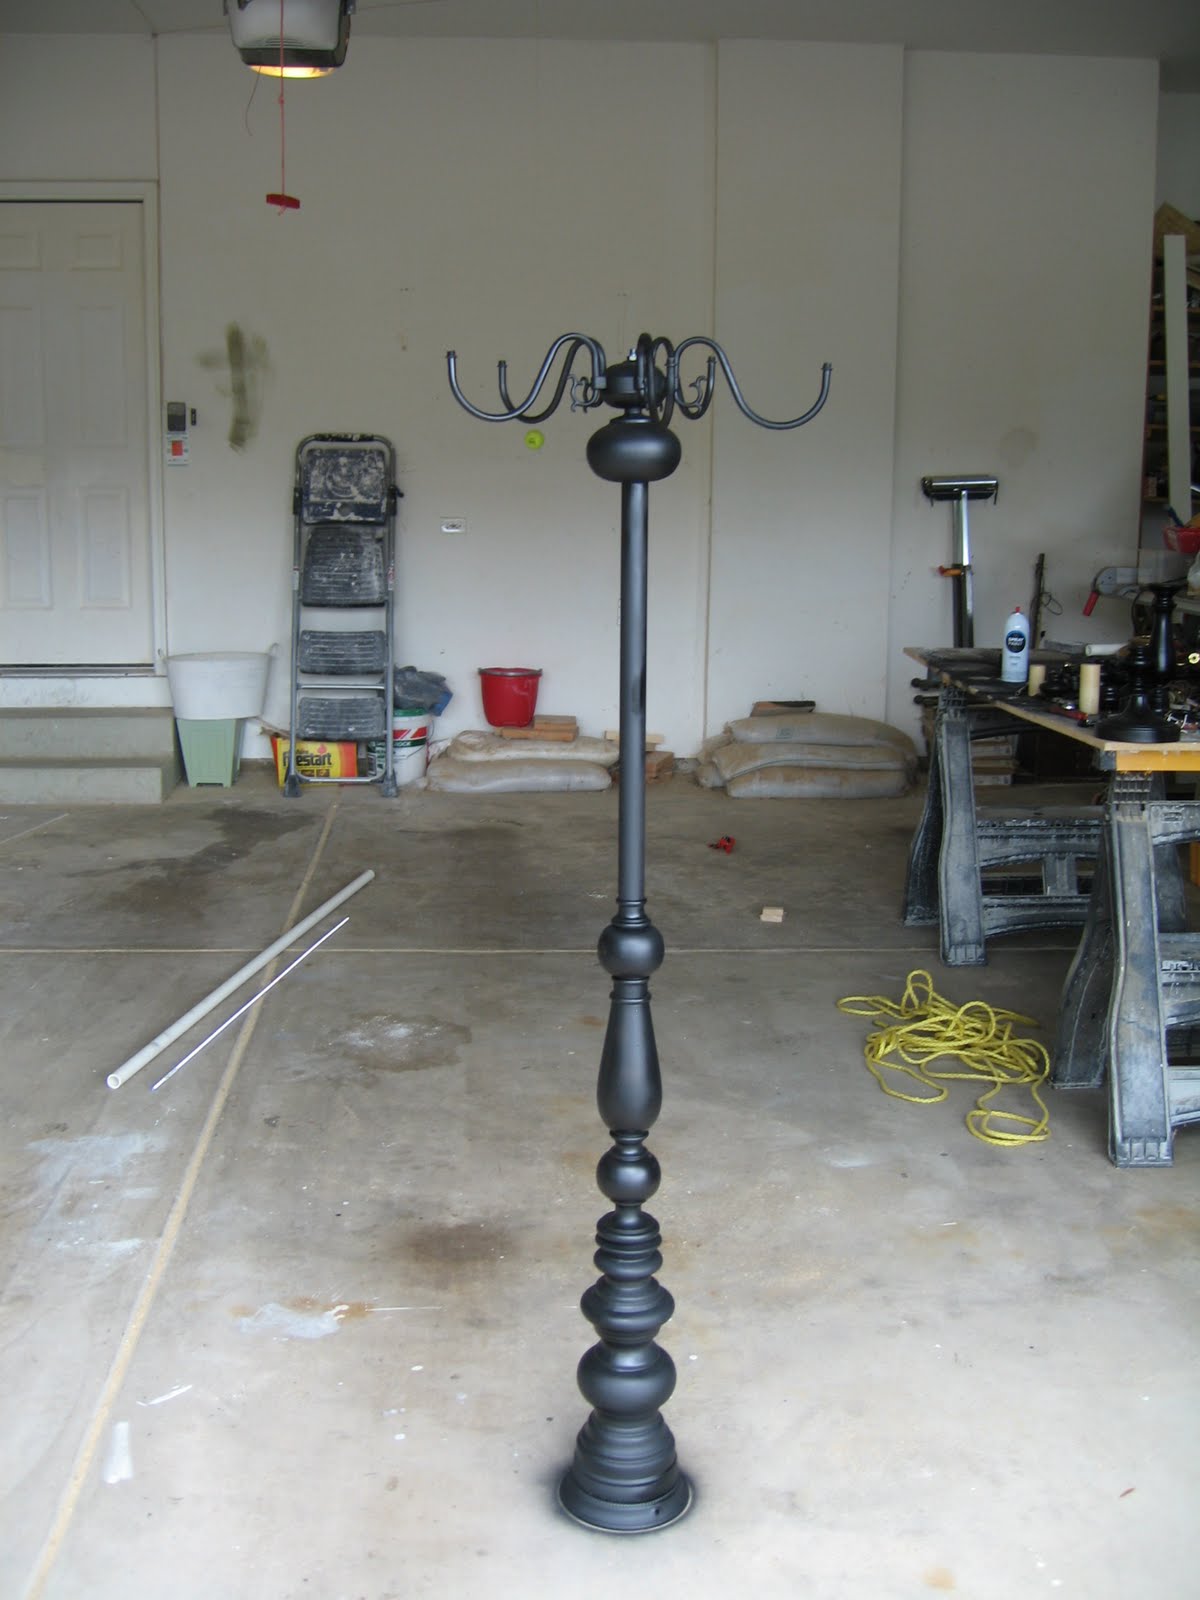
Re-attached the candle plates.

I decided to add a larger “plate” in the middle. It was just sitting on that table of junk you saw earlier so I used it. I’ll probably need it later for something else but whatever!
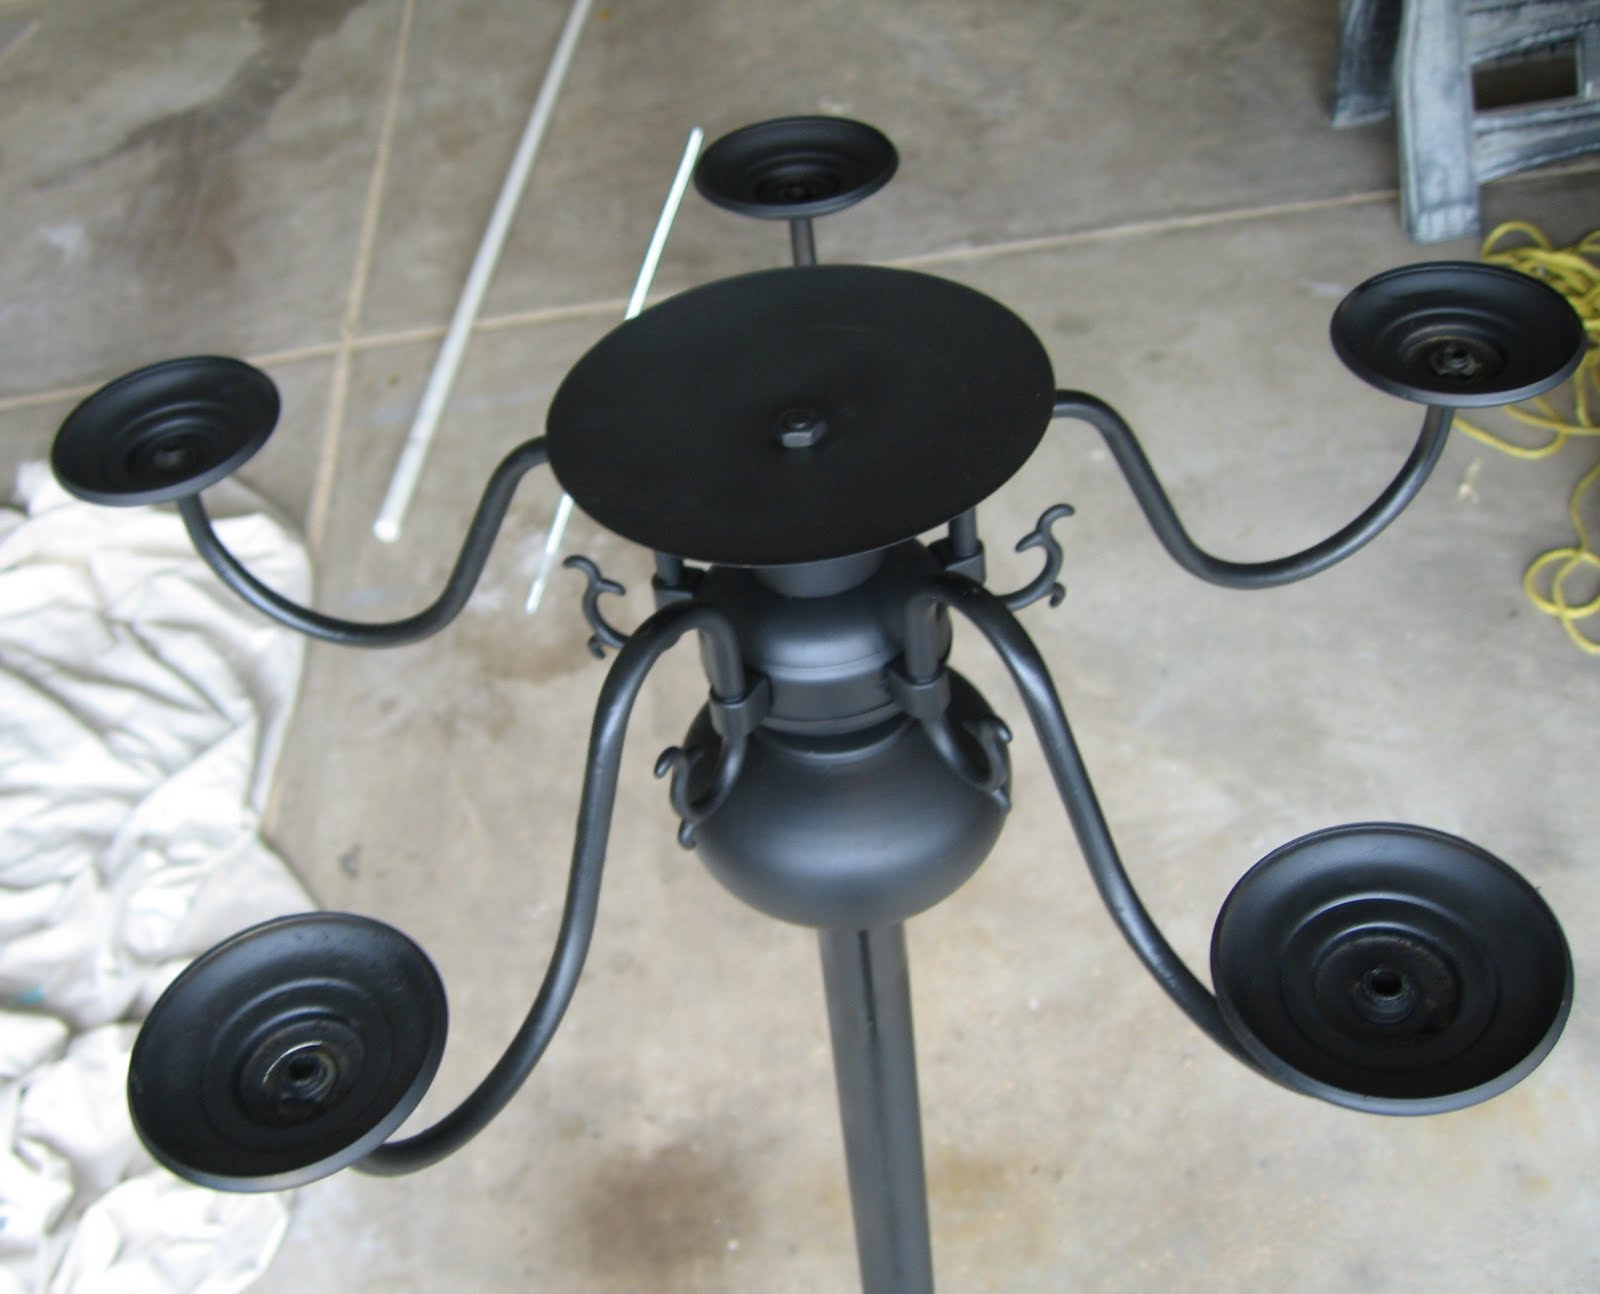
I just think it looks better that way.
Now, obviously, you could just leave it like this.
Throw some candles on there and be done with it.
I want to “bling” it up a bit!
I found these at the thrift store and yellow stickers happened to be half price so I got the whole bag for $1!

I hung them on a dowel and spray painted them with a gloss black.
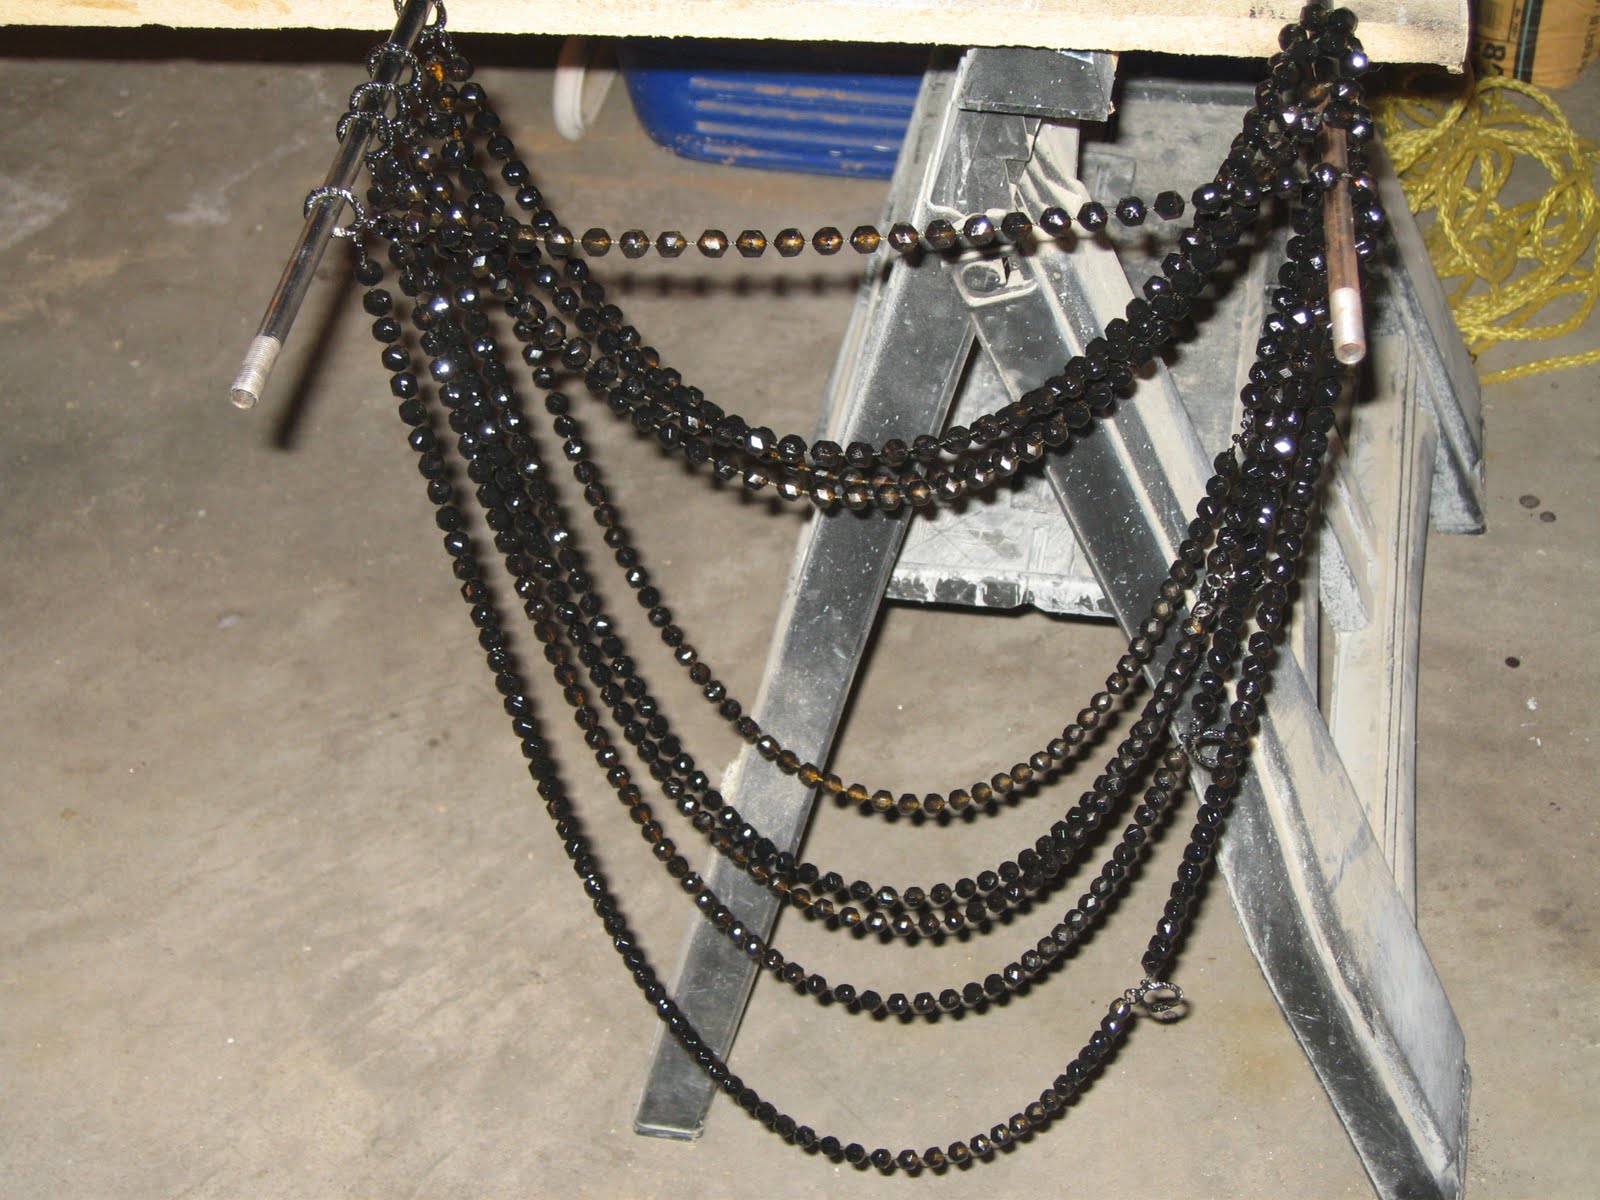
I hung and draped and swagged them all over the candelabra. Some of them I cut and hot glued around the outside edges so the beads would be well dispursed.
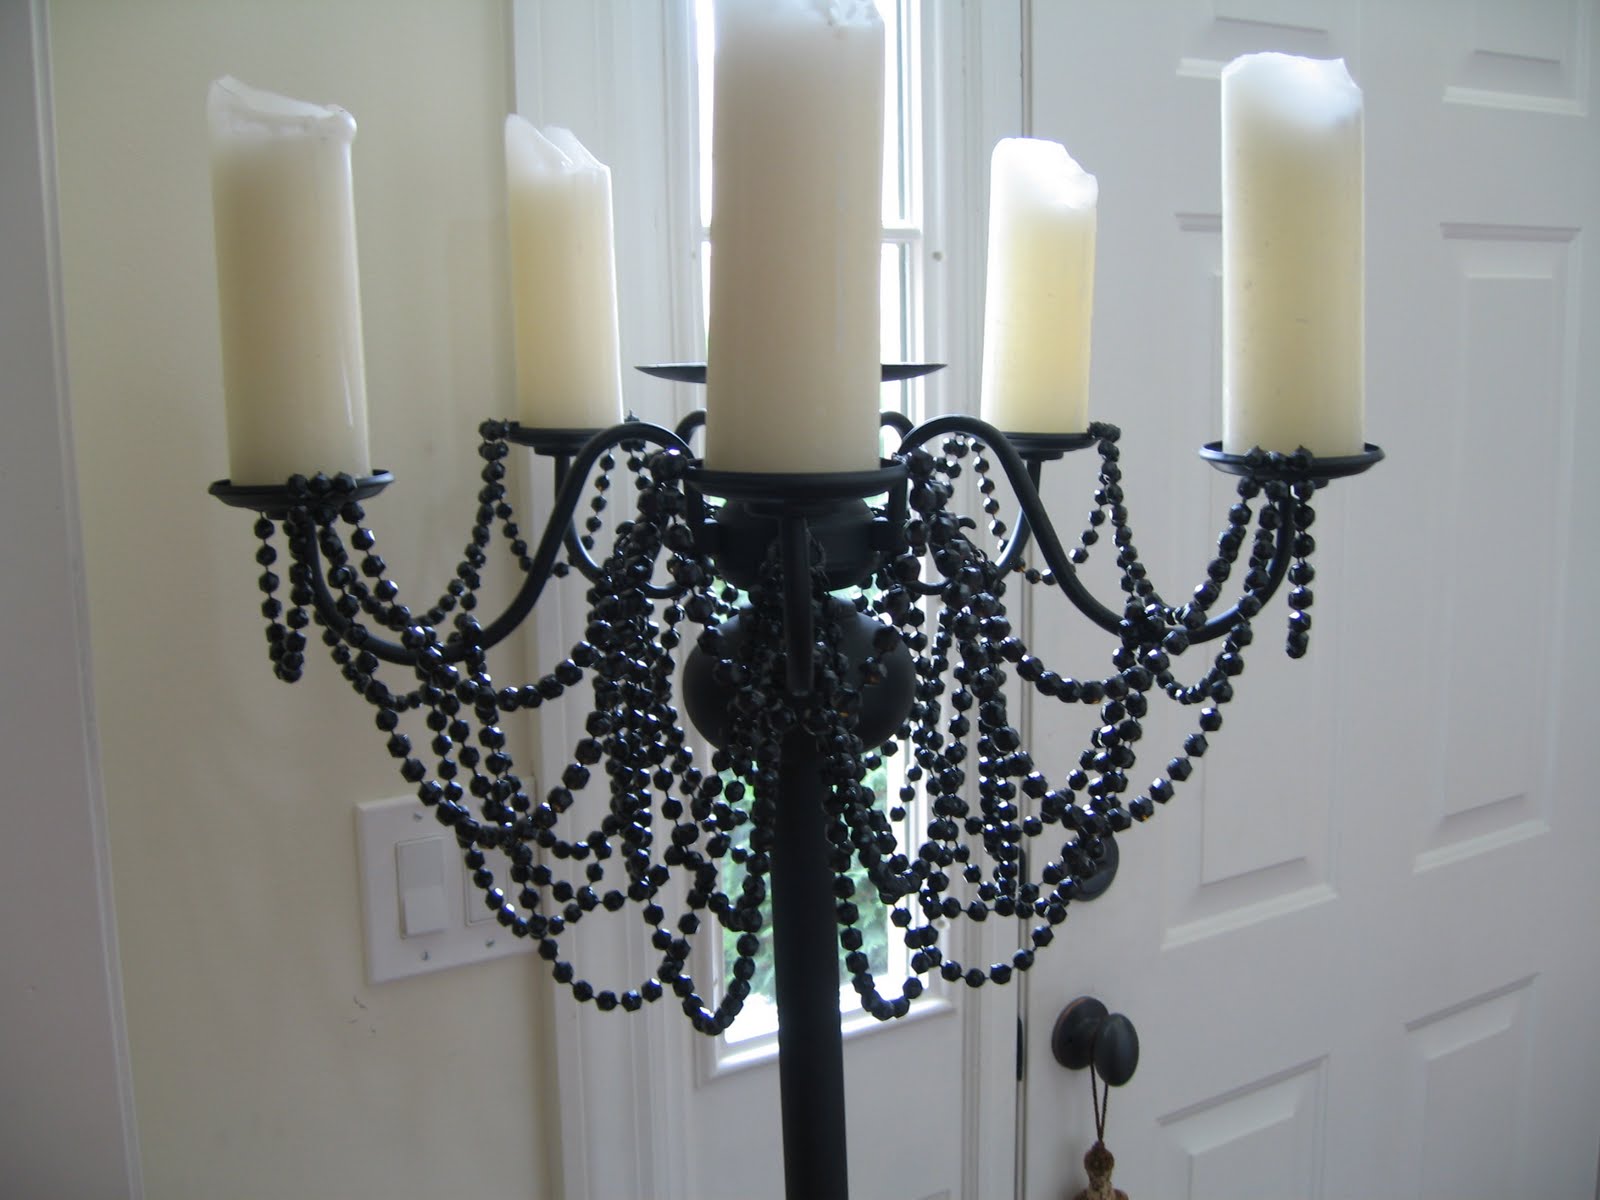

And that’s how you can make a Halloween Candelabra for $26.32.
Alright, so it’s not a $5 project but it’s better than $69.00!
Plus, I have another 5′ piece of threaded rod and PVC to make another something or other.
I’ve got something in mind
I’m sure I’ll get to it, eventually!
Thanks for letting me come and share with you today. The deadline motivated me to finish one of the 10 projects I have going on. It’s crazy around these parts. Stop by and visit me sometime if you can handle the mess! Happy Haunting!

Sandra!!
That. Is. Amazing!!
Now I’m going to be on the lookout for some old lamps and a chandelier to make one of those. I love the beads too.
Sandra has INCREDIBLE DIY skills.
You really must see her projects.

Sandra built this entertainment center in her basement. Yes —- I know!! Incredible.


This is her Before and After Kitchen. Not only did she refinish the cabinets, but she built new cabinets to match the originals, and installed beadboard and new corbels to the island. Sandra – will you come help me tackle my kitchen next?? I’ll pay you in wreaths and quatrefoil crafts!

Here she is all suited up to build!

Ummm, yeah – she built these cabinets in her Office too! Wow!
![[007.JPG]](https://4.bp.blogspot.com/_-JtV-j1gCHo/S6Zz0f5yx5I/AAAAAAAAAto/Ig08AqKmyMQ/s640/007.JPG)
And this is the project I saw when I first discovered Sandra’s blog. Amazing Playhouse. Amazing!
Sawdust and Paper Scraps is chock full of DIY goodness!!
XOXO
PS – It’s Friday and that means tonight we kick off the weekend with a party! Come over for some dip, chips and pineapple drinks. LOL But seriously, I can’t wait to see your projects at the Weekend Wrap Up Party! With an awesome jewelry giveaway and TWO winners this week. Come stop by and join in the fun. I say it starts at 7, but I’ve been starting it at about 6 lately. So be there or be square 🙂


This is so amazing! We are having a Halloween themed wedding and I was trying to figure out decor. I really want to do this! It would be great to make a few of them for the venue! Thanks!
LOVE THIS! Can’t wait to make it for this year!!!! 2013
Love your project! I’ll try to make it sometime. I love how everything is black and sparkles!
Terry Rose
I just finished making the Halloween candelabra and it looks awesome! I had some extra clear hanging crystal teardrops from some old lamps I had stored away and hung them on there as well as with the black beads and it really set it off. It was a fun project, but spray painting all of those beads took forever, as I had a bunch of colored ones stored away I used on mine also. Thanks for the great idea!!!
This was really awesome. Love how you mixed and matched pieces and came up with something really grand.
This was really awesome. Love how you mixed and matched pieces and came up with something really grand.
Holy Cow! Coolest thing I've seen in forever!
And all the other stuff too…wow! Can't wait to snoop around her blog!
Very classy Halloween project Sandra! Everything you do rocks.
This is so awesome! There is no way I would have ever thought to make this myself. I wouldn't even know where to begin!
I love her entertainment wall!
Wow! That woman is A.MA.ZING!!!!
Love it! I need to make me one of these!
Sandra is an astonishing woman. I had to show everyone else this post. She is an inspiration to other women and I love the candelabra. Makes me want to find something to make better.
I saw these at Home Goods, your are so much better!!! I love them, I like to make lamps, I am mentally going thru what parts I might already have. Great project and I LOVE your kitchen, I am planning on redoing my kitchen in the next couple of months.
Wow, that is so cute. Sandra amazes me with her building and DIY skills!
Wow! That is just amazing! I love it! Halloween is big in our house too!
I think I better hit the thrift store soon!
Thanks for sharing!
~Liz
btw – your house is beautiful!!
Very nice!
That was quite an energetic project,,, really nice too!
Sandy
This is awesome! She has some mad skills!
Amazing feature… I am going to her blog now. Love the halloween candelbra, its fab. as well as her kitchen re-do! JEN
Exaggeration my Aunt Fannie, Sandra, you rock and you know it!
Seriously. That one is OUT OF THIS WORLD! It looks like it came right out of The Hollywood Tower of Terror. (which I adore) That is some serious "out of the box" thinking! Wow. I'm blown away.
Have such a great weekend and holiday! (and weekend wrap-up party) I'm off to make some tissue balls and pulled pork for our party! ARGH. I want a calm weekend. Not to be!!
You have got to love when a girl uses power tools!! MY kinda of gal!! Everything is just Incredible!!
Big hugs to you Jen! We need to get together soon! After this weekend I will be up to it 🙂
xoxo
That candelabra is amazing! Love it.
Taylor
Wow, those candelabras are fabulous!! And I am seriously in awe of all of her DIY projects!! Come to my house next, Sandra!
♥ Amber
Silver Lining
on my way to goodwill… cutest thing ever…. Sandra, you have got it down… I love it!!
amazing
That candelabra is AMAZING! I love it!
I love it!!! I featured you:
http://dragonflyfeathers.blogspot.com/2010/09/what-i-am-loving-this-week-1.html
I have to say the DIY is SO much prettier than the Homegoods version. That is amazing. Now I totally want to make one! Goodwill here I come!
I actually think your is much better than the one at the store! I am getting so ansy to decorate for halloween so I loved your post! I cant wait to see your halloween decorations up!
HOLY COW! Better than $69? This is better than ANYTHING!
You are killing me! I need one of these!!
Fabulous! I have gutted and reworked chandys before, but it never occurred to me to make standing candelabras. Brilliant!!
That candelabra is fantastic!!!!!! My mouth is still hanging open!
Looks like this will be our next project! Wow!!! How very creative! Love it!!!!
Oh my goodness. I LOVE this project!!! Now, if I can think of a place to store a Halloween candelabra all year…
OMGosh, that lamp post is just gorgeous and the money you saved is unbelievable. Loved all the other projects as well.
wow! that looks amazing! and way better than the $69 one. thats one talented lady!
My word Jen, I'm just embarrassed now. Thank you for sharing my "other" projects and for your kind descriptions and over exaggeration of my DIY skills. I'm actually blushing!
The only problem with sharing this tutorial is that I'll probably never be able to find a $2 lamp at Goodwill again! Ha ha.
p.s. Can you make that Zombie picture a little smaller? It's scary!
Oh my goodness… that is totally awesome! I so wouldn't have thought about using that stuff to make that!