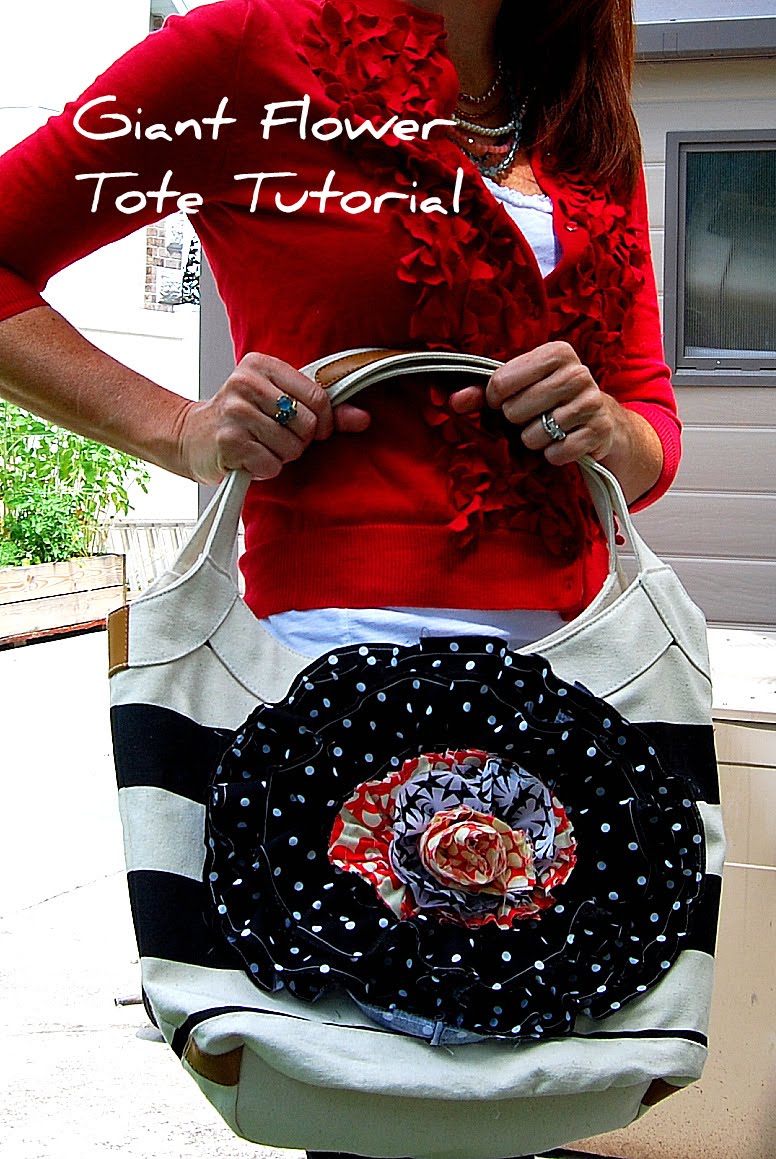
I needed a sturdy, easy-access bag for my trip. But I also wanted it to be different and cute. So I decided to make one! I took a tote I bought at Walmart a few months ago on clearance. I liked the stripes, but it needed something to jazz it up.

If you want to make one, here’s what you do:
Materials:
Tote Bag
3 Designs of Fabric
Sewing Machine
Needle and Thread
Liquid Stitch (optional – but recommended)

So I got out my fabric stash and laid out different fabrics with the bag until I had a good combination. I liked the black and white with a little dash of red. I basically used what I had. I had a lot of black material with white polka dots, so that is what I used for the bottom layers of the flower. I cut out a really long piece of fabric — 5 inches in width by 110 inches in length. Then I sewed each of the corners of the fabric 1/2 inch from the edges, so it won’t fray too much. After I sewed a big basting stitch all the way down the center.

I took the thread from the center stitch and pulled on it so that it gathered the material. This took a few minutes, since the material was so long. I pulled the thread all the way down to the edges and ruffled the material up uniformly so it made a really long ruffle.

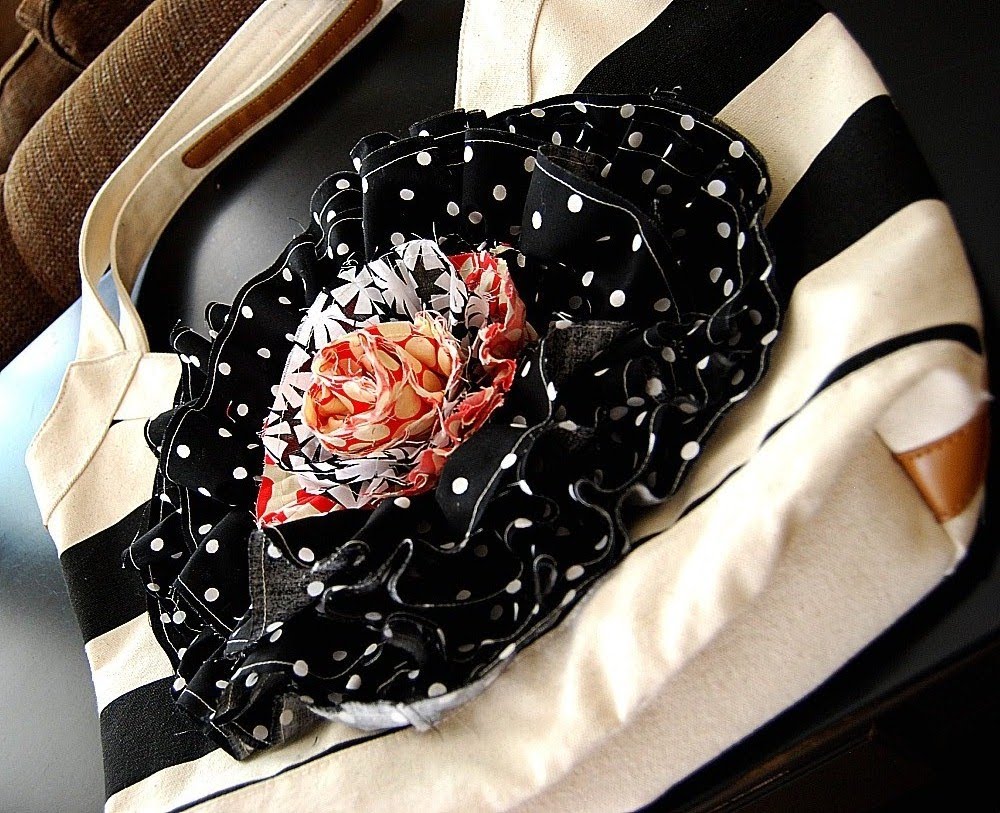
Once my ruffled material was ready, I laid the black and white polka dotted material on top of one side of my tote in a big circle. I wanted the edges of the flower to go up over the top of the bag. I had such a long piece of material, that I was able to make the flower very ruffly — which is what I wanted. I was able to layer the black and which material about 5 times around the bag, with the biggest circle on the bottom and then coming in toward the center with each turn of the material. I pinned the material in place. Then I did the same thing with the Amy Butler red material, only I made it just long enough to go around the center of the bag once — 5 inches in width by 36 inches in length — and then ruffled up to 9 inches in length.
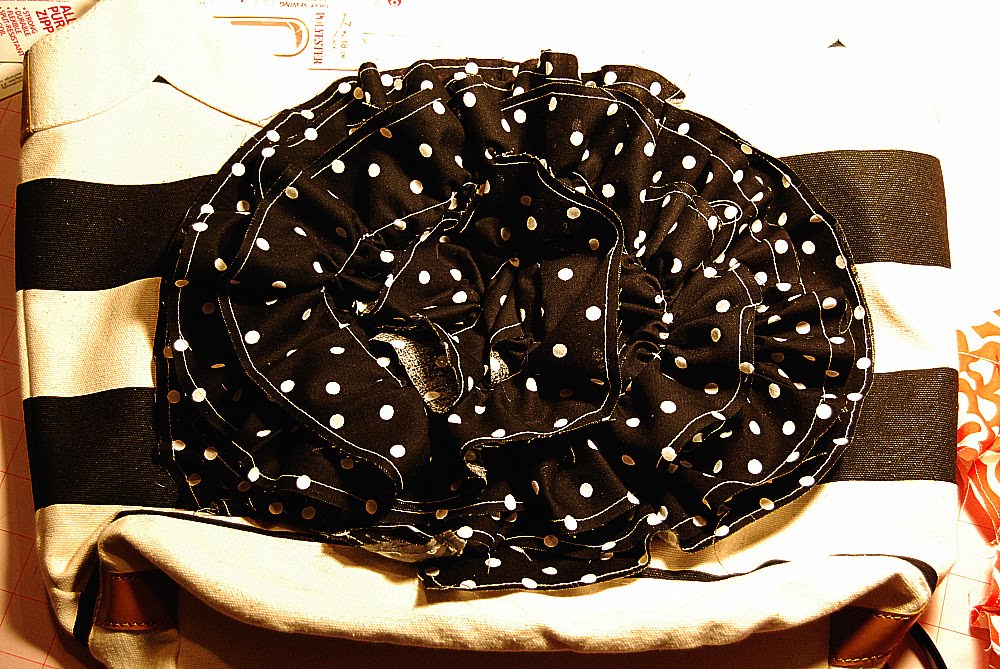
Then I used my sewing machine to secure the flower onto the bag. But if you don’t have a machine, or your bag won’t fit inside the machine, you can use liquid stitch to secure the flower to your bag. Use books to weigh down the flower and make the liquid stitch really hold the material. Leave the books on top of the material overnight for best results.

To make the flower embellishment, I took two pieces of material. A black and white floral and a red and white circle design. The red and white circle material I cut to a width of 5 inches by 35 inches in length. And the black and white floral I cut to 5 inches in width and 20 inches in length. I also sewed around the edges of these fabric pieces so the edges wouldn’t fray too much.
I took the inside material — the red and white circle design and wrapped it around itself until it looked like the inside of a flower. Then I took the black and white floral and wrapped that around the outside of the red and white circle flower I just made — wrapping it looser than I did with the red circle material. You can experiment and see what looks best for you.

Once I had it looking the way I wanted it to, I pinned the two pieces of flower together. Then I turned it upside down and sewed the bottom of the flower using a needle and thread. I made sure it was very secure. Once the flower was secure, I used my needle and thread to attach the flower to the center of the big ruffled circle on the tote. After you are done sewing the flower onto the tote, use some liquid stitch underneath the flower for a really secure hold.
And you are done — now you have a really unique bag to carry around town! I’ve loved having it as I’ve explored Boston and New York!
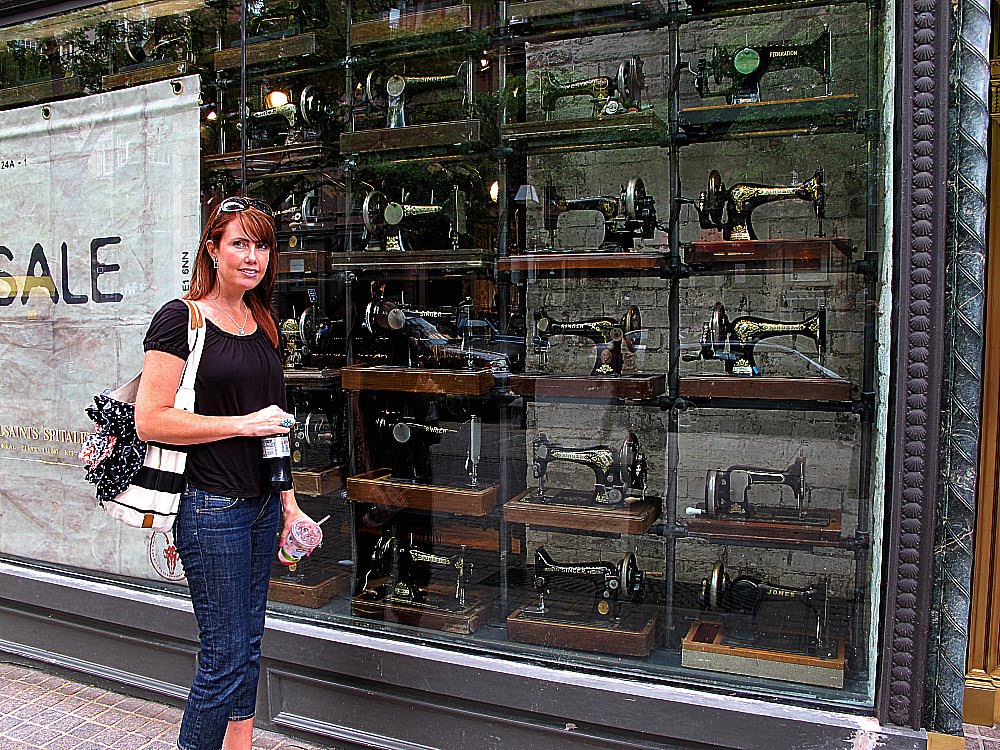

I even took it with me to meet my bloggy friend Kenlie from All The Weigh yesterday! She is so delightful and wonderful in real life too!!

Have a Super Day!I am linking up to these fun parties:


XOXO


Super Cute! I'm impressed you walked around in those cute sandals while exploring..hurts my feet just looking and thinking how much you walked. lol
Hello my lovely JEN~ your flower tote has been featured at CraftOManiac.blogspot.com luv ya!
A Froggy and a t-shirt
The hallway is amazing. I wish I had the time to create this!!
By the way, this is FROG BLOG entry #1
What a fantastic idea, thanks for the step by step how-to!
The froggy is back, right under the Alice.com link and above the BlogFrog prizes link – I KNEW I saw it there earlier! (I'm not trying for 2 entries, btw…) 🙂
So cute! I love the flowers!
FABULOUS!!! This is the neatest altered purse project, like ever! Thanks for the tutorial!
So cute! Adorable fabric. I would love to visit NY and Boston. How fun!
You made the bag?! Why would I even be surprised?! It's incredible! And meeting you yesterday was incredible too! Thank you!! 🙂 I'm going to post about it later tonight. 🙂
This bag is stunning, I bought a leather one just like this from Portobello just before we left London and it is my fav….you make it look so easy…me on the other hand…needs to buy them.
OMG!!! I mean seriously?! Now, of course I loved the bag before, but you totally rocked it out! LOVE I tell you!
Thanks for your comment on my sons room on twitter! I really appreciate it. Especially since I found your blog;-)
Have a great night!
That is such a cute bag! I bet you get compliments on it all the time when you're out and about 🙂
OMG! I totally have the same bag! Snagged it at Walmart when it was on sale! I can't wait to refashion it with your flower tutorial! Thanks a bunch! So cute!
-Nicole
http://www.craftmysoul.blogspot.com
I am sooo in love with your bag. I love that huge flower. It just makes the bag so eye catching and adorable.
I love your blog! I featured you today over at Sassy Sites! Come by and grab a button!! 🙂
-Marni
CAYUTE!!!
oh my gosh.. I LOVE IT!!!!! Such a cute purse.
You know what? That's perfect timing because of two things, a) I just fell in love with a bag just like that with a HUGE flower on the front (I think it was a sort of leather or pleather thing) and decided against paying $50 for it and b) I just put a discount on the Michael Miller fabrics in my shop and I have some cute polka dots that would be perfect! I hope you'll stop by!
Anna
So cute!!! I have a Balenciaga (knock-off, ahem, cough cough) bag that I got in NYC last winter. It's a deep grape color and has a giant flower just like yours. I bet the real ones cost a bunch more than yours…you smart girl!! Stylish for less! 🙂
Super cute! Love it Jen!
~Liz
This is fabulous!!
Love all the pictures. 🙂
Oh Jen that turned out sooo flippin cute! I'm afraid of my sewing machine to make one..but i'll dream about it I'm sure. hehhe. Stacey
I love the bag! So cute and easy to do! The picture of you and Kenz is great, too. 🙂
And never mind, I just found it – Down East Basics – I think I need it…
Oooh, that is cute and you look like you are having so much fun! Now what I REALLY want to know is: where can I get that red cardi you are wearing? LOVE IT!!
Oh Jen this is SO cute!! I love it!!
This is such a fabulous idea! I've been looking for a fun (and inexpensive) way to dress up some totes I'm using as party favors. This is the PERFECT solution!!!
Again, thank you for your amazing creativity!
Oh, this is a beautiful bag and you were stylin' in NY. I love how you just embellish it. I did a fun bag tutorial this summer too where I just opened up a canvas bag and added ruffles. Stop by and visit. I am celebrating my 100th follower (which swelled quickly) and am giving away a Cuisinart Ice Cream Maker.
Love love the bag!! Your vaca looks like it was fun for all!
That is adorable! I especially love the colors and the fabrics you chose!
so cute! i think i probably have a few bags lying around that could use a bit of a "pop"!
Oh! This is so cute! I love it! You did a wonderful job. I can't wait to try out this project. I am on a big flower trend lately. Thank you for sharing.
Brooke
thecraftcave.blogspot.com
Oh, that tote is adorable! So girly and fun – what a great idea. Love the fabric choices.
Have a great day,
Lindsay
That is absolutely adorable, just like everything you make! Glad you guys seem to be having a nice trip!
Gorgeous bag!
I love it Jen! That bag is just adorable like you. So fun to meet a blogging friend.
I love this bag, I dont have a sewing machine though:( You ever think about selling one?
I love it Jen!! Turned out just darling!! What a darling idea, thanks for sharing!! xoxo
I adore handbags, I MEAN REALLY ADORE THEM. I so whant this bag or one just like it. I LOVE IT JEN! I can't sew or don't have a sewing machine. Maybe I will email this link of yours to my MIL and ask for this for my birthday in Sept. DARLING BAG! thanks for linking up too. Hugs, Jenn
I LOVE this…this is such a great idea. Awesome!