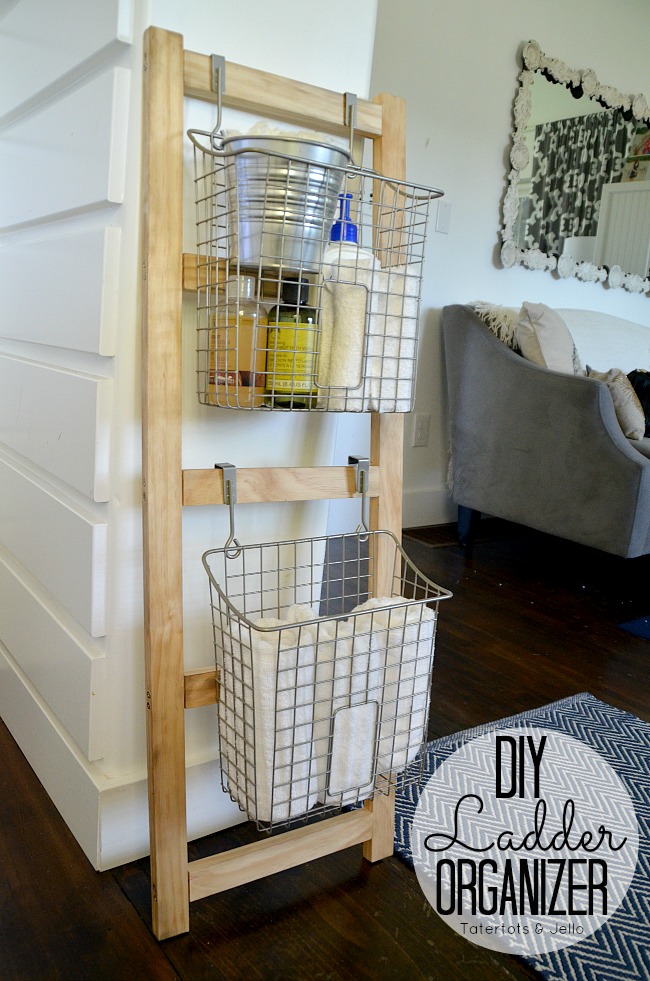
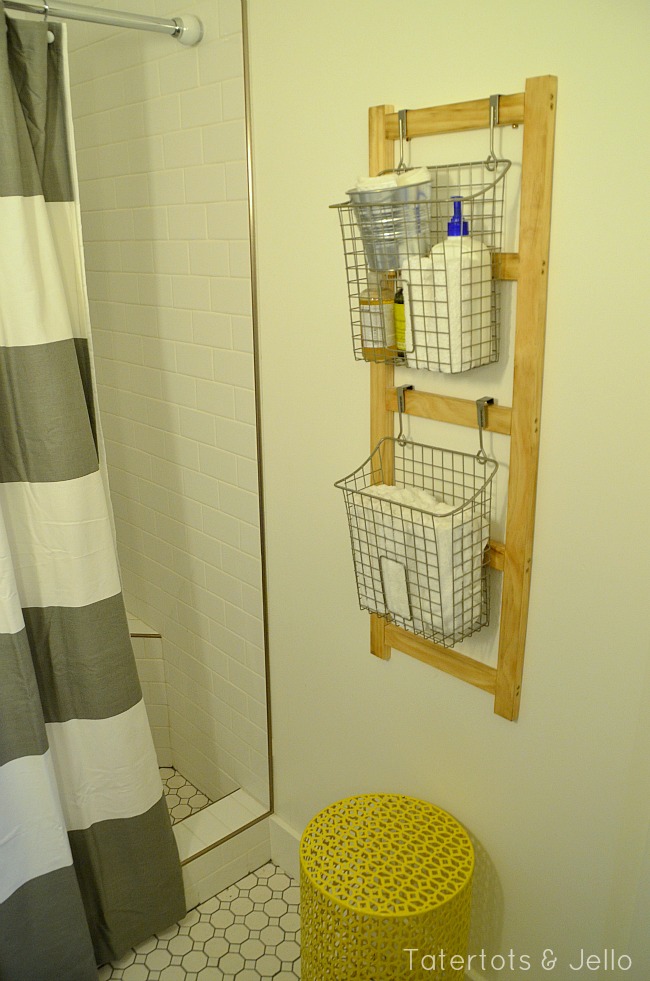
The bathroom is at the #1905Cottage is teeny tiny. And I have been thinking of a way to add some way to storage and organize items people might need in that space. So when MICROJIG contacted me to try out their GRR-RIPPER, I thought it would be fun to make a storage bin organizing project.
I don’t know about you, but for me using power tools can be a little bit intimidating. You see, I cut the tip of my finger off when I was a child in an accident and I know how easily things can happen. So I have always tried to be as safe as I can with power tools. And sometimes, no matter how safe you are trying to be, things happen. So I was so excited to try out MICROJIG tools.

While I love the GRR-RIP Block, the GRR-RIPPER 3D Pushblock is even better! I have some projects coming up with my table saw and router where I’m dying to really put the GRR-RIPPER to use!
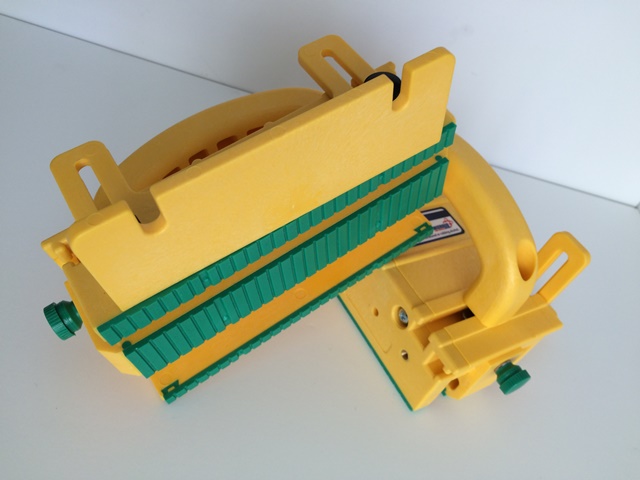
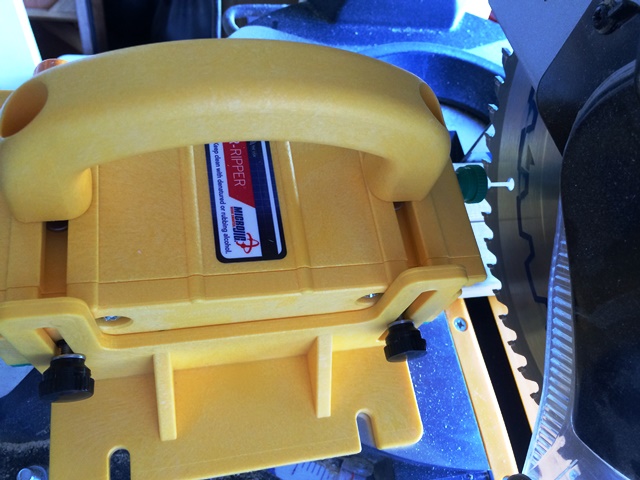
This GRR-RIPPER is the bomb. Seriously. It’s adjustable in all kinds of amazing ways, as the guide and DVD explain in the package! And my favorite: it keeps my fingers well away from the blade for the entire length of the cut, and I can rip up to 1/8″ on a table saw safely.
I have some projects coming up at the 1905 Cottage where I’m going to put these to work with my table saw and router table, as I said, and you can also use them with bandsaws and jointers. Notice that these are all tools where there’s a whirling blade involved — I love the safety. (You can find these at select Lowes Home Improvement Centers across the United States.)
Again, not only did I find that these blocks gripped the lumber securely and made it easy to push it smoothly, but the thing I love most is that these tools keep our fingers away from the blades. They are an invaluable safety addition to anyone’s workshop.
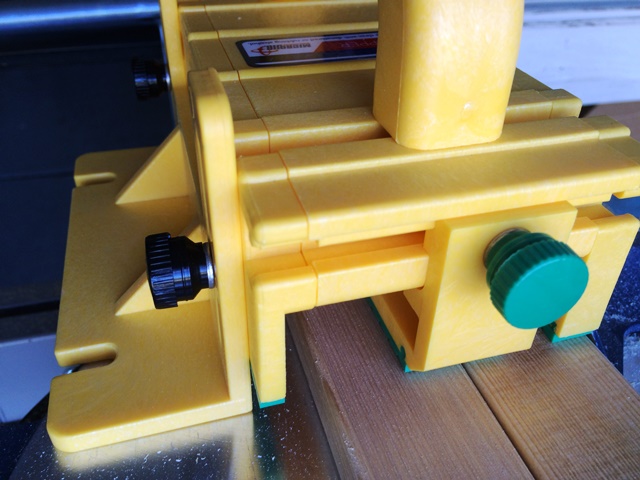
The GRR-RIPPER does what it claims it will do, that is, hold boards parallel with the saw blade (the saw fence actually) while you push them through in a rip cut.
Among other projects, I plan on making a picnic table soon. And will feel much more secure using the GRR-RIPPER with my saw and router.
The GRR-RIPPER really gave me a secure grip on the wood as I cut it. And I always think it’s smart to think of safety first. Usually I get nervous as my fingers get within even 6 inches of the saw blade, but I felt comfortable with the GRR-RIPPER!
Supplies:
- Wood – I used two four-foot lengths of 1 x 1.5-inch select pine – Note – the finished size on a 1 x 1.5 is really .75 x 1.25 inches
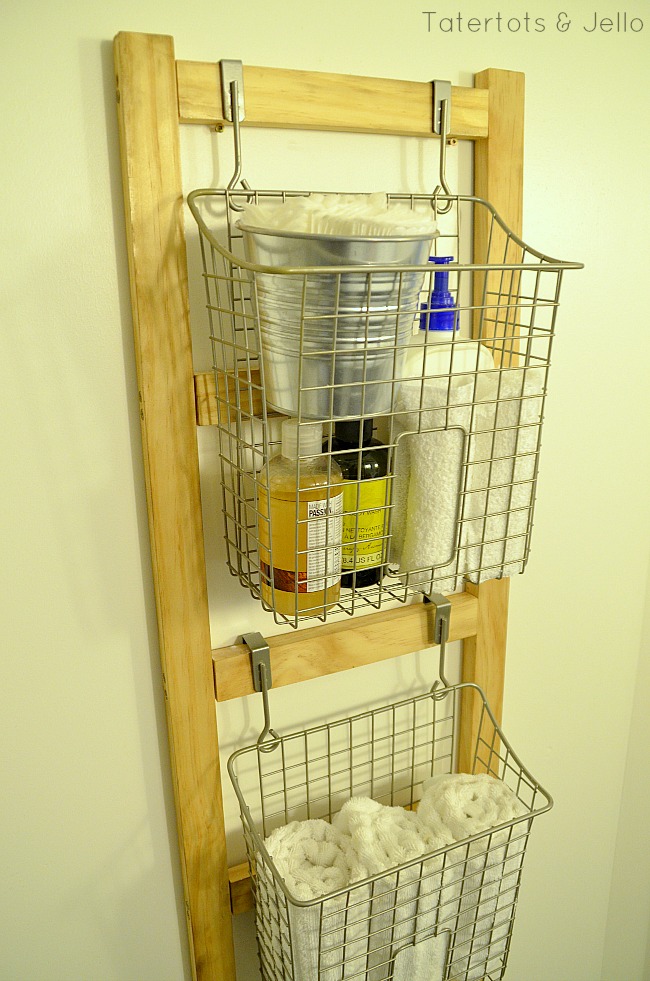
- Baskets. I found these wire baskets at Lowes in the kitchen organization section. They come in these extra long baskets, and also another size which is less deep.
- Stain
- Polyurethane
- Screws (I used 1.75″ screws; 2″ would work too)
- Tools like a miter (chop) saw and drill (you could do this project with a handsaw and hammer if you chose nails instead of screws)
This project is very straightforward.
First, after I recut an end of both pieces to give each a smooth end to start with, I just cut two 39 inch pieces and five 10.5 inch pieces for the rungs on the ladder. But you can adapt you ladder to fit your baskets.
(Check out how awesome the GRR-RIPPER was – I cut both pieces at once and held a firm, precise grip without worrying about my fingers! Even on a miter saw, I could use the adjustable side to hold the pieces stable and flat.)
Once I cut the wood pieces, I laid them out carefully on the table and made sure I had the “rungs” spaced evenly. I marked two spots on the edge of the longer pieces where I would put two screws in the end of each rung through the sides.
(If you decide to use nails, you can skip the next step).
Because I have a gift for splitting any wood I work with, I then pre-drilled holes in the sides of the “ladder” before I put the screws in. Then I held the rungs firmly against the sides and screwed from the sides into the rungs. I used two screws on each end of each rung to keep them from twisting.
Now your assembly’s done!
Just stain and then add a coat of polyurethane and you’re set!
Note: these measurements put the rungs about 9″ apart — worked great for my ladder, but if you use different baskets or prefer a different look, adjust however you like. I found that the 1 x 1.5″ pine was a perfect fit for the baskets I bought!
* * * * *
And I’m giving away one of these awesome GRR-RIPPERs to one lucky reader! Here’s how to enter!
a Rafflecopter giveaway
You can learn more about the Microjig GRR-RIPPER here, follow MICROJIG on Facebook, Instagram and Twitter!
Happy creating!
xoxo

This post was sponsored by Microjig; however, the opinions and project are mine. See my disclosures.


I pinned! http://www.pinterest.com/pin/255368241346509170/
Pinned 🙂
http://www.pinterest.com/pin/252483122834911692/
I pinned! http://www.pinterest.com/pin/255368241346503811/
https://twitter.com/tweetyscute/status/522175569174085635
Shared via Twitter!
https://twitter.com/ScoomerBlog/status/521802368682180608
https://twitter.com/tweetyscute/status/521775740753178625
Shared on Twitter ; https://twitter.com/SonyaBullinger/status/521721681174224896
I tweeted! https://twitter.com/Mommy2kidsnc/status/521697807103586304
Shared via twitter https://twitter.com/TwoDartMom/status/521683735297916928
I pinned http://www.pinterest.com/pin/255368241346489197/
I shared on Facebook.
I would love to win this! I pinned it in Pinterest, shared it on Facebook and Google+, and Tweeted it. Good luck everyone!
Tweeted to my tweeps! https://mobile.twitter.com/UniqueJunktique/status/520930319201865729
I tweeted! https://twitter.com/Mommy2kidsnc/status/520761061947887617
I posted on facebook, twitter, and pintrest. Now I have yet another idea on how to re-purpose wood pallets. Thank you for the wonderful idea to add to my craft room in the process of being remodeled.
https://twitter.com/meg_tripp/status/520704351417815040
tweeted
This tool has me totally intrigued!
I just shared on twitter: https://twitter.com/savedonemore/status/520692637129379840
forgot to mention… I love your ladder storage/organization idea! I see ladders like this often, but can’t think of anything to do with them. Now I know and will buy the next one I see!
Would like to join the giveaway but I dont’ do any of the options! I follow you via email.
Pinned to pinterest! Thanks!
I shared the giveaway on twitter: //twitter.com/techy_homecky/status/520663896512679936
Shared on Twitter!
https://twitter.com/SonyaBullinger/status/520638184435105793
It’s been shared! https://www.pinterest.com/pin/271271577530569014/
Shared on twitter
Where is the cute grey sofa from?
Shared on twitter: https://twitter.com/AmyBReed/status/520605597817794560
Thanks for the tutorial. Going to have to make one of these!! Shared on Facebook and Pinterest.
Shared on Google+, FB, Tweeted, and Pinterest! I NEED THIS!!!!!!!!!!!
This is so cute!! I love it! What a great idea.
I shared on facebook
https://www.facebook.com/my4boysand1/posts/10152922020792176
This would make projects so easy!
I also shared on twitter
Shared on twitter
I shared on Twitter.
Here is my link from twitter that I shared :
Check out @RanaDurham’s Tweet: https://twitter.com/RanaDurham/status/520573379863408640?s=09
Love this! Here’s my tweet –
https://twitter.com/AlinaConn/status/520569999639867392
Shared on twitter :
https://twitter.com/connsean71/status/520569800704012288
I shared on twitter: https://twitter.com/kellybb31/status/520504766426656768
shared on twitter! 🙂 thanks for the giveaway! 🙂
https://twitter.com/gretcho31/status/520468583109767168
I love this!
Shared on Twitter!