Tatertots and Jello

COLORFUL HAPPY HOME -- Daily DIY, Decor, Craft and Recipe Tutorial

  • My Home
    • 1905 Cottage
    • Daybreak House
  • DIY
    • DIY Projects and Ideas
    • Organizing
    • Tutorials
    • Printables
  • Decor
    • Spring Projects
    • Summer Projects
    • Fall Projects
  • Crafts
    • Kids Crafts
    • Painting Projects
    • Paper Projects
    • Sewing
    • Wreaths
  • Holidays
    • Valentines Day
    • Easter
    • Halloween
    • Thanksgiving
    • Christmas
    • HAPPY Holidays Series!
  • Recipes

Explore

  • my home
  • diy
  • decor
  • crafts
  • holiday
  • printables
  • recipes

Connect

Home » diy » DIY Corkboard String Art

diy, guest tutorials, kids crafts · March 10, 2015

DIY Corkboard String Art

Tatertots & Jello is a participant in the Amazon Services LLC Associates Program, an affiliate advertising program designed to provide a means for sites to earn advertising fees by advertising and linking to amazon.com.

Hey everyone, it’s Holly from My Sister’s Suitcase and I’m excited to share an easy decor idea with you today! I have been wanting to try my hand at string art, and when I found these darling wooden push pins in the Target dollar spot I thought it would be fun to create one with corkboard. No nails and hammer needed for this project…
corkboard string art

To make this DIY corkboard string art, you’ll just need a few supplies:

string art corkboard supplies

  • Sheet of cork (12″x 22″)
  • Crochet thread
  • push pins
  • picture frame

string art materials
Start by cutting the cork down to fit in your frame and remove the glass. Next, print a template for the monogram or design you want for your string art. Cut out the template and tape it down in the center of your frame. Outline the template with push pins and then create a border of pins around the edge of the frame. To make sure the pins were secure enough to hold the weight of the string wrapping, I pushed them through the backing board that came with my frame. This part takes a little while and some of the pins go in easier than others, but it is definitely doable!
adding push pins
Once all the pushpins are in place, you can start wrapping the string in a consistent pattern. I didn’t really have a plan for this, I just went for it!
creating string pattern
Continue to layer the string until you get the coverage you want. The push pins may start to pull a little if there are too many layers of string on one pin, so make sure you are spreading the pattern out evenly. Here’s my finished pattern:

finished pattern
I really love how it turned out! And it looks so cute in my daughter’s room:

monogram string art
string art final

I hope you like this spin on string art, let me know if you try it too!
Signature-Holly

*************

Thanks Holly! That is just darling, and looks like such an easy project, too. My Sister’s Suitcase has tons of great ideas. Here are a few right now I  think you’ll love:

pom-pom-necklace-and-headband

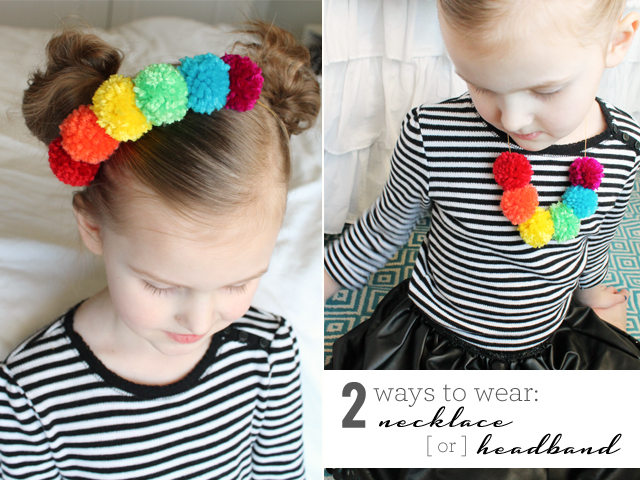
I love this super cute Rainbow Pom Pom Necklace! Such a cute idea for St. Patrick’s Day or just because.

gold-glitter-marquee-letters2

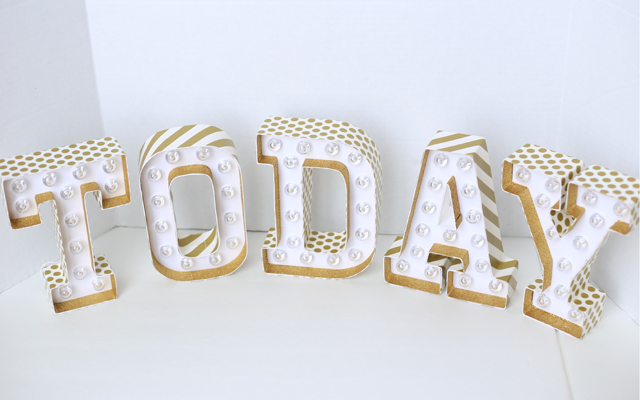
And, I just loved how they transformed these Gold Glitter Marquee Letters. I love the gold!

breakfast

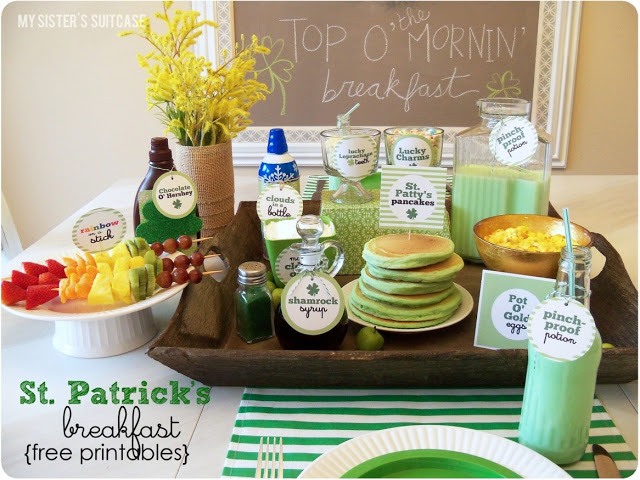
And, they also have so great St. Patrick’s Day Free Printables you can grab to have a yummy breakfast for your kids!

Follow My Sister’s Suitcase on Pinterest
instagram.32x32.icon.square
Follow Nat from My Sister’s Suitcase on Instagram
instagram.32x32.icon.square
Follow Holly from My Sister’s Suitcase on Instagram
facebook.32x32.icon.circle
Follow My Sister’s Suitcase on Facebook
twitter.32x32.icon.circle
Follow My Sister’s Suitcase on Twitter
xoxo
jen signature

Posted By: Jen · In: diy, guest tutorials, kids crafts

Great Ideas — 22 Tasty Spring Recipes!
Win a DSLR Camera or Cedar Swing Set!

You’ll Also Love

Pretty Summer and Father’s Day Ideas
15 Outdoor Summer DIYs!
Farmhouse DIy projects to make18 DIY Spring Home Ideas!

Comments

  1. Stephanie R says

    March 15, 2015 at 3:16 PM

    I love this! I have been wanting to try string art for a while now but the nail and board version is a little too much for me, so I have got to give this a try!

  2. Motte says

    March 15, 2015 at 8:45 AM

    This is fun! I love that you did the outline and surroundings of the letter, rather than filling in the letter itself, great idea! Thanks your sharing!
    x Motte
    http://mottesblog.blogspot.com/

  3. Hannah says

    March 13, 2015 at 3:04 PM

    Thos looks awesome!! I’ve seen lots of these where the string is used to create the shape of the letter but I love your use of negative space – really effective and eyecatching
    http://crafternooncabaretclub.com

  4. Renee says

    March 11, 2015 at 10:54 AM

    I love this idea! I’m wondering why I never thought of using a cork board! And this is why I listed your site as one of my favorite things a couple weeks ago!

  5. Brie @ like-the-cheese.com says

    March 10, 2015 at 5:34 PM

    How stink’n cute! I love this! Great gift idea!

  6. Kathleen Webster says

    March 10, 2015 at 1:54 PM

    Nice DIY string art. Thanks for the great tips.
    I shared this article on DIY best posts.

  7. Hayley Appleford says

    March 10, 2015 at 5:38 AM

    Wow this is super creative, I love it !

    Definitely coming back for more ideas 🙂

    With love,
    Hayley x

    http://thelifestylemenu.co.uk/

Hi! I'm Jen Hadfield. I'm a mom of 5 restoring an 1891 home in the heart of Salt Lake City. I love being creative and sharing simple ideas to make your life easier and more beautiful!

Receive the Latest Crafts, DIY, Recipes and More in your INBOX!

Follow us on Pinterest! It's awesome!

Top Posts & Pages

Copycat Panera Spinach and Artichoke Egg Soufflés - SO good!
Spruce up Your Outdoor Space with a DIY Recirculating Fountain! (tutorial)
DIY Black Painted Window Frames
How to Change a Recessed Can Light into a Pendant Light with No Remodeling!
How to Make a Simple Garden Planter Box
DIY Secret: How to Print on Post-It Notes (and Free Printable Template)


Popular Posts

  • Copycat Panera Spinach and Artichoke Egg Soufflés - SO good!
    Copycat Panera Spinach and Artichoke Egg Soufflés - SO good!
  • Spruce up Your Outdoor Space with a DIY Recirculating Fountain! (tutorial)
    Spruce up Your Outdoor Space with a DIY Recirculating Fountain! (tutorial)
  • DIY Black Painted Window Frames
    DIY Black Painted Window Frames
  • How to Change a Recessed Can Light into a Pendant Light with No Remodeling!
    How to Change a Recessed Can Light into a Pendant Light with No Remodeling!
  • How to Make a Simple Garden Planter Box
    How to Make a Simple Garden Planter Box
  • DIY Secret: How to Print on Post-It Notes (and Free Printable Template)
    DIY Secret: How to Print on Post-It Notes (and Free Printable Template)
  • Spring Mushroom and Moss Wreath
    Spring Mushroom and Moss Wreath

As seen in


Amazon Affiliate

Tatertots & Jello is a participant in the Amazon Services LLC Associates Program, an affiliate advertising program designed to provide a means for sites to earn advertising fees by advertising and linking to amazon.com.
  • About Me
  • Advertising
  • Get Featured

Copyright © 2023 Tatertots and Jello · Privacy
This site is a place for positive discussion and ideas. Negative talk, comments that disparage others, and similar are not welcome and may be removed.