Do you have an area or spot in your home that you like to change out seasonally?
I don’t an entry way buffet or table to display seasonal items, so I created a little place in my kitchen that I love to change out during the year.

At Halloween I created these Halloween Specimen Art frames…

During the winter I made some Felt Snowflake frames…
And now that Spring is upon us, I thought it would be fun to create something new for that space. The other day I was tooling around Tai Pan {a really cool home decorating store in Utah/California} and I came upon this $10 frame.

{Check out what she my friend My friend Ellie G. from Less Cake {More Frosting} did with the same exact frame —
It’s long and skinny and I thought it was the perfect shape for my kitchen wall.
And then the another night was at Ikea and I found these super cute, inexpensive frames that I fell in love with.

I combined the two and something exciting happened!!

The first thing I did was I painted the silver frame white with some glossy craft paint. Now don’t laugh at me, but I didn’t even know that glossy craft paint existed until about a month ago. Can you believe that? I love it!

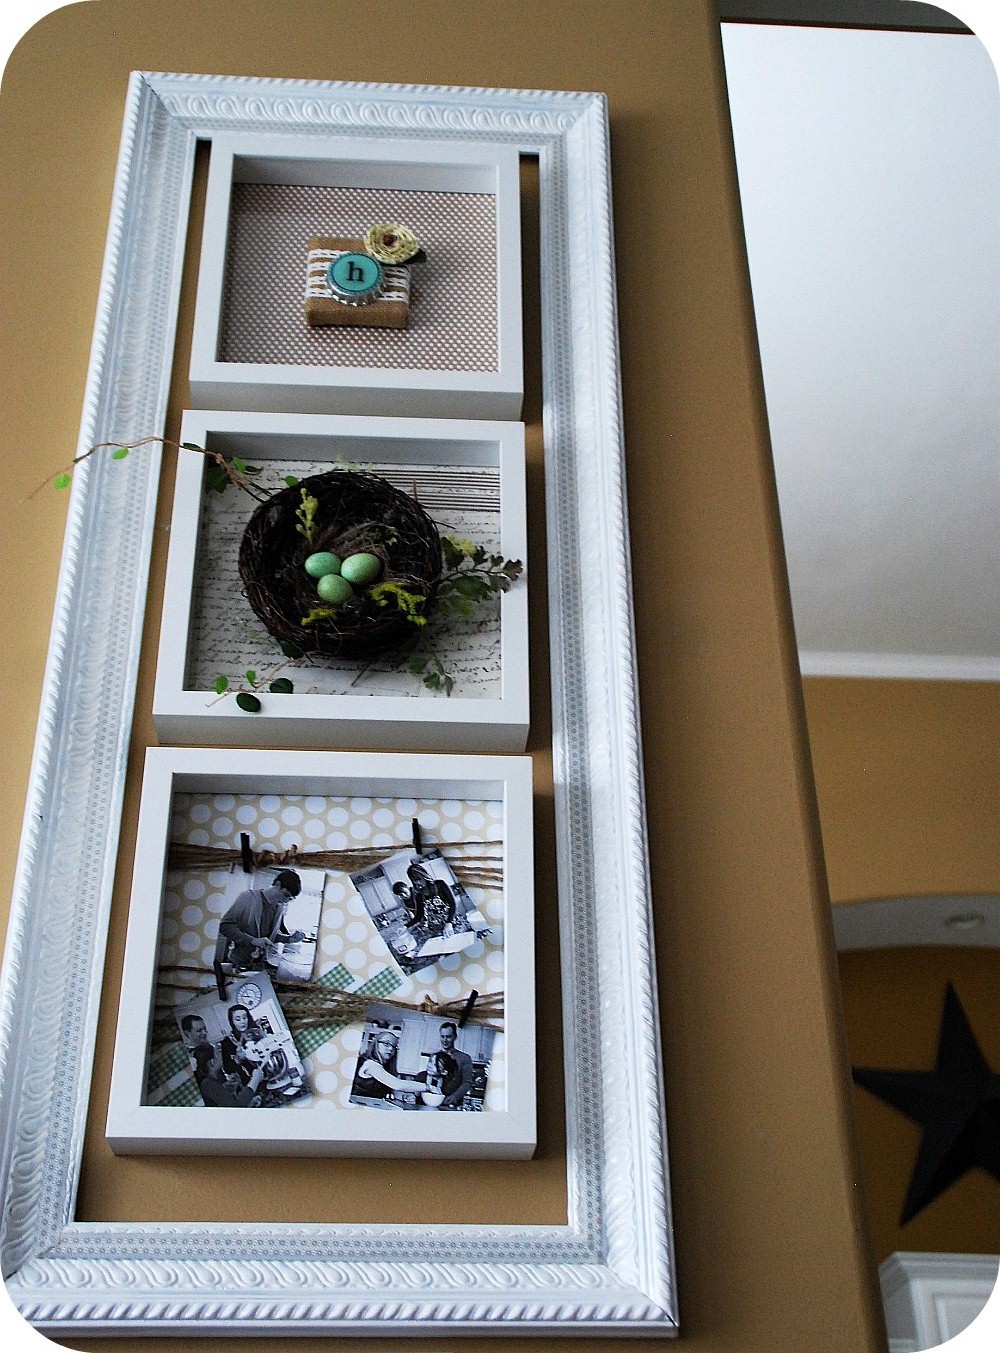
Once I painted my frame, I went to work on the gallery frames. I found three coordinating scrapbook papers and cut them out to fit inside of the frames. Then I decided to do three different things in the three frames.

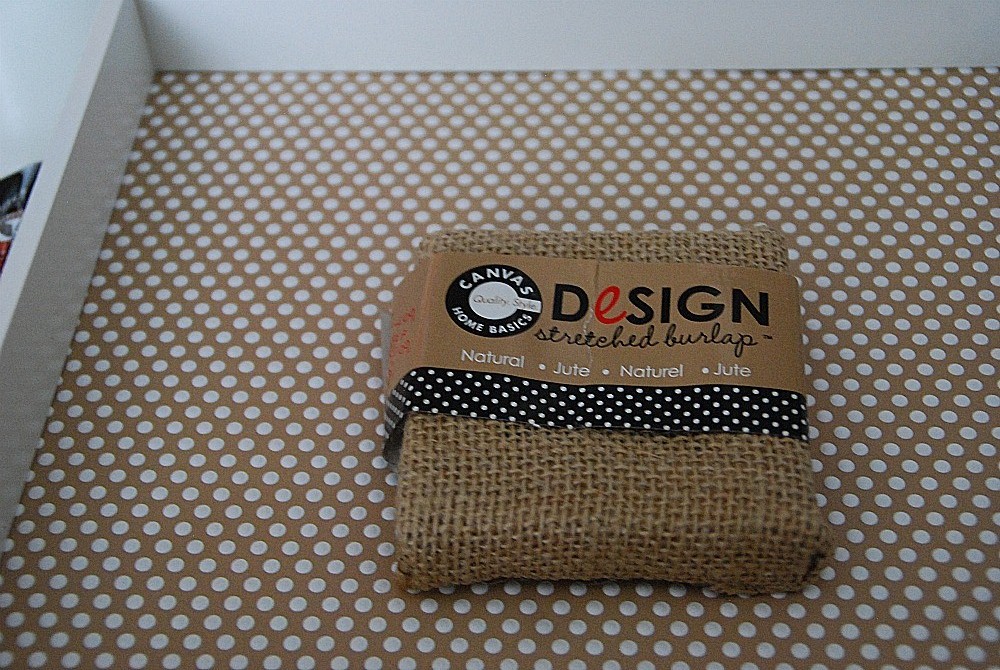
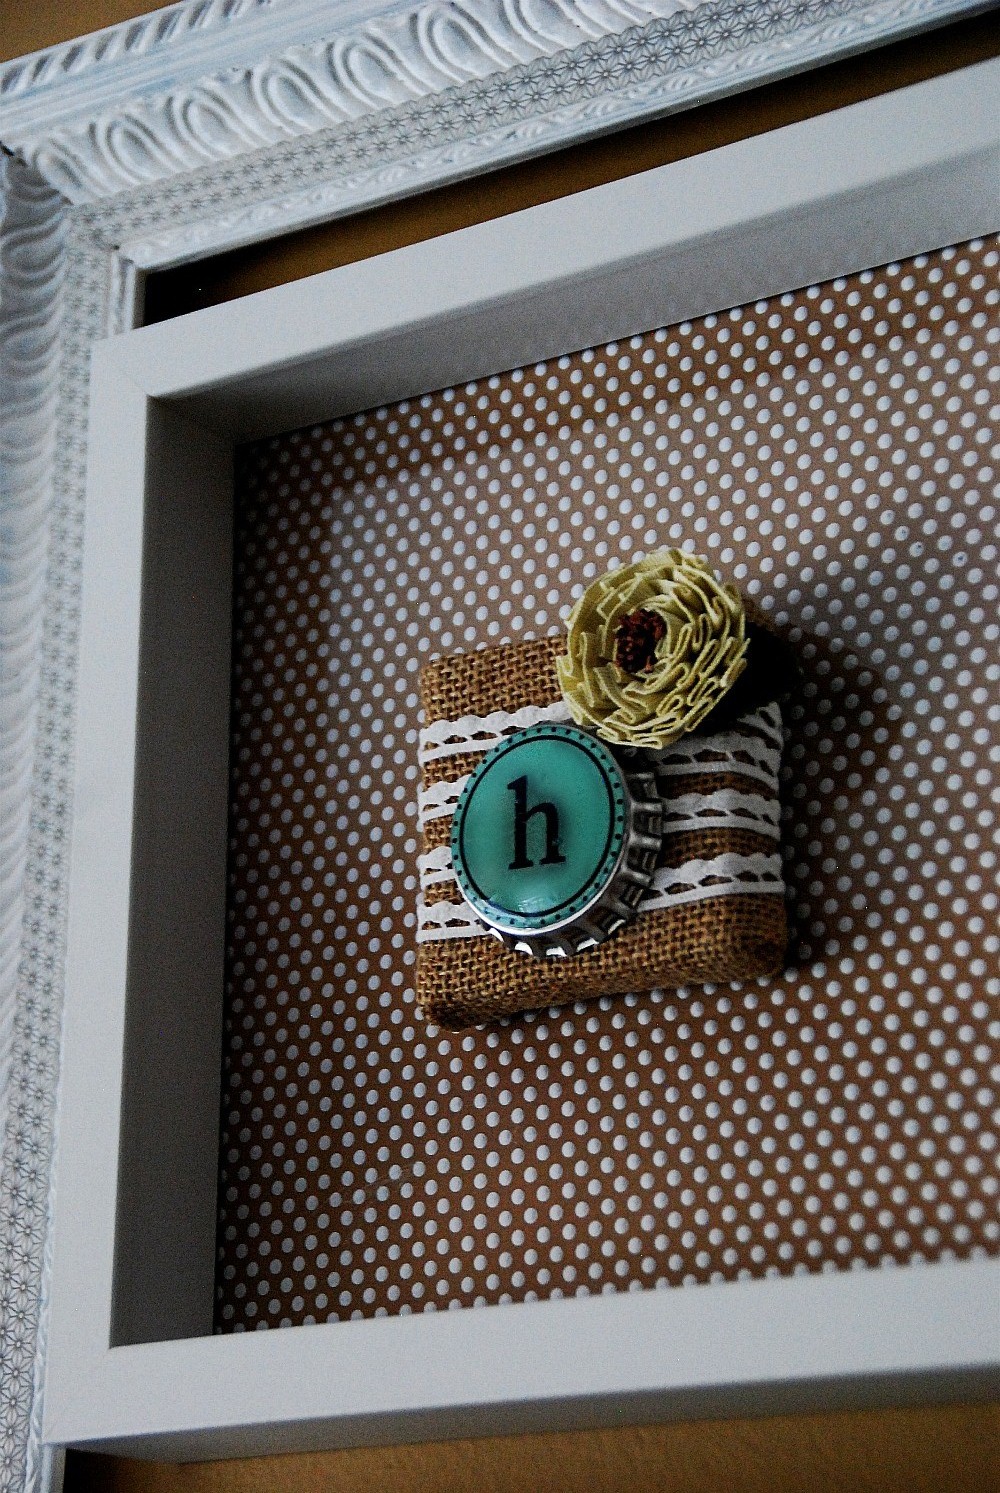
The first frame I used a Canvas Corp. tiny burlap-wrapped canvas. I met PSA essentials at CHA this year and they were sweet enough to send me the awesomest customized stamp pad. I love it! More information to come on that {as well as a giveaway} but suffice to say that I love it.

I used their alphabet letters and made a “h” to represent our last name.

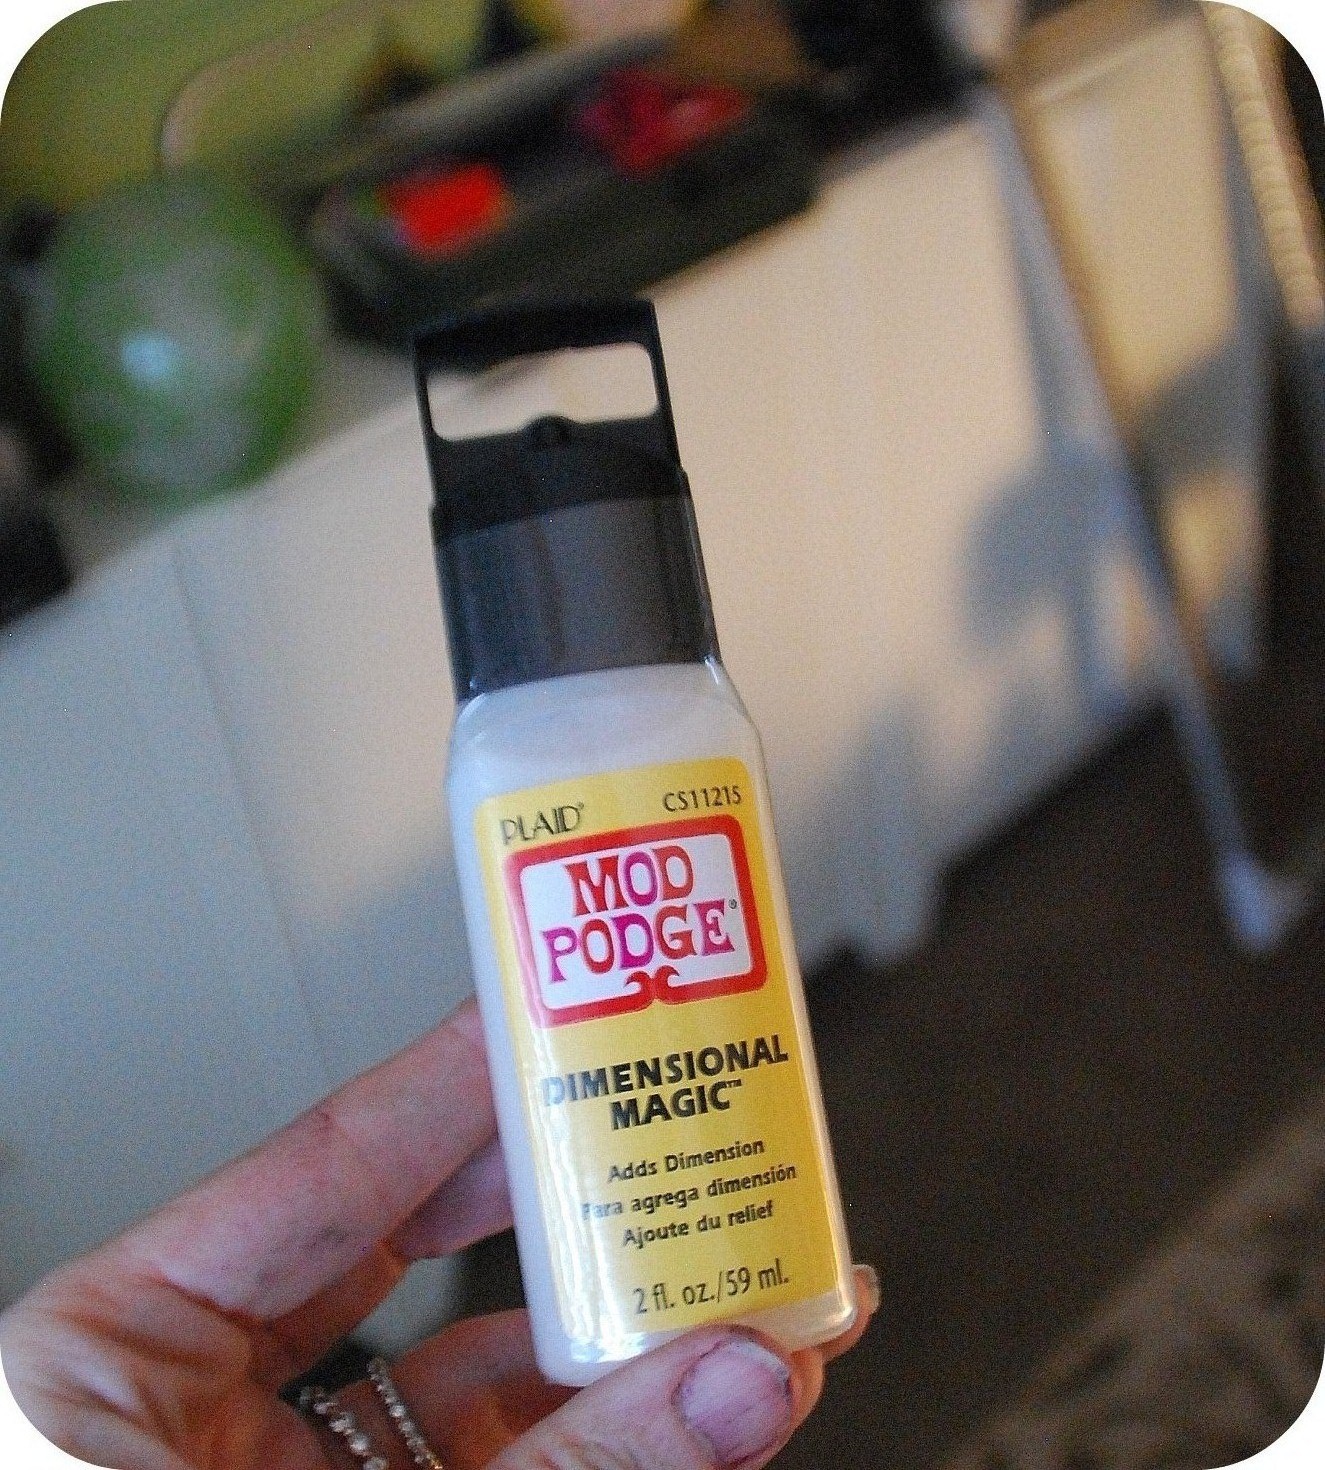
I used a circle stencil to cut around the stamp and then I sealed it with Mod Podge and used Plaid’s Dimensional Magic to create a 3-D look. After that dried, I hot glued a giant bottle cap from Bottle Cap Inc. to the canvas with the “H” on top to the first gallery frame.
I wrapped the burlap frame with some pretty Maya Road ribbon that they sent me. I love the lace look of it. And I also attached a pretty ribbon flower, also from Maya Road, at the top of the frame.
The second gallery frame I added scrapbook paper to and then some Washi tape.


Do you know about Washi tape?? It is the coolest stuff!!! I am working on some projects for a Studio 5 segment and I am loving it!! So cool! You can buy Washi tape on etsy — like here.

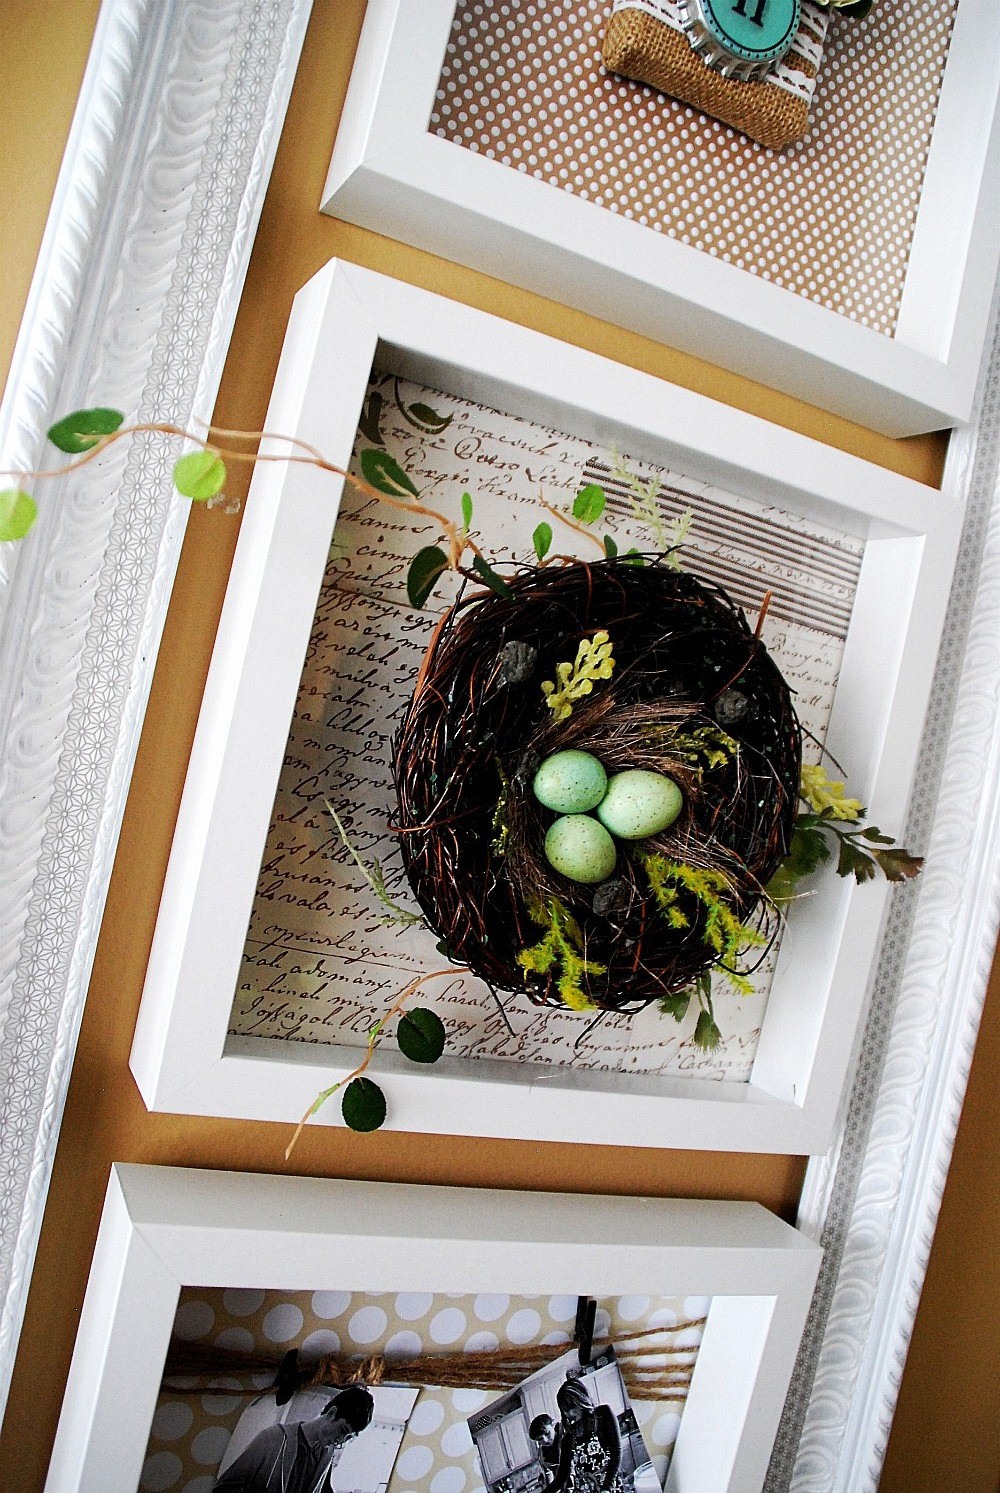
I added the Washi tape to this second frame. And then a birds nest to the center.

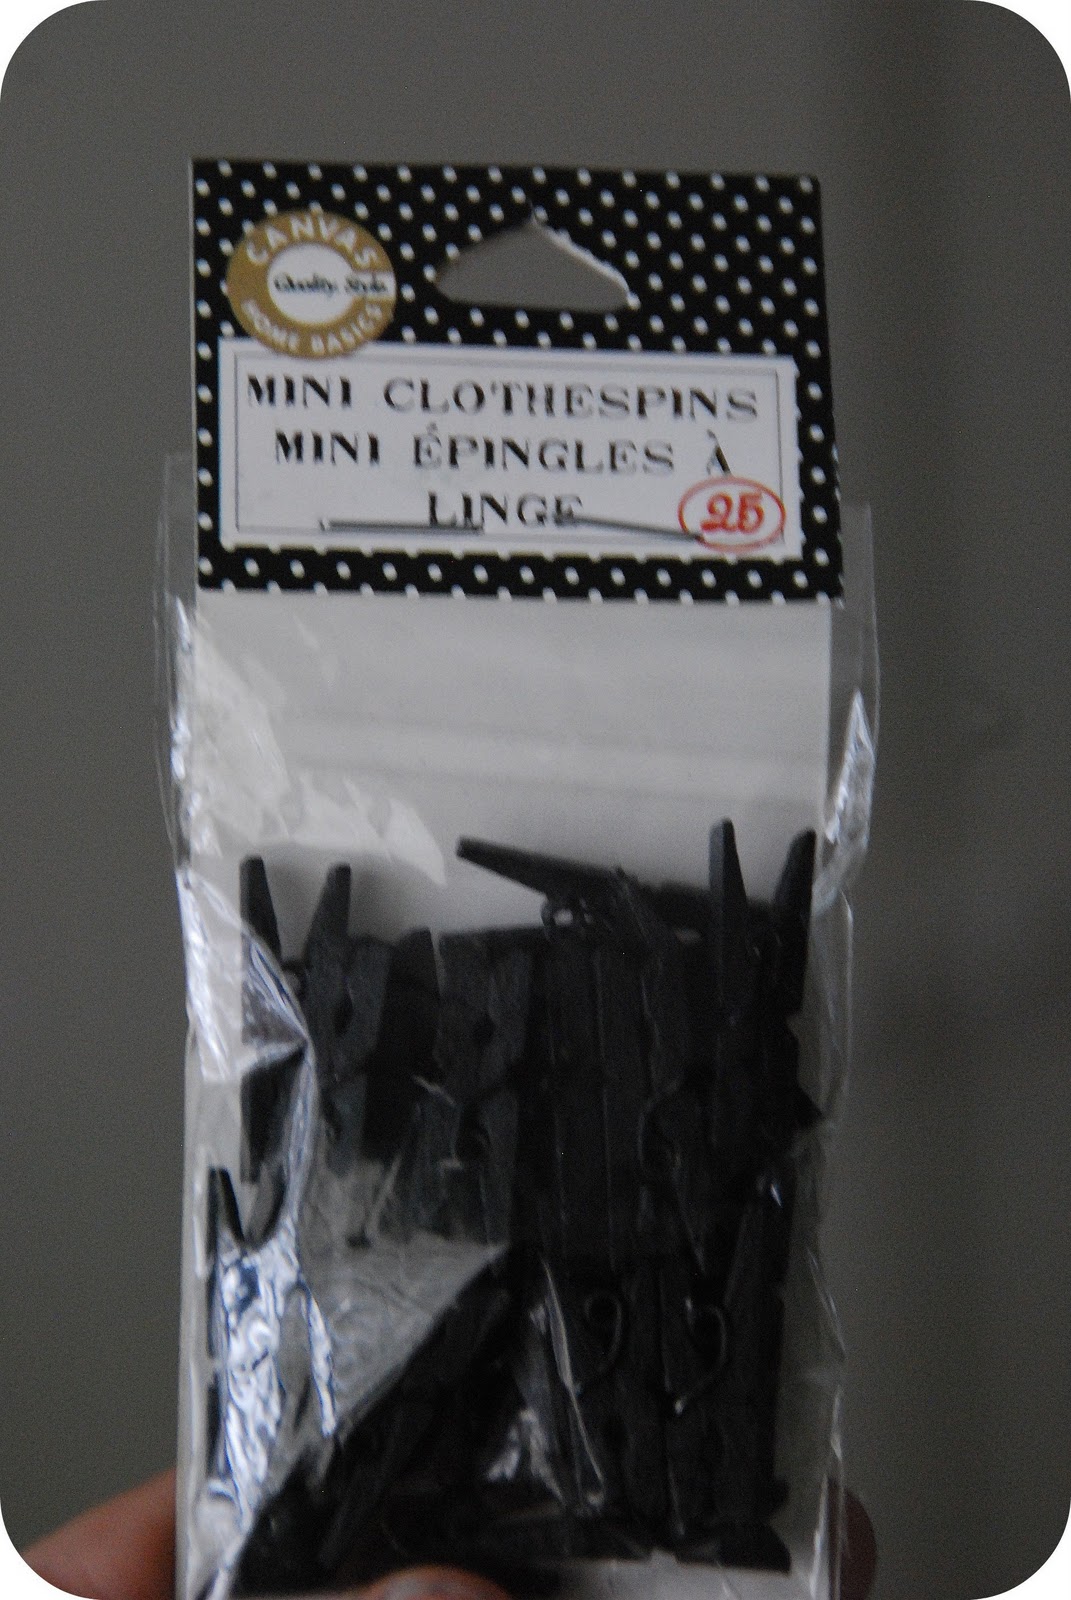
The third gallery frame I added the third scrapbook paper to and also some Washi Tape.And the I put the glass on top of it and then I wrapped some twine around the glass and tied the twine . I did this two times at the top and bottom. Then I put the glass and paper inside of the gallery frame. I used some tiny little black clothespins from the Canvas Corp and attached some B&W family pictures to those. So that third frame is a little photo gallery that can be switched out. I really love it!

And that is my little Spring/Summer Kitchen Wall.
I love that it’s interactive and can be altered over the season/years with different pictures and momentos.

And the white and fresh vibe makes me so excited for Spring!


xoxo

This post sponsored by


Love this look
Lovely idea. How did you attach the birds next to the middle frame?
Nice ideas . I like that…
Bathroom Wall Cabinets
This is Gorgeous! I could really use something like this at the front door of my poorly, undecorated home!
I LOVE how you trade out the frames! I have a spot in my house that could benefit from a fun wall art! Love your blog – I've been a longtime follower!
First time visitor here. Wow how incredible. I think I'll attempt something similar at my house. Thank you for the inspiration.
Hi there,
This is my first time at your blog and I LOVE it. I have already added you to my reader 🙂
I love the idea of having something that you can change out seasonally. I going to have to think awhile about how I can incorporate this idea.
But I am REALLY writing to say – I ADORE YOUR BANQUETTE AND WANT ONE! Are your benches custom? Where did you buy them, otherwise?
Thanks!
Vanessa
I love this idea! I wanted to let you know that I featured this on my "What I Bookmarked This Week" post on Saturday – stop by and check it out.
Danielle
http://mostlyfoodandcrafts.blogspot.com/2011/04/what-i-bookmarked-this-week.html
Takes my breath away! Incredible! Very in depth tutorial! 🙂 Happiness!!
Hi Jen,
Just popping over from The Inspired Room. It is great to see your gallery wall. Mine is #10.
Fondly,
Glenda
Gg – Notes on the Journey
ps. This really reminded me of the shadow boxes we did in the early seventies when I was in college. Your home is so lovely.
Love this project! So super cute!
You are so amazing! I wish I could feature you everyday!
Just wanted to let you know I featured this post today, Jen. 🙂 Great job!!
It looks gorgeous. I love everything about it. I had never heard of Washi tape. I need to go check that out.
Ruth
I can't really get over how much I love this! Why can't Tai Pan branch out to more states?? But I love your tutorial and it is officially filed in my brain for future inspiration! (I do that, I just used your guest post from last year about bookpage eggs to make some for me) Thanks for sharing!
Dot
Love it, well done!! Happy Friday Hugs! P.S. have you made it over to my new location?
Okay, that's it. This week, you totally win the internet. This is the coolest project and such an amazing tutorial!
LOVE LOVE LOVE it jen! The frames turned out so lovely! perfect fit in your kitchen 🙂
Stunning and such a creative use of space. Love it!
I LOVE it Jen!! 🙂 I have a long frame that I picked up at the thirft store and it didn't work for what I thought it would. I am SO copying this idea!! lol 🙂
Denissa
xoxo
I LOVE the burlap covered one!!
I love this, just love it!! I have an empty wall, plenty of them, hehe!! I can't wait to get started on this project. Thanks for sharing!
New follower, love your blog and look forward to following you
Andrea
I love this post and you have given me a great idea for the future. Once I get rolling I will send you photos. Thank for always being so inspirational.
So amazing. Love, love it!
darling Jen! PSA sent me some stuff to create with too! I'm excited!
I just discovered you blog (the laundry room posting from 2010 was incredible. You made a tough narrow area into laundry heaven.
– Joy
Love this!
I might have to borrow this idea some day!
Hey, I framed a nest this year!
That sounds weird, huh?
This is so awesome! I love it! You have to be the most creative person in the world!
I'm in love with this idea! Can I come and live at your house so I can enjoy all your great ideas…lol
Jeanna @ dramaqueenseams.blogspot.com
LOVE the spring frame project! That looks like something I would love to do and have in my house! Awesome! Hope you have a wonderful day!
I am loving the nest especially!!! Well done! Love it 🙂
<3
Risa
Awww, I love how organic and beautiful this spring decor is! It turned out so beautiful! And now I need the scoop on where you found all the free burlap bags, lol! i love me some burlap 🙂
THANK YOU so much for spreading the word about the Groop Deal! you are too good to me!
Your Spring art is so beautiful! My Easter specimen art was inspired by your halloween bats. Stop by and check it out if you get a chance. Thanks for being so inspiring! http://www.fairlyfabulousblog.com/2011/03/old-rugged-cross.html
Oh man! Yours turned out WAY cooler than mine. 🙂
I love how different they are. You wouldn't even know that they were the same frame. I think mine might be taking a turn for the "hot pink" this summer. We'll see.
It can turn into the tale of the two frames.
You are perfection. The black paper clips are perfection. And I am using Dimentional Magic today….and thinking of you.
LOVE this! May I feature this on my blog, giving you full credit of course? I know my readers would love this as well! :0)
framefanaticblog [at] yahoo [dot] com
This is so CUTE! I love the double frame look.
Jen, this is adorable!! I always love your little seasonal wall display and this one is perfect as well. Thanks for the great inspiration! 🙂
Erin
LTC
Love it! You have me inspired to find do some wall art to change out seasonally.
What adorable spring ideas. SO excited about the stash necklace. LOVE LOVE it 🙂
I love that!
Love the birds nest idea! I may steal this for my daughter's nursery!!! Thanks for sharing.
Jen, This is GREAT! I love your ideas! I have a very tall and narrow wall in my kitchen, I may have to do this. I love seeing what you come up with, it's so inspiring. Thanks so much!
Heather
You are so talented and a wonderful inspiration to us. Thanks for sharing your ideas!
Love the frames inside the frame-I would have never thought of that! The 3 inside frmaes are great-especially the last one where you can change the pictures!
I always love to see what you arre gonna do with this space and love how you always change it out. This is Beautiful!!!
SQUEEEEEEEEEEEK!!! 😀
I'm SO excited to see this!
i am in love… this is the exact {similar} project that is taking over my shopaholic brain!
{LOVE IT!}
I can't wait til my crafting space is done!!!
Ditto Alison…the dimensional aspect is so cool. All the layers together make for one pretty fab project, Jen. 🙂 I love the rustic feel of the bird's nest paired with the pretty paper.
The twine frame with the photos is awesome! I wanted to do something similar for my Elmer's Craft & Tell party, but the girl who was helping me with start-up ideas voted me down. 😉 Now I'll just have to show her your link so she can see how cool it is. 😉
Great job!
I love this and I am going to have to try some dimensional magic and washi tape.
You have some really cute ideas. Thanks for inspiring!
I thought that frame & store name looked familiar. 😉 I love what you've done with this, I think the third frame is my favorite too. I don't change out my decor seasonally but doing so within these small frames would be a fun way to do that.
I really love this idea!! I am going to "lift" it! THanks for the inspiration. Love the CC and Maya Road!!
Use to live in Utah and would shop at that Tai Pan all of the time! Such a great store…fabulous project!! I love that you switch that area out during the seasons!!!!
Paula
Love this idea..and loved what your friend did with hers. I have a blank area and I think that something like this is what it needs!
Thanks for posting
Deanna 😀
Oh, this is wonderful!!! That nest is just gorgeous…such a great way to add seasonal decor!!!
Love the idea of decorating with a nest! I think I am going to make a centrepiece one – what did you use to make the green eggs?
Blue Skies,
Charlotte xo
blueskiesblog.blogspot.com
Love, love, love this project. I'm a minimal seasonal decorator and this is a great solution to incorporate holidays and season changes to a quirky space! Thanks, Jen. 🙂
I love the frames! I especially love the one at the bottom that you hung pictures on with clothespins! Beautiful! Love your blog!
Susan @ homeroad
That looks so good with your wall color, Jen! The white frames and the scrapbook papers you used. I didn't know they made a glossy craft paint either. I'm so used to it being flat.
¡What a beautiful idea!
Jen I absolutely love this! Love the 3dimensional aspect of it and how fun to change it for each season! So cool!