
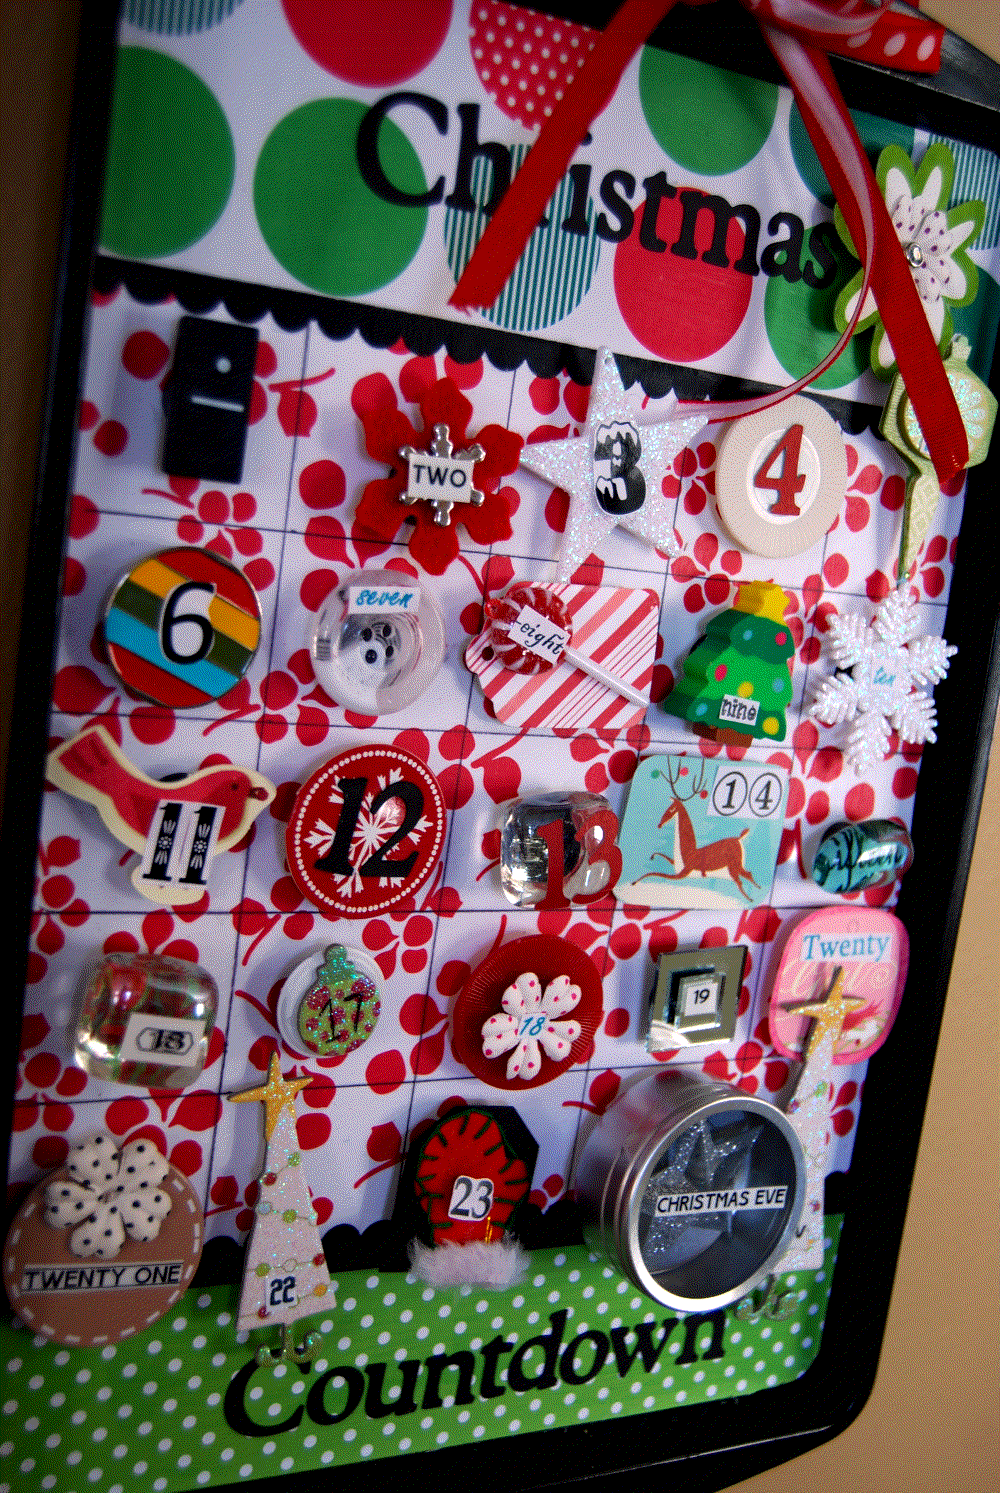
My kids love playing with this calendar. My 4 year old loves to put the new magnet on each day. This is a fun project to make because you can use your imagination to make up the magnets. Some things I used were:
- little mirrors
- dominos
- small ornaments like sleds, stars and drums that are meant to go on miniature trees
- die cuts
- poker chips
- glass disks
- vintage buttons
- flower scrapbook embellishments
- game pieces
- printed scrapbook paper
- pieces of metal
- pictures


If you want to make this fun project, here’s what I did:
- Get a cookie sheet. {You can get a new one or go to Goodwill and pick up an old one. Also, the Dollar Store has cookie sheets – they are a small size, but work great for this project. If you get a new one that has non-stick surface, you will need to sand it down so your paint will stick.}
- Drill two holes at the top of the cookie sheet for your ribbon to go through. I used regular drill. It is hard, but if you apply pressure it will work. Make sure to drill on a surface that can get dinged up. I did it on my garage workbench. You might have some sharp edges and you can file those down with a metal file.
- Spray paint your cookie sheet. I did mine white, but black, red or green would be cute. Or maybe silver or gold?
- Pick out 2 pieces of scrapbook paper that coordinate. One will be for the top of the calendar and the other will be at the bottom. You also need a plain piece of paper that will have the actual calendar grid on it.
- Once your cookie sheet is dry, bring it to your work space and measure it width and length. This is how you will figure out how big to cut your scrapbook paper. Each cookie sheet is different, so I can’t give you exact dimensions. You will want a pretty square surface for the grid section of the calendar. So if your cookie sheet is 8 inches wide, then it will look good to make the grid paper 8 inches by 8 inches. This will also give you room at the top and bottom to put your coordinating paper for your lettering.
- Once you have figured out the dimensions for your grid paper, cut it out and then figure out your dimensions for each day. You will divide the total amount of width and length by 5 to get these dimensions. Now take a pencil and ruler and measure the dimensions out and draw lines to get the grid. You may need to make corrections, that is why you should use a pencil. Once you have the correct dimensions, go over the lines with permanent marker.
- Now cut out the other paper. I made the top a little longer than the bottom so it wouldn’t be so matchy-matchy, but you can do whatever you like.
- Lay it out on the cookie sheet. Once it looks right, use Mod Podge and glue it down. I went over the top with mod podge too to protect the paper so it will last. If you haven’t ever used Mod Podge, be careful. You need to put a thin layer of Mod Podge on the back of each paper and another on the acutal cookie sheet. Then lay the paper down and smooth all of the bubbles out. It works best to go in small sections. Start at one end of the paper and go diagonally across to the other side. Keep smoothing the bubbles out. NOTE: If Mod Podge sounds too scary, you can use spray adhesive and then spray a coat of clear sealant over the top to protect it.
- I put the Christmas die cut letters on right at the end of the Mod Podging – adding a thin layer over the top of the letters.
- Now while your paper is drying, get out all of the embellishments to make the magnets. I lay it all out the way it is going to go on the board before I put any of the numbers on the magnets. This way you can see how it looks and make any changes that you want to without having to take the numbers off. You will want the shapes to be separate: no circles next to each other or anything that is the same color together.
- Once you have all of the magnets laid out they way they will go on the calendar, start putting them together. Then put the numbers on last. For the numbers I used a few different methods to make them so they wouldn’t all be the same. I printed a bunch of numbers off in different fonts and different colors. If you go to 1001fonts.com, you will find tons of fun fonts. They also have many many Christmas and holiday fonts which are fun for this project. I also used a labeler to print off some numbers, some stickers and I wrote some numbers with a sharpie.
- When you have the numbers on you can add the magnets to the back of each number. I used a super glue.
- Now put your ribbon through the holes and tie it into a bow.
- Another note: Depending on how you decide to you use your Advent Calendar, you can put all of the magnets on and then take one off a day until there are no more, or start with a blank surface. Since it is magnetic, you can keep the magnets you are not using on the back of the cookie sheet so they will not get lost.
- Enjoy your new Advent Calendar!
XOXO


too cute!! so bright and festive <3
Hi Jen… Have been looking for an advent calendar to make for my granddaugher and came across your site. The calendar is so beautiful but a bit overwhelming since i am not a crafter! My question is about the little red branches of cherries (?) in the background. I’m wondering where I could find something like that and also are they stick on or are they drawn on? Thank you so much!
Thanks for the inspiration! I made a cookie sheet advent calendar last year and my girls love it! I mentioned you in my blog today. Thanks for all the great ideas! 🙂
Janessa