Hello Tatertots and Jello!
This is Desirée from The 36th Avenue.
I’m not even going to chit chat since I can’t wait to share with you the tutorial of this bracelet
that I made thinking about you my friends!
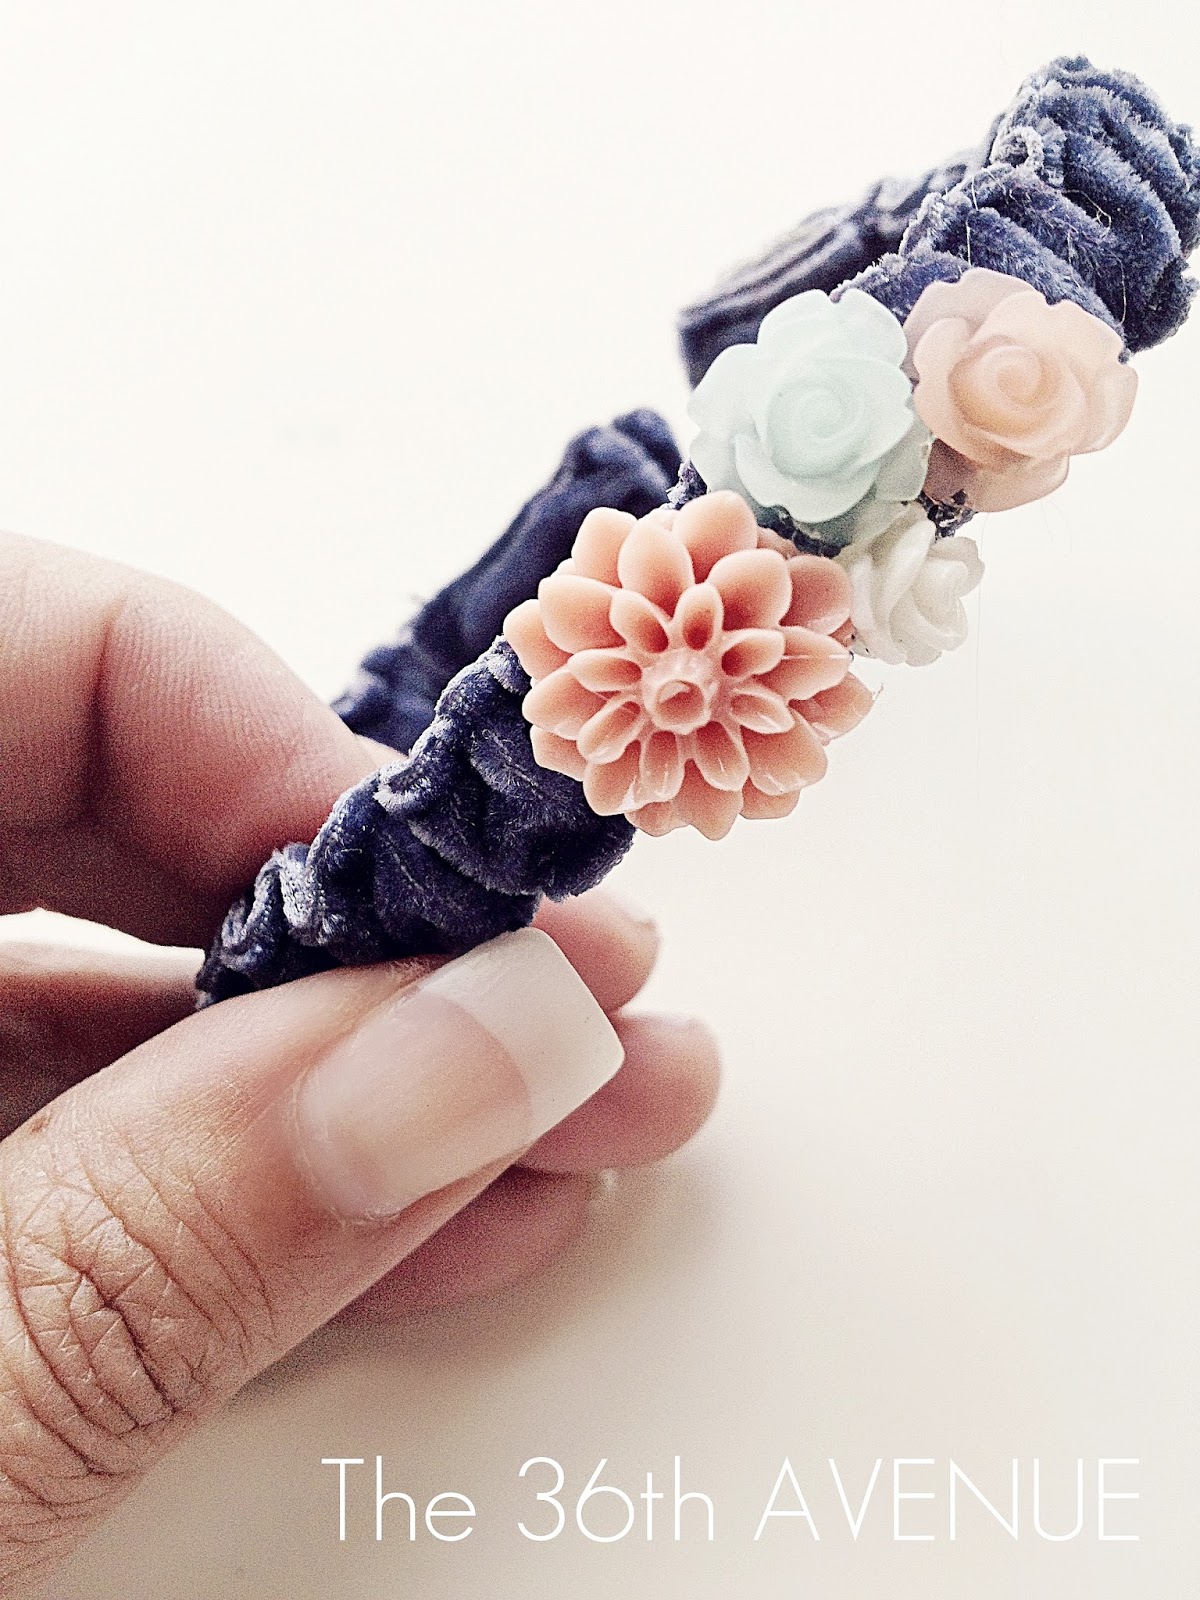
I love when I make a project with endless possibilities and I think this adjustable ribbon bracelet
is just that. Think about the colors, the different type of ribbons and even lace that you can use.
Think about the embellishments… from felt flowers, to buttons or missing earrings…
Love it!
MATERIALS
There is a good chance that you have some of these items on hand.
You need ribbon, embellishments and jewelry wire.
I ended up using the thicker lighter type… the one on the right side of the picture.
Believe it or not this wire is more bendable that the other one and easier to work with.
You can find these items at your local Craft Stores or even Wal-Mart.

TUTORIAL
1
First you want to fold about 3/4 of a yard in half.
Don’t cut it.
After you have the ribbon folded get your pins and hold the folded halves together
pinning right in the middle of the ribbon.
After you are done pinning you want to sew both edges together leaving the center empty.
Sew all the length of the ribbon as close to the edge as you can.

2
Get your wire and bend the end of it so it is not sharp.
With pliers squish the top together to make it flat and smaller as seen in picture number 2.
Then as you see in picture number 3 introduce the wire inside of the ribbon.
The last thing you want to do is cut the end of the wire when you get to the end.

3
Now with your fingers push the ribbon back making it ruffle.
When you cannot ruffle it anymore repeat the step before:
Fold the wire making a loop and squish it with the pliers.

4
With hot glue seal the other end of the ribbon.
This next step is important:
To keep the ruffle secure and in place you need to fold each end of the bracelet one more time.
Just like this…

5
Now you are going to make it EXTRAORDANARY!
Use any embellishment you like.
I had these cute flowers on hand and the colors were perfect so I used them.
I think old missing earrings would make it look super vintage.
Hot glue your embellishments in place.

We are done!
My Mimi wanted to try it…
The best thing about this bracelet is that it would fit anyone since you can adjust it.
Isn’t that awesome!

I think it would make a great accessory and a super cute personal gift.
I hope you give it a try… you are going to love it!
As always I can’t go without thanking beautiful Jen for having me every month.
I feel that I am the luckiest girl on the block.
Thank you my friend!
Happy Thursday to all!

Desirée

WOW Desirée – what an adorable idea.
It would be great for Mothers, Birthdays, Friends and Teacher gifts. Love it!!
Here’s what’s been happening at The 36th Avenue this month:
 DIY Mason Jar Salt and Pepper Shakers


You will ADORE The 36th Avenue.
xxo

PS — I am hard at work on my Beachy Guest Room. If you follow me on Facebook, you know that I finished the painted Greek Key rug this week. And now I am working on a planked wall and a few other projects. I am trying to get it finished before my mom comes out to visit the first week of June. I have a project from this room coming up on Tuesday 🙂


cant wait to give it a go, i love me some jewelry always!
I just wanted to stop by and give you a heartfelt thanks! As I prepare to host a fundraiser for my dear friend who has a baby girl battling leukemia I have been struggling! I wanted something treasured contributors could take away from the event and remember the little girl we are fighting for! I contemplated ordering the plastic bands everyone sports for awareness, but wanted something a little sweeter! Stumbling across this tutorial was a blessing:) Thank you!
Loressa
lifescuriouswisdom.com
Wow that rug is incredible. That looks like you had to do alot of measuring and planning to get it to come out so perfectly. What talent and what an ambitious project. You must have gobs of patience. The Greek key is very sophisticated.
I love when I see a great project AND I have all the supplies on hand! Can’t wait to try this!
LOVE this! Will be making an armload! Thanks so much for the post!
Cute tutorial Desiree! I really like the the flower embellishments, do you know where I could find them online?
Thanks 🙂
great idea to do with the grand kiddies!
Hi I LOVE that bracelet… I am just wondering where you got YOUR gorgeous embellishments?? I LoVe them!!
Thank you Jen for having me!
That bracelet is really cute. I like that you could embellish at will, to suit your taste =)
Jen, that rug is rocking. Look forward to the room reveal, they always knock my socks off!!
What a cute little bracelet! Two quick questions, first, how long was the wire that you used? And secondly, will regular craft wire work just as well??
Susan,
Great question!
The wire should be about 10 inches long since you are going to bend the ends. The final bracelet will be about 8″ long.
I think regular craft wire should work… you can give it a try!
Love the bracelet! so simple and so pretty! Little Bit
What gauge wire did you use?