Tatertots and Jello

COLORFUL HAPPY HOME -- Daily DIY, Decor, Craft and Recipe Tutorial

  • My Home
    • 1905 Cottage
    • Daybreak House
  • DIY
    • DIY Projects and Ideas
    • Organizing
    • Tutorials
    • Printables
  • Decor
    • Spring Projects
    • Summer Projects
    • Fall Projects
  • Crafts
    • Kids Crafts
    • Painting Projects
    • Paper Projects
    • Sewing
    • Wreaths
  • Holidays
    • Valentines Day
    • Easter
    • Halloween
    • Thanksgiving
    • Christmas
    • HAPPY Holidays Series!
  • Recipes

Explore

  • my home
  • diy
  • decor
  • crafts
  • holiday
  • printables
  • recipes

Connect

Home » diy » DIY Nursery Picture Banner

diy, guest tutorials, paper craft · July 27, 2015

DIY Nursery Picture Banner

Tatertots & Jello is a participant in the Amazon Services LLC Associates Program, an affiliate advertising program designed to provide a means for sites to earn advertising fees by advertising and linking to amazon.com.

Welcome to the Summer of Paper series – where we’ve invited fabulous guests to create projects using supplies from my Home + Made paper decor line.

summer-of-paper-logo

Hi!  My name is Amy and I blog over at Ameroonie Designs. I’m mom to 5 (soon to be 6) children.  I live in Utah and I love creating things.  Paper crafting has been my longest love, but my newest passion, and where you’ll find me most days, is in front of my sewing machine.  I try to share my projects as much as I can on my blog, but I find the instant gratification of Instagram simpler on those days when all I have time to do is snap a quick picture.  I hope you’ll check out both!

I am so excited to be here today sharing a project using Jen’s new scrapbook line.  I was searching for the right inspiration for my baby’s nursery and when I opened the package of all these beautiful pictures, I knew the search was over.

I have a few more projects planned with these lovely papers, but I thought I’d start with this super fun Nursery Picture Banner.  It looks darling empty, but I’m really excited to fill it with shots of my sweet new baby.

I added ultrasound pictures for this shot, just so you could see what I am talking about. 🙂  This project would be so fun for any room, you could make it much less girly by adjusting the papers- but I can’t wait to build a gallery wall around it for my daughter.

Here’s how to make your own:

You will need a large frame.  I used a shaped frame, but you could also use a regular or thrifted frame.  I wanted to add some interest to the frame, so I decided to add these wood cut out flowers- you could create a similar look using chipboard or different wood shapes.

You are also going to need paint and brushes to get your frame the color you want.  Another option would be spray paint.

You are also going to need plenty of gorgeous papers and embellishments.  I used the puffy stickers, gold foil stickers, gold Thicker- alphabet stickers, dimensional paper flowers, chalkboard labels (not shown) and two sided cardstock from Jen’s new Home + Made line.  I also used some flower punches, seam binding ribbon, pennant shapes (both chipboard and wood) and Mod Podge from my own stash.

To begin you will want to paint your frame and any embellishments.  You will also want to cover your pennant shapes with papers of your choosing.  I used Mod Podge to do this.  Arrange your banner pennants to your liking before stringing them onto the ribbon.

I found that the trickiest part of the project for me was getting the placement of the banners just right.  I loosely arranged them on the frame and then made sure the nails lined up and were evenly spaced.  When I went to tie the banners on the nails, it took a bit of adjusting to get them hanging the right way.  Just tie your knots loosely at first, and then when you like how they look, go back and tighten everything up.  You may also want to add some glue to make sure everything stays in place.

The last step is by far my favorite, embellishing everything!  Add stickers, dimensional flowers, ribbons and anything else that makes you happy.  I used clips to make the pennants into mini clipboards to hold my pictures.  You could also use mini clothes pins or bulldog clips to attach your pictures, or another option would be to use washi tape.

Or, even if you didn’t want to add pictures, it would absolutely darling as just a fun art piece with the banners.

Maybe I’ll make another one of these dimensional floral art pieces using the colors from the paper line.

Either way, I better get started, this little girl is set to make her appearance in about three weeks.

Thanks so much for having me today!

XOXO,

Amy

*******

Thanks Amy! I just love that banner. What a fun way to be able to change things out as baby gets bigger, too! Amy has so many fun ideas on her blog. Here are a few more I think you’ll love:

She made a gorgeous Ribbon Mobile for her nursery that looks so easy too!

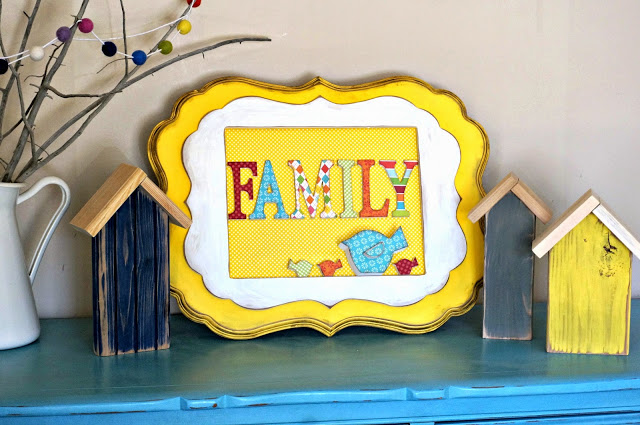
stage frame as part of display

And, I love this Family Wood Art that she made too!

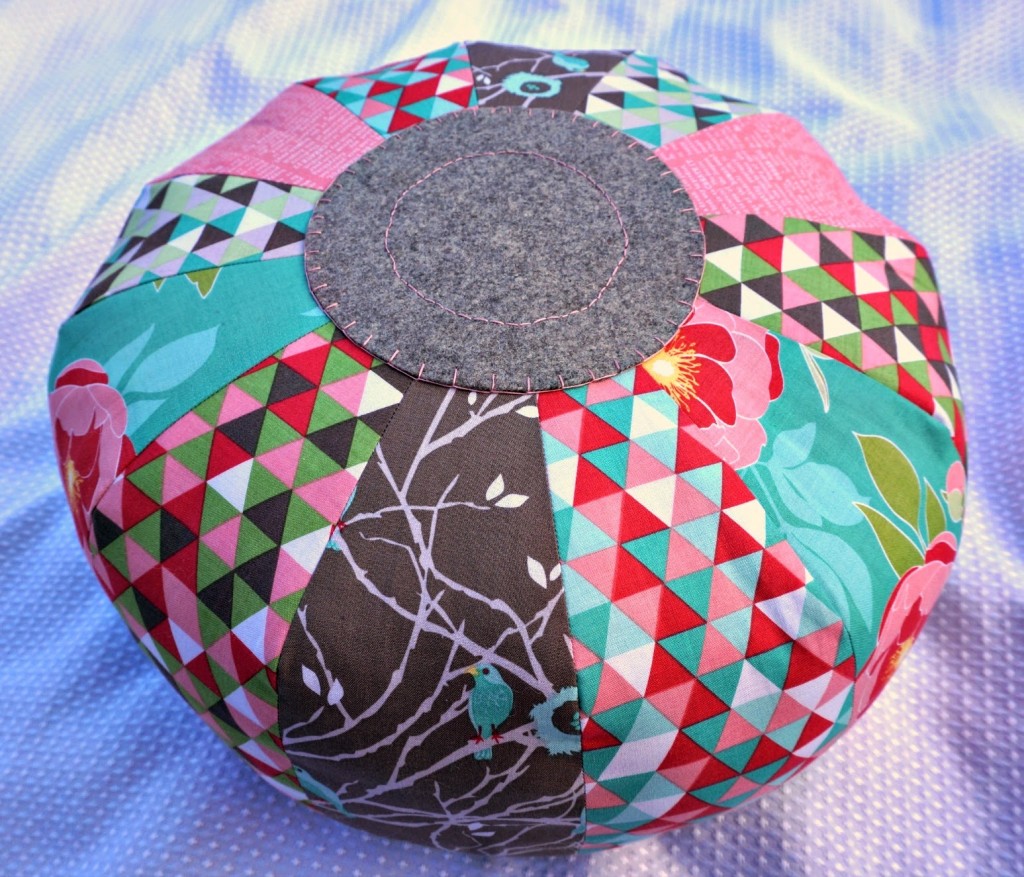
pouf close up

And, I was so amazed by this Colorful Pouf she created with her Cricut Explore!

Visit Ameroonie Designs and

pinterest.32x32.icon.circle
Follow Ameroonie Designs on Pinterest
instagram.32x32.icon.square
Follow Ameroonie Designs on Instagram
facebook.32x32.icon.circle
Follow Ameroonie Designs on Facebook
twitter.32x32.icon.circle
Follow Ameroonies Designs on Twitter
And if you’d like to try this project she shared today, you can find my Home + Made line at craft and hobby stores near you!
unnamed
xoxo
jen signature

Posted By: Jen · In: diy, guest tutorials, paper craft

Great Ideas — 18 DIY Summer Home Projects!
DIY Notes Board

You’ll Also Love

DIY Halloween Bat Mantel Ideas
make a dog playhouse out of a box. all the instructionsMake an Adorable DIY Dog Playhouse Out of a Box!
Make a DIY Marble Kitchen Pedestal

Comments

  1. Cathie Rigby says

    August 22, 2015 at 12:47 AM

    So cute….Great idea!

Hi! I'm Jen Hadfield. I'm a mom of 5 restoring an 1891 home in the heart of Salt Lake City. I love being creative and sharing simple ideas to make your life easier and more beautiful!

Receive the Latest Crafts, DIY, Recipes and More in your INBOX!

Follow us on Pinterest! It's awesome!

Top Posts & Pages

Spruce up Your Outdoor Space with a DIY Recirculating Fountain! (tutorial)
A New Deck in Under 30 Minutes!
DIY Secret: How to Print on Post-It Notes (and Free Printable Template)
12 Must-Have Items to Pack on an Alaskan Cruise!
Copycat Panera Spinach and Artichoke Egg Soufflés - SO good!
How to Change a Recessed Can Light into a Pendant Light with No Remodeling!


Popular Posts

  • Spruce up Your Outdoor Space with a DIY Recirculating Fountain! (tutorial)
    Spruce up Your Outdoor Space with a DIY Recirculating Fountain! (tutorial)
  • A New Deck in Under 30 Minutes!
    A New Deck in Under 30 Minutes!
  • DIY Secret: How to Print on Post-It Notes (and Free Printable Template)
    DIY Secret: How to Print on Post-It Notes (and Free Printable Template)
  • 12 Must-Have Items to Pack on an Alaskan Cruise!
    12 Must-Have Items to Pack on an Alaskan Cruise!
  • Copycat Panera Spinach and Artichoke Egg Soufflés - SO good!
    Copycat Panera Spinach and Artichoke Egg Soufflés - SO good!
  • How to Change a Recessed Can Light into a Pendant Light with No Remodeling!
    How to Change a Recessed Can Light into a Pendant Light with No Remodeling!
  • Mother's Day Cup Holder Gift Basket
    Mother's Day Cup Holder Gift Basket

As seen in


Amazon Affiliate

Tatertots & Jello is a participant in the Amazon Services LLC Associates Program, an affiliate advertising program designed to provide a means for sites to earn advertising fees by advertising and linking to amazon.com.
  • About Me
  • Advertising
  • Get Featured

Copyright © 2025 Tatertots and Jello · Privacy
This site is a place for positive discussion and ideas. Negative talk, comments that disparage others, and similar are not welcome and may be removed.