Tatertots and Jello

COLORFUL HAPPY HOME -- Daily DIY, Decor, Craft and Recipe Tutorial

  • My Home
    • 1905 Cottage
    • Daybreak House
  • DIY
    • DIY Projects and Ideas
    • Organizing
    • Tutorials
    • Printables
  • Decor
    • Spring Projects
    • Summer Projects
    • Fall Projects
  • Crafts
    • Kids Crafts
    • Painting Projects
    • Paper Projects
    • Sewing
    • Wreaths
  • Holidays
    • Valentines Day
    • Easter
    • Halloween
    • Thanksgiving
    • Christmas
    • HAPPY Holidays Series!
  • Recipes

Explore

  • my home
  • diy
  • decor
  • crafts
  • holiday
  • printables
  • recipes

Connect

Home » diy » DIY Bullet Planter

diy, guest tutorials · September 5, 2014

DIY Bullet Planter

Tatertots & Jello is a participant in the Amazon Services LLC Associates Program, an affiliate advertising program designed to provide a means for sites to earn advertising fees by advertising and linking to amazon.com.
10
10Shares

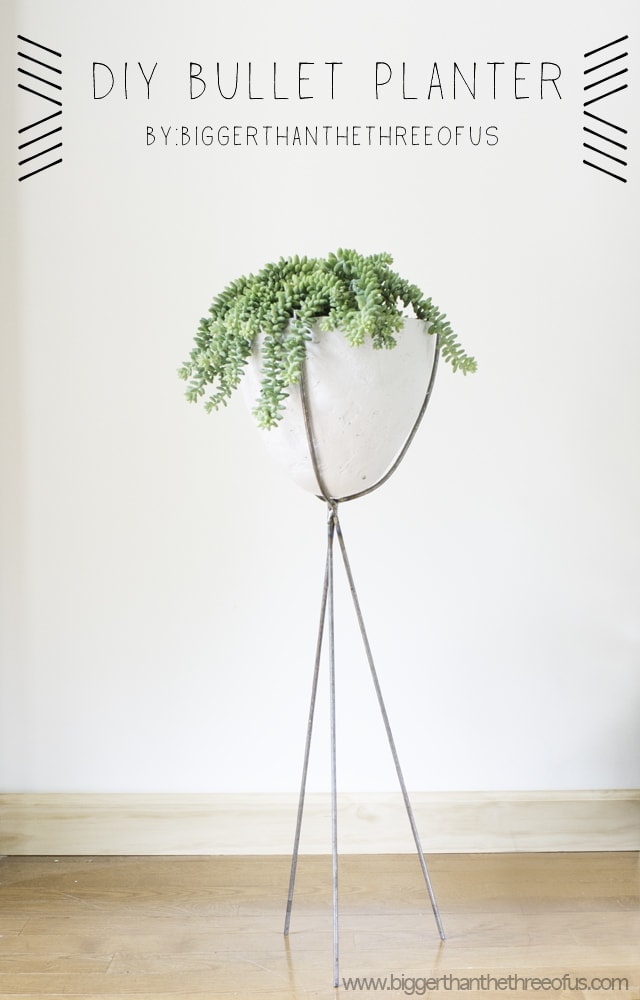
Hi Guys! I’m Ashley from Bigger Than The Three Of Us. Today, I want to share with you a tutorial for making the ever-so popular bullet planter. I love planters and I’ve been eyeing a bullet planter for quite some time, but just have never pulled the trigger. Then, I got to thinking about going the DIY route with one and that turned in to this tutorial. Over at Bigger Than The Three of Us, my husband and I are committed to sharing the good and the bad and the same goes for this post! I’m going to show you the steps that we did and then I’m going to give you a few ideas to simplify the project. Hope you love this DIY Bullet Planter project as much as we do!

DIY Bullet Planter by Bigger Than The Three OF Us

Like I just said, I’m going to go through what we did and what we used and then at the end I will give you a few ideas to modify the bullet.

Supplies needed:

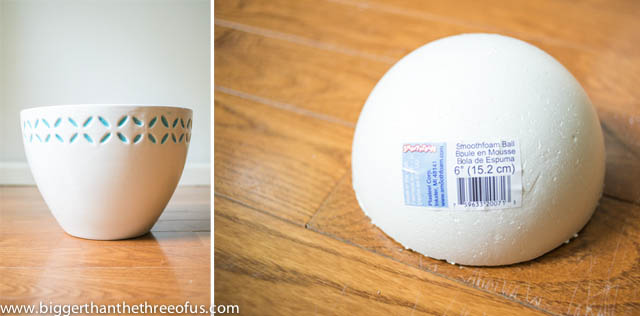
Planter Pot (as close to a cone shape as possible)

Styrofoam Ball

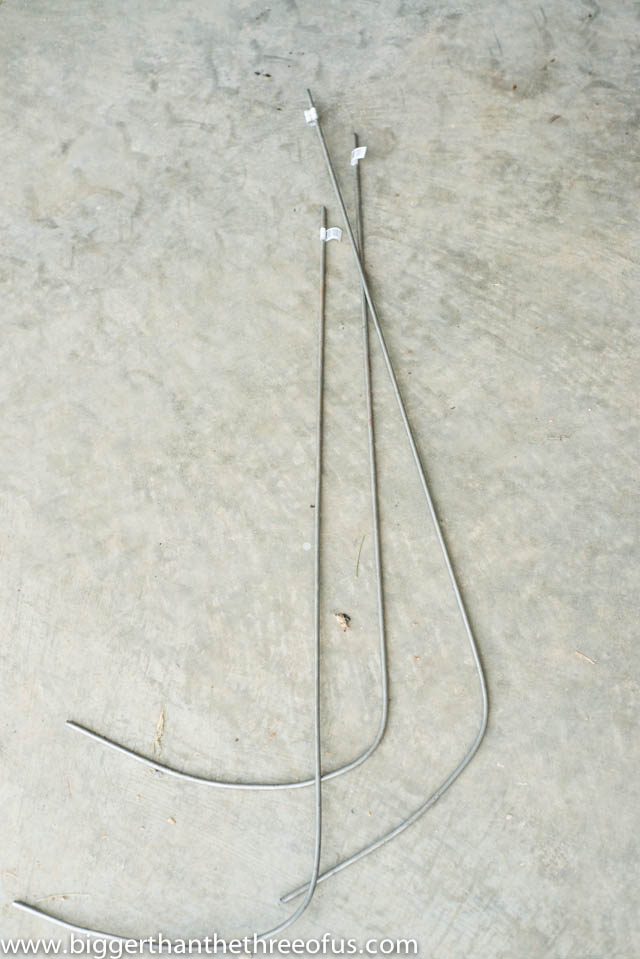
3 Bendable/Weldable Steel Rods (found in the hardware aisle at your big box store)
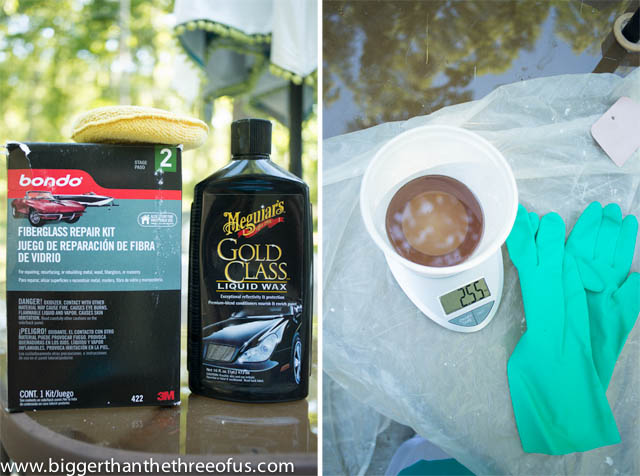
Fiberglass Kit

Wax

Plastic Cling Wrap (found in the food aisle)

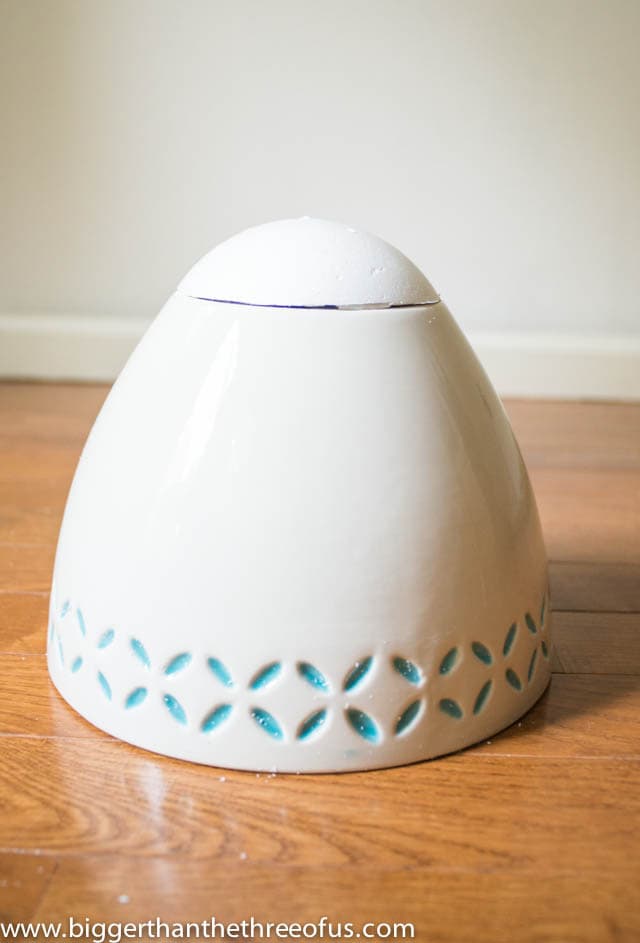
Step 1: Take your pot and measure the bottom of it. Buy a styrofoam ball that has roughly the same diameter as bottom of pot. Using a utility knife and/or small saw, cut the ball until you have the same diameter as the bottom of the pot.

#bulletplanter #tutorial #plantertutorial

Step 2 : Attach styrofoam piece to planter using tape.

Planter Pot to Bullet Style Planter

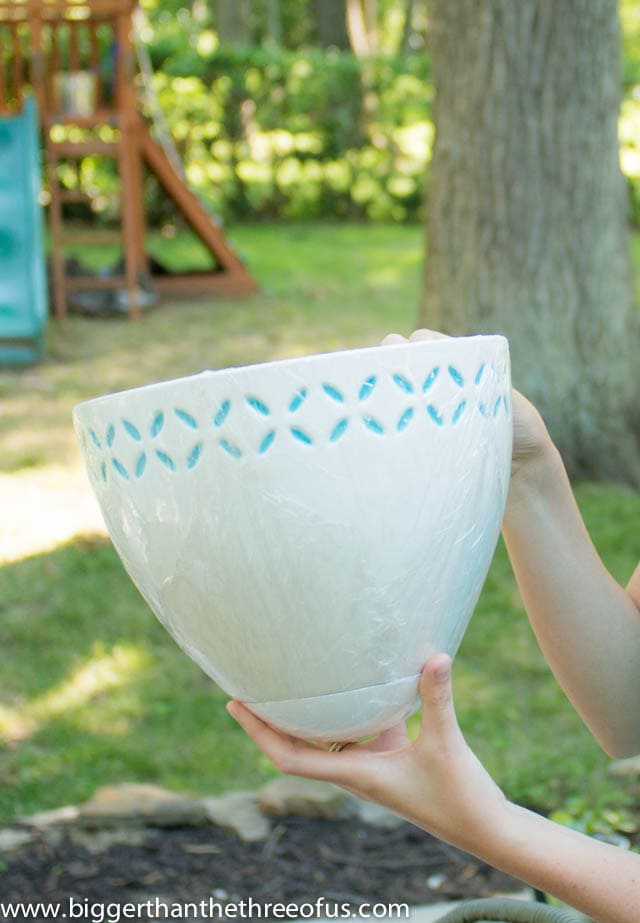
Step 3: Cover planter in plastic wrap and coat it with wax.

Plastic Wrap Covered DIY Bullet Planter-0105

Step 4: Prep your fiberglass by cutting strips out of the fiberglass mat before you add the hardener to your resin and mix. Once the hardener is added, you will have to work pretty fast to get the strips on your pot. It worked the best for us to dip our strips in the resin and then smooth it around the pot. Continue wrapping strips with the liquid on the pot until the whole pot is covered. Be careful to smooth out any bubbles under the fiberglass strips.

Fiberglass DIY Planter Covered In Wax- Steps for Covering Pot with Fiberglass-

Step 5: Reapply fiberglass after the first coat is dried. After the second coat is dried, you will want to sand it. At this point, we reapplied the resin but not the fiberglass sheeting. Lightly sand after the hardener is dry.

Step 6: Bend your steel rods. These are bendable by hand or by drilling into a piece of wood and sticking one end of the rod in the wood and then bending the other end. We bended until we thought we had the curve of the bowl and then made adjustments until the curve was close.

Bending Steel Rods for Bullet Planter-0279

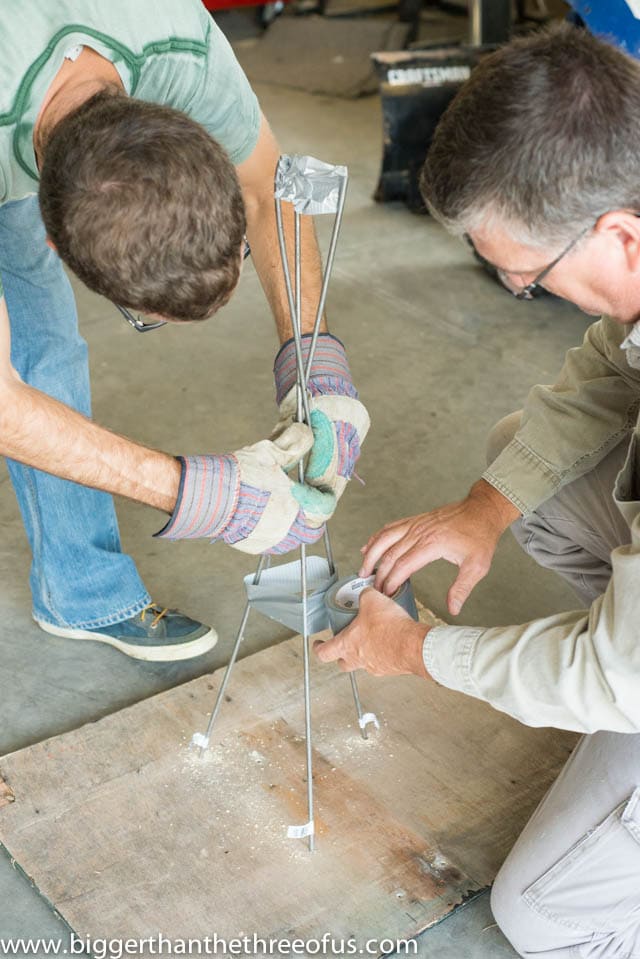
Step 7: Mark rods and cut them where they would join together to make the pot holder. Tape to planter to create the form and weld pieces together (and thank your Dad for helping you with the welding part). =)

Making the base of the bullet planter with steel rods by Bigger Than The Three Of Us

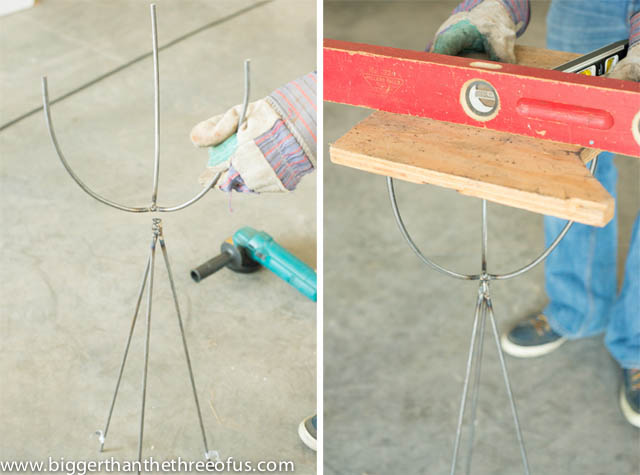
Step 8: Weld your tripod base together. Then, using a level, weld your tripod base to your pot holder.

Weld your Tripod Base Together-0293

Making the base of the bullet planter tutorial-

DIY Bullet Planter Tutorial -0302

Step 9: Prime and paint your planter. I used Rustoleum primer followed by their Automotive Enamel spray paint.

Step 10: Enjoy your hard work. =)

Mid Century Planter Tutorial by Bigger Than The Three Of Us

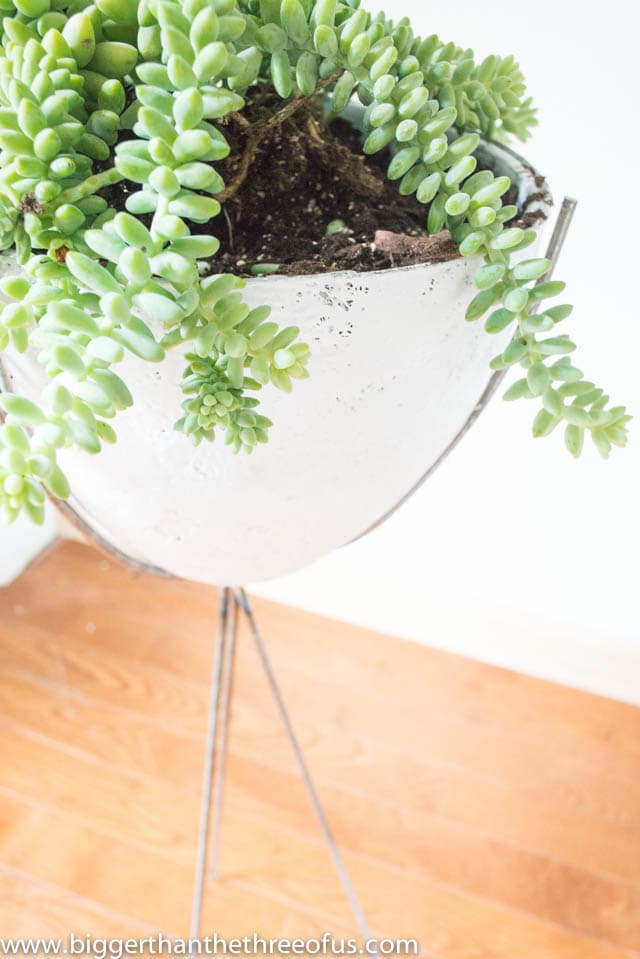
I really love how the planter and stand turned out; but, it definitely wasn’t the most simple thing ever. We had never worked with fiberglass before and that was definitely a learning curve! Isn’t it always the case with DIY projects that hindsight is 20/20?

DIY Bullet Planter Tutorial

To make this project more straightforward, I would recommend skipping the fiberglass part. If you used the pot with the styrofoam, I think you could use paintable caulk for the seam. That would still achieve the same look, but be much simpler.

Tutorial for a Mid Century Style Bullet Planter DIY

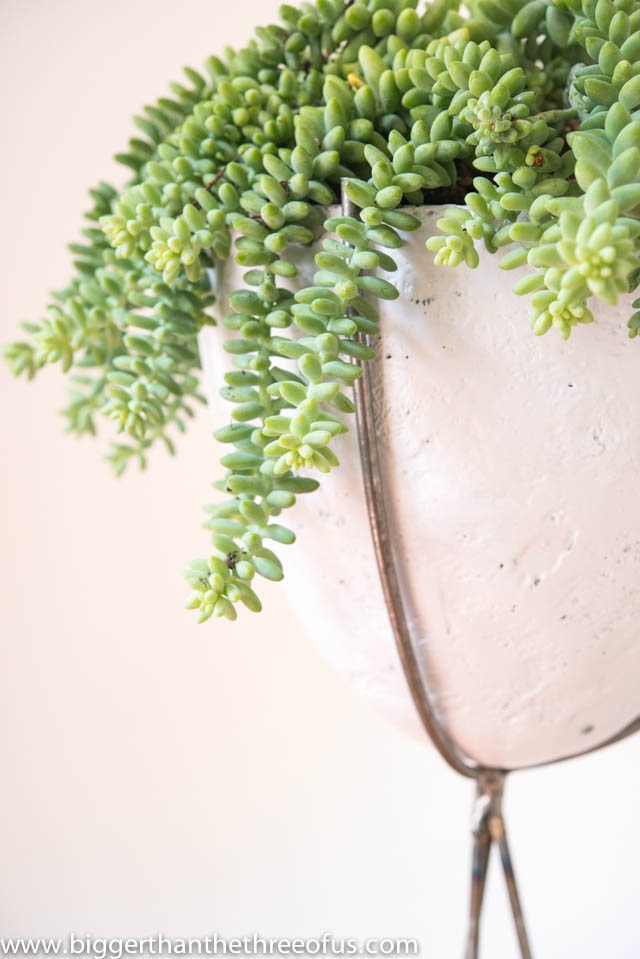
In the end though, I finally have my bullet planter and couldn’t be happier! Hope you enjoyed the tutorial and I would love to know if you end up making one.

***************

Thanks Ashley! Isn’t that planter so pretty! I love the idea of making one yourself too. Then you can have any color you want. Such a fun project!! Ashley has tons of great ideas on her blog. Here are a few of her recent projects I think you’ll love:

Repurposed-String-Art-by-Bigger-Than-the-Three-Of-Us

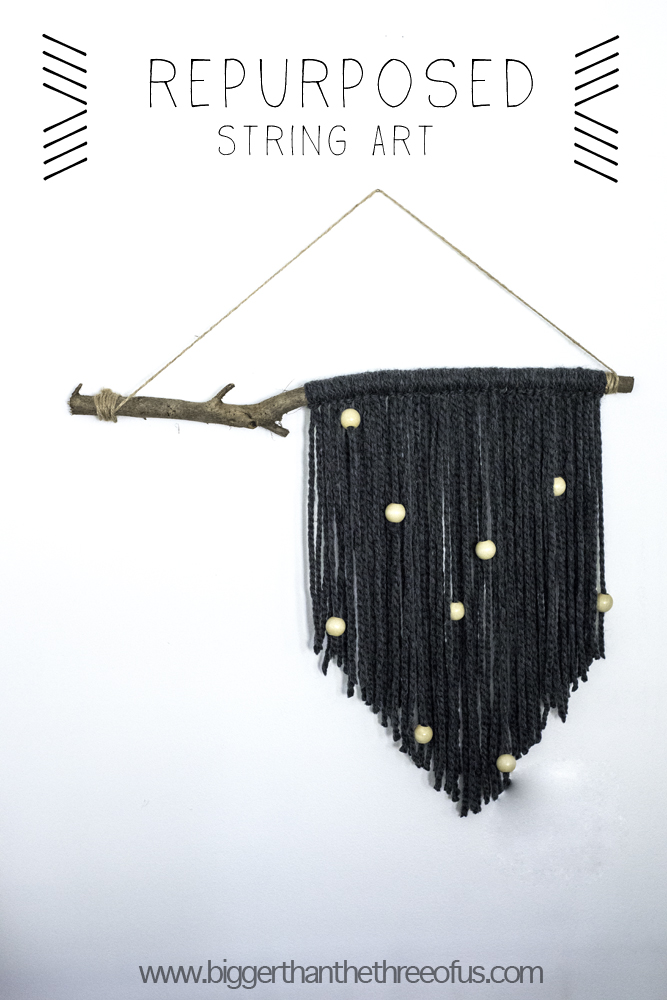
I love this tutorial for her Repurposed String Art! Weaving is making a comeback and is definitely on trend. It’s a great way to add some personality to your walls too!

How-to-make-a-sunburst-mirror-under-10

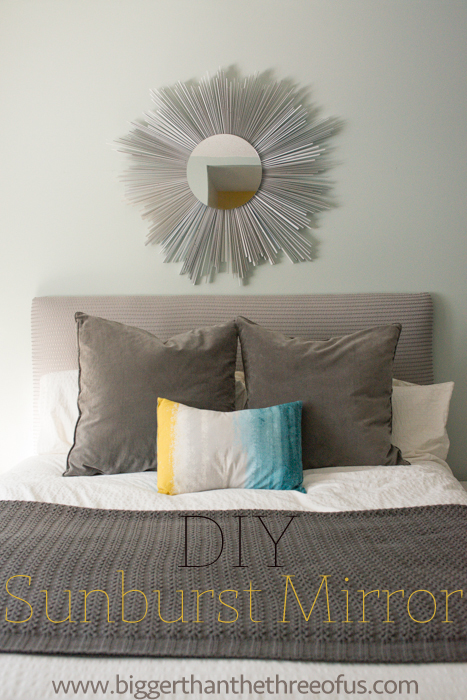
Her house is just beautiful!! Make sure you stop by and check out her house tour. I love this Sunburst Mirror DIY. SO cool!

paint_stick_light-scaled1000

And she has such fun and creative ideas for DIY projects that are inexpensive, but with a big impact. I love this DIY Paint Stick Light!!

I’m so glad Ashley could stop by today! Make sure to follow Bigger Than the Three of Us and

pinterest.32x32.icon.circle
Follow Bigger Than the Three of Us on Pinterest
instagram.32x32.icon.square
Follow Bigger Than the Three of Us on Instagram
facebook.32x32.icon.circle
Follow Bigger Than the Three of Us on Facebook
twitter.32x32.icon.circle
Follow Bigger Than the Three of Us on Twitter
xoxo
jen signature


10
10Shares

Posted By: Jen · In: diy, guest tutorials

Make an Easy Industrial Spice Rack! #LowesCreator
Link Party Palooza — and #TeamShout & Shutterfly Giveaways!

You’ll Also Love

DIY Halloween Bat Mantel Ideas
make a dog playhouse out of a box. all the instructionsMake an Adorable DIY Dog Playhouse Out of a Box!
Make a DIY Marble Kitchen Pedestal

Comments

  1. wendyDIY says

    June 18, 2018 at 8:30 PM

    I love the design of this DIY plant stand!Thank you for sharing this impressive tutorial!DIY plant stand making tutorial.

  2. Kyla @HouseOfHipsters says

    October 2, 2014 at 7:29 PM

    Oh, and pinned!

  3. Kyla @HouseOfHipsters says

    October 2, 2014 at 7:28 PM

    This is such a great DIY! LOVE! Thanks for sharing Ashley! Although you missed a supply…2 cute boys to help ya out =) hahaha. Seriously though…great project!

  4. Alexis @ Persia Lou says

    September 27, 2014 at 5:25 PM

    Wow! This is amazing! I love the stand you created for it too!

Hi! I'm Jen Hadfield. I'm a mom of 5 restoring an 1891 home in the heart of Salt Lake City. I love being creative and sharing simple ideas to make your life easier and more beautiful!

Receive the Latest Crafts, DIY, Recipes and More in your INBOX!

Follow us on Pinterest! It's awesome!

Top Posts & Pages

Spruce up Your Outdoor Space with a DIY Recirculating Fountain! (tutorial)
A New Deck in Under 30 Minutes!
Copycat Panera Spinach and Artichoke Egg Soufflés - SO good!
DIY Secret: How to Print on Post-It Notes (and Free Printable Template)
12 Must-Have Items to Pack on an Alaskan Cruise!
Mother's Day Cup Holder Gift Basket


Popular Posts

  • Spruce up Your Outdoor Space with a DIY Recirculating Fountain! (tutorial)
    Spruce up Your Outdoor Space with a DIY Recirculating Fountain! (tutorial)
  • A New Deck in Under 30 Minutes!
    A New Deck in Under 30 Minutes!
  • Copycat Panera Spinach and Artichoke Egg Soufflés - SO good!
    Copycat Panera Spinach and Artichoke Egg Soufflés - SO good!
  • DIY Secret: How to Print on Post-It Notes (and Free Printable Template)
    DIY Secret: How to Print on Post-It Notes (and Free Printable Template)
  • 12 Must-Have Items to Pack on an Alaskan Cruise!
    12 Must-Have Items to Pack on an Alaskan Cruise!
  • Mother's Day Cup Holder Gift Basket
    Mother's Day Cup Holder Gift Basket
  • The BEST Fresh Strawberry Cream Cheese Cake Recipe!
    The BEST Fresh Strawberry Cream Cheese Cake Recipe!

As seen in


Amazon Affiliate

Tatertots & Jello is a participant in the Amazon Services LLC Associates Program, an affiliate advertising program designed to provide a means for sites to earn advertising fees by advertising and linking to amazon.com.
  • About Me
  • Advertising
  • Get Featured

Copyright © 2025 Tatertots and Jello · Privacy
This site is a place for positive discussion and ideas. Negative talk, comments that disparage others, and similar are not welcome and may be removed.

10