Tatertots and Jello

COLORFUL HAPPY HOME -- Daily DIY, Decor, Craft and Recipe Tutorial

  • My Home
    • 1905 Cottage
    • Daybreak House
  • DIY
    • DIY Projects and Ideas
    • Organizing
    • Tutorials
    • Printables
  • Decor
    • Spring Projects
    • Summer Projects
    • Fall Projects
  • Crafts
    • Kids Crafts
    • Painting Projects
    • Paper Projects
    • Sewing
    • Wreaths
  • Holidays
    • Valentines Day
    • Easter
    • Halloween
    • Thanksgiving
    • Christmas
    • HAPPY Holidays Series!
  • Recipes

Explore

  • my home
  • diy
  • decor
  • crafts
  • holiday
  • printables
  • recipes

Connect

Home » diy » Seersucker & Leather Fold Over Clutch

diy, guest tutorials, refashion, sewing projects · April 2, 2014

Seersucker & Leather Fold Over Clutch

Tatertots & Jello is a participant in the Amazon Services LLC Associates Program, an affiliate advertising program designed to provide a means for sites to earn advertising fees by advertising and linking to amazon.com.
64
64Shares

Hello Tatertots & Jello readers! My name is Melissa Mortenson and I blog at the Polka Dot Chair! I love to sew and I especially love dreaming up new projects! I live in Louisville, Kentucky where we’ve had a particularly hard winter (like most of the country I think!). The long winter has me dreaming of summer, especially summer clothes.

polka-dot-chair-blog-bio

Living in the South, nothing says summer like seersucker! It’s always been one of my all time favorite fabrics.

Seersucker & Leather Clutch by Melissa Mortenson of polkadotchair.com

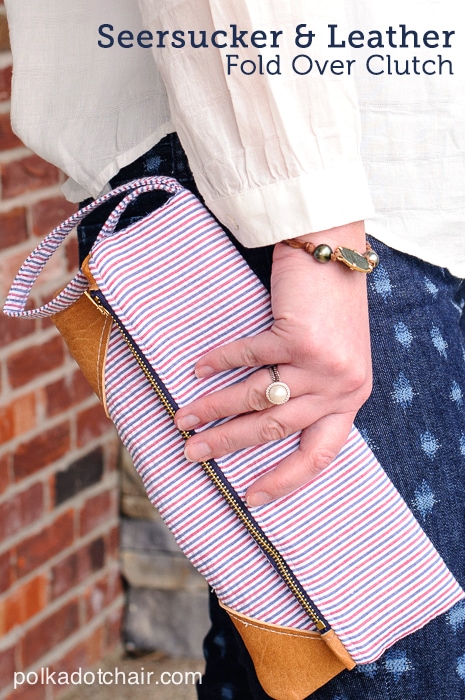
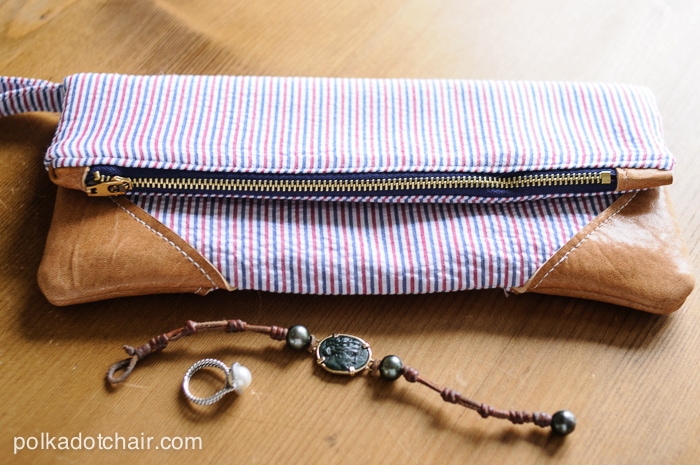
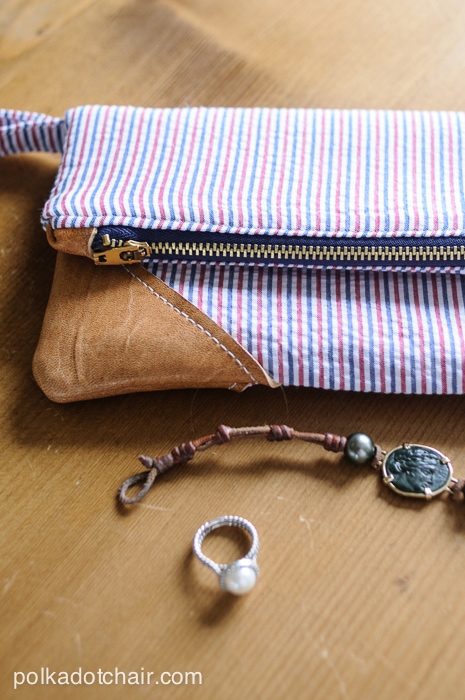
Normally I sew clothing from seersucker, but I thought it would be fun to try out making a clutch out of seersucker fabric. To keep it all from being too “sweet” I added a few touches of leather.

Seersucker & Leather Clutch by Melissa Mortenson of polkadotchair.com

Even though it’s still chilly outside, I’m going to start carrying my clutch as a reminder that warmer weather is not far away.

Seersucker & Leather Clutch by Melissa Mortenson of polkadotchair.com


Seersucker & Leather Clutch by Melissa Mortenson of polkadotchair.com

If you want to make one you’ll need:

2 pieces of seersucker fabric cut to 9” x 12″

1 piece of seersucker cut to 3” x 16”

2 pieces of Shape Flex interfacing cut to 9” x 12”

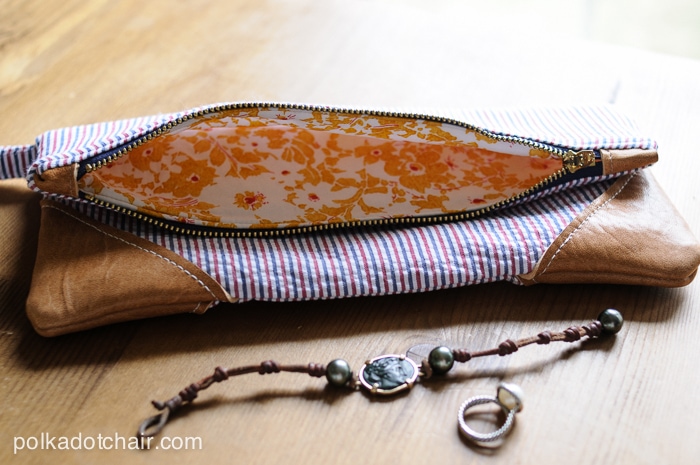
2 pieces of fabric for the lining cut to 9” x 12”

2 pieces of fusible fleece interfacing cut to 9” x 12”

2 pieces of leather cut to 4” x 4”

2 pieces of leather cut to 1” x 1 1/2”

Leather Needle

Extra Strong Thread

Regular Thread

9” Metal Zipper

Glue Stick

Zipper Foot for Sewing Machine

How to make a zip clutch

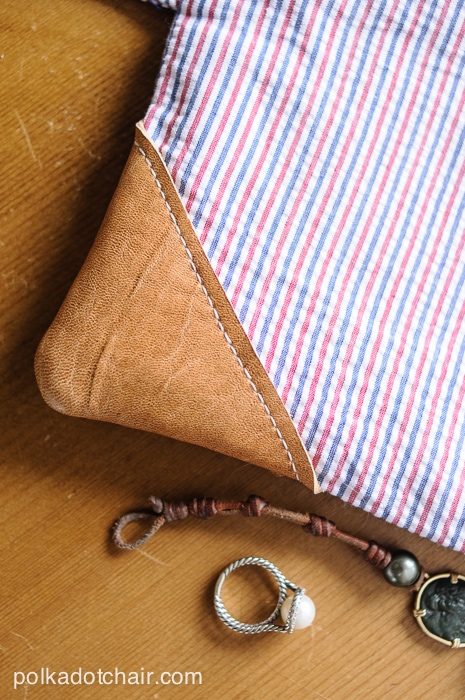
Begin by cutting your 4” x 4” leather squares in half on the diagonal. To cut leather I use a rotary cutter dedicated to only cutting leather.

Press the shape flex to the wrong side of the seersucker fabrics

Press the fusible fleece to the wrong side of the lining fabrics

How to make a zip clutch

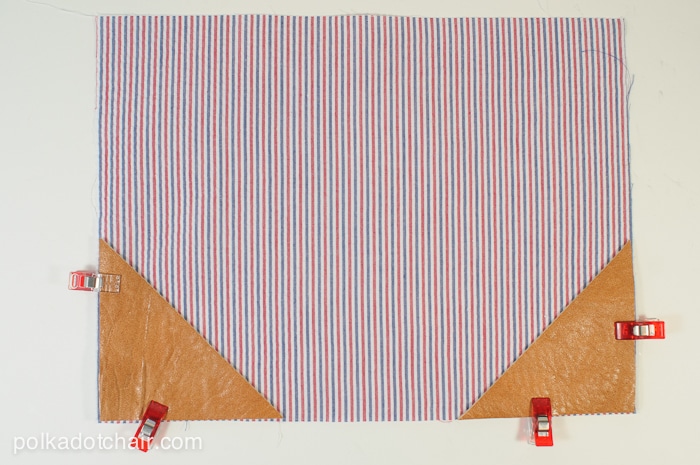
Using a glue stick, apply a bit of glue to the wrong side of the leather triangles. Attach one triangle to each bottom corner of the clutch. Use binding clips to hold the leather in place.

Put the leather needle in your machine

Thread the top thread with extra strong thread (you can leave the bobbin thread as is)

Set your stitch length to 4

How to make a zip clutch

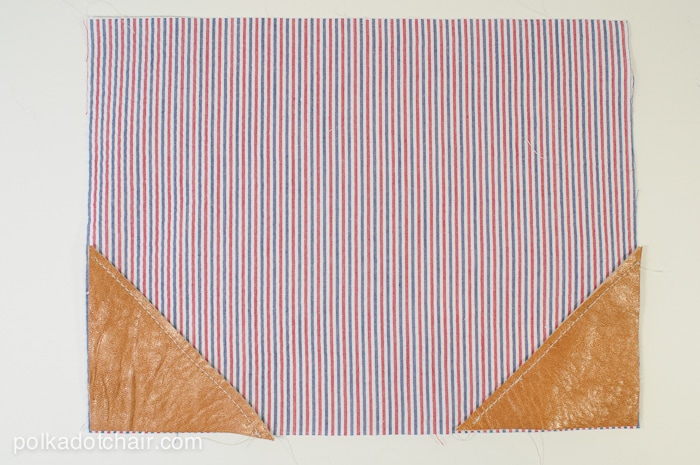
Going slowly, sew the leather across the diagonal.

Repeat for the other side of the clutch.

How to make a zip clutch

Apply a bit of glue to the back of the 2 1″ x 1 1/2” pieces of leather. Using binding clips, clip to the ends of the zipper. Stitch the leather to the ends of the zipper, close to the zipper.

Put the regular needle back in your machine and switch the thread back out.

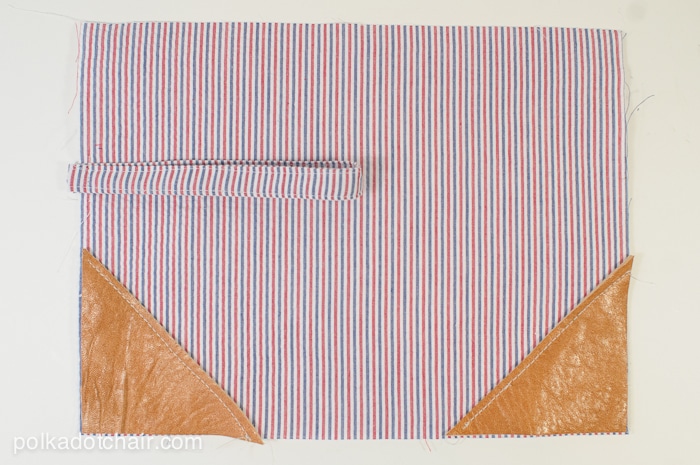
Fold the 3” x 16” piece of fabric in half lengthwise with right sides together. Sew. Turn right side out and press with the seam in the center of the tube of fabric.

Fold the fabric in half again.

Top stitch down each side of the fabric.

Cut the finished piece to 13″ long.

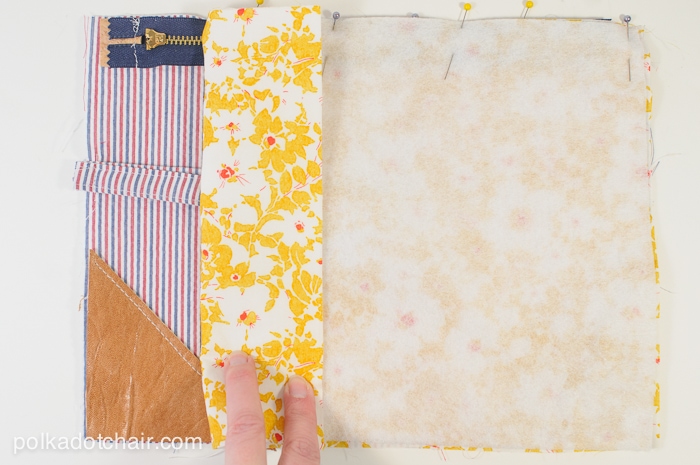
Pin to the left side of the clutch front 3 1/2” down from the top.

How to make a zip clutch

Trim the leather ends of your zipper down to 1” long.

How to make a zip clutch

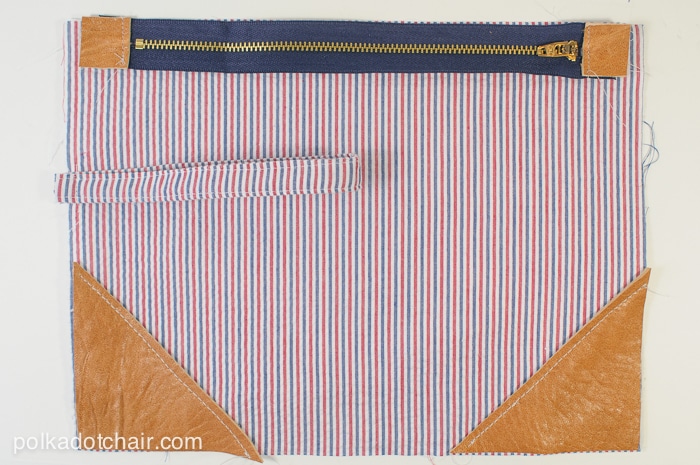
Center the zipper on the clutch front piece. Pin the zipper to the clutch front piece with the RIGHT side of the zipper facing the RIGHT side of the clutch.

Pin the RIGHT side of the lining to the WRONG side of the zipper.

Attach a zipper foot to your sewing machine. Stitch this seam.

Repeat for the other side of the zipper.

How to make a zip clutch

After you’ve sewn the clutch front and back to the zipper, press the seams well away from the zipper. Top stitch along both sides of the zipper.
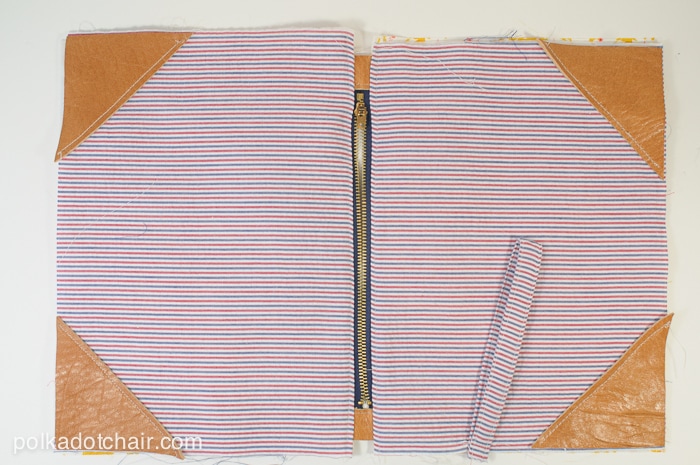
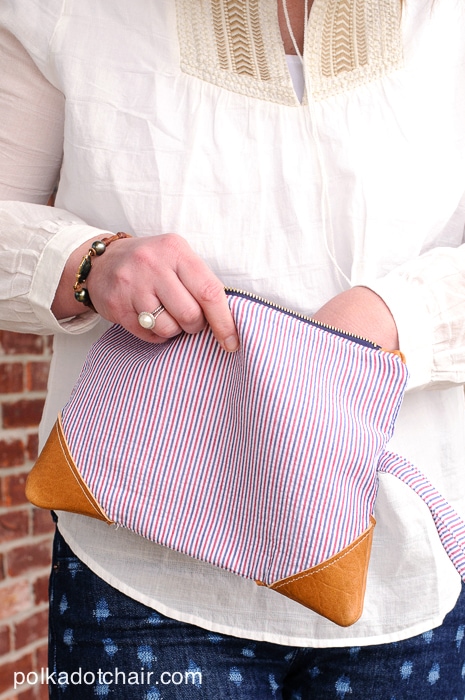
How to make a zip clutch

UNZIP the zipper.

Pin the two clutch outside pieces together, right sides together. Pin the two lining pieces right sides together. Stitch around the perimeter of the clutch using a 1/2” seam allowance. Leave a 4” opening in the lining piece to turn the clutch right side out.

How to make a zip clutch

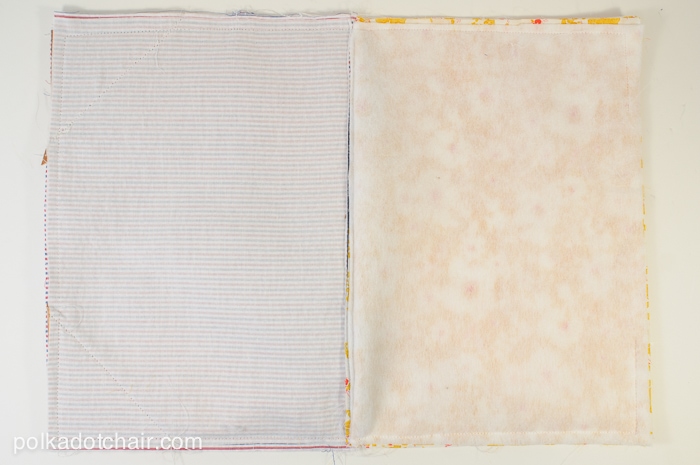
Turn right side out. Press well. Hand stitch the opening in the lining closed.


Seersucker & Leather Clutch by Melissa Mortenson of polkadotchair.com

Seersucker & Leather Clutch by Melissa Mortenson of polkadotchair.com

Seersucker & Leather Clutch by Melissa Mortenson of polkadotchair.com
***************

Thanks Melissa! I LOVE seersucker too. What a fun accessory to have for the summer! Melissa has so many great ideas on her blog. Here are a few of recent projects of hers that I love:

diy-hair-ties

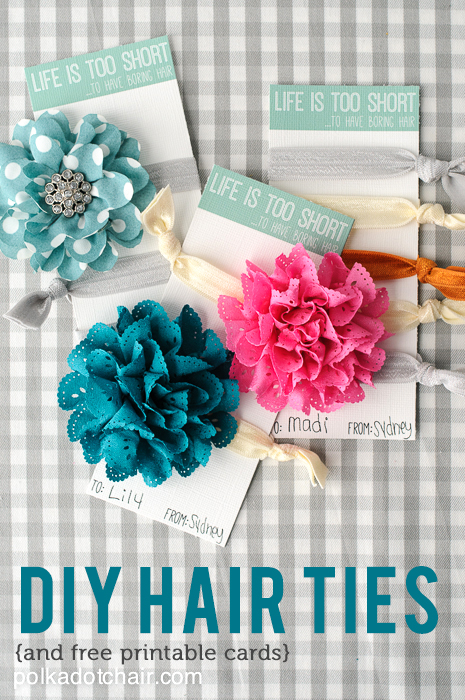
This DIY Hair Tie Tutorial is so fun, and would be a perfect gift idea too!

button-up-shirt-refashion-project

And this Button up Shirt Refashion is the perfect way to dress up a plain white shirt!

printable-pom-pom-polka-dot-party-hats

And these Printable Pom Pom Polka Dot Hats are so adorable and would be a fun addition to a spring birthday party!

I am SO thrilled to have Melissa as one of my contributors this year. As you can see, she has such fun, creative ideas on her blog and I know you will just love everything she shares with us.

Visit Polka Dot Chair and

pinterest.32x32.icon.circle
Follow Polka Dot Chair on Pinterest
instagram.32x32.icon.square
Follow Polka Dot Chair on Instagram
facebook.32x32.icon.circle
Follow Polka Dot Chair on Facebook
twitter.32x32.icon.circle
Follow Polka Dot Chair on Twitter
xoxo
jen signature


64
64Shares

Posted By: Jen · In: diy, guest tutorials, refashion, sewing projects

Submerged Color DIY Wall Art! #LowesCreator
“Let’s Go Fly a Kite” Spring Wreath Tutorial!!

You’ll Also Love

DIY Halloween Bat Mantel Ideas
make a dog playhouse out of a box. all the instructionsMake an Adorable DIY Dog Playhouse Out of a Box!
Make a DIY Marble Kitchen Pedestal

Comments

  1. Elizabeth says

    June 18, 2014 at 12:30 AM

    Just finished making this! Your instructions were so easy for this novice to follow. Thank you so much for sharing! Can’t wait for date night with the hubby so I can rock my new bag. 😉

  2. Patti V says

    May 25, 2014 at 12:09 PM

    Thank you for the tutorial. I have some batik fabric with matching faux leather, I’m going to try it for this pattern. Just perfect.

  3. Kristyn says

    April 15, 2014 at 12:13 PM

    LOVE this, Melissa – too, too cute!

  4. Desiree @ The36thAvenue says

    April 3, 2014 at 2:45 AM

    Adorable all the way!

  5. KpMcD says

    April 2, 2014 at 8:14 PM

    The leather accents really make that! Where do you find leather needles for a sewing machine?

  6. Anne says

    April 2, 2014 at 8:44 AM

    Beautiful!! I’ve got a Craft Gossip post scheduled for later this morning that links to your tutorial:
    http://sewing.craftgossip.com/tutorial-seersucker-and-leather-fold-over-clutch/2014/04/02/
    –Anne

  7. Lisa says

    April 2, 2014 at 8:40 AM

    I love this bag. You make it look so easy!!
    L x
    http://workingmumy.blogspot.com

  8. Katie @ Little House of Four says

    April 2, 2014 at 6:08 AM

    I have got to make one of these and will definitely be pinning for later! I love the addition of the leather and fun accent fabric on the inside.

Hi! I'm Jen Hadfield. I'm a mom of 5 restoring an 1891 home in the heart of Salt Lake City. I love being creative and sharing simple ideas to make your life easier and more beautiful!

Receive the Latest Crafts, DIY, Recipes and More in your INBOX!

Follow us on Pinterest! It's awesome!

Top Posts & Pages

Copycat Panera Spinach and Artichoke Egg Soufflés - SO good!
Spruce up Your Outdoor Space with a DIY Recirculating Fountain! (tutorial)
A New Deck in Under 30 Minutes!
12 Must-Have Items to Pack on an Alaskan Cruise!
How to Change a Recessed Can Light into a Pendant Light with No Remodeling!
The BEST Fresh Strawberry Cream Cheese Cake Recipe!


Popular Posts

  • Copycat Panera Spinach and Artichoke Egg Soufflés - SO good!
    Copycat Panera Spinach and Artichoke Egg Soufflés - SO good!
  • Spruce up Your Outdoor Space with a DIY Recirculating Fountain! (tutorial)
    Spruce up Your Outdoor Space with a DIY Recirculating Fountain! (tutorial)
  • A New Deck in Under 30 Minutes!
    A New Deck in Under 30 Minutes!
  • 12 Must-Have Items to Pack on an Alaskan Cruise!
    12 Must-Have Items to Pack on an Alaskan Cruise!
  • How to Change a Recessed Can Light into a Pendant Light with No Remodeling!
    How to Change a Recessed Can Light into a Pendant Light with No Remodeling!
  • The BEST Fresh Strawberry Cream Cheese Cake Recipe!
    The BEST Fresh Strawberry Cream Cheese Cake Recipe!
  • DIY Secret: How to Print on Post-It Notes (and Free Printable Template)
    DIY Secret: How to Print on Post-It Notes (and Free Printable Template)

As seen in


Amazon Affiliate

Tatertots & Jello is a participant in the Amazon Services LLC Associates Program, an affiliate advertising program designed to provide a means for sites to earn advertising fees by advertising and linking to amazon.com.
  • About Me
  • Advertising
  • Get Featured

Copyright © 2025 Tatertots and Jello · Privacy
This site is a place for positive discussion and ideas. Negative talk, comments that disparage others, and similar are not welcome and may be removed.

64