Hello Tatertots & Jello readers! I’m Jillian from Food Folks and Fun where I mostly post restaurant-quality recipes for the home cook.

Today I am so excited to share with you my Carrot Cake Whoopie Pies with Coconut recipe. I love carrot cake and think it’s the prefect spring-time dessert. Here’s my fun take on the classic, enjoy! {If you are looking for a classic recipe, check out my Bakery-Style Carrot Cake.}
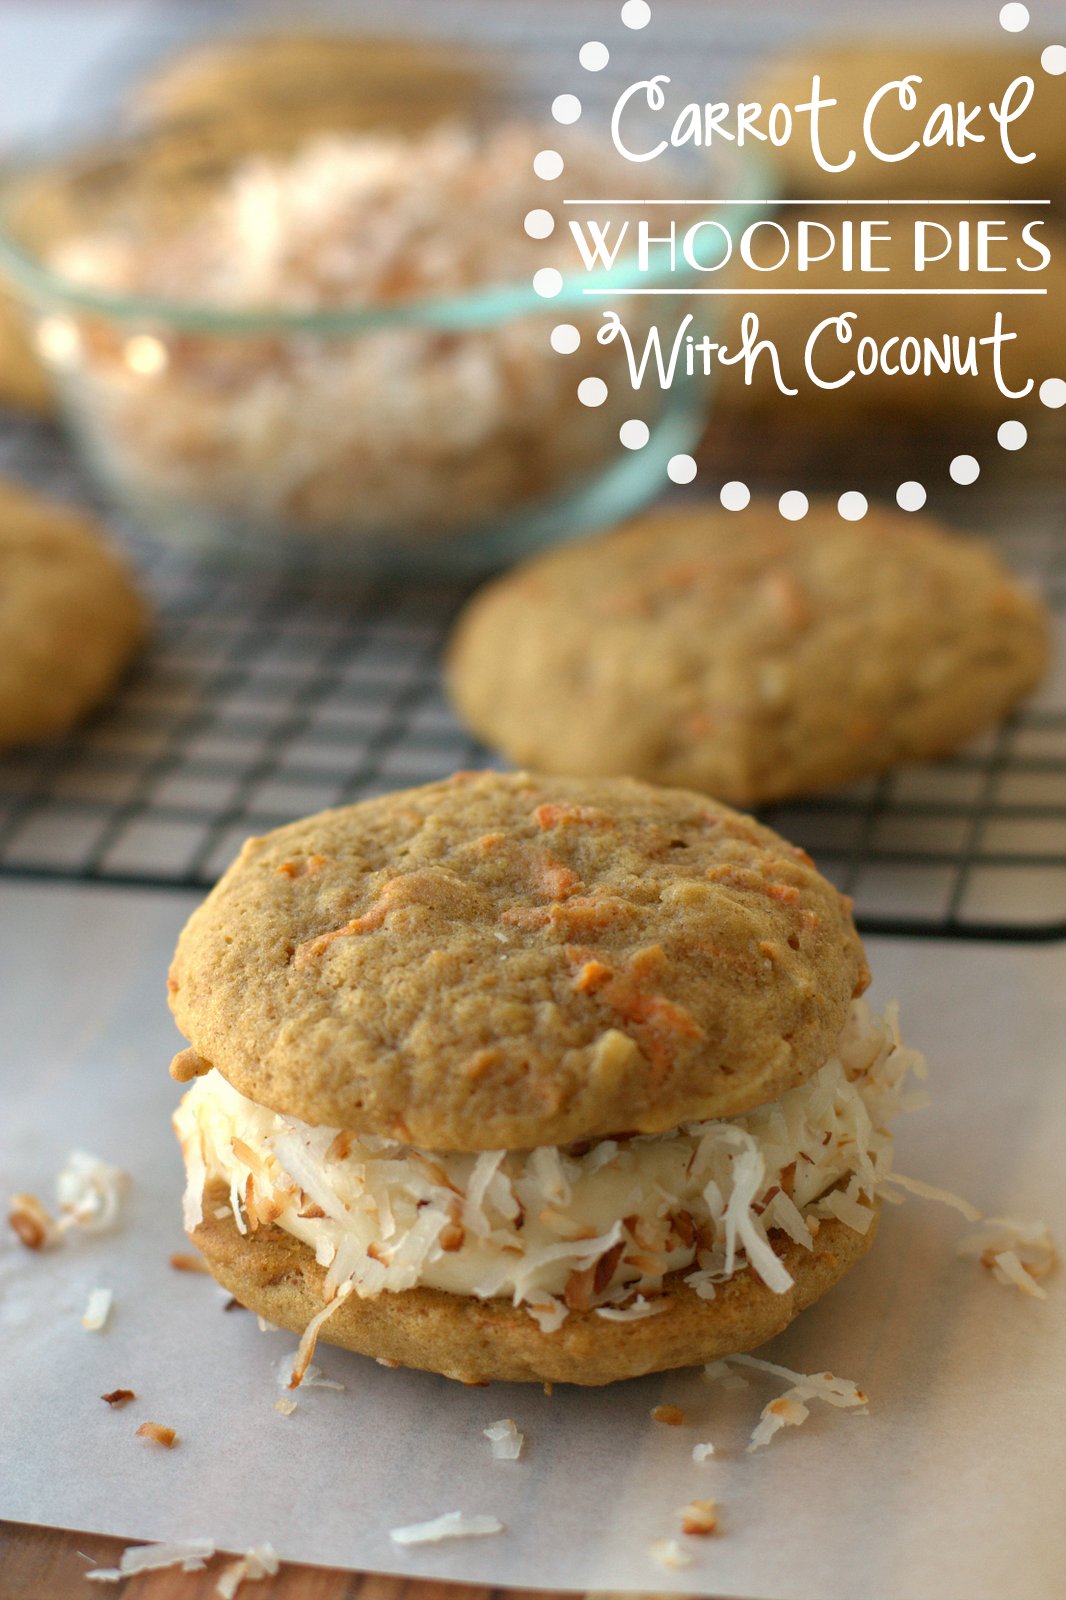
Carrot Cake Whoopie Pies with Coconut
Cook’s Notes:
- Scrape down the sides of the bowl as needed in this recipe.
- Make sure your eggs and butter are at room temperature, this will make them easier to mix into the batter and will make it less likely for the batter to become over-mixed.
- Use freshly grated carrots in this recipe, not the pre-shredded variety from the grocery store (the shred is too large for these whoopie pies).
- If you don’t want lumpy frosting, make sure your cream cheese and butter are at room temperature and that you’ve sifted your powdered sugar.
Ingredients:
Cake Tops
2 cups all-purpose flour
1-1/2 teaspoons baking soda
1 teaspoon baking powder
2-1/2 teaspoons ground cinnamon
1-1/2 teaspoons ground ginger
1/2 teaspoon salt
1/4 cup unsalted butter, at room temperature
1/2 cup granulated sugar
1/2 cup light brown sugar, packed
2 large eggs, at room temperature
2 teaspoons vanilla extract
1-1/2 cups freshly grated carrots
1/2 cup sweetened, shredded coconut
Coconut Cream Cheese Frosting
8 ounces cream cheese, softened
1/2 cup unsalted butter, softened
1 cup powdered sugar, sifted
pinch table salt
1/2 teaspoon coconut extract
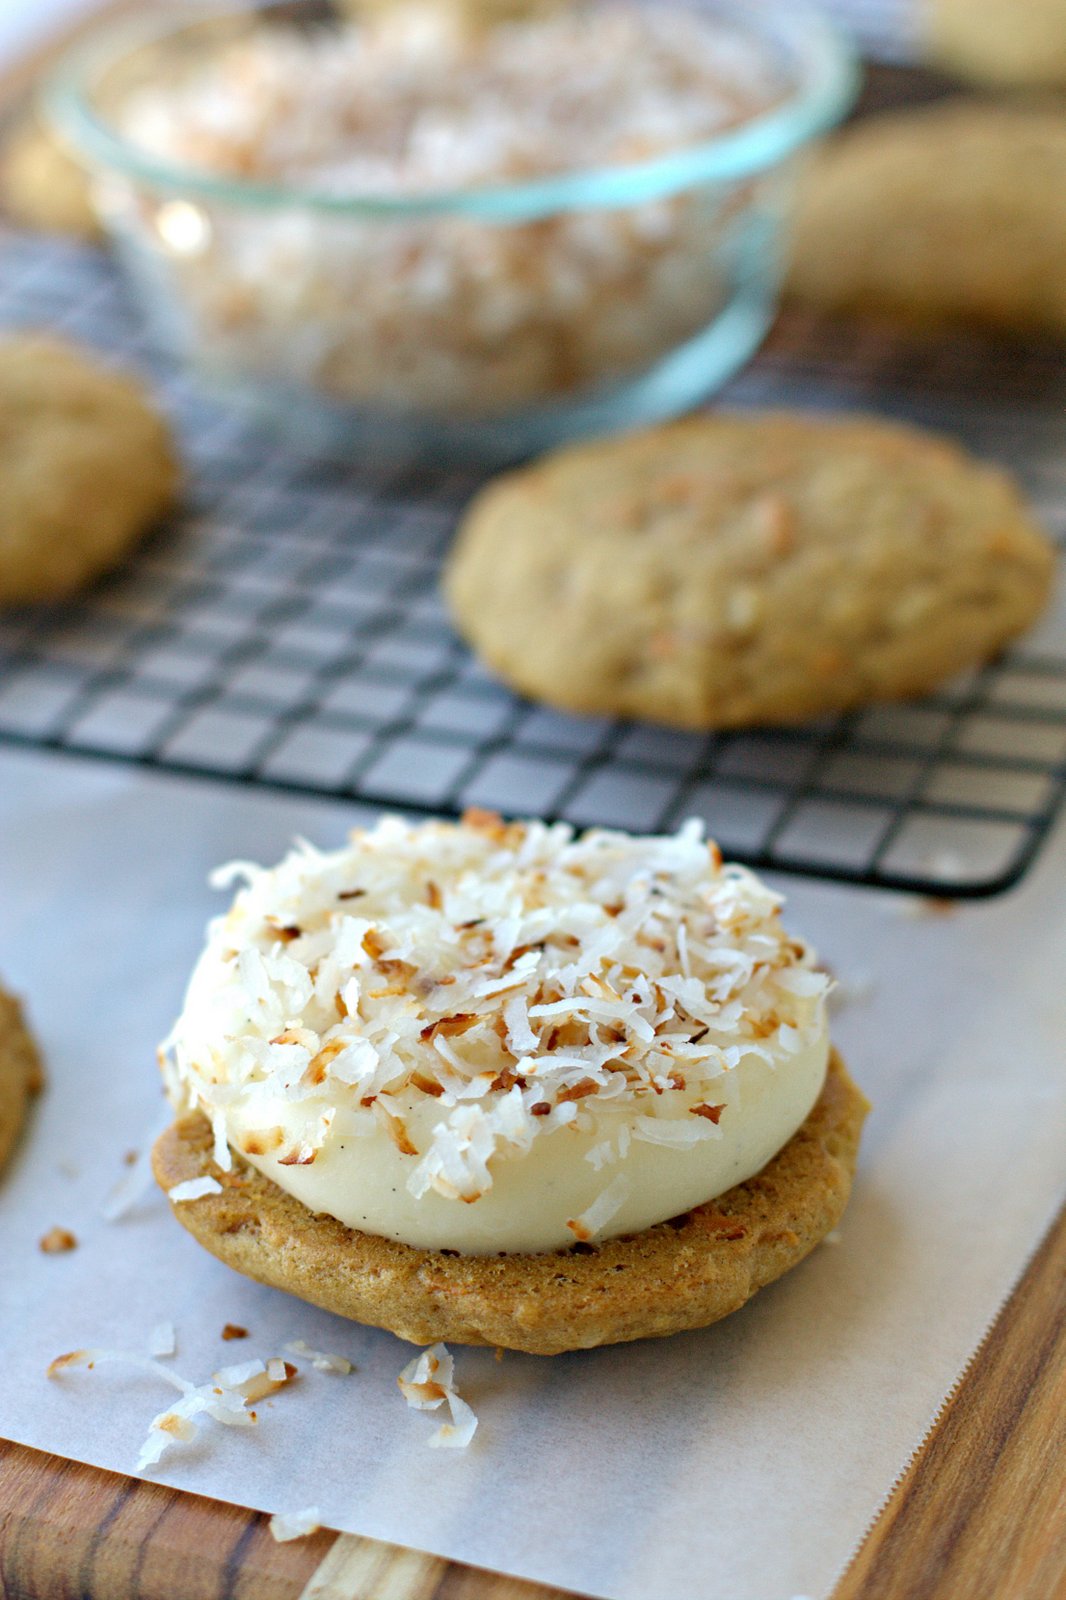
1/2 cup toasted sweetened, shredded coconut
Instructions:
Cake Tops
1. Place the oven racks in the middle and lower-middle positions. Preheat oven to 350 degrees F. Line two baking sheets with parchment paper or silicone baking mats.
2. In a medium bowl, whisk together the flour, baking soda, baking powder, cinnamon, ginger, and salt. Set aside.
3. In the bowl of a stand mixer fitted with the paddle attachment, or in a large bowl using electric hand beaters, add the butter and sugars and mix on medium speed until light and fluffy, about 1-2 minutes.
4. Add the eggs & vanilla and mix on medium speed until combined, about 1 minute.
5. Dump in the dry ingredients and mix on low speed until just combined, about 30 seconds.
6. Fold in the carrots and shredded coconut.
7. Scoop and drop 3 Tablespoons of the batter, 2 inches apart on your prepared baking sheets. (I used a 3 Tablespoon scoop to make this a lot easier).
8. Bake for 12 minutes, rotating the pans half-way through baking, until the cake tops are just firm and spring back when pressed.
9. Let the cake tops sit on the pan for about 5 minutes, then transfer them to a wire rack to cool completely.
Coconut Cream Cheese Frosting
10. In the bowl of a stand mixer fitted with the paddle attachment, or in a medium bowl using electric hand beaters, beat the cream cheese and butter on medium speed until smooth and no lumps remain, about 30-60 seconds.
11. Add the sifted powdered sugar, salt, coconut extract, and shredded coconut and mix on medium speed until just combined, about 30-60 seconds.
To Finish
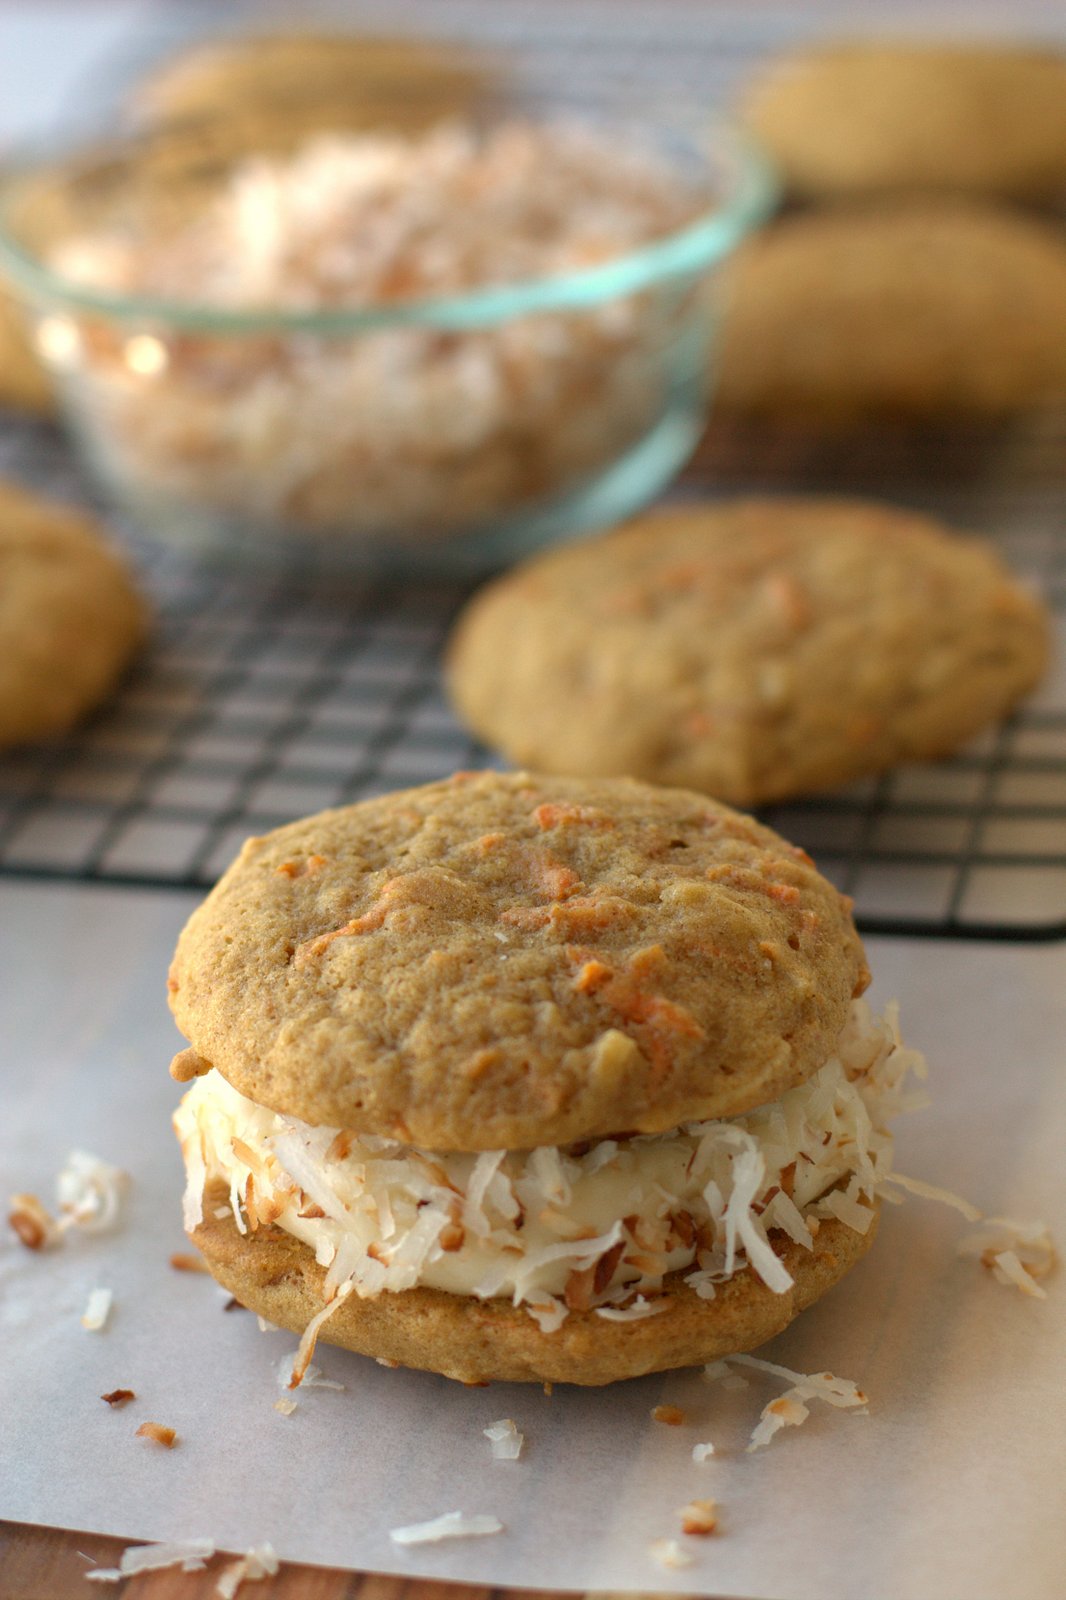
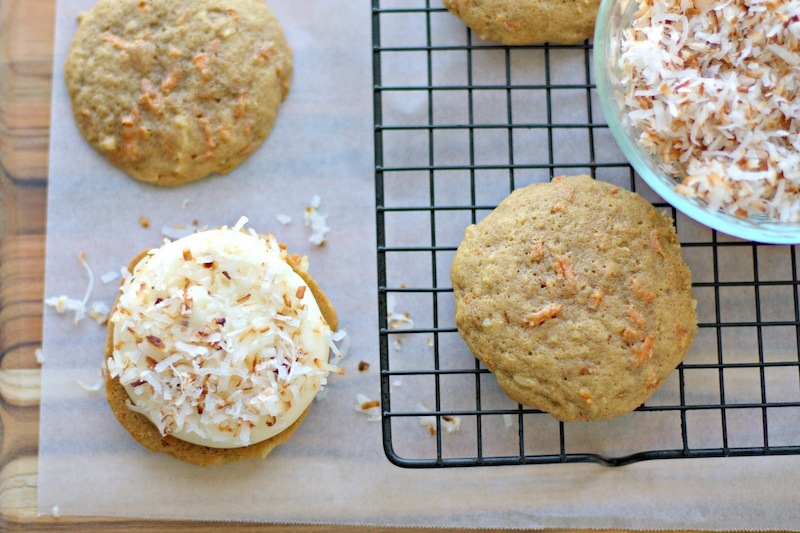
12. Add about 2 tablespoons of the frosting to the flip side of one of the cake tops. Gently press shredded coconut into the frosting and top with another cake top to create your whoopie pie. Sprinkle more coconut in the crevasse (optional). Repeat to make 11 more whoopie pies.
Store your whoopie pies by wrapping them individually in plastic wrap and keep in an air-tight container for up to 4 days.
Makes 12 large whoopie pies.
************
Thanks Jillian! Don’t those look SO yummy?? I love whoopie pies, and a carrot cake version is perfect for Easter!! Jillian has so many yummy recipes on her blog. Here are a few that look mouth-watering:
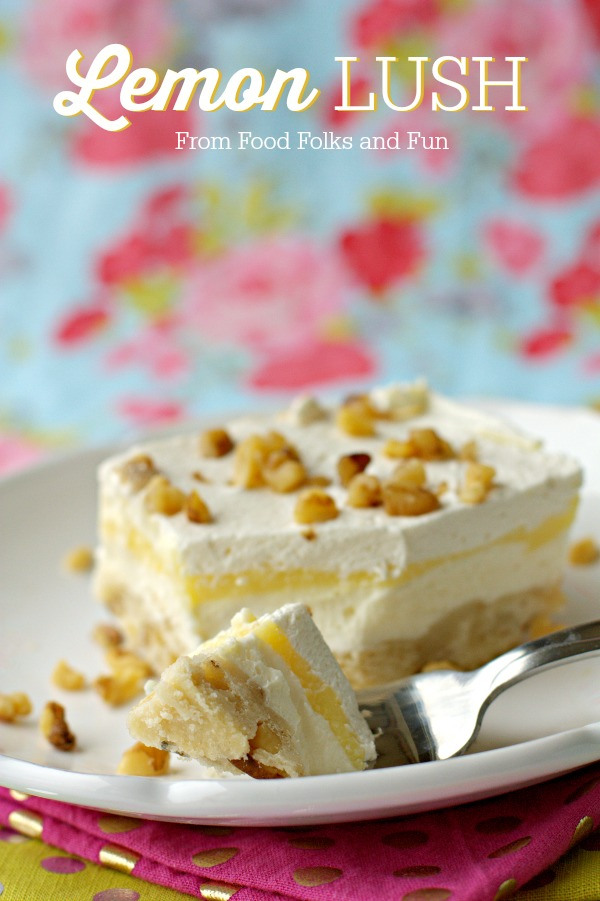
This Lemon Lush recipe looks so yummy! I love how you can make it ahead of time too!

Who doesn’t love a hot breakfast in the morning? These Overnight Breakfast Enchiladas would be so tasty for an Easter Brunch!
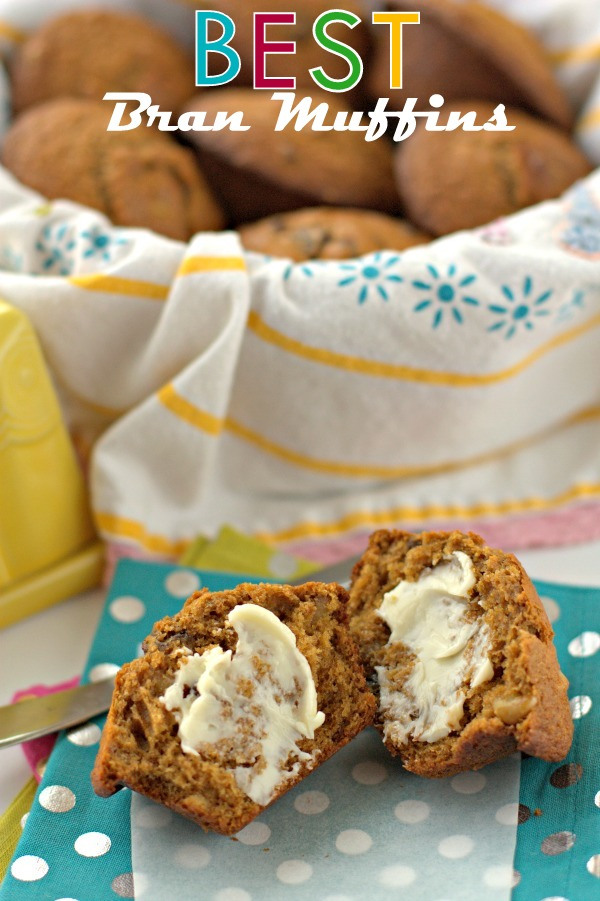
And I can’t wait to try out these Best Bran Muffins! They would make a great addition to an Easter brunch too!
Follow Food, Folks, and Fun and

- 2 cups all-purpose flour
- 1-1/2 teaspoons baking soda
- 1 teaspoon baking powder
- 2-1/2 teaspoons ground cinnamon
- 1-1/2 teaspoons ground ginger
- 1/2 teaspoon salt
- 1/4 cup unsalted butter, at room temperature
- 1/2 cup granulated sugar
- 1/2 cup light brown sugar, packed
- 2 large eggs, at room temperature
- 2 teaspoons vanilla extract
- 1-1/2 cups freshly grated carrots
- 1/2 cup sweetened, shredded coconut
- –Coconut Cream Cheese Frosting
- 8 ounces cream cheese, softened
- 1/2 cup unsalted butter, softened
- 1 cup powdered sugar, sifted
- pinch table salt
- 1/2 teaspoon coconut extract
- 1/2 cup toasted sweetened, shredded coconut
- Place the oven racks in the middle and lower-middle positions. Preheat oven to 350 degrees F. Line two baking sheets with parchment paper or silicone baking mats.
- In a medium bowl, whisk together the flour, baking soda, baking powder, cinnamon, ginger, and salt. Set aside.
- In the bowl of a stand mixer fitted with the paddle attachment, or in a large bowl using electric hand beaters, add the butter and sugars and mix on medium speed until light and fluffy, about 1-2 minutes.
- Add the eggs & vanilla and mix on medium speed until combined, about 1 minute.
- Dump in the dry ingredients and mix on low speed until just combined, about 30 seconds.
- Fold in the carrots and shredded coconut.
- Scoop and drop 3 Tablespoons of the batter, 2 inches apart on your prepared baking sheets. (I used a 3 Tablespoon scoop to make this a lot easier).
- Bake for 12 minutes, rotating the pans half-way through baking, until the cake tops are just firm and spring back when pressed.
- Let the cake tops sit on the pan for about 5 minutes, then transfer them to a wire rack to cool completely.
- –Coconut Cream Cheese Frosting
- In the bowl of a stand mixer fitted with the paddle attachment, or in a medium bowl using electric hand beaters, beat the cream cheese and butter on medium speed until smooth and no lumps remain, about 30-60 seconds.
- Add the sifted powdered sugar, salt, coconut extract, and shredded coconut and mix on medium speed until just combined, about 30-60 seconds.


These look so good! They probably so much healthier than the store bought kind. I never thought about adding coconut to them. Thank you for the recipe!
I’m pretty sure I just heard my Mr fall in love with this from across the room. I know what I’m making for next weekend’s treat!
These sound fantastic!
looks delish!