![]()
 I love being part of the Lowes Creative Ideas Team. This month we were asked to create something for our home using Pantone’s color of the year – Radiant Orchid.

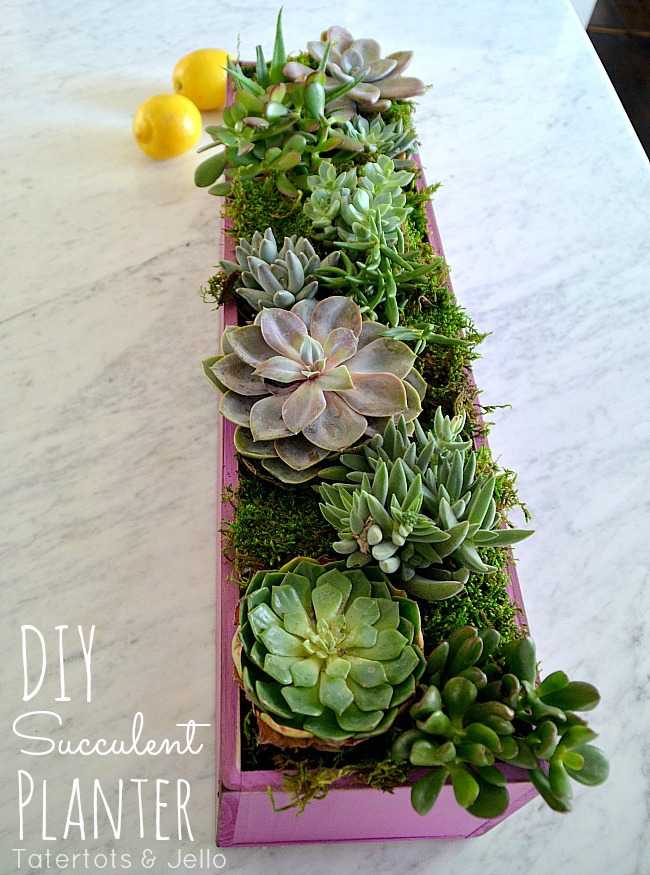
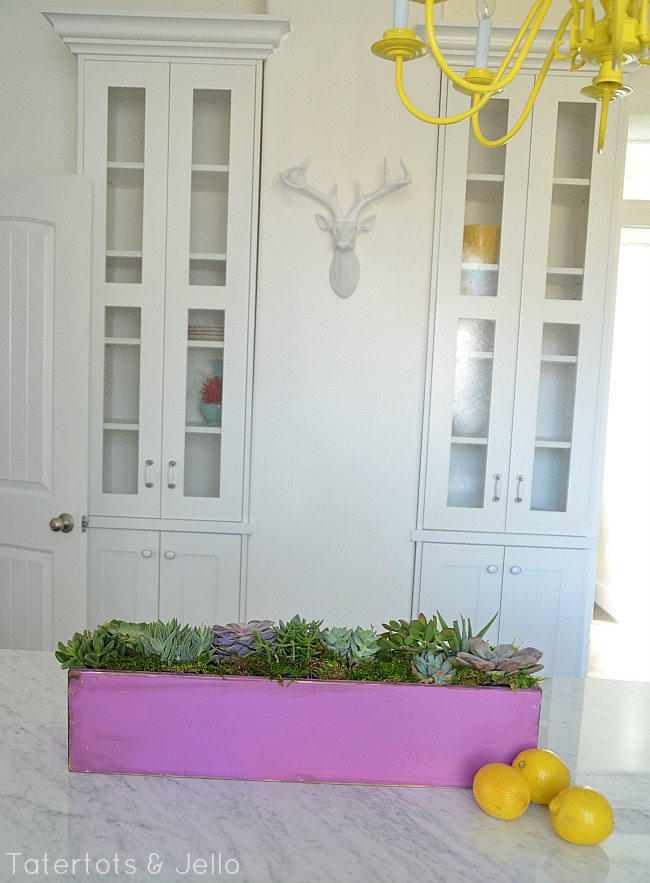
I recently posted some home decor ideas using Radiant Orchid. When I originally saw the color of the year, I didn’t think I could incorporate it into my home’s decor. It seemed a little too vibrant. But after doing some research I thought it might work. Especially for Spring. And I loved the idea of incorporating the bright purple color with the soothing color of succulents. The greens against the contrast of the purple seemed so pretty to me. 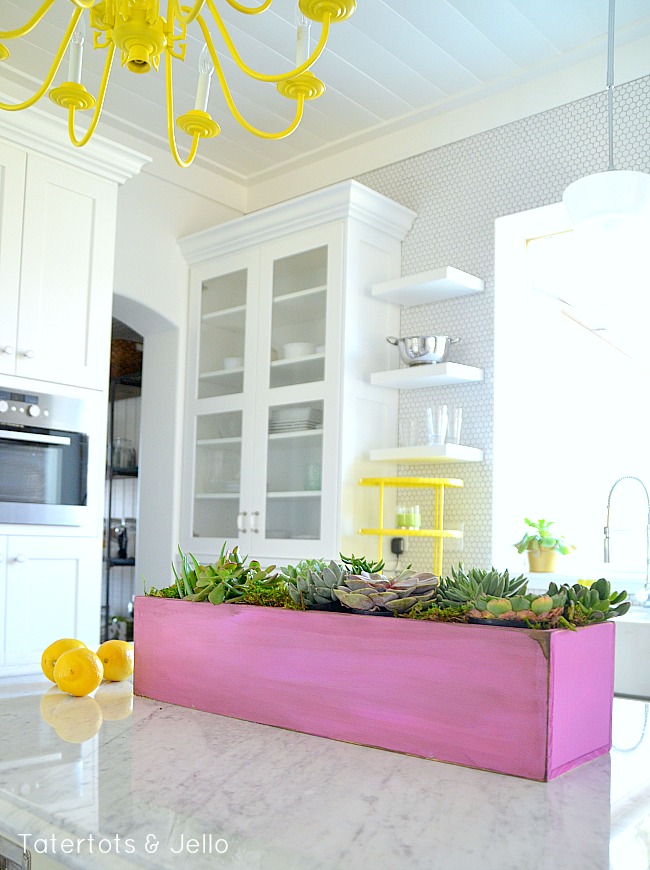 So I thought it would be fun to make a DIY wooden succulent planter and paint it Radiant Orchid.
 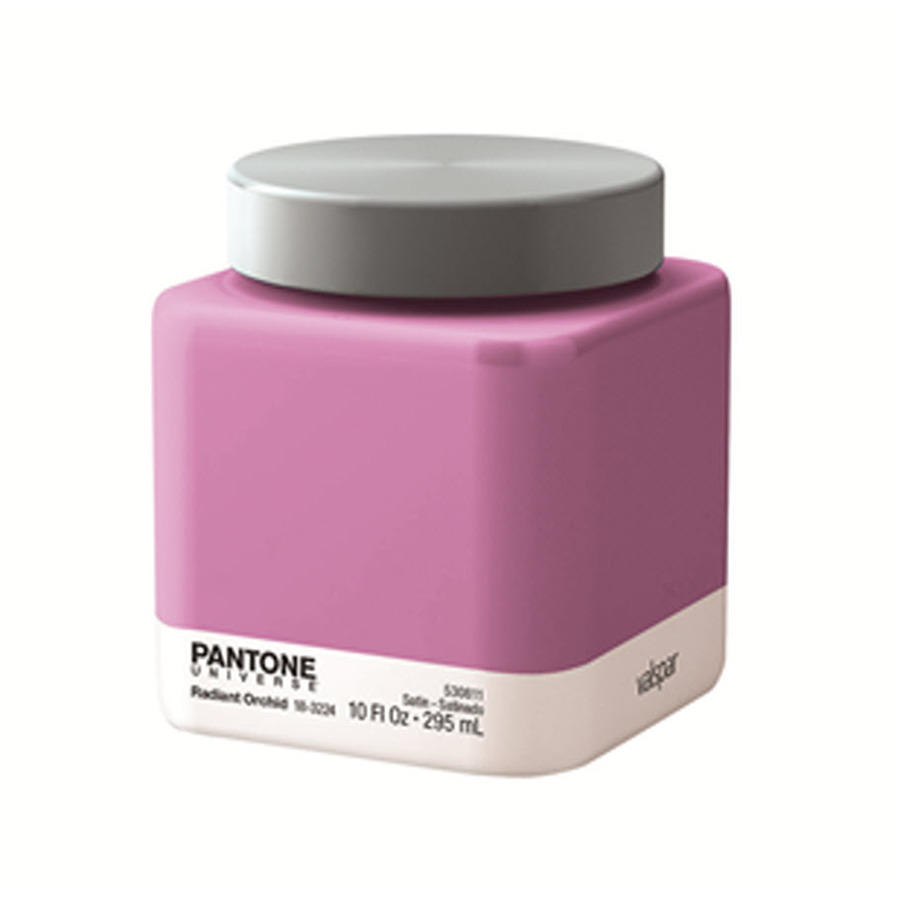 Here’s how simple it is to make: You’ll need:
- 3 of the 3/8 x 6 x 36 craft wood pieces — in my Lowe’s, they’re stored horizontally underneath the molding. Be sure to choose nice, straight pieces. (See left image below)
- 1 package of #6 x 3/4″ “Pro Crafter” screws (See center image below)
- Saw, drill and screwdriver
- Sander
- Wood fill if you want to fill in the screw holes
- Paint (you can buy little samples of the Valspar Pantone Orchid color of the year, perfect for this project)
Note: you could do this project with small nails to attach the wood. However, I first tried using nails to attach the wood and I found that it was even easier to split the wood with nails and they didn’t feel secure, so I used the screws. You may also consider using wood glue on each joint. 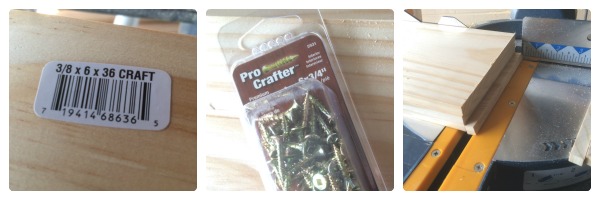 1. Use your saw to carefully line up all three pieces of wood and trim off one end — removing the rough, mill-cut end. (See the right picture above)
 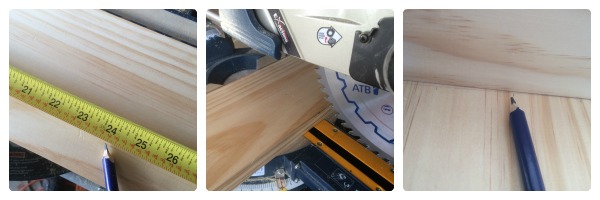 2. Measure 24″ — or however long you want your planter to be — and mark it on the wood. (See picture at left above)
3. Cut the boards to the 24″ length: I cut all three pieces at once. (See picture in the center above.)
4. Lay one of the boards perpendicular on the sides of two of the others and mark a board’s width light pencil mark along three sides — the two shorter sides (ends) and one of the long ends. (See right picture above.) Why? You’re going to make drill marks, so you need to know where to make those marks so they’ll go into the adjacent boards, like this:  You can measure them so they’re consistent, or just guess well. Make these marks on each end and along the bottom. I did three on each end and about five along the bottom. You are only marking two boards and leaving one unmarked.
 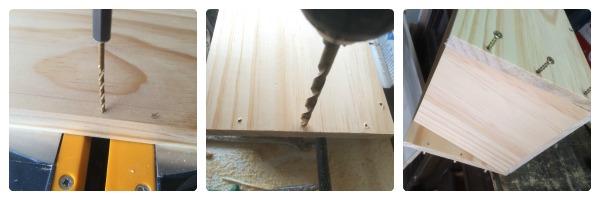 5. Now, use a small drill bit — I used a 1/8″ one — to drill through the boards in each place you marked. You are only drilling two of the three boards.
6. Use a chamfer bit or a larger drill bit and good judgment to drill a hole to countersink the heads. I didn’t have my chamfer bit handy so I used a 1/4″ drill bit to make a space for the screw heads to sink into the wood. Be sure to drill the countersink/chamfer holes on the opposite side of where you made the pencil marks on the two boards — then the pencil marks will be on the inside of your box.
7. Line up the two boards and the bottom board — the one you left unmarked and undrilled — and screw them together loosely.
8. Now, measure the remaining ends — they should be the same measurement, but they may be slightly different if your boards are not perfectly straight — and cut two end pieces from the wood remaining.
9. Slide the end pieces in and screw them on (see right image above). 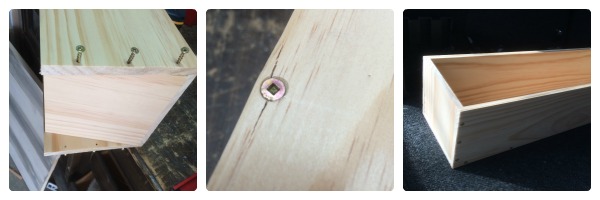 10. Tighten all screws and you’re done! Tip: Be careful putting in the screws. Because your screws are so close to the ends and sides of this wood, it’s easy to split the wood (see center image above). That’s why we pre-drilled both the screw holes and the countersink/chamfer holes.
11. Now you can use wood filler to cover the screw holes if you like, and paint it whatever color you like! I used Pantone’s Radiant Orchid for my planter. I sanded down the edges and added a little stain too.
12. And to make sure the wood didn’t get damaged by water, I kept the succulents in their pots and lined the bottom of the planter with a plastic garbage bag to keep water off of the wood. I camouflaged the pots by adding a layer of moss on top of the planter. 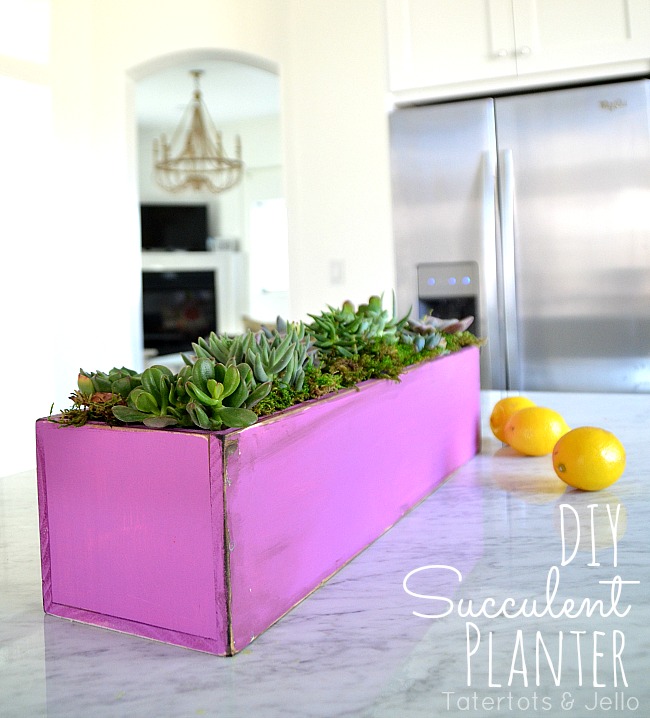
What Spring project are YOU excited to make for YOUR home??
Let me know in the comments!!
You can also follow Lowe’s on Facebook for more great ideas and sign up for their FREE Creative Ideas Magazine with TONS of great DIY ideas and instructions!!

++++
How might you use the color of the year?
xoxo

Thanks to Lowe’s for providing materials for this post; the opinions and content are mine. See my disclosures.
PS: I’ve linked up this post to these fabulous blogs this week!


Great idea. I LOVE this color! I need to make one for our picnic table. xo
Love this!!! I live in Arizona so succulents abound. I am not making my own planter though but have the perfect one in mind. Thanks for the inspiration.
I love this idea! As always, great post Jen! xx Hope you’re having a wonderful week
I love this Jen- I agree that the green with the purple looks fabulous together. Some of the prettiest succulents even have a hint of that purple right in them. Such a cute springy centerpiece- and I like the distressed edges. I have a sample size of a similar color right now and I am excited to change up a key piece in our living room with it soon!
Oh my gosh this is the cutest thing ever and so simple! Thanks for sharing!
Did you use a liner? I had the cutest wooden planter box but it totally warped from watering. Super cute though!
I obviously missed that step. Love that you use miss to hide the pots. Must make it this weekend, thanks for the idea!
Love the color of the box and the succulents also!!!
That looks super cute in the cottage.
Oh I’m loving the succulents & the orchid color this year. I am soooooo looking forward to incorporating it more in my surroundings
That radiant orchid planter looks beautiful in your kitchen!! It definitely brings some Spring colors in, and the succulents are the perfect thing to fill it with.
I love your kitchen. I have a white kitchen & I was wondering what the island countertop is and is that wallpaper behind the sink or tile?
Hi Jaycee!
The island ountertop is marble and the tiles behind the sink are hexagonal tiles (I got them through overstock.com).
xoxo