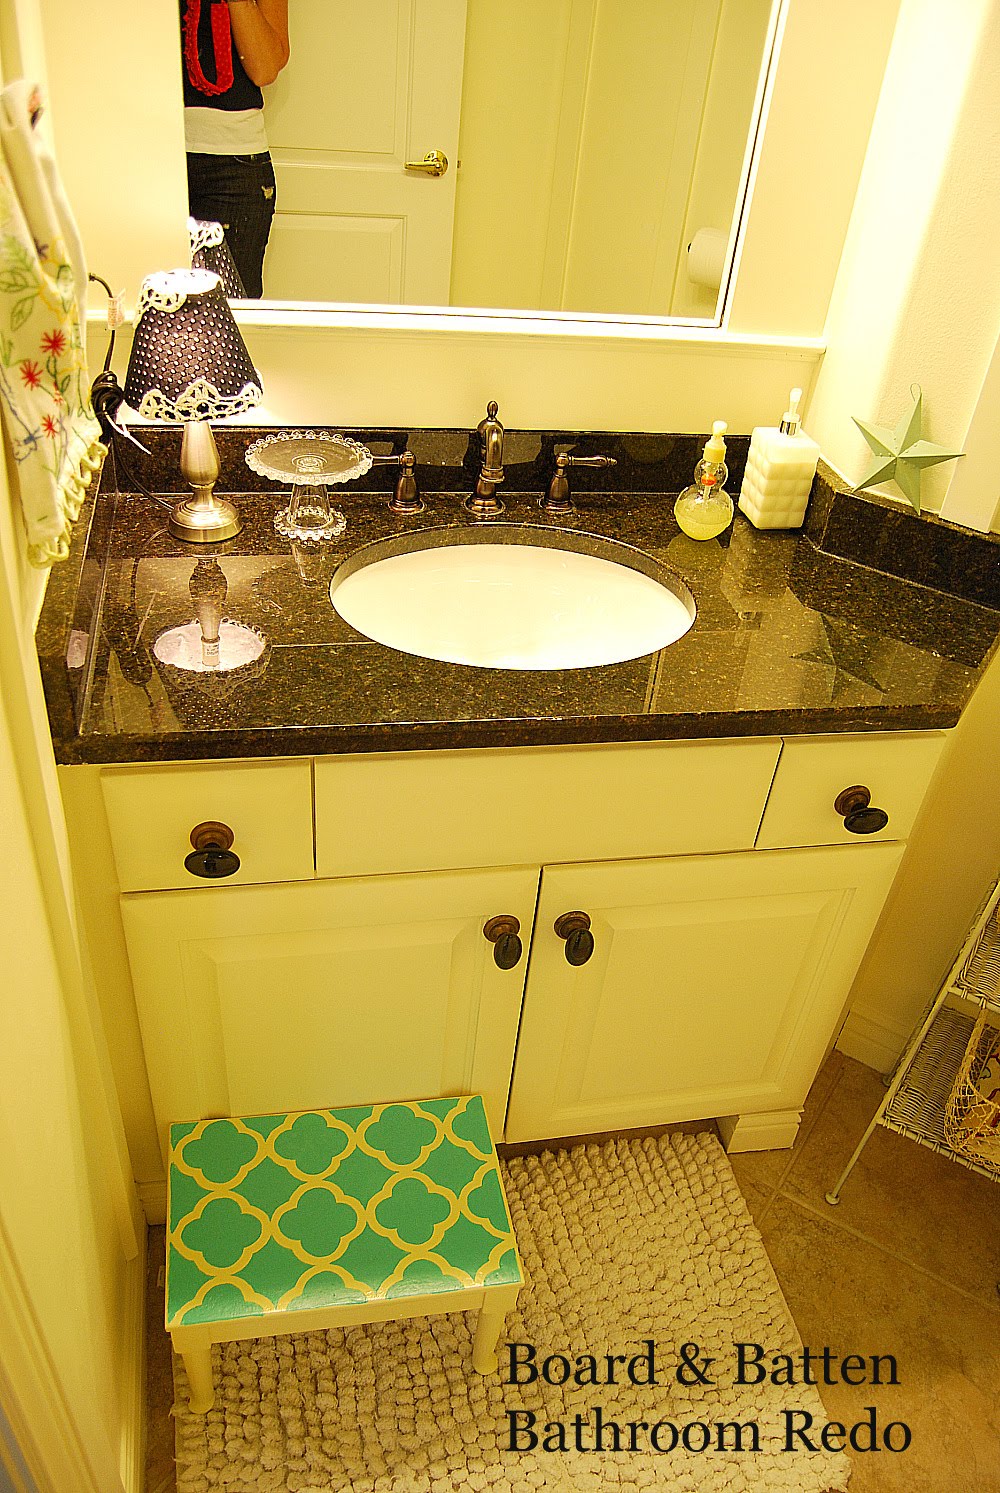
I got my first big project done.
Yay! I have been wanting to redo my hall bathroom for quite some time.
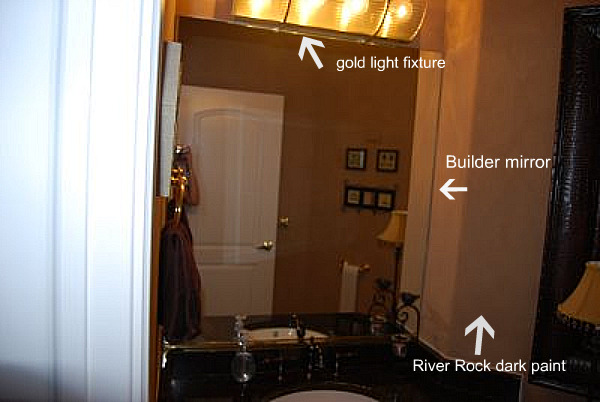
It doesn’t have a window and had been painted a very dark brown color with a River Rock finish. Here are some before pictures:
Yay! I have been wanting to redo my hall bathroom for quite some time.
It doesn’t have a window and had been painted a very dark brown color with a River Rock finish. Here are some before pictures:
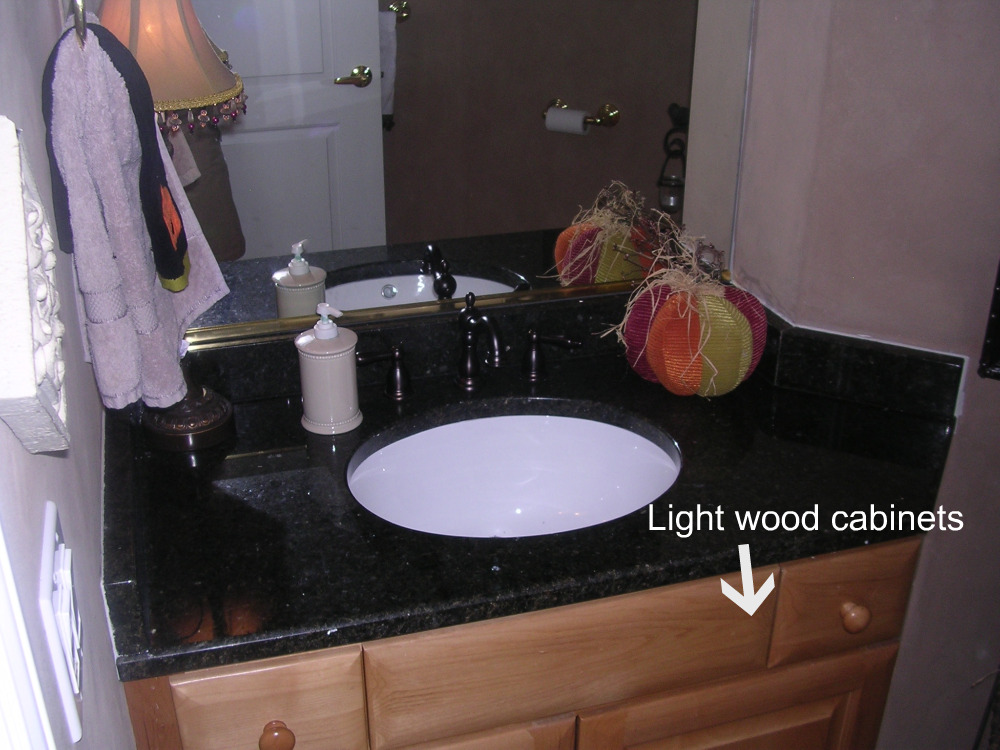
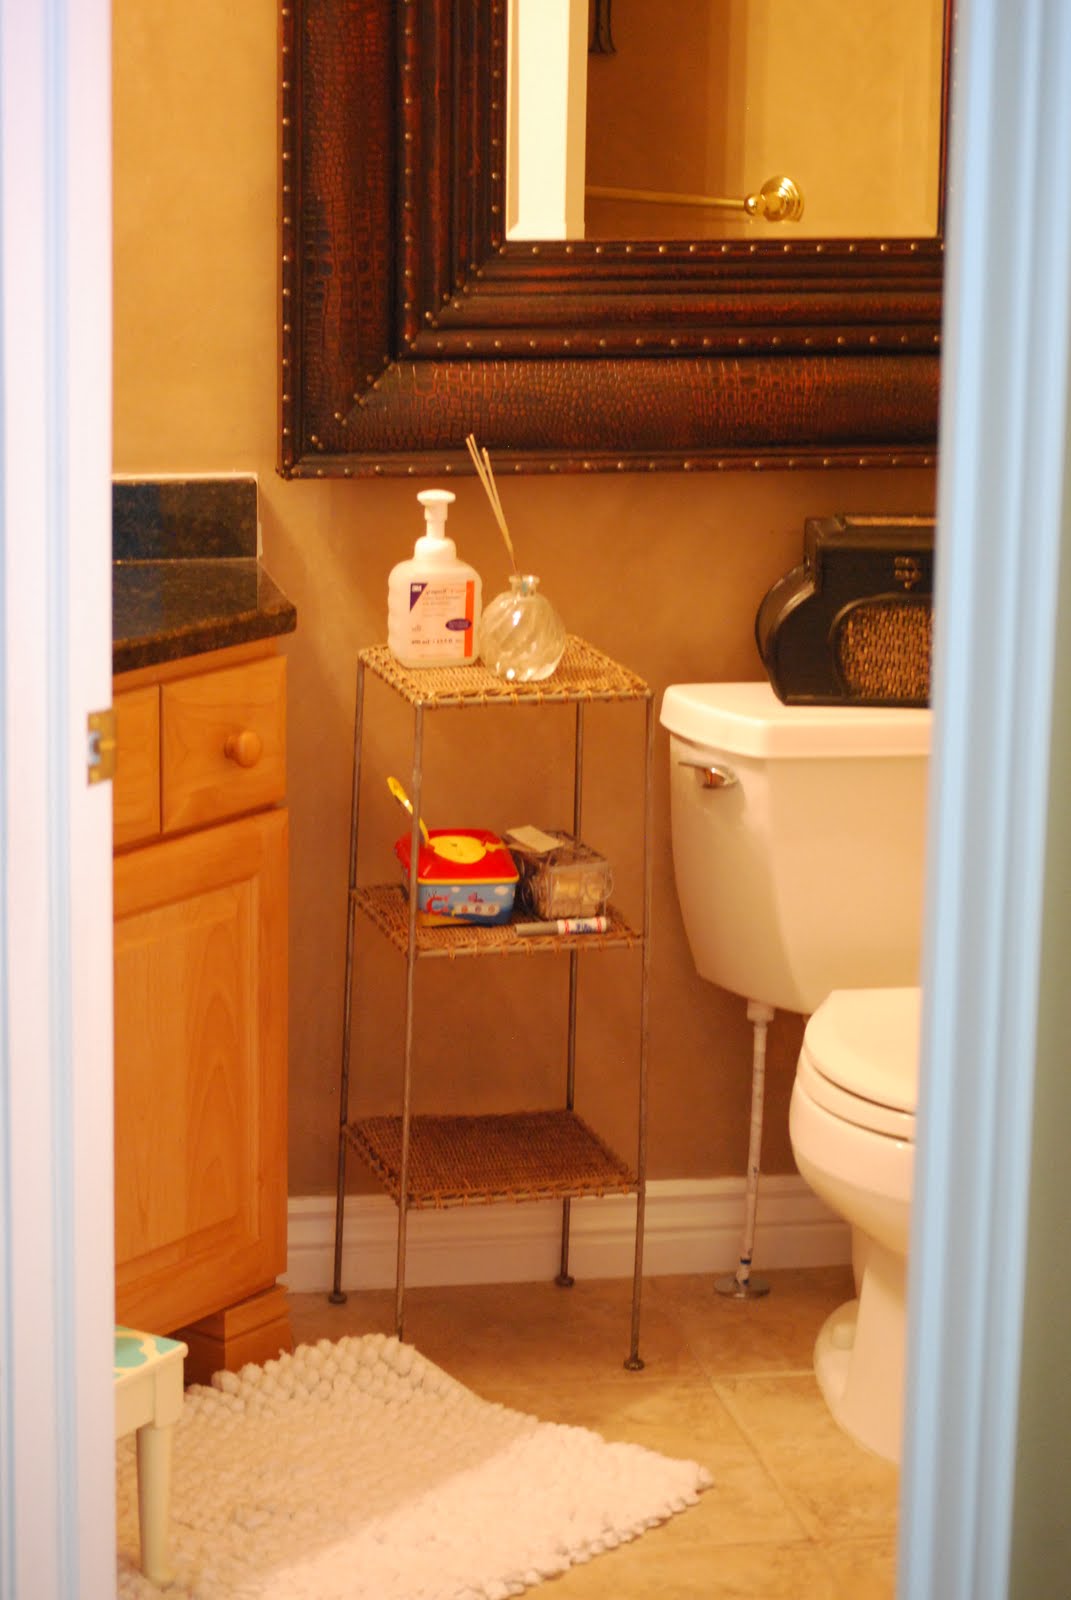
Sorry – my camera lens wasn’t working when I started the project so I couldn’t get a good before shot. Here are some older pictures that show you what it looked like before. I really wanted to lighten it up a bit.

Come on in and I’ll show you what we did!
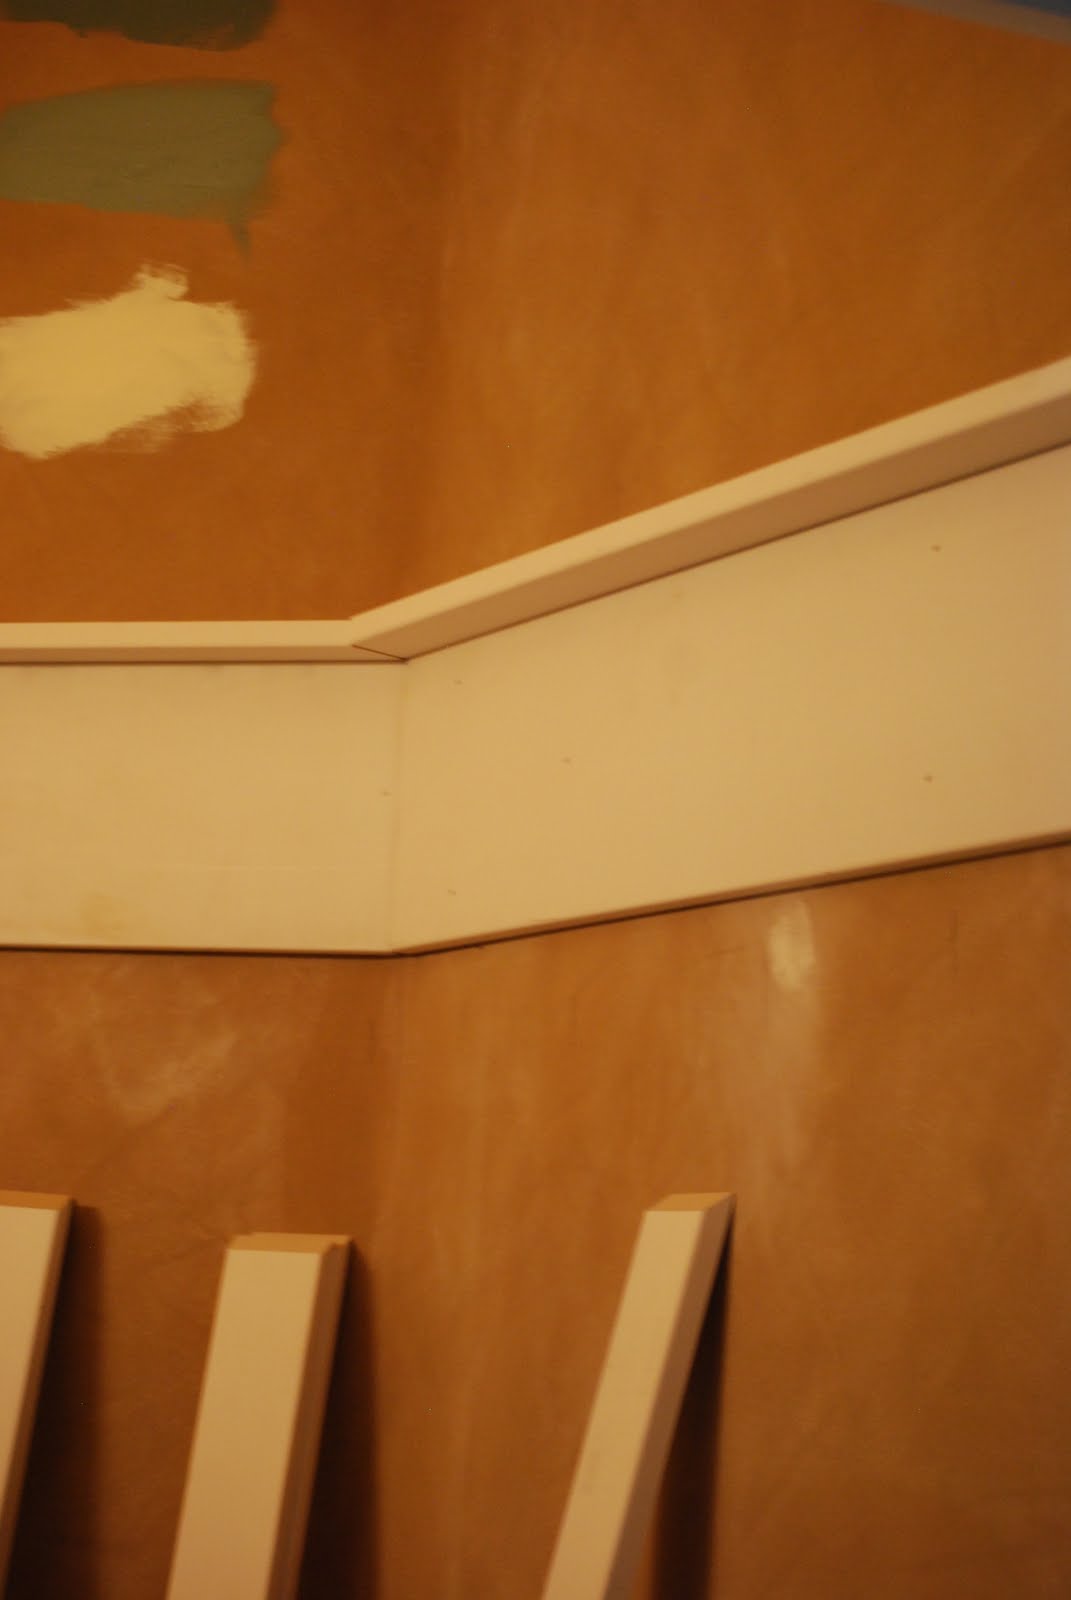
Firs I sanded down the walls and got all of the River Rock paint finish smoothed out. I used primed MDF boards for the Board & Batten treatment.
Steps to Board & Batten Treatment:
- 1 x 8 — is the top part of the wall treatment. Miter the edges and nail these in — use a level — lol.
- 1 x 2.5 — are laid over the top of the 1 x 8’s, creating a small shelf. {you can use a larger board like 1 x 4’s if you want}.
- 1 x 2.5’s were also used for the boards running vertically on the walls. We spaced them about 16 inches apart on the walls.
- We angled the edges of the boards at the bottom end so they could rest on top of the existing base moulding and we didn’t have to take that moulding off.
- Run a line of Gorilla Glue Wood Glue on the back of the boards and nail them in. A nail gun is wonderful for this!!
- Caulk the edges of the boards so there are no gaps.
- Paint the walls and the moulding. {It would probably be easier to paint before you put the moulding on – I realized this half way into the project. You would still need to do a final coat over the top after you caulk too.}

My fantastic father-in-law came over and cut the boards for me. He even brought his nail gun — so nifty!!
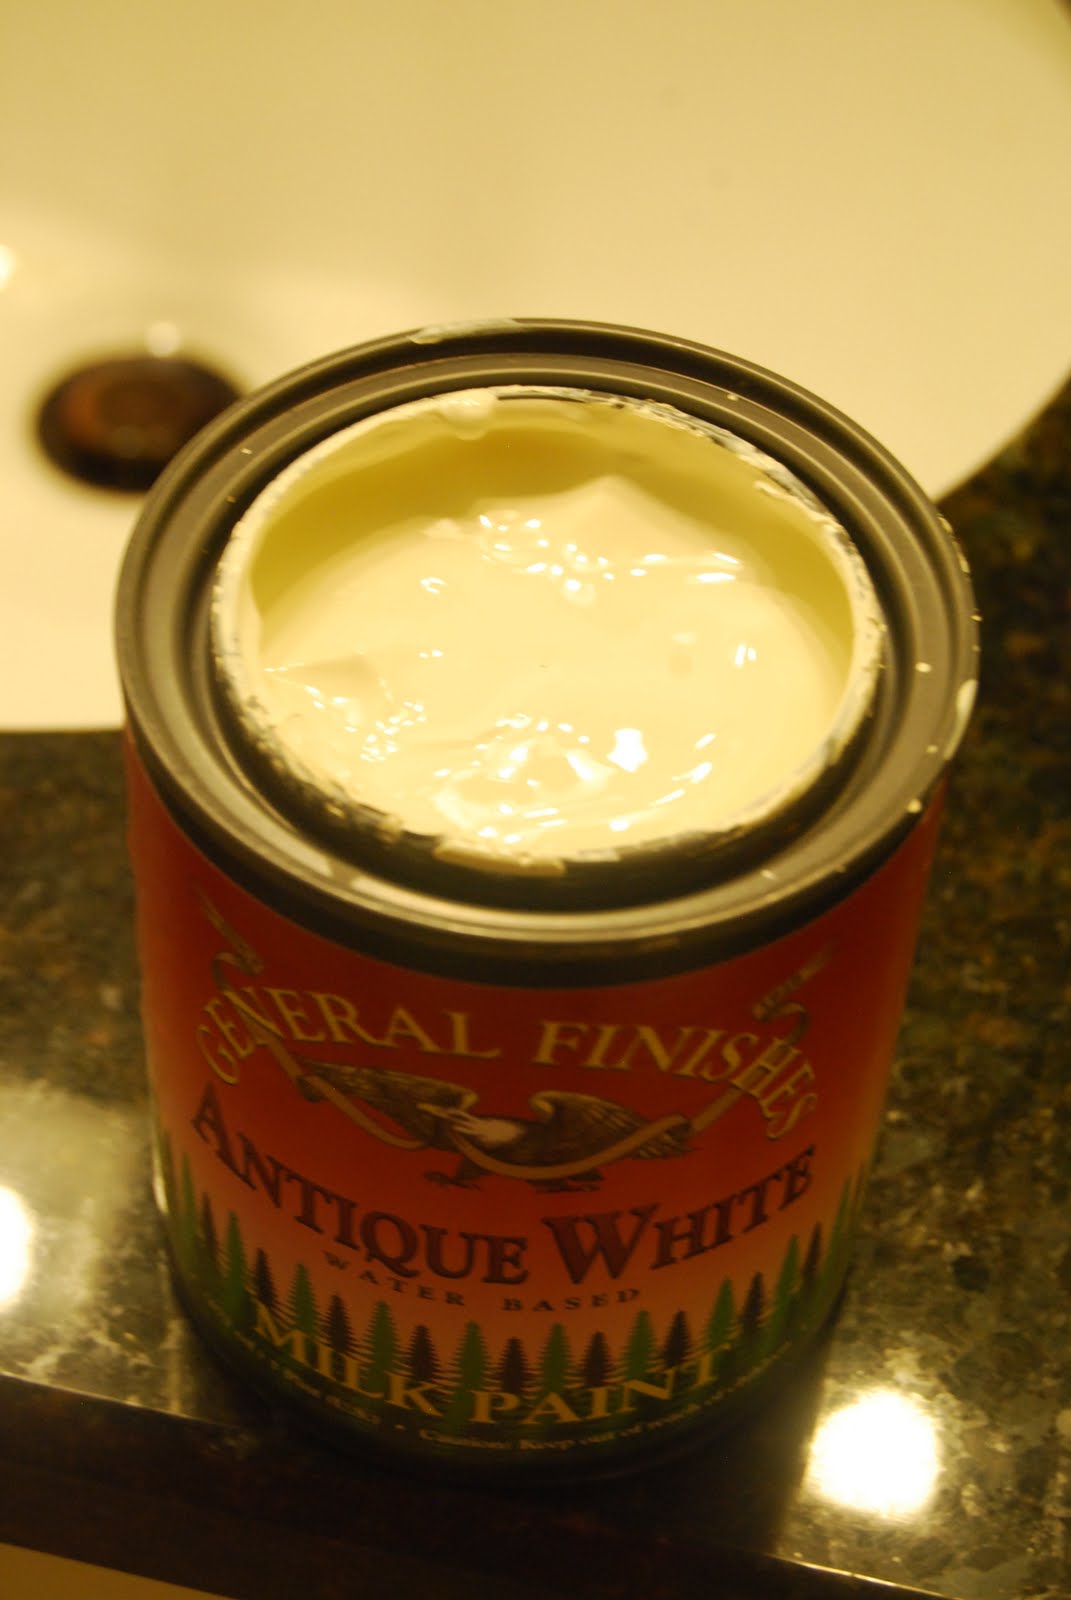
Rockler sent me some products to try out because they are one of the newest sponsors of The DIY Club. One of the things they sent me was their Milk Paint! Wow – this is an amazing product! I was surprised at how thick the milk paint was. I was thinking that it would be thin, but it is actually quite thick and creamy!
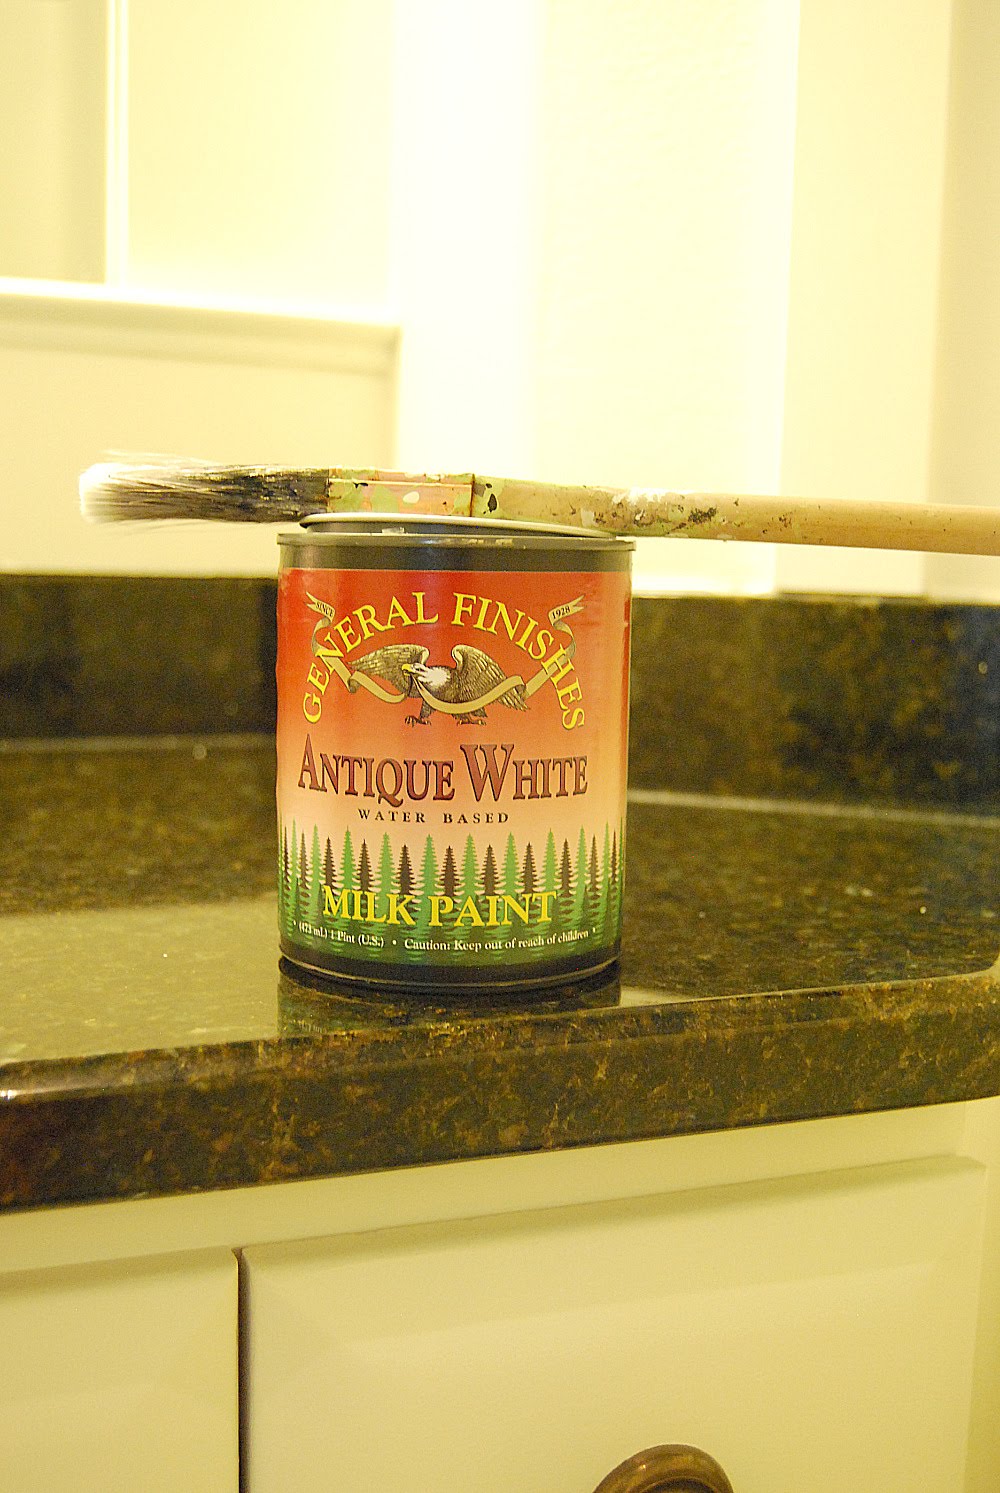
I used Antique White for the cabinets and the woodwork {I primed the cabinet first}. Milk paint also has a beautiful satin finish, so it was perfect for this project. I actually thinned it down a little with some water and the consistency was perfect. I put about 4 coats of paint on the walls, cabinet and woodwork. I used a small roller to do most of the surfaces and a small angled paintbrush for the corners and small spots.
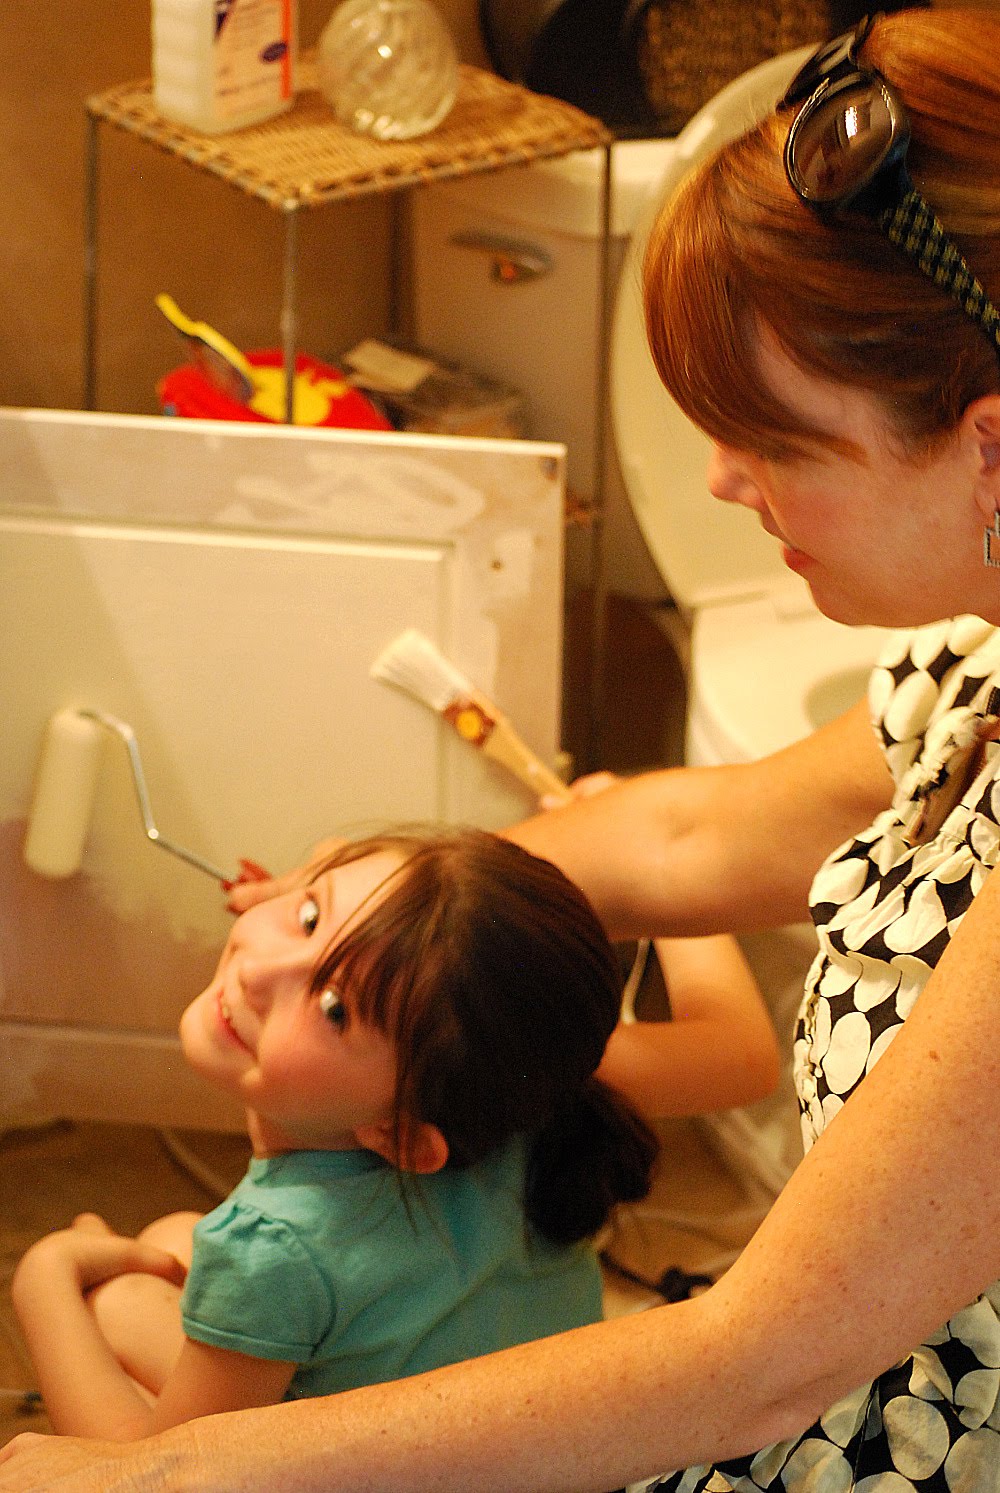
Ella helped paint the cabinet and room too – she had to get in on the act!!
Then I painted the ceiling:

And the top of the walls:

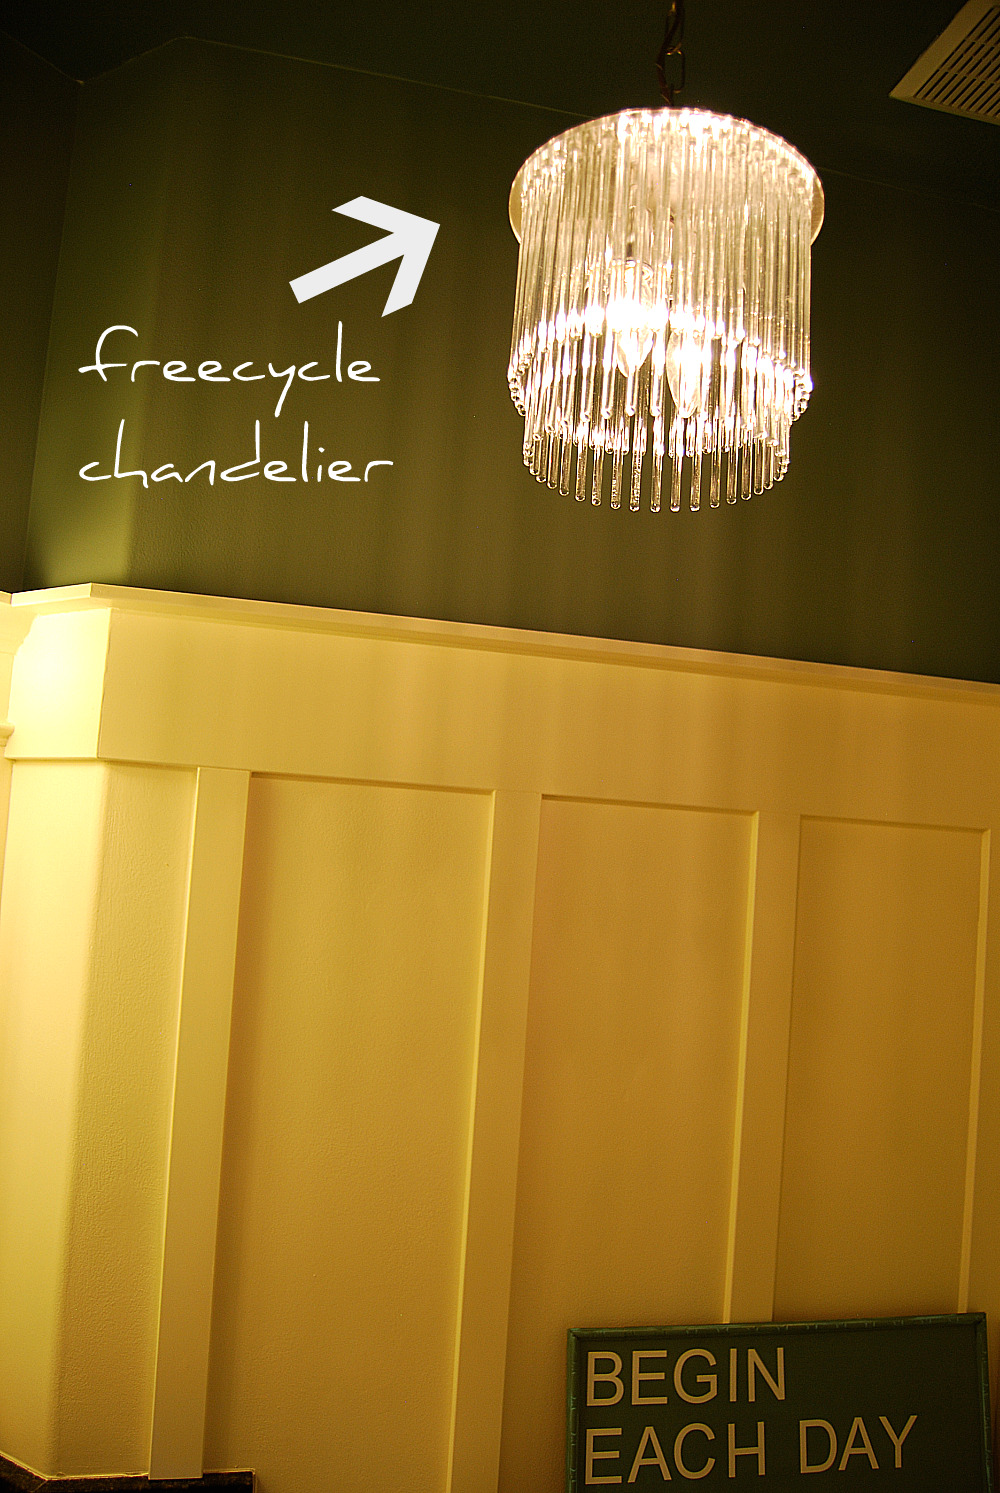
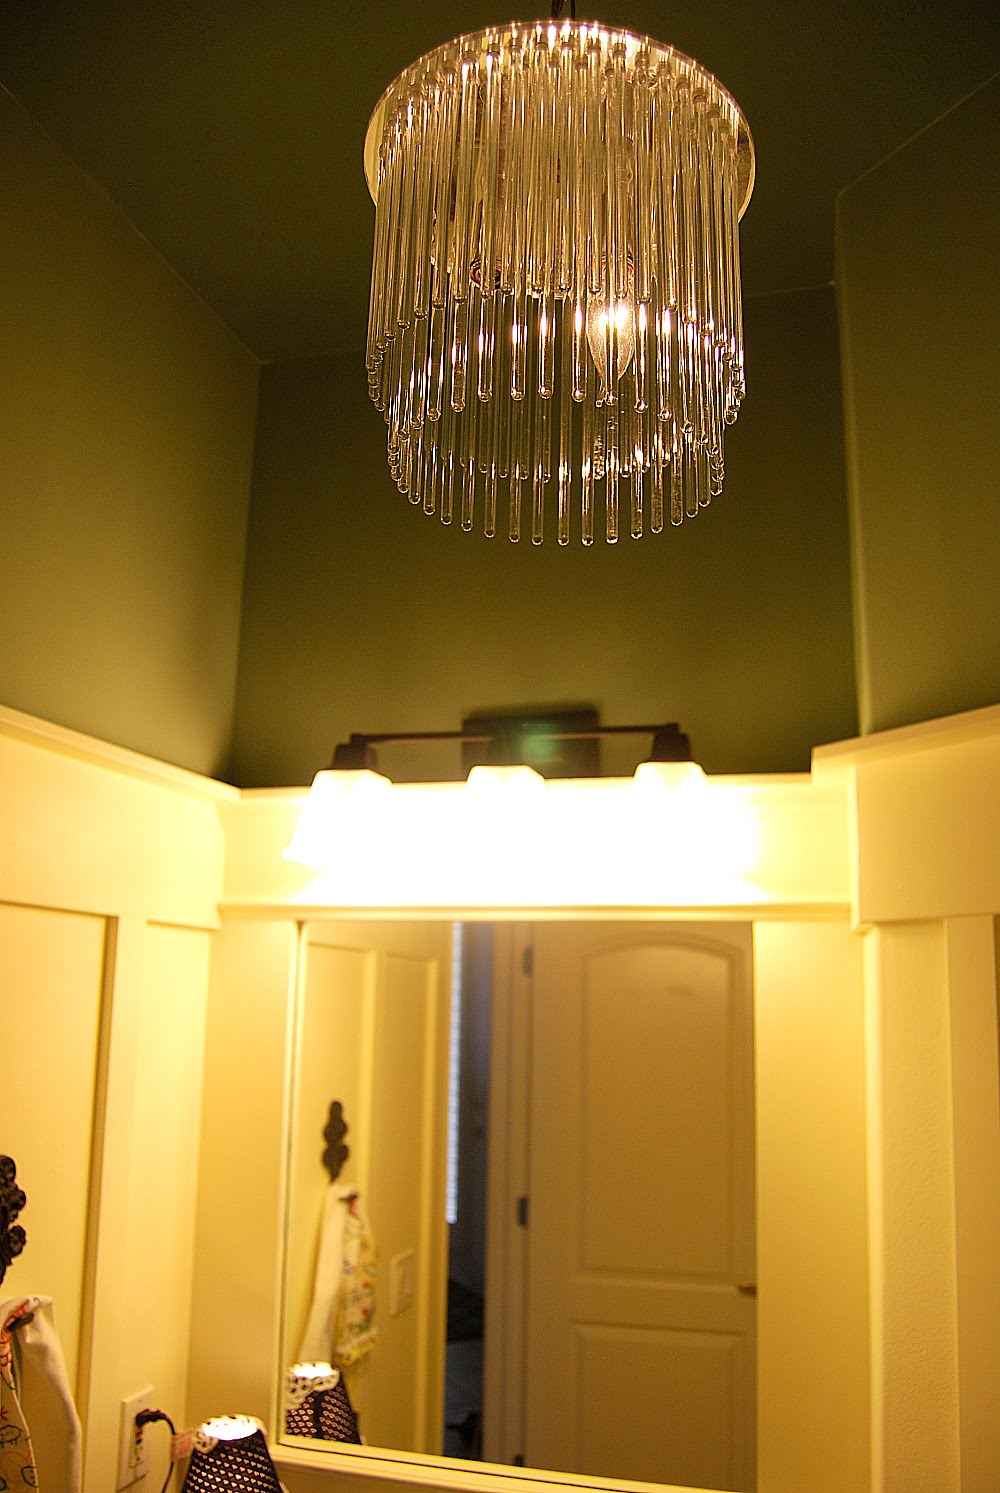
My father-in-law also ran electricity to the ceiling for a chandelier:

I put an ad on Freecycle and a woman contacted me who had a chandelier from her 1940’s home that she didn’t want. So I brought it home and gave it a good wash:
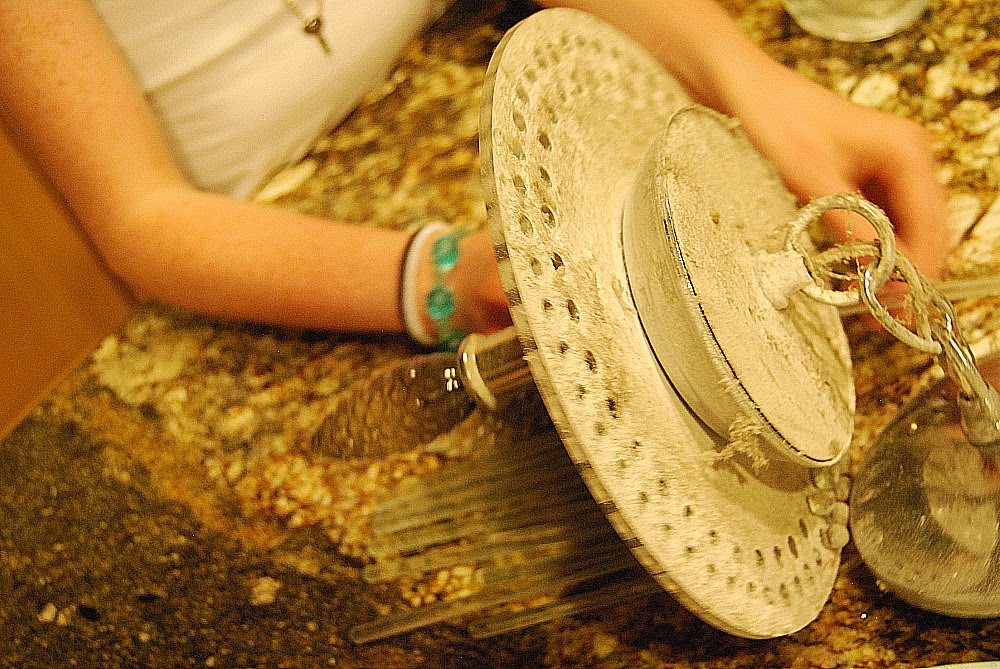
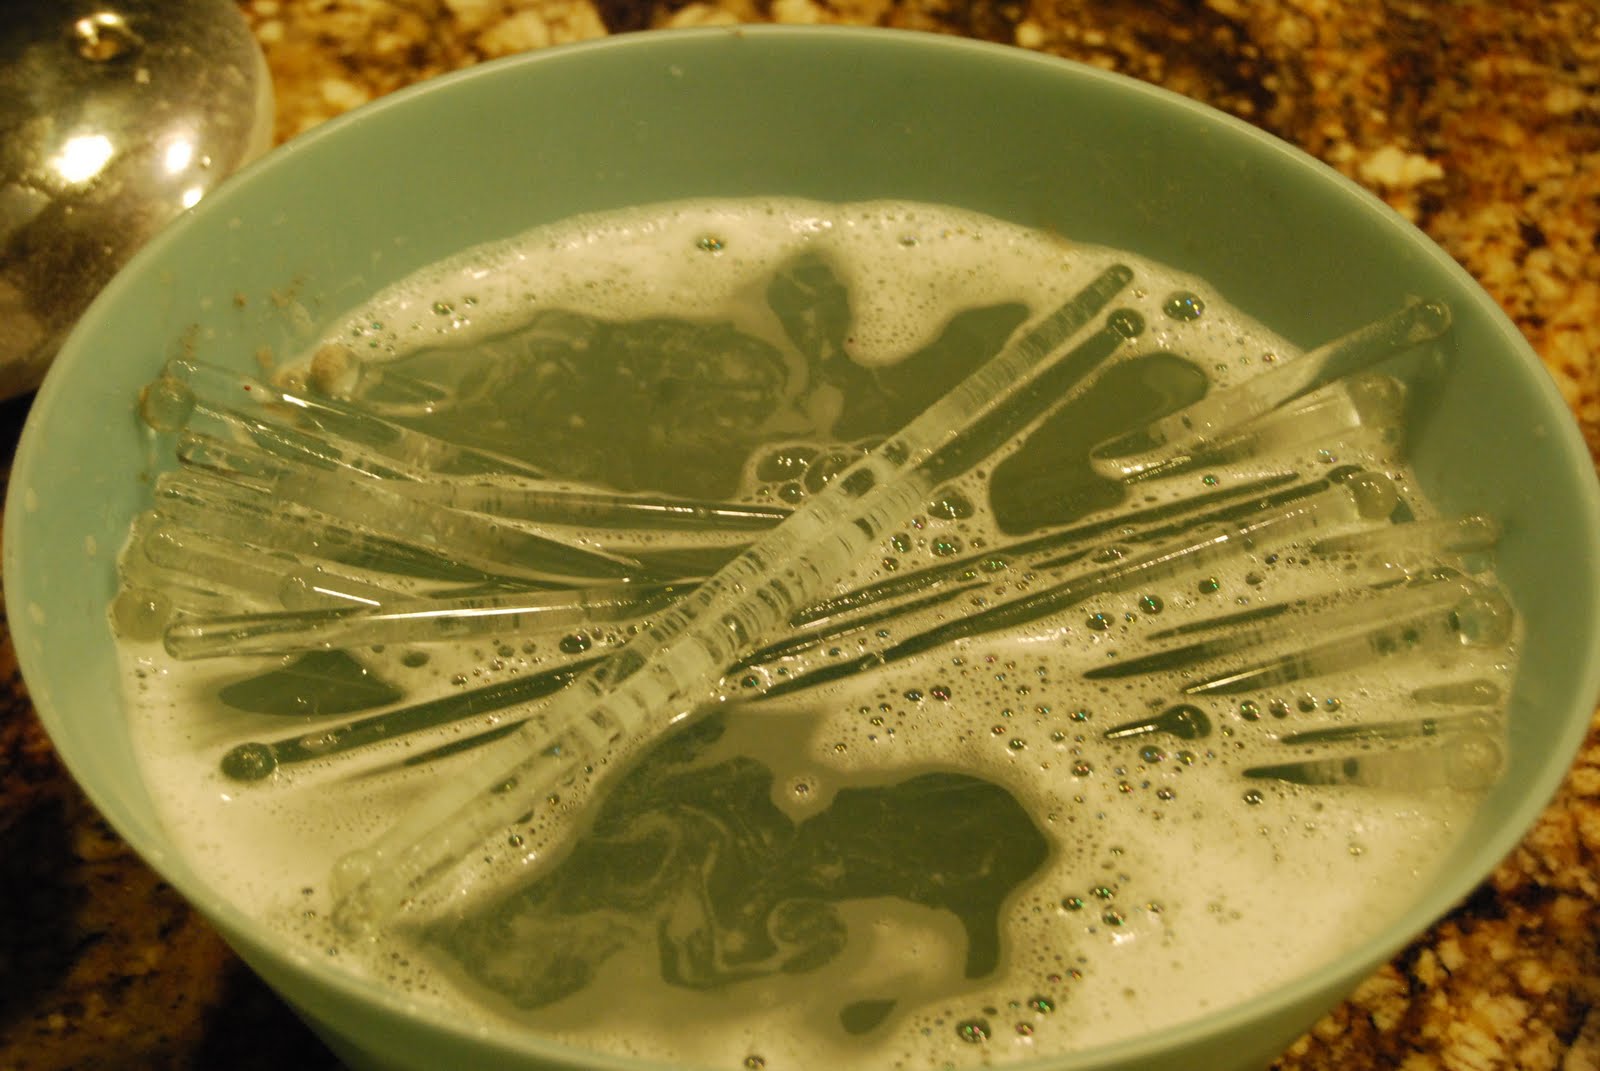
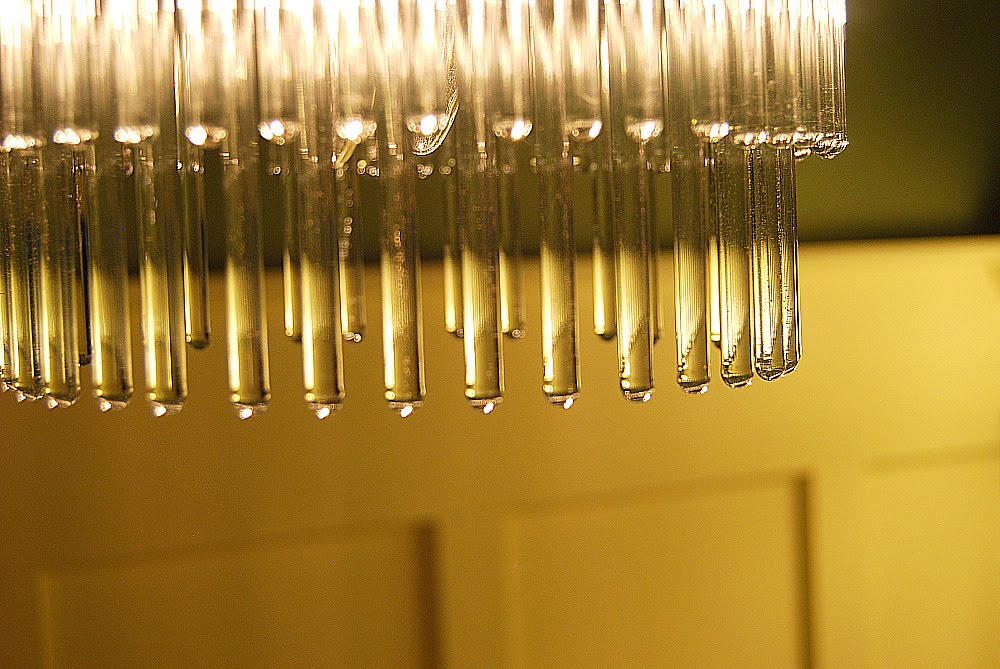
It has these really cool long beachy-ish glass prisms.
And we put a new light fixture over the sink too.

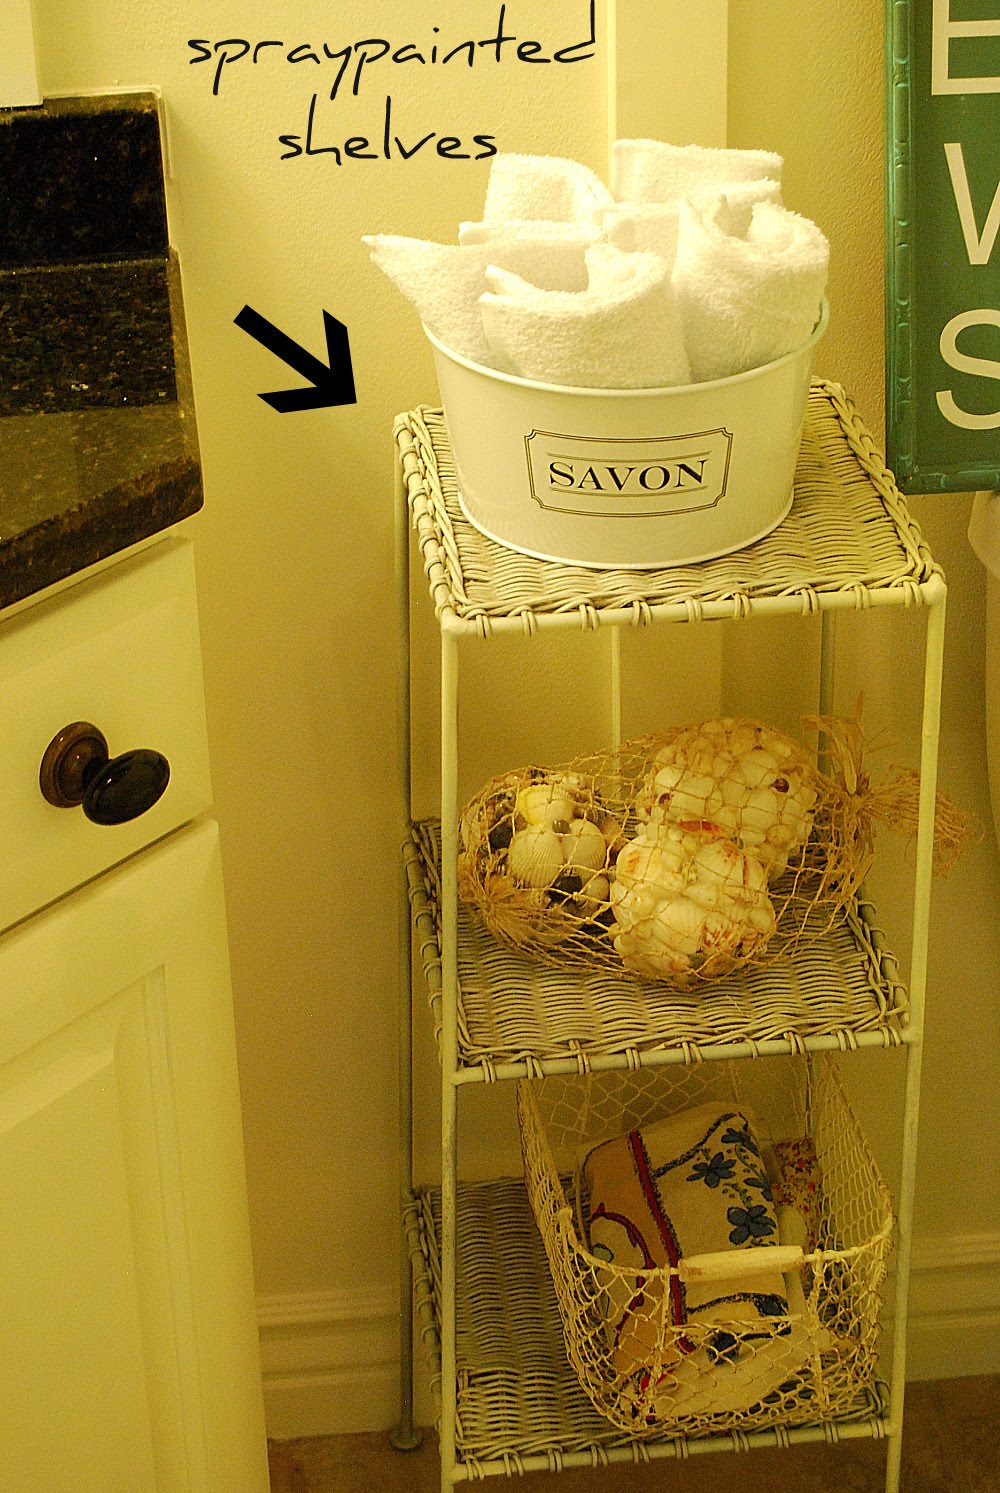
I spray painted these shelves so they looked a little beachy-ish.

And that’s one project checked off the list!
Next up: Board & Batten Laundry Room!!!
Next up: Board & Batten Laundry Room!!!

XOXO

www.tatertotsandjello.com


Hi there! I just HAD to send you a quick note AND a huge thank you! You've totally inspired me to FINALLY put the finishing touches on my powder room makeover, including your batten & board, and of course a cute subway sign! I love your blog and get SO many great ideas from it. I just did a little feature on my blog about all your great ideas. Thanks- from one Jen to another! http://jenniepowers.blogspot.com/2010/10/two-jens-do-make-right.html
I came over from Kimba's DIY Day, and I have to tell you how much I like your bathroom redo. The chany is fabulous! I love the board and batten – the room looks so fresh and light. Thanks for sharing!
Kelly@40isthenew30
I love this!! Thanks for the B&B info. The other tutorials I've seen, they didn't angle the cuts and so the strips stuck out a little from the moulding. Hubs said he didn't want to do it that way because if he was gonna do it, he was gonna do it right. I think he'll probably end up doing it your way.
Love the board and batten look of your bathroom. I have posted one of your pics as design inspiration on my blog! Thanks!
http://amyhogan.com/blog/renovation/?p=3093
Good job, and great choices with color and style!!I noticed that you added some board and batten around your existing mirror to make it fit with the new decor. I like it very much and wanted to know how you installed it around the mirror? Did you glue it onto the glass or is it attached to the surrounding wall?
Somehow I missed this post! You did a fabulous job on this! Board and batten is awesome but so is the new chandy and the new paint colors you chose for everything else! =)
I love this! I featured you at this weeks link party!
http://www.houseofhepworths.com/2010/07/21/hookin-up-with-hoh-12/
Jenn,
This will be on my favs list tomorrow morning. Come grab a featured button.
Cheri
I love this! It looks awesome. What an improvement!
Ok…. river rock paint??? thats… odd!
And apparently a man built that house because the gold "light fixture" is pretty bad!
I love everything you have done!
Start every day with a smile!! I dont think that could of been in a better place!!
Perfection! Good job! =) Its sad I want to buy my own house just so I can do this EVERYWHERE!! So classic =)
This is AWESOME! I love it!
I featured you here:
http://firefliesandjellybeans.blogspot.com/2010/07/sunday-spotlight-soys-35-favorites.html
LOVe your walls, what a difference… the knobs and all the other little touches are just great! Lezlee
Can't tell you how much I love it! You just advertised that you were looking for an old chandelier on Freecycle?? You smart girl!
It's beautiful! You really did an awesome job! If you lived near me, I'd hire you to do my bathroom!
I love the lighter colors. It looks like a beautiful cabin retreat!
Looks great! Too cool!
Thanks for linking up!
~Liz
Love it! It's too cute!
Thanks for linking up!
~Liz
beautiful makeover. it's so much brighter and warm. the milky paint looks yummy. how long did it take you to finish this great project?
Absolutely gorgeous!!!
Absolutely gorgeous!
It looks great! LOVE that green on top!
Beautiful job! Your hard work certainly paid off.
Lucky you with the vintage chandy.
Annette
What a beautiful bathroom! I've never heard of "milk paint"! I'm gonna check into it!
Thanks for sharing @ Anything Related!
Wow! It looks great! What a beautiful job!!
Jen this is gorgeous! I love the green and white. You make it look so easy {I haven't tried the B&B yet but this is so inspiring!} The chandelier is fabulous..what an amazing find. I'll be featuring this today. Thanks again for joining the Sunday Showcase. Hope you have a fabulous week! ~ Stephanie Lynn
I love how it turned out, Jen! and that chandelier, is awesome!
Looks completely amazing. Is there anything you're not good at?!
Wow, Jen! It looks gorgeous! I just may have to get over my fear of saws, 'cause this one looks worth it!
Wow that really came out great! I love the look of the wide board or molding used for the top
OMGosh, girl…this is absolutely amazing. It is BEAUTIFUL….you did such a fabulous job. and…I am totally lovin' your new chandy.
Awesome!!
xo bj
O, I'm over from Housewife Bliss. 🙂
Stunning, so pleased your joined in on the fun, looking forward to getting to you know you more. All the best, Coryanne
Gorgeous!!! Love how airy and bright it is! Well done Jenn!!
LOVE it!!! I'm thinking I want to do that in my spare bath. Now to talk my hubby into it…
Well golly sakes your bathroom is fantastic looking! I now must redo my redo of mine…lol! I really like the old fashioned highboard on the walls and I wonder about the green above, wallpaper or paint? lovely room, you did a great redo!
Absolutely GORGEOUS end result!!
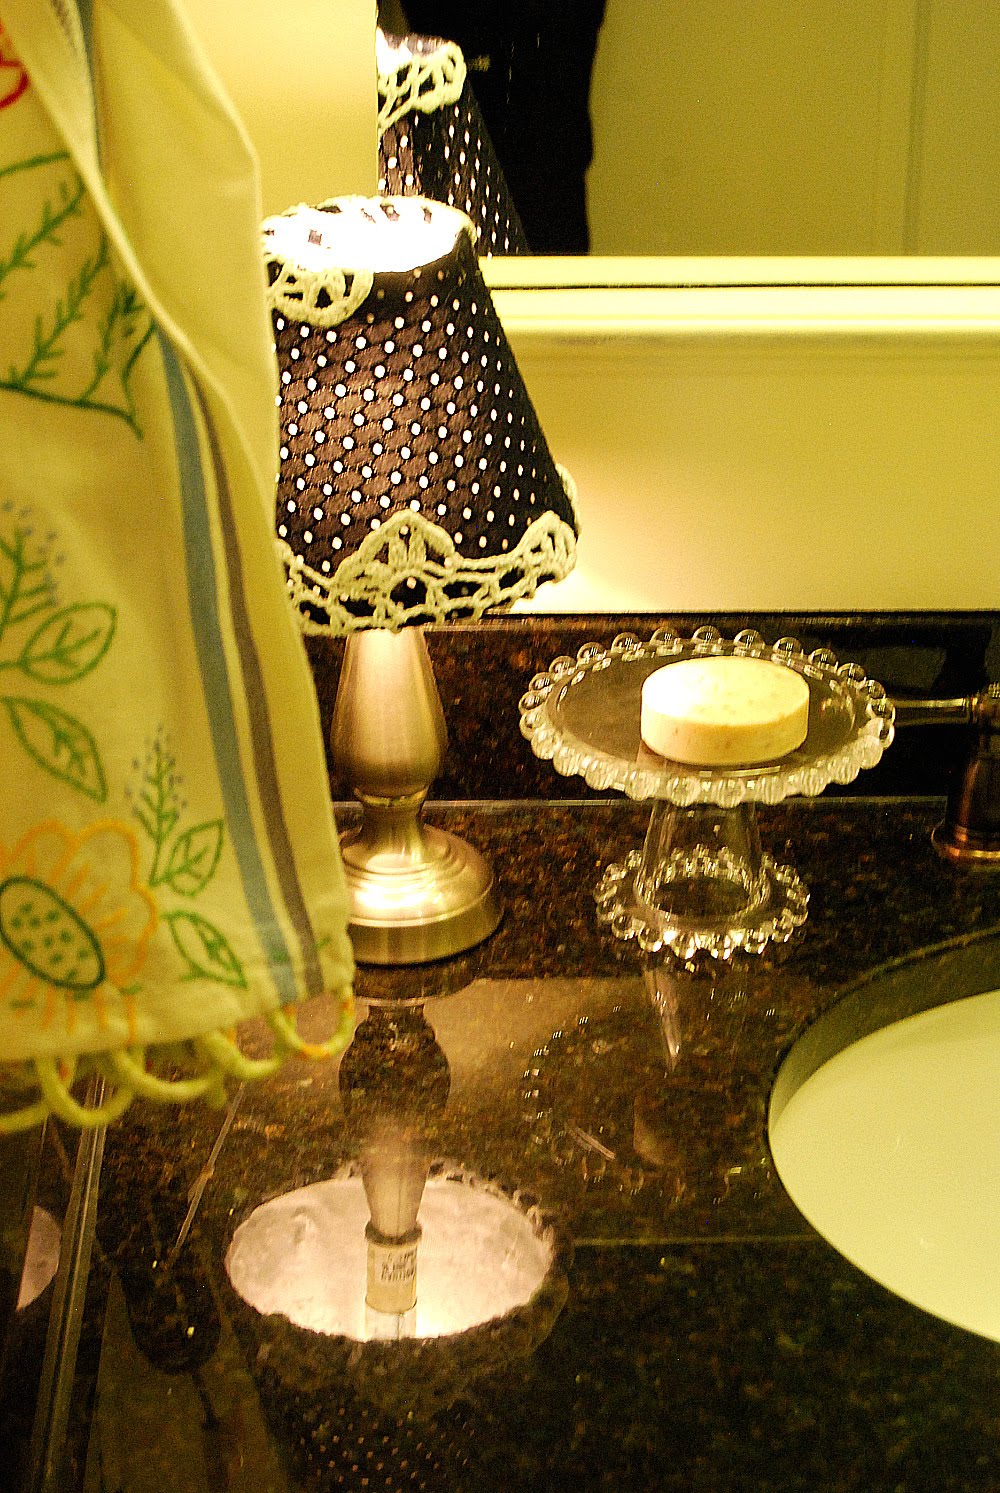
GORGEOUS!!!!!! LOVE the lighting and the little ckae plate for the soap holder…ADORE! Greta job! Great inspiration! 🙂
You did an amazing job! Your bathroom looks beautiful. I love the board and batten.
Hey Jennifer,
That looks AMAZING–don't forget we talked about pushing the party back to the 8th because of the holiday weekend.
Cheri
How cute are you painting in that top with sunglasses on your head? 🙂 Love the new br look! The free chandelier rocks!
Great job!!
Jen, Jen, Jen…..what will you do next! This is an amazing project, and that chandy!!! I really love it! Great job!
WOW! I love that! We're buying our first house right now and I'm so looking forward to being able to do cool stuff like this!
Jen, love the board and batten in your bathroom. I've been thinking about doing this in my basement, and now I think you've totally convinced me. Nicely done. And I can't believe you got that beautiful chandelier…for free! Looking forward to seeing the laundry room redo, as this is an area I need to tackle as well. 😉
Jen this is GORGEOUS!!! GREAT work!!
I stumbled it too!
Hi I'm from Turkey İstanbul.I really liked your project,very cute
you happy to use. lovess
AMAZING! I have been hoping to do the batten board in our main room once the kitchen goes in. But what I wouldn't GIVE for those tall ceilings (I'm in a basement.. Ugh). It's just GORGEOUS!
I love it! What a great freecycle chandi! I have used General Finish milk paint…and I LOVE it!!
I love it Jen!! Love the colors and the board & batten turned out awesome! I started mine and the boards were about 100x too big!!! Don't know what I was thinking when I picked them out and had the HD guy cut 25 of them!! So, yep now I'm stuck w/ them ;(
Beautiful JENN you did a fab. job, love it! WAY TO GO! night~ Jenn
I love this project and I love you! Thanks for the inspiration.
Warmly, Michelle
TO.DIE.FOR. It looks amazing Jen! You're inspiring me to finally start the B&B treatment in my girls room. It's been on my list forever!
That freecycle chandy is gorgeous! What a lucky score. I rarely see many offers on our local freecycle…too many wants/needs. I gave up on it. Maybe I need to give it another go!
~Amanda
LOVE the way the bathroom turned out! SO in love with the freecycle chandelier! Ive never heard of freecycle so I will def have to check it out!
I also noticed your silhouette piece(s)…did you do the step stool with it or the cricut?
Great job! Cant wait to see the laundry room.
You outdid yourself. Love it. And the chandie? What the heck I need to get on my freecycle and try and get a chandie. Loves!
Wow, I am a major redoer by trade, I am impressed. Love the Milk Paint. I can't get over the Free Cycle Chandelier. I am inspired. It looks fabulous. Can't wait to see the Laundry room. Mine is waiting, but I don't make any money off redoing my own home!
Yeah! It turned out sooo great! Love the whole look and can't believe the luck on the freecycled chandy! 🙂
Have a GREAT time tomorrow! I will be sad I couldn't be there!
Looks great! Love the free chandy that you got! It looks so light and airy! Great job!
This is just an amazing re-do. Great job. The walls and the chandelier are so cool.
I love the new look. I love the little cake stand that you use as a soap dish. I love the free cycle lighting…when can you come to my house!!!
Beautiful! You sure did score on that freecycle chandelier!
The whole room is perfect! Thank you for showing the technique. I have been wanting to try it. That chandelier is amazing, that kind of thing NEVER happens to me!
Jen it looks wonderful!! Love it!! You did an awesome job and loved that the girls wanted to help out too 🙂 The chandy and board and batten look great! Can't wait to see your next project you're doing. ~ Laura
This is an amazing redo! We just bought a house and the master bath needs to be completely remodeled. We have not started yet and it actually only has concrete floors. AHHHHH! Yours is so inspirational. I love everything about it. And we too are getting a loo chandy. Getting fancy in the wash room. LOVE IT!
My bathroom is so boring! yours is so great! I love the french touch 🙂
I love your bathroom redo! It looks so fresh and beachy! You have inspired me for sure…I have been wanting to redo our guest bath. I think that may have to wait until school starts back in the fall though:)
Jen, I am seriously inspired!! Your bathroom is gorgeous!! I love that lamp.
Whoa baby! It's incredible. I love the walls, I love the chandelier, I love the green. It's all completely delightful. I could spend all day in there. (but you might not want me to. you know what happens when someone spends a ton of time in the bathroom. It's usually not to enjoy the decor)
I give it a 10! Yay!
Jen this is stunning!! You are one talented lady!!
Hope you have a wonderful fourth!!
Jen that's amazing! LOVE the molding – makes such a difference! And I did think it was green, too 🙂
It looks fabulous!!!
The funny thing is that the blue paint sorta looks green-ish in the pictures! But I still love it!
Wow, what a great makeover.I just love the chandilier. Very creative.
Superb job! Everything looks absolutely gorgeous. It is amazing what just changing the color will do. I am inspired. 🙂
Very nice, Jen! It really lightens up the space. Great find on the free chandy, too!
You mean to tell me you got that from Freecycle??? I'm a member of my local freecycle group, and have never gotten anything like that. The chandelier is gorgeous.
I love the pic of Ella helping you! Do you always have to look gorgeous girl. I will be in painting clothes when I do mine! Ha! I'm sure no make-up and my hair in a pony tail too.
What a great job you did on this bathroom. It looks wonderful.
I just love it!!!! You have yet to stop amazing me!
Awesome job Jen! Yea, one project out of the way! I love the free Chandy and the board and batten! Everything looks awesome. Okay, I really need to get busy, you've inspired me to get it done!
I love it… How high up did you go with the B&B?? Love the color combo…
I just wanted to introduce myself because I just started following your blog today!! If you would like to check out mine, the address is http://yourworkistodiscoveryourworld.blogspot.com/
Anyways… Your bathroom looks great! I am in LOVE with the chandelier! Did you make that or was it store bought??
Keep up the good work!
So gorgeous!!! Will you please come do this at my house?!?!?
Love that chandy! I've been wanting some of those door knobs too! Too Cool!
~Liz
It looks beautiful, Jen!! I love the board and batten, and the chandelier looks fantastic. 🙂