Tatertots and Jello

COLORFUL HAPPY HOME -- Daily DIY, Decor, Craft and Recipe Tutorial

  • My Home
    • 1905 Cottage
    • Daybreak House
  • DIY
    • DIY Projects and Ideas
    • Organizing
    • Tutorials
    • Printables
  • Decor
    • Spring Projects
    • Summer Projects
    • Fall Projects
  • Crafts
    • Kids Crafts
    • Painting Projects
    • Paper Projects
    • Sewing
    • Wreaths
  • Holidays
    • Valentines Day
    • Easter
    • Halloween
    • Thanksgiving
    • Christmas
    • HAPPY Holidays Series!
  • Recipes

Explore

  • my home
  • diy
  • decor
  • crafts
  • holiday
  • printables
  • recipes

Connect

Home » crafts » Modern Front Door Wreath

crafts, diy, guest tutorials, paper craft · September 7, 2015

Modern Front Door Wreath

Tatertots & Jello is a participant in the Amazon Services LLC Associates Program, an affiliate advertising program designed to provide a means for sites to earn advertising fees by advertising and linking to amazon.com.

Welcome to the Summer of Paper series – where we’ve invited fabulous guests to create projects using supplies from my Home + Made paper decor line.

unnamed
Hey guys! I’m thrilled to be here today on Jen’s site sharing another fun crafting idea with her awesome new line!! I’m Abbey from The Cards We Drew where I blog about crafts, home decor, recipes and more!!

Abbey DeHart 400x400
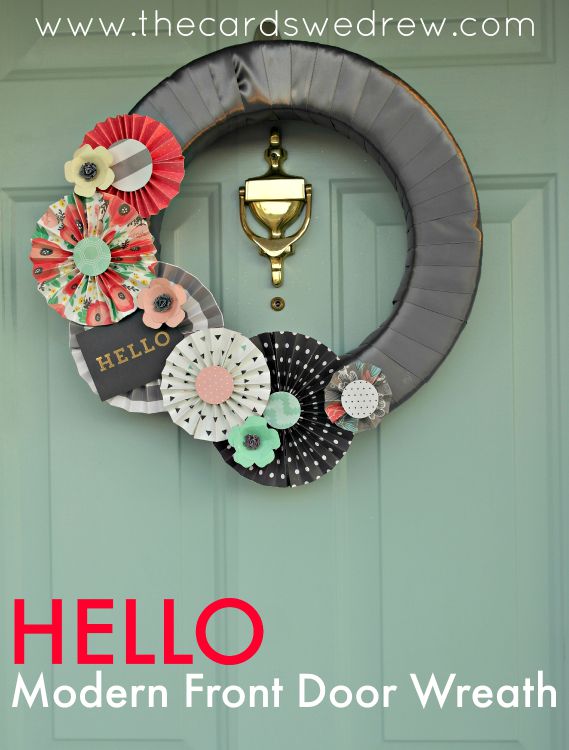
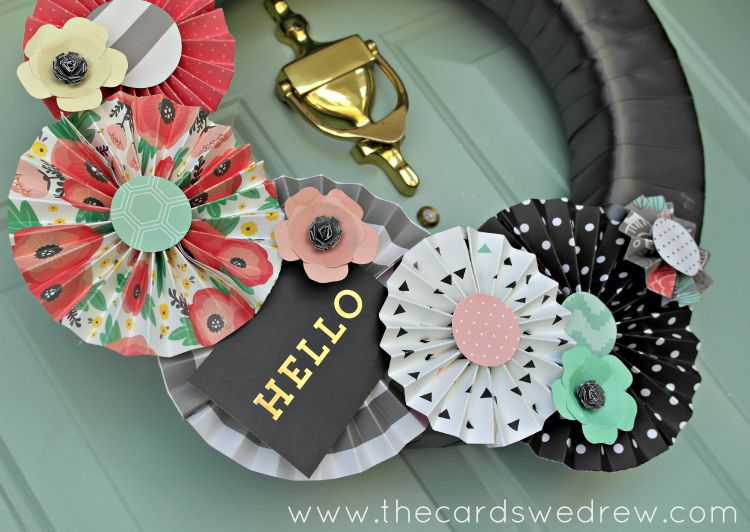
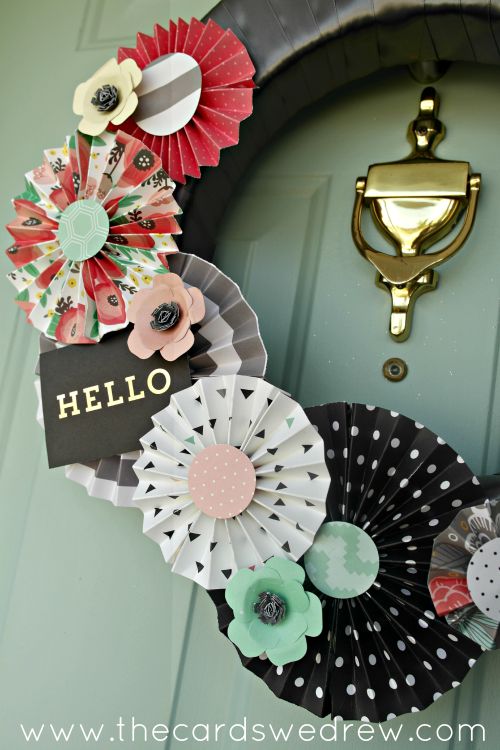
When my box of goodies from Jen’s new paper line arrived I was in awe!! So much great stuff in my favorite colors and patterns! I couldn’t wait to get my hands on it!! So today I thought I’d share a simple “HELLO” Modern Front Door Wreath I made for my house using a variety of her papers!!

What you need:

Variety of Jen Hadfield Home + Made paper decor line

Scoring board (not required, but much easier)

Hot glue

Circular paper punch

Ribbon + Wreath form

How to:

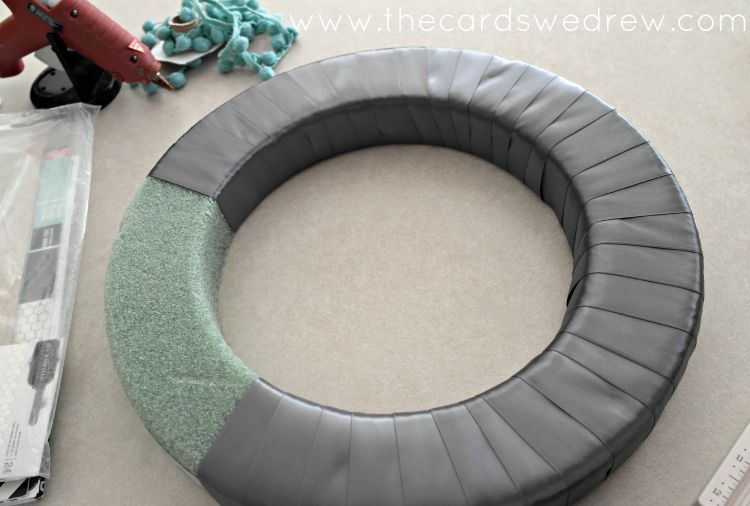
1. Start by wrapping your wreath with your ribbon. I hot glue every few wraps around or so and then glue the whole thing off at the end.

2. After your wreath is wrapped, you get started making your paper pinwheels. I made mine a variety of sizes. You start by cutting a strip of paper the length of the scrapbook paper. I made 4″, 5″, and 6″ sizes, plus one small 3″ size. After your scraps are cut, use your scoring board and gently mark a line down the center of the paper length wise.

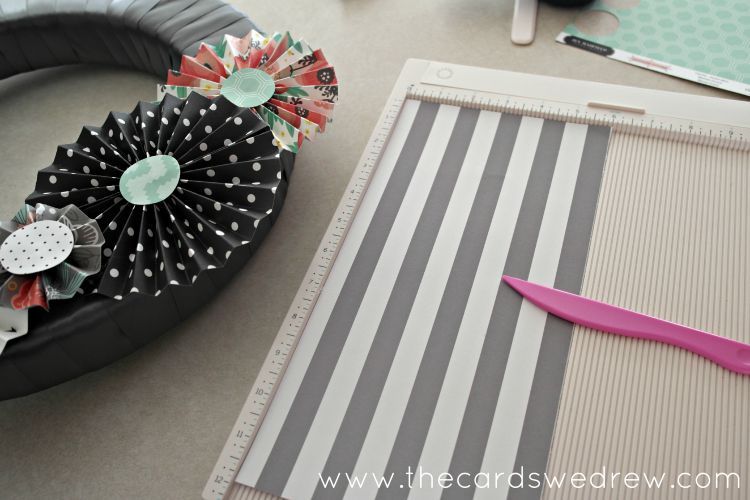
3. After you’ve made your line, then you flip it horizontally on your scoring board and score it every 1/2″ down the side of the paper.

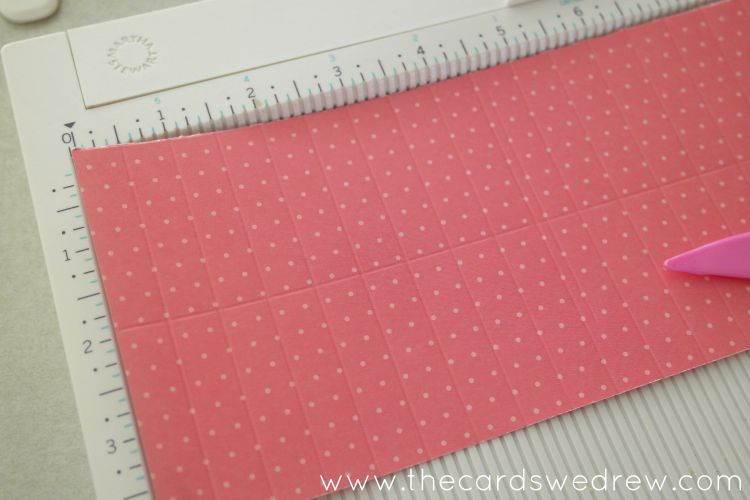
4. Fold your paper in half and then accordion fold it all the way down. Once it’s folded, glue the two ends together to create your pinwheel.

5. Finally, punch out a circular piece of paper to place in the center of your pinwheel. This adds another decorative element, but once you hot glue it on, it also helps hold your pinwheel together!

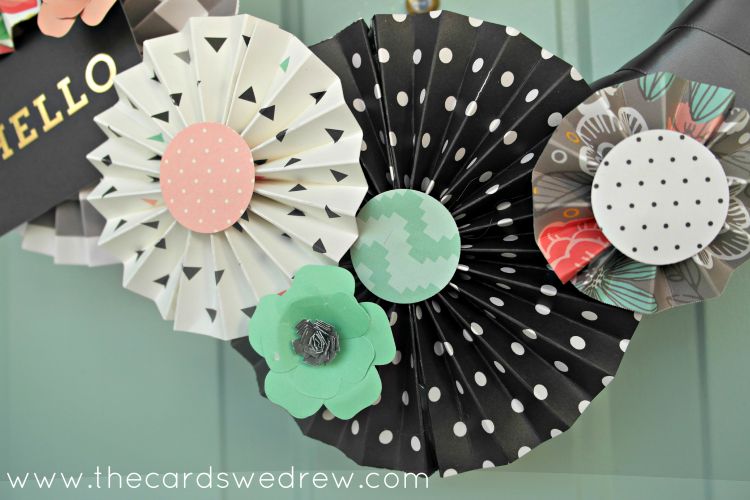
My pinwheels took hardly any time to make and it was so fun pulling different color combinations and patterns together from Jen’s collection! There are just so many to love!! You finish up the whole thing by hot gluing your pinwheels down onto the wreath form and enjoying your handmade creation!

Thanks so much to Jen for having me! Check out my site, The Cards We Drew, sometime and see what I’m up to!

********

Thanks so much Abbey! I love that wreath! Such a gorgeous combo of all the papers! Abbey has great ideas on her blog. Here are a few I know you’ll love:

Chocolate-Chip-Brownie-Cookie-Cups-with-DOVE®-Fruit-Cherries

This recipe for Chocolate Chip Cookie Cups looks amazing!

DIY-Engraved-Cutting-Board-from-The-Cards-We-Drew-MyBrilliantIdea

And, I love this Unique DIY Engraved Cutting Board for a gift idea!

Ceramic-BOO-candy-dishes

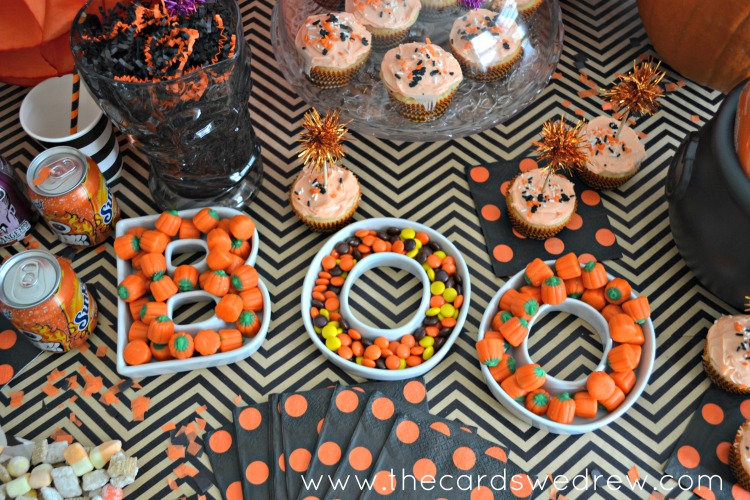
And she has great party ideas like this Mini Pumpkin Carving Party!

Make sure and visit The Cards We Drew and
pinterest.32x32.icon.circle
Follow The Cards We Drew on Pinterest
instagram.32x32.icon.square
Follow The Cards We Drew on Instagram
facebook.32x32.icon.circle
Follow The Cards We Drew on Facebook
twitter.32x32.icon.circle
Follow The Cards We Drew on Twitter
And if you’d like to try this project she shared today, you can find my Home + Made line at craft and hobby stores near you!
unnamed
xoxo
jen signature


Posted By: Jen · In: crafts, diy, guest tutorials, paper craft

Great Ideas — 17 Apple Projects!
DIY Upcycled Frames

You’ll Also Love

DIY Halloween Bat Mantel Ideas
make a dog playhouse out of a box. all the instructionsMake an Adorable DIY Dog Playhouse Out of a Box!
Make a DIY Marble Kitchen Pedestal

Comments

  1. Sharon says

    September 8, 2015 at 1:08 PM

    The papers and prints are so pretty, especially against the black background. Love it!

Hi! I'm Jen Hadfield. I'm a mom of 5 restoring an 1891 home in the heart of Salt Lake City. I love being creative and sharing simple ideas to make your life easier and more beautiful!

Receive the Latest Crafts, DIY, Recipes and More in your INBOX!

Follow us on Pinterest! It's awesome!

Top Posts & Pages

Spruce up Your Outdoor Space with a DIY Recirculating Fountain! (tutorial)
A New Deck in Under 30 Minutes!
DIY Secret: How to Print on Post-It Notes (and Free Printable Template)
12 Must-Have Items to Pack on an Alaskan Cruise!
Copycat Panera Spinach and Artichoke Egg Soufflés - SO good!
Mother's Day Cup Holder Gift Basket


Popular Posts

  • Spruce up Your Outdoor Space with a DIY Recirculating Fountain! (tutorial)
    Spruce up Your Outdoor Space with a DIY Recirculating Fountain! (tutorial)
  • A New Deck in Under 30 Minutes!
    A New Deck in Under 30 Minutes!
  • DIY Secret: How to Print on Post-It Notes (and Free Printable Template)
    DIY Secret: How to Print on Post-It Notes (and Free Printable Template)
  • 12 Must-Have Items to Pack on an Alaskan Cruise!
    12 Must-Have Items to Pack on an Alaskan Cruise!
  • Copycat Panera Spinach and Artichoke Egg Soufflés - SO good!
    Copycat Panera Spinach and Artichoke Egg Soufflés - SO good!
  • Mother's Day Cup Holder Gift Basket
    Mother's Day Cup Holder Gift Basket
  • How to Change a Recessed Can Light into a Pendant Light with No Remodeling!
    How to Change a Recessed Can Light into a Pendant Light with No Remodeling!

As seen in


Amazon Affiliate

Tatertots & Jello is a participant in the Amazon Services LLC Associates Program, an affiliate advertising program designed to provide a means for sites to earn advertising fees by advertising and linking to amazon.com.
  • About Me
  • Advertising
  • Get Featured

Copyright © 2025 Tatertots and Jello · Privacy
This site is a place for positive discussion and ideas. Negative talk, comments that disparage others, and similar are not welcome and may be removed.