Tatertots and Jello

COLORFUL HAPPY HOME -- Daily DIY, Decor, Craft and Recipe Tutorial

  • My Home
    • 1905 Cottage
    • Daybreak House
  • DIY
    • DIY Projects and Ideas
    • Organizing
    • Tutorials
    • Printables
  • Decor
    • Spring Projects
    • Summer Projects
    • Fall Projects
  • Crafts
    • Kids Crafts
    • Painting Projects
    • Paper Projects
    • Sewing
    • Wreaths
  • Holidays
    • Valentines Day
    • Easter
    • Halloween
    • Thanksgiving
    • Christmas
    • HAPPY Holidays Series!
  • Recipes

Explore

  • my home
  • diy
  • decor
  • crafts
  • holiday
  • printables
  • recipes

Connect

Home » guest tutorials » Guest Project — Turn a Purse into a Stylish Camera Bag!!!

guest tutorials, refashion, sewing projects · March 18, 2011

Guest Project — Turn a Purse into a Stylish Camera Bag!!!

Tatertots & Jello is a participant in the Amazon Services LLC Associates Program, an affiliate advertising program designed to provide a means for sites to earn advertising fees by advertising and linking to amazon.com.
Hello, fellow readers of Tater Tots and Jello!  This is Valerie, from The Crafter’s File Box.  
I am super excited to hijack Jen’s blog today and share with you my tutorial for making a regular purse go to fab camera bag!
I am sure you have all see the amazing camera bags that have been out there lately. They look like a purse, so they are still feminine, but the insides are made to function like a camera bag.LOVE IT!

What I didn’t love was the price.  I would rather spend the $$ on equipment than a bag, so I created my own.
Here’s how you do it…

STEP ONE:  Find the right kind of bag.
Look for one that has a more rigid outside, like leather or coated nylon, which is what I am using here.  Then, look at the innards.  You want to find one that has a larger base, with SEAMS going down the middle and across the two ends.  Lastly, check to make sure you are comfortable with the strap.  You want to make sure you can wear it AND shoot with it on.
STEP TWO:  Turn the bag inside out.
STEP THREE:  Open the seam along the middle with a seam ripper.Stop about 1/2 inch before the ends.

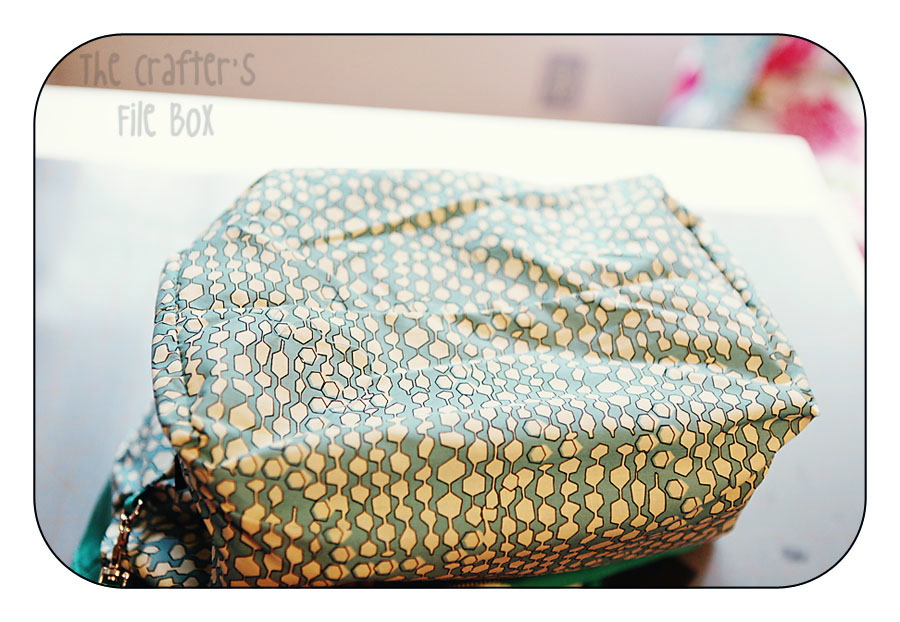
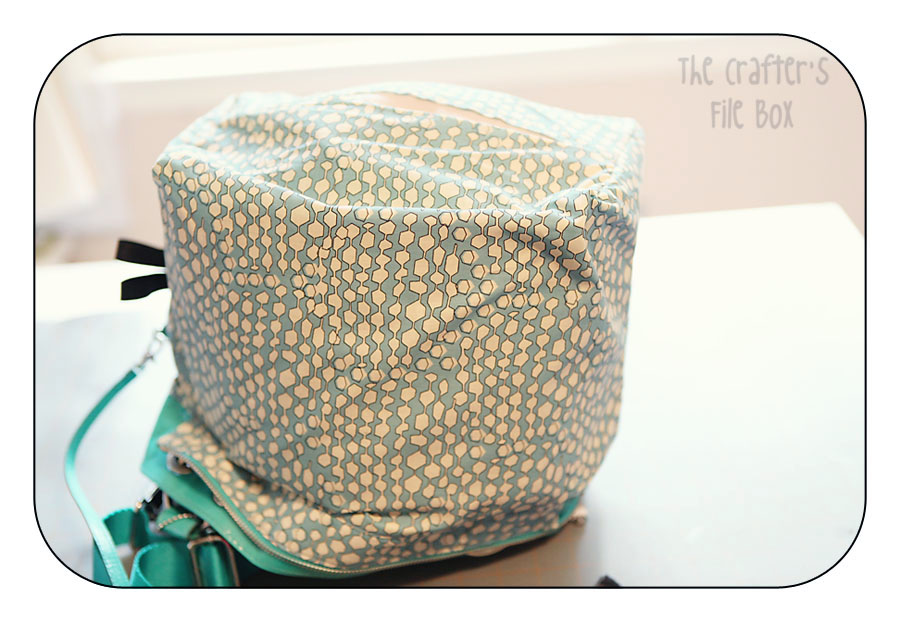
STEP FOUR:  Make the bottom.

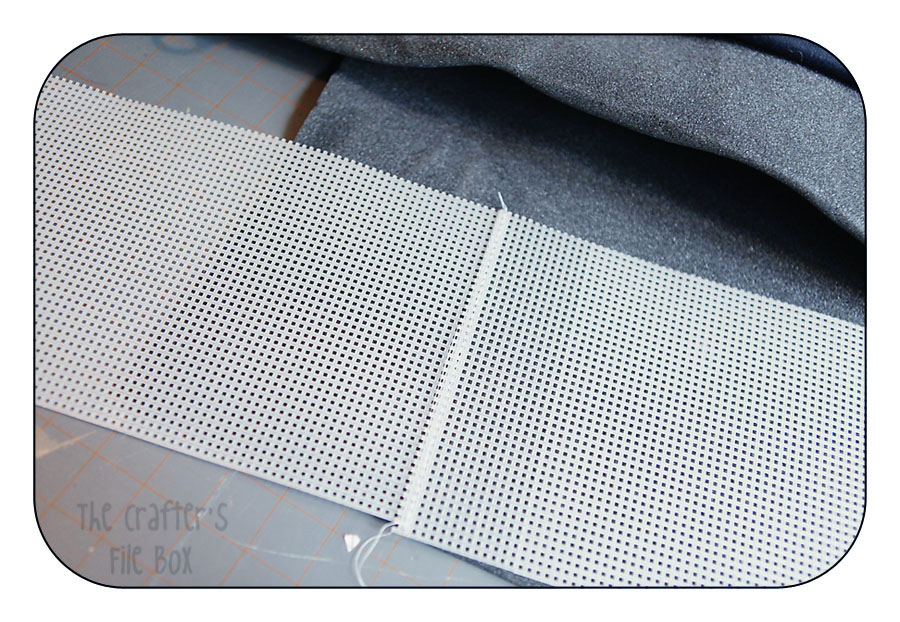
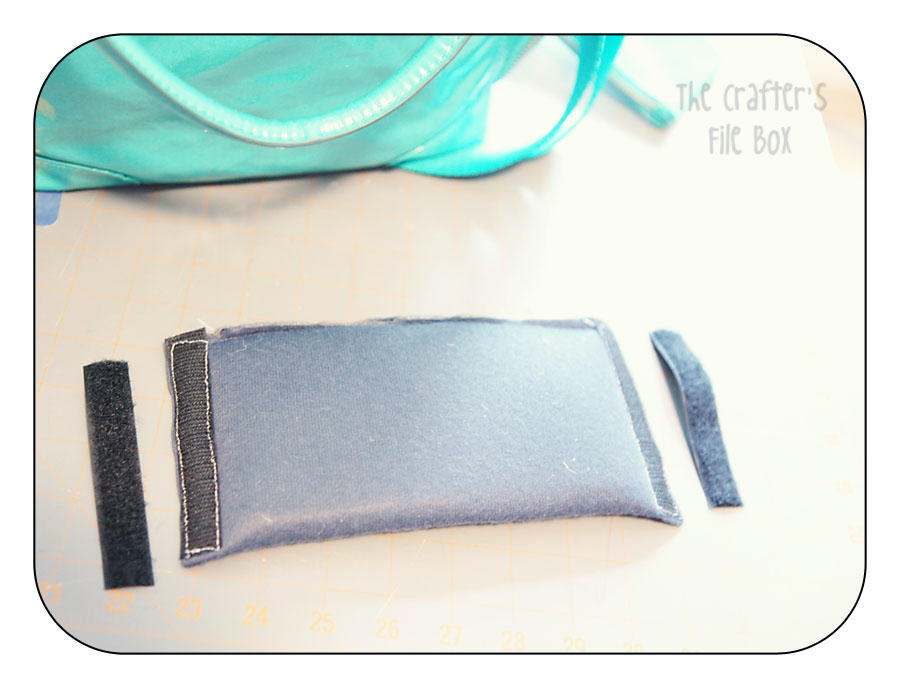
(Is it totally childish that I laughed a bit at typing “bottom”?) Cut plastic needle point canvas to the dimensions of your bag’s bottom. (snicker) 
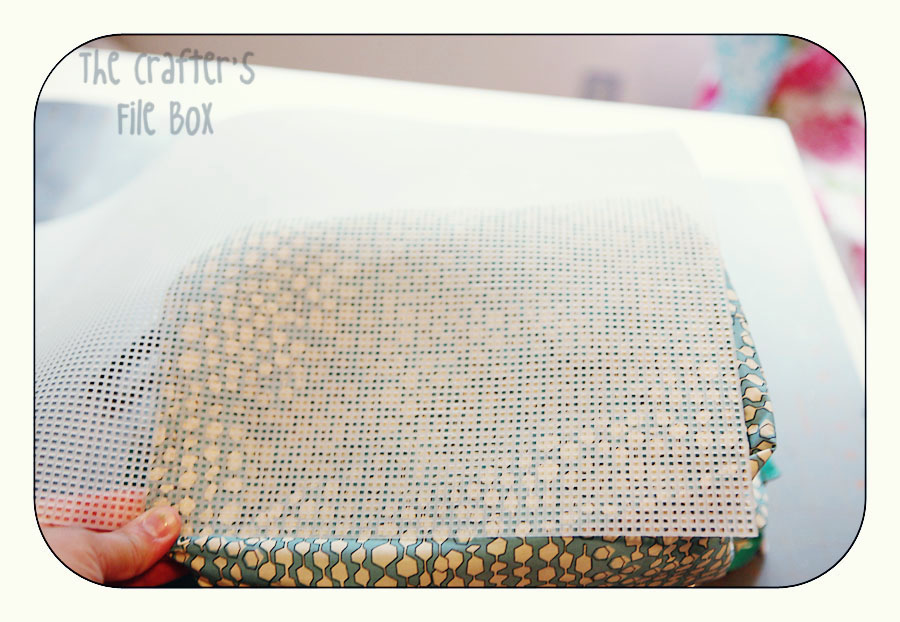
STEP FIVE:  Cut headliner fabric to fit the canvas. Headliner fabric is the fabric they use to uphoslter car ceilings.  I found mine at Jo-Anns.  You could substitute any foam or neoprene type fabric’s here.  If you would like to make your bag even more plush, you could double the headliner fabric here and wrap the canvas twice!

STEP SIX:  Wrap the fabric around the fabric and sew ends closed.
It doesn’t have to be pretty or perfect.  This will be going inside the lining, so no one will ever see it!
STEP SEVEN:  Repeat Steps 4-6, but use the SIDES of the bag as your template.
You might have to sew the canvas together at places to make it long enough to wrap the whole bag.  I simply overlapped it for about two bars and did a straight stitch down.

Your finished pieces should look something like this!
STEP EIGHT: Reinforce your bag.
This is where we give your regular bag more support so that it can cushion your camera in safety. This is done in two parts, going through the hole you cut with the seam ripper at the bottom of your bag.
Take your long, side piece and “stuff” it through the bottom and put it into place at the sides.  It should look like this when done.

After the sides are in place, put the short, bottom piece in place at the bottom.

STEP NINE:  Pin the bottom closed with straight pins.
Try to follow the bags original seams and make sure the raw edges are folded over so it looks neat.
STEP TEN: Sew closed with a blanket stitch.
You can stop here if you don’t carry additional lenses, but for those of you who would like lens dividers… read on!
STEP ELEVEN:  Repeat Steps 4-6 , but this time measure the width of the bag.

You will want to add about 1/2 inch to your measurement on the sides, so you can sew a velcro strip on each side.
STEP TWELVE:  With a high adhesive glue, like E- 6000, apply glue to the mates of the velcro on the divider.

STEP TWELVE:  Apply the glued pieces to the sides of the bag where you want the divider.

…and it should look like this after you insert the divider!
Ahh.. safe and cozy lenses. 🙂  You can repeat as many times as you like to give yourself a custom made inside.  Also, you could cover the divider with a custom fabric to match the insides for a fun, high end look.  Just sew on the velcro AFTER sewing on the fabric.
And that, my friends is how you go….

Thanks for having me at Tatertots and  Jello, Jen!  Hope to see you all over at The Crafter’s File Box from time to time! Disclaimer: I cannot guarantee the safety of your camera if you use the tutorial.  You assume all risks if you make your own camera bag using this tutorial. I can say that I have used my bag for over a year now, with no incidents whatsoever.  Use your best personal judgement and care when handling an sort of electronic equipment.  Whew! Had to get that out there! 🙂

Valerie — that is GENIUS!!! 


I love it!! Thank you so much such an awesome tutorial!!! 

If you don’t follow The Crafter’s Filebox, you are missing out!  

Valerie has great ideas on her blog!

Like:

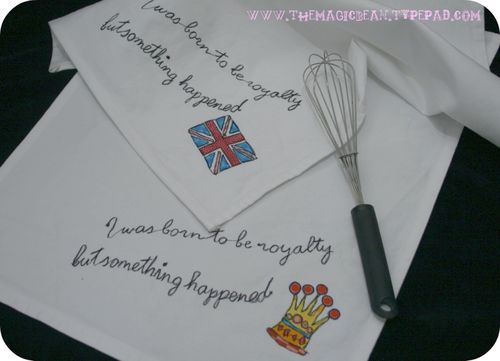
{Royal Tea Towel tutorial guest post by the Magic Bean on The Crafter’s File Box}


http://1.bp.blogspot.com/_sP2tas94CaA/TUMmcaB1jnI/AAAAAAAAGas/fQazC0sDHic/s1600/15.jpg

 {check out Valerie’s Amazing Kitchen Redo – love that colored beadboard}


And, Valerie has a beautiful and smart new business. She has come up with these beautiful camera strap covers that ZIP — Zipcoverz.  Such a great idea!!

You will love the ideas at The Crafter’s File Box! 


xoxo


PS — It’s Friday. You know what that means!!! It’s time to show off YOUR ideas. Come party with me at The Weekend Wrap Up Party tonight — it’s gonna be fun. The linky goes up at 6 pm {MST}. I can’t wait to spotlight YOU! 


xoxo


This post sponsored by

Posted By: Jen · In: guest tutorials, refashion, sewing projects

Guest Project — 10-minute Easter/Spring Wreath!!
Great Ideas — Decorating Solutions {3}

You’ll Also Love

Free Printable Patriotic BannerFree Printable Patriotic Banner
how to bleach dye clothesHow to Bleach Dye Clothes – a Great Teen or Tween Craft!
Paint Candy Corn Treat Jars – an Inexpensive Fall Gift Idea

Comments

  1. Danielle says

    February 20, 2013 at 8:31 AM

    Thanks so much for a great tutorial!!! I can’t wait to sew my very own camera purse 🙂

  2. usman says

    November 29, 2012 at 11:53 PM

    Shoulder handbags are in unique quality and latest brands, our site has everything unique and cheap price with low price without no shipping fee. Shoulder Handbags

  3. jack says

    April 3, 2012 at 3:16 AM

    Printed Bags

    Oh wow!!! That is positively splendid! its a wonderful.

  4. Hearthandmade says

    April 13, 2011 at 10:21 AM

    Was this not originally done by vanilla and lace blog last year?
    It's hard to find a nice enough bag I think. I've been having lots of trouble and bought a straw shopper online but wasn't deep enough. Gutted!

  5. Krista S. says

    April 9, 2011 at 1:34 AM

    LOVED this tutorial!!! Saved me some big bucks and now I can take my camera anywhere!!!

    Here is the one I made

    http://thehandmadehomemaker.blogspot.com/2011/04/purse-turned-camera-bag.html

  6. Krista S. says

    April 9, 2011 at 1:30 AM

    Here's the one I made 🙂

    http://thehandmadehomemaker.blogspot.com/2011/04/purse-turned-camera-bag.html

    Excellent tutorial! I would suggest buying more than 1/4 yard of the headliner fabric. Also, I wasn't able to sew through the plastic canvas so I attached the pieces with embroidery floss.

  7. Krista S. says

    April 2, 2011 at 8:02 AM

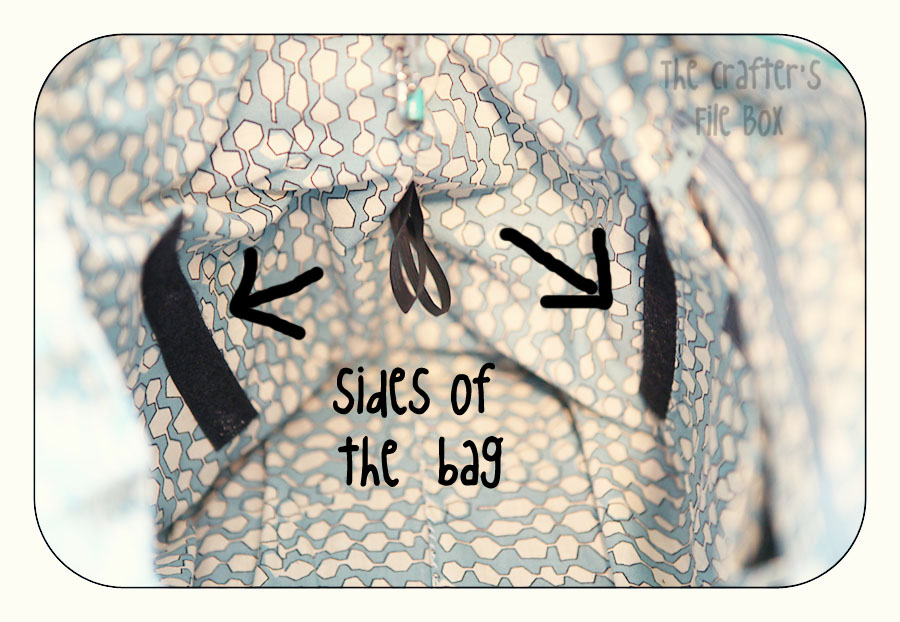
    Love this!!!! Hope I can find a bag to transform 🙂 couple of questions: did you have to sew the end of the piece that goes around the sides of the purse together after you insert it into the lining, if not, how does it keep from shifting away? Does that makes sense? Oh, and what kind of plastic canvas did you use? You rock! Thanks!

  8. Anne Magee says

    March 28, 2011 at 2:06 AM

    That is so awesome! Thank you so much for sharing! I'm definitely trying this!!!!

  9. Classy D says

    March 24, 2011 at 5:57 PM

    this is so awesome and its something i should do for my mom let alone myself haha. but this would be a great mother's day present for my mom. anyways, love this tut 🙂

  10. Amanda says

    March 22, 2011 at 4:15 PM

    You were featured today at Today's Top 20! I'd love if you stopped by!

    Amanda
    http://www.todaystoptwenty.blogspot.com

  11. nicole / Twitter: BTHM1 says

    March 22, 2011 at 3:24 AM

    OH SUPER WOW!!!!

    Now I HAVE to go back to TJ Maxx and get the purse I saw this weekend and try this!

    I LOVE that turquoise color for spring!

  12. Shelley Haganman says

    March 22, 2011 at 2:18 AM

    What a great tutorial! I may just have to try this! Thanks!

  13. therobotsattack says

    March 21, 2011 at 10:59 PM

    I love this tutorial! It's the answer to my long search for a camera bag. Thank you for sharing it. I also featured a link to this from my blog.

  14. Diane {Created by Diane} says

    March 21, 2011 at 5:40 PM

    LOVE the camera bag re-do!!! Just so clever!

  15. anne says

    March 21, 2011 at 3:55 PM

    Oh, I seriously jumped up and down a little when I saw this tutorial! It's going straight to the top of my to-make list! Thanks for sharing!

  16. Vixen says

    March 21, 2011 at 3:55 PM

    Wow!!! Amazing! I want to get started on one immediately!! I also loved it so much, I linked up this post on my blog here: http://vixenmade.blogspot.com/2011/03/diy-purse-to-camera-bag.html

  17. VeganCraftastic says

    March 21, 2011 at 2:02 AM

    This is such a great idea, camera bags are so expensive and ugly!

  18. Kylie Craftafarian says

    March 20, 2011 at 5:12 PM

    Awesome!

  19. Tiffany says

    March 19, 2011 at 8:17 PM

    I need to make me one of these camera bags! I hate taking my big huge ugly camera bag to some functions and this would be PERFECT 🙂 thanks for sharing.

  20. cassi says

    March 19, 2011 at 3:04 PM

    Valerie is so very talented!!! So cute!

  21. Moms of all Trades says

    March 19, 2011 at 3:56 AM

    This is AWESOME! Thank you so much for sharing, heading over to her blog now!

  22. Christy says

    March 19, 2011 at 12:07 AM

    such a great idea…i have a bag i can convert–YEAH!

  23. Candice says

    March 18, 2011 at 8:37 PM

    What a fantastic idea!!!! I need a new camera bag so bad and haven't been able to find anything I like. This wonderful tutorial came at a perfect time for me! Thank you bunches!!

  24. Lyndee @ A Recovering Craft Hoarder says

    March 18, 2011 at 8:07 PM

    Wow! There were several steps, but Valerie made them so easy to follow. This would be so much fun to try with one of my old purses!

  25. Valerie says

    March 18, 2011 at 8:06 PM

    Thanks, Jen for featuring my tutorial on your blog! It has been so much fun!

    Kimber- I bought the bag at TJMaxx last season… sorry! 🙂

    Sue- Don't be afraid to try this! It really is super, super easy! Reading through all the steps may look complex, but it is totally do-able! Pinky promise! 🙂

  26. Kelley says

    March 18, 2011 at 6:42 PM

    This is a great idea. I am in desperate need if a a camera bag. Will have to give this a try.

    Thanks!

  27. Sue (Someone's Mom) says

    March 18, 2011 at 6:15 PM

    Well, this project is way out of my skill level, but it was interesting to read about. I'm on my way to look at that kitchen!

  28. Natalie says

    March 18, 2011 at 5:49 PM

    GENIUS!!! Wow, what a treasure trove of awesome stuff! Thanks so much for featuring her!

  29. April says

    March 18, 2011 at 5:04 PM

    My camera bag is so big and bulky, I rarely take it anywhere! I would love a snazzy one like she made…so cute and unique!

  30. Dawn says

    March 18, 2011 at 4:49 PM

    The camera bag is darling, love the color 🙂

  31. Jenny says

    March 18, 2011 at 4:11 PM

    I love this! Can I just pay you to make me one? LOL!

  32. Jennifer says

    March 18, 2011 at 3:50 PM

    love it! I really need to do this. I take my camera along with me to a lot of places, but it's hard when I need a purse or diaper bag too.

  33. Sweet Bella Roos says

    March 18, 2011 at 3:23 PM

    Love this! I did a "no sew" version of this when I went to Disneyland & didn't want to take my ugly camera bag. I bought a thick purse (Ross!) and then took out the velcro inserts from my camera bag and put it inside the purse. I definitely like the idea of padding the walls!

  34. Kristen says

    March 18, 2011 at 3:16 PM

    Awesome! Now I want a new camera AND a new bag!

    -Kristen
    http://craftingwithtrainingwheels.blogspot.com/

  35. Lil Mama Stuart says

    March 18, 2011 at 2:53 PM

    I was so excited my JoTote just came in yesterday! But it's too big (for my 5'1 frame at least) and I'll be returning it. SO bummed! 🙁

  36. Nike says

    March 18, 2011 at 2:51 PM

    Awesome! I love the funky purse and the custom touches–so much more fun than a plain 'ol black camera bag.

    ~Nike
    http://choosetothrive.blogspot.com

  37. Michelle Whitlow says

    March 18, 2011 at 2:48 PM

    LOVE this idea!! I am totally doing this 🙂

  38. Tonya says

    March 18, 2011 at 2:21 PM

    Very cool! Love it!

  39. Shabby Soul says

    March 18, 2011 at 2:02 PM

    That is the best tutorial I have ever seen on "homemade" camera bags! Awesome!! Thanks!

  40. Chrissy Farnan says

    March 18, 2011 at 1:58 PM

    What a great idea! Then you can get what you really really want in the exact color!!

    Fun post!!

    {I had a typo and had to delete and re-post – oops}

  41. milliemorganmedia says

    March 18, 2011 at 12:01 PM

    hello! i am your newest follower from the blog hop. your site is so cute and i look forward to reading more posts. i would also appreciate if you took some time to check out my blog and followed me too! thanks & have a great day!
    http://milliemorganmedia.blogspot.com

  42. The Tinkerer says

    March 18, 2011 at 11:29 AM

    Oh wow!!! That is positively splendid! Genius Idea…thanks for sharing 🙂

  43. Kimber says

    March 18, 2011 at 11:15 AM

    Did you just buy that purse recently? I actaully would love that as a summer purse.. LOL

  44. Louley's Belles says

    March 18, 2011 at 11:00 AM

    Well, now isn't that clever! Great Job!!!

  45. Paula says

    March 18, 2011 at 10:29 AM

    I love this idea and I'm also happy to discover Valerie's blog. A purse camera bag is so much cuter than the ones most of us have.

  46. Colleen Babcock says

    March 18, 2011 at 9:32 AM

    How cool – I come by for my regular Tatertots and Jello fix and there is Valerie. And I read her lovely tutorial and there is a picture of my tutorial on Valerie's blog. Fabulous. Thanks so much for sharing Jen!

  47. Cherished Events says

    March 18, 2011 at 7:32 AM

    That is awesome!! Thanks for the tutorial.

Hi! I'm Jen Hadfield. I'm a mom of 5 restoring an 1891 home in the heart of Salt Lake City. I love being creative and sharing simple ideas to make your life easier and more beautiful!

Receive the Latest Crafts, DIY, Recipes and More in your INBOX!

Follow us on Pinterest! It's awesome!

Top Posts & Pages

Spruce up Your Outdoor Space with a DIY Recirculating Fountain! (tutorial)
A New Deck in Under 30 Minutes!
DIY Secret: How to Print on Post-It Notes (and Free Printable Template)
12 Must-Have Items to Pack on an Alaskan Cruise!
Copycat Panera Spinach and Artichoke Egg Soufflés - SO good!
Mother's Day Cup Holder Gift Basket


Popular Posts

  • Spruce up Your Outdoor Space with a DIY Recirculating Fountain! (tutorial)
    Spruce up Your Outdoor Space with a DIY Recirculating Fountain! (tutorial)
  • A New Deck in Under 30 Minutes!
    A New Deck in Under 30 Minutes!
  • DIY Secret: How to Print on Post-It Notes (and Free Printable Template)
    DIY Secret: How to Print on Post-It Notes (and Free Printable Template)
  • 12 Must-Have Items to Pack on an Alaskan Cruise!
    12 Must-Have Items to Pack on an Alaskan Cruise!
  • Copycat Panera Spinach and Artichoke Egg Soufflés - SO good!
    Copycat Panera Spinach and Artichoke Egg Soufflés - SO good!
  • Mother's Day Cup Holder Gift Basket
    Mother's Day Cup Holder Gift Basket
  • How to Change a Recessed Can Light into a Pendant Light with No Remodeling!
    How to Change a Recessed Can Light into a Pendant Light with No Remodeling!

As seen in


Amazon Affiliate

Tatertots & Jello is a participant in the Amazon Services LLC Associates Program, an affiliate advertising program designed to provide a means for sites to earn advertising fees by advertising and linking to amazon.com.
  • About Me
  • Advertising
  • Get Featured

Copyright © 2025 Tatertots and Jello · Privacy
This site is a place for positive discussion and ideas. Negative talk, comments that disparage others, and similar are not welcome and may be removed.