Hey there! I’m Celeste: wife, mother of three {a 7 year old son and 3 year old identical twin daughters} and a DIY addict.
I am so thrilled to be posting on Tatertots and Jello today! I just love Jen’s blog {it’s one of the first blogs I ever read} and all her fantastic ideas. She’s such an inspiration! After getting addicted to reading blogs, I decided to start my own blog to chronicle our adventures in updating our 1950’s ranch home we bought 2 years ago. We’ve redone the master bathroom, the kitchen {and built an island}, wood floors, board & batten, painted every room {some twice three times}, painted numerous pieces of furniture and tons of smaller projects. It’s all over on my ‘lil blog My Greenbrae Cottage.
As much as I love the big projects, today I’m going to share an easy project with you… painting mason jars! {both with glass paint and chalkboard paint}
I love all the mason jars I’m seeing everywhere in catalogs and blogland. I especially adore the old vintage blue jars I’ve seen used for candles or flowers or anything for that matter. Instead of searching thrift stores {not my children’s favorite pastime……..yet} I decided to make my own. And it turned out to be super easy!
First I did a Freecycle post looking for free mason jars {do you freecycle? it’s like craigslist but all items are free} I ended up with several dozen! Most of them are just spaghetti sauce jars, but when spruced up, they can fool you into thinking they are from an old vintage kitchen.
I picked up this glass paint from Michael’s….Vitrea 160, in turquoise. I also grabbed some thinner from the Vitrea 160 collection. 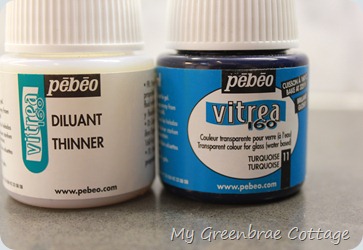

I gathered my materials: clean mason jars, paint brush {which I decided later was not the best way to apply the paint}, bowls to mix paint.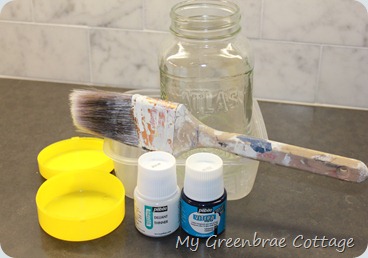

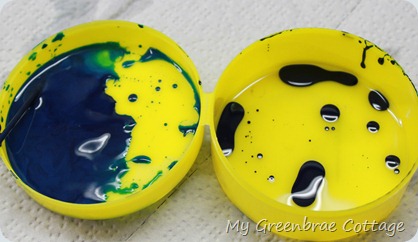
First I thought I’d try diluting the paint with regular ‘ol paint thinner. Made sense to me at first…
but you’ll see on the right {above} the turquoise just beaded up when mixed with regular paint thinner. So then I mixed it with the Vitrea thinner and it worked much better {tray on the left}. I started with about a 50/50 solution of paint to thinner and later realized that I only need a TINY amount of the turquoise to achieve the faint blue color I was hoping for.
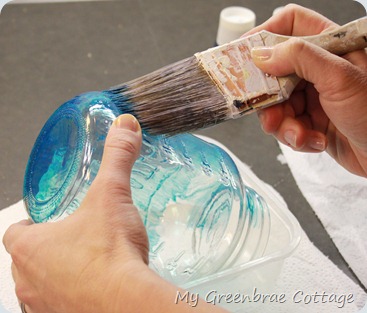
I started off by brushing the paint on. I used a large brush, hoping to have as few brush strokes as possible.
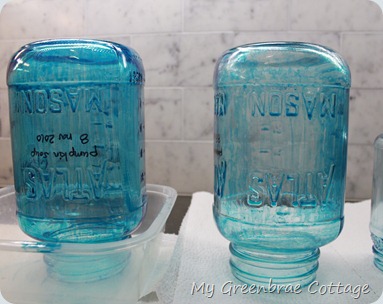
Both of the jars above were done with a paint brush. The first was a 50/50 ratio or paint to thinner. The second was about 30/70 paint to thinner. {Noticed I used the least attractive of my jars: labeled pumpkin soup, for my guinea pigs!}
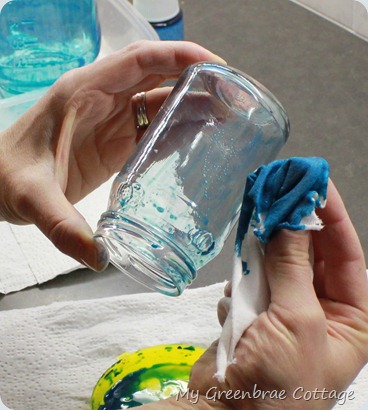
Then I switched to a rag for the paint application:
I liked the rag MUCH better. I got a smoother finish and less of that brush stroke look. Also I thinned the paint much more by this point. I was using probably 20% paint and 80% thinner.
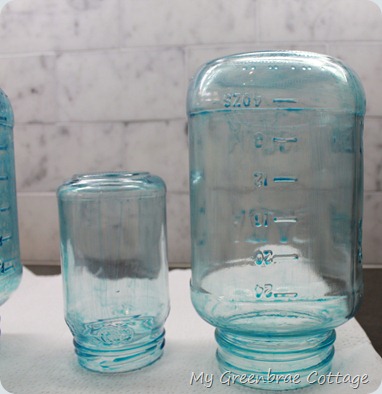
Above are the next two jars that were done with the rag instead of a brush and with a ratio of around 20/80 paint to thinner.
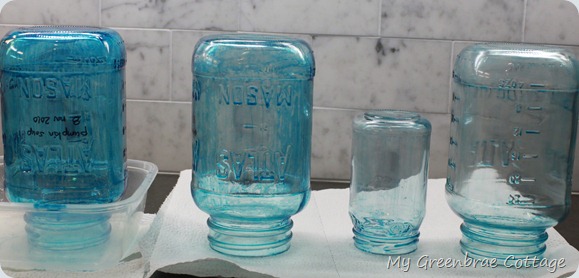
Here’s all 4 jars lined up for you to compare. The far left is 50/50 paint to thinner and brushed on. Next is 30/70 paint to thinner and also brushed on. The last two on the right are both 20/80 paint to thinner and applied with a rag.
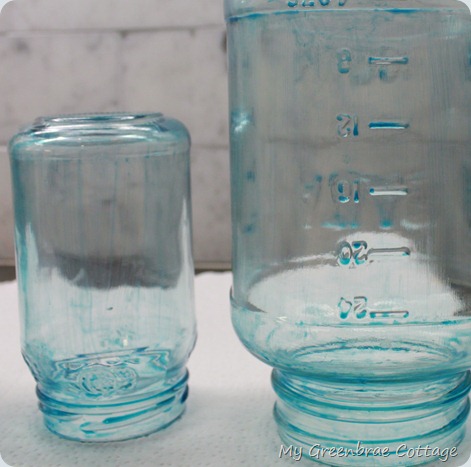
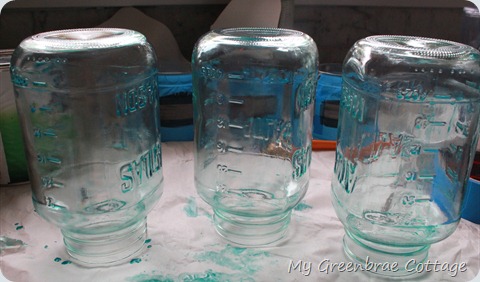
You’ll notice you can still kinda see some strokes of paint {even with the rag} and also places where the paint is thicker than other places…but when you bake the color on and fill them with water and flowers, that all fades.
Once I had my technique mastered, I did a few more.
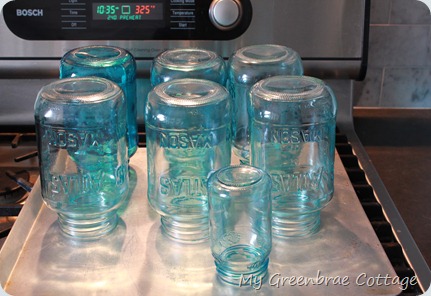
Ok, so next step is to bake the jars in the oven. This step locks the color in, makes them dishwasher safe and gets rid of that tacky/sticky feeling they have. First let them dry for 24 hours. Then bake the jars in a 325o oven for 40 minutes.
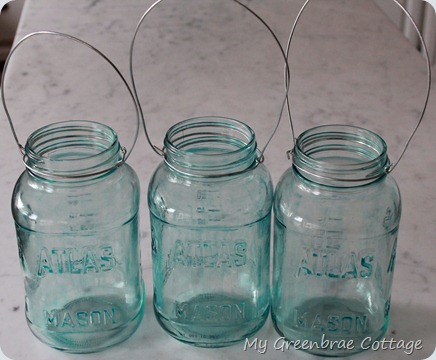
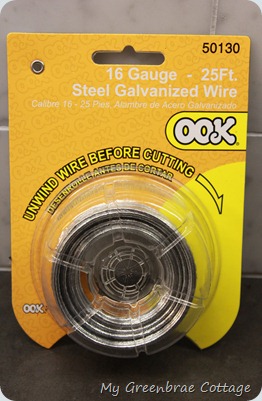
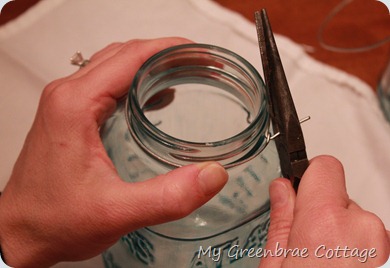
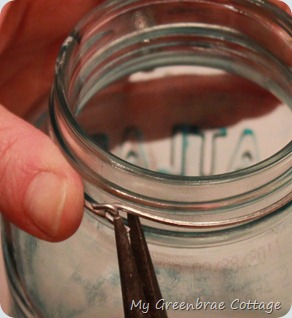
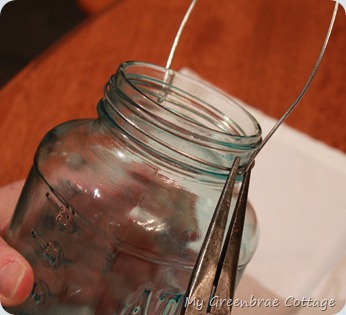
And then I thought I’d accessorize them just a tad by adding some wire around the neck and as a handle. I bought this steel wire from Home Depot. It bends pretty easily, but the next thinner gauge would have worked well too.
Then I eye-balled how long I wanted the handle, added a bit more for twisting it on and cut.
I just love how the color came out. So faint and refreshing……just beach-y!
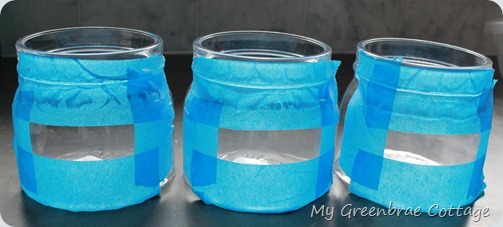
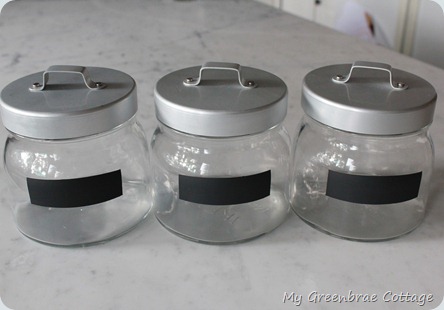
I want to share one other way I’ve painted mason jars and that’s with chalkboard paint. I just love chalkboard paint and am so excited when I discover another way to use it. I wanted to create a place to write my kids’ names on these jars. So I taped off an area with blue painter’s tape. I just eye-balled it.
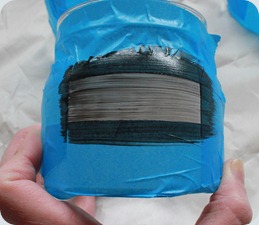
Then I painted the small area with chalkboard paint.
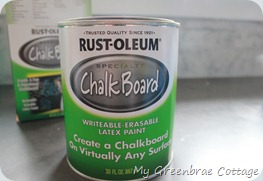 I love this chalkboard paint from Rust-oleum! Did you know it comes in a rainbow of colors? But the scariest most exciting thing is that it also comes in a tint-able white! Oh, help me! I’d be at the paint counter for days trying to get just the right color. So for now I’m sticking with black!
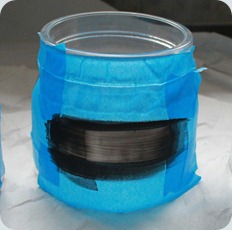
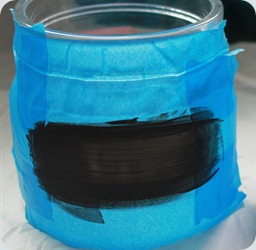
One coat Two coats
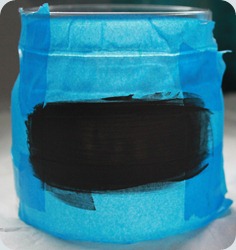
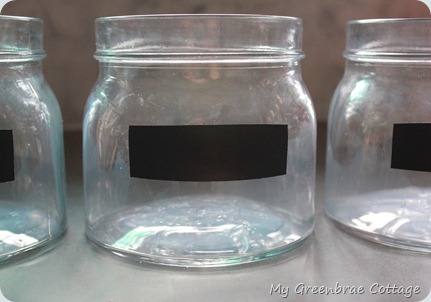
Three coats Four coats
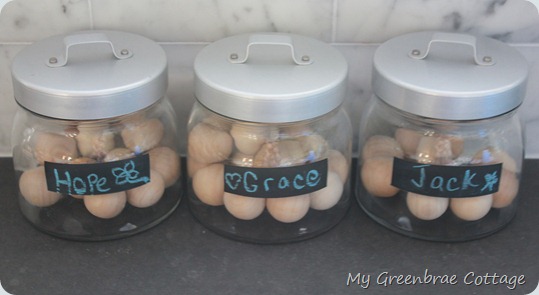
I use mine for our family’s positive discipline incentive program. We fill them with wooden balls to be redeemed for a special treat.
You can read all about our ball jars here!
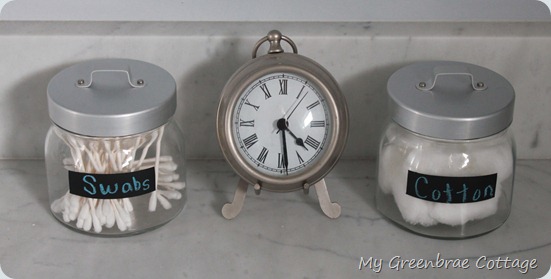
Also, I think they’re cute in the bathroom…
I’m sure you can think of dozens of ways to use them!
Well, folks, that’s all for now! Thanks SO much for stopping by to learn a little about me and what I love to do.
And thanks a million to Jen for featuring me on her amazing blog today!
Thanks Celeste!!
What a fabulous project. I love those mason jars.
![[IMG_3740[9].jpg]](https://lh6.ggpht.com/_zsE10Cz3Pu0/TW3Mkag_wnI/AAAAAAAACyU/jdMa0To-PSw/s640/IMG_3740%5B9%5D.jpg)
![[IMG_1872[5].jpg]](https://lh6.ggpht.com/_zsE10Cz3Pu0/TTiG_hPf6nI/AAAAAAAACGE/FE0-7ojOpyc/s640/IMG_1872%5B5%5D.jpg)
You will love following along with Celeste at
xoxo



 This post sponsored by



I
Love lyour light aqua jars . Do you sell them?
I love painted mason jars and I plan on doing this for my beach wedding reception center pieces. I also plan on giving all guests a mason jar mug with a handle to get drinks from the bar, but I want to paint a charcoal stripe on them so people can write their names on them. BUT, how can I make the charcoal permanent so it won’t easily come off?? Please help if you have any ideas 🙂
Carrie » Maybe you could try chalkboard paint?
So helpful step by step guide. Thanks!
Hi Celeste,
I love your tutorial on how to paint mason jars. I like to collect jars and use them for different things around the house. I don’t have mason jars, but I have jam, salsa, sauce, and pickle jars, and I would love to paint them. However, I’m afraid that they will break in the oven, should I be worried?
Maybe you already know, but I noticed the jar with the pumpkin soup writing on it and wanted to let you know that nail polish remover will take permanent marker off of any non porous surface. Love your jars!
Great job on you blue mason jars. The tutorial is great too. Thanks for sharing…..Gj
Fabulous tutorial! Just what i’m looking for. Won’t the glass break though, when you put it in the oven?
This is exactly what I’m looking for!!! Thank You soo much for giving colors and step by step instructions! I will be doing these for my up coming wedding in June! found post yesterday, got paint thinner and paint brush, and your right paint brush leaves stripes! Vietra didn’t have the turquoise color at my local Michael’s only royal blue. So I got Delta Air Dry Perm Enamel in Mediterranean. Did my paint then thinner and couldn’t see any color so just added more blue, and it’s perfect!! Now I just have to get a rag, because paper towel (thought it would work) & paint brush does not work! Also I checked my local area for free cycle and no one is involved, where do you think I could get more mason jars for practice?
Jen, I absolutely love those mason jars. I used to have some real vintage ones but the dope heads stole them, My house was broken into and someone stole all my jars. But no worries now, I can just make some. Thank You for that great tutorial.
Just another hint if you mix mod podge and food coloring and paint a Mason jar it will tent the color of the glass they now make outdoor mod podge that is safe to leave out doors the more food coloring that you add the darker the glass will be, it works I have tried it several time.
Cool idea! I can’t wait to try it!!!
Awesome idea! Thanks so much for this info.
would you believe I was messing around with this very paint today?!?! Same shade and everything! I did NOT get the thinner, but I am going to go back and get. I had trouble w both a brush and a sponge (I saw both recommended for this paint) and ended up using my finger. Going try your method next.
Thanks!
I love this! Just what I need… more ideas swimming around in my head… 🙂
Thanks for sharing your process with us!
WOW!!!!! Is all I can say! Thank you EVERYONE for such fabulous comments about my blue mason jars…and thanks a gazillion to Jen for featuring me. All these comments have made my WEEK! You guys are all so sweet. Hugs, Celeste
Very cute and crafty idea on the mason jars! I really love the ones w/ the chalkboard paint. I need some of those for my new pantry!! I'm feeling a project coming on…as soon as I get the rest of the furniture moved over! 🙂
Oh my, I love these! I own 3 blue mason jars, and they are cherished – but expensive! What a great idea!
Don't count those pumpkin soup jars out just yet … a little rubbing alcohol will take permanent marker off your jars. I label my jars each year when I do my canning, and it wipes off with rubbing alcohol.
I love, love, love this tutorial! Thanks for sharing. I am headed over to follow!
I am using mason jars at my wedding as center pieces so I love this idea!!! I had never heard of freecycle before but I will definitely check it out! 🙂
Fantastic, thanks for sharing!! Please link up at my Sweet Links Party!!!
http://sweetcraftcakes.blogspot.com/2011/03/sweet-links-party-no-9.html
Smiles~ Noelle
love this post! i want to make the mason jars and use the chalk paint soon!
This is so cute!!! I really love this idea! thanks for sharing!! I cant wait to try this!!
I've been sick and terribly busy and missing my daily dose of tatertots and tuning in and finding this today was awesome!! I LOVE this idea!!! Thank you for sharing! 🙂
They are great! Thank you for the tutorial!
It was nice to meet you!
what a fab DIY project. thanks so much for sharing!
I would never have thought to do such a thing, but I love that color of jar and they are expensive when you do find them. Great project.
What a wonderful idea! I, too, love mason jars! There are so many uses!
I love this, so beautiful. Thanks for the great tutorial!
This is a great idea. I have wanted these blue jars but couldn't find them while thrifting.
Thanks for sharing this great tutorial.
Ruth
Super duper cool! Thanks for sharing.
Ohhhh I'm going to make some. Can you picture them hanging outside with tea light candles on a summer night. Beautiful.
Thanks for posting.
really cute mason jars!!!
I love Mason jars, and this is a craft I actually think I could do and would use!!! Thanks for guest posting, Celeste, and thanks for inviting Celeste, Jen!!!
Those jars are so cute! Thanks so much for the tutorial. I will definitely be trying some of my own. 🙂
Have a great day!
Pam
Those are lovely!!! I love all her projects! I featured that lovely wreath awhile back on my blog! haha… Obviously you have great taste Jen!
This is a great idea. Thanks for sharing.
And I love freecycle.
oh-em-geeeee!!!
I LOVE blue mason jars, but don't want to spend countless hours searching for them at the thrift stores… this is AMAZING!
Thank you sooo much for featuring her, and I am TOTALLY going to tackle this project!!
i love mason jars!
my grandma gave my mom tons a blue tinted ones for her wedding and she's giving me some for mine!
but this is an awesome idea to get the same look.
thanks for the inspiration!!
caitimae.blogspot.com
So great 🙂 I really loved the chalk board paint idea 🙂
You are BRILLIANT!!! it is so hard at times, or expensive to find the blue jars!! And your came out stunning!
Thanks so much for the tutorial!
Smiles~
Cricket
This is awesome! thank you 🙂 I'm going to be using this for my wedding for sure!
I love the blue Mason jars! I always see these in thrift stores or antique shops – usually around $5 – $10 each, so this is such a great idea, I will be saving my spaghetti jars from now on! This would also be a good idea for baby food jars – maybe as little flower vases?!
Thank you!
Rachael @ bella-rae designs
Soooooo cute!!!
Those jars are adorable!
Rachel @ Maybe Matilda
fab!! I love that idea!!!!!!!!!