This post is brought to you by FloraCraft®.

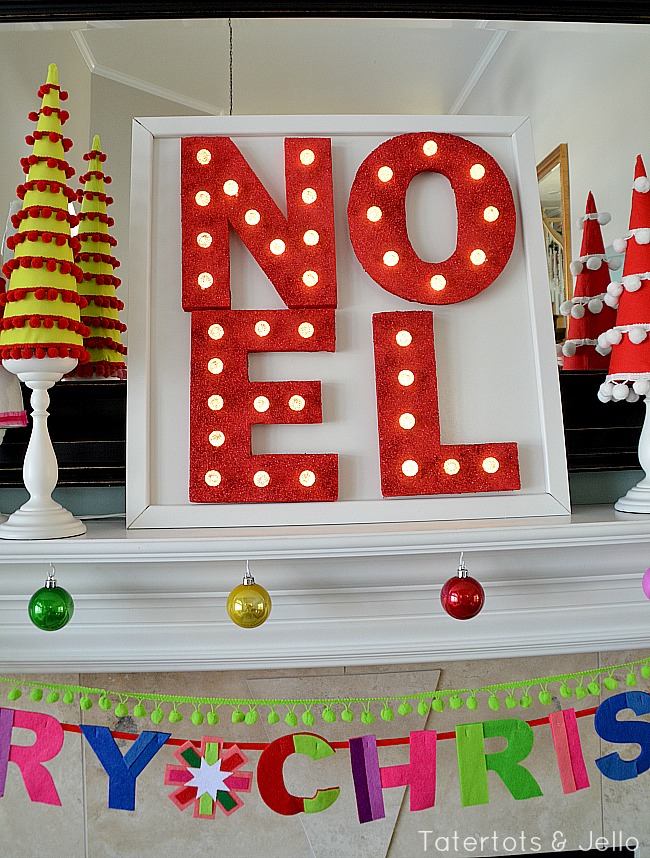
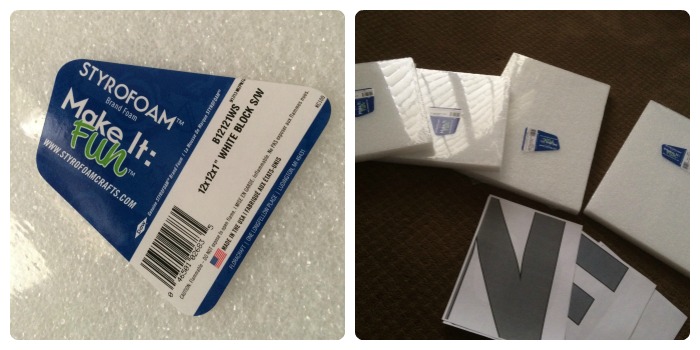
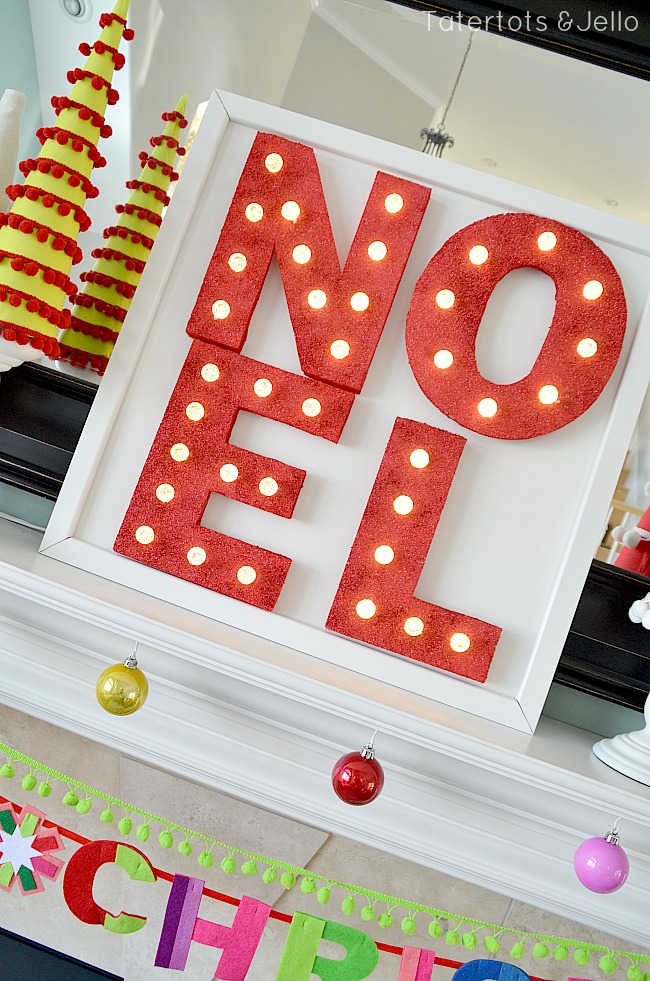
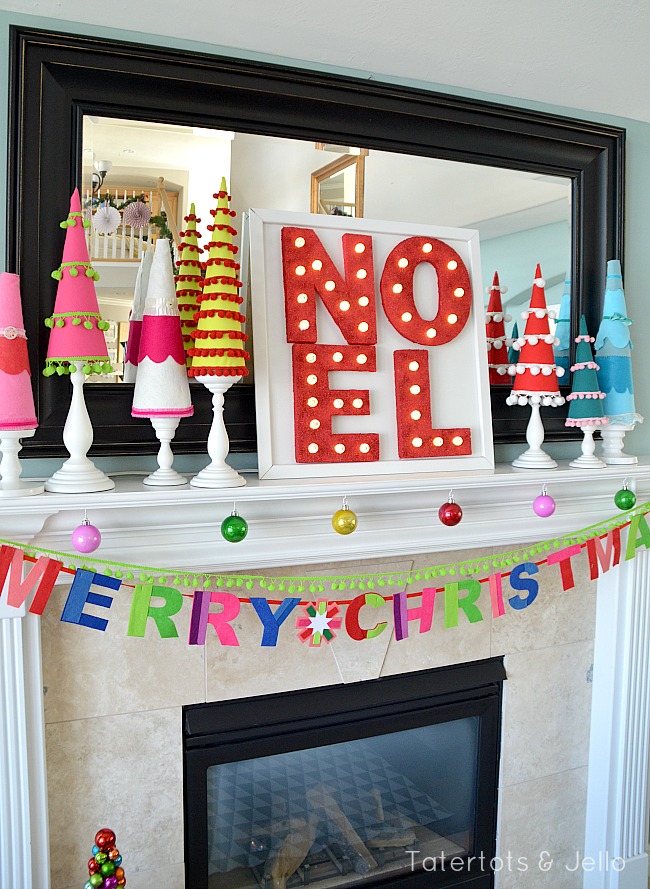
FloraCraft was kind enough to send a goodie box full of different sizes of square and rectangular styrofoam shapes. They gave me the challenge of creating something for the holidays using these items – for their “Foam for the Holidays” challenge. I had a lot of fun ideas, but I decided to make a set of marquee lights that spell NOEL!
Here’s how I made it. The project is in three stages:
1. Cutting out the foam letters
2. Creating the mounting board
3. Running the lights.
You may want to do something a little different. For example, I considered using some of the smaller, thick rectangular pieces of FloraCraft “Make It: Fun® Foam” to place behind the foam letters and make them stand on their own. This could be a cool project, but it didn’t work for what I had in mind.
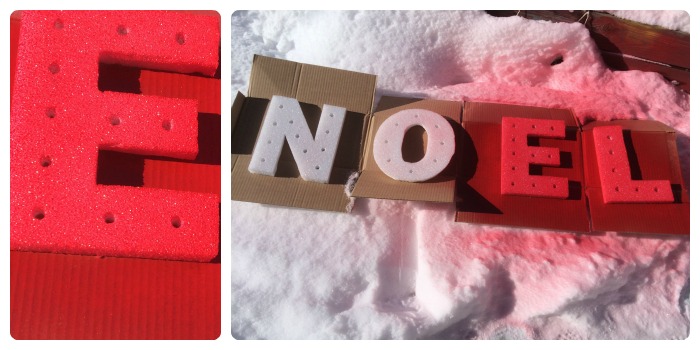
1. Cut out the foam letters.
To create the letters, I created giant letters in Adobe Illustrator and printed them. I had to print a couple of the bigger ones in two pieces and then piece them together. I cut them out along the outside and taped them onto the foam.
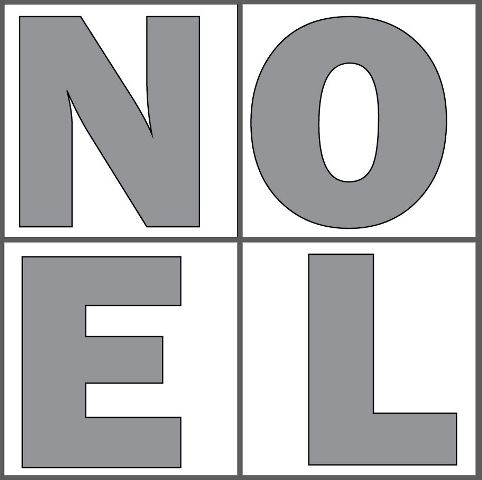
(I included the PDF of my letters here as a free printable download if it helps you. Right-click the link and choose “save as” to download; personal use only as always.)
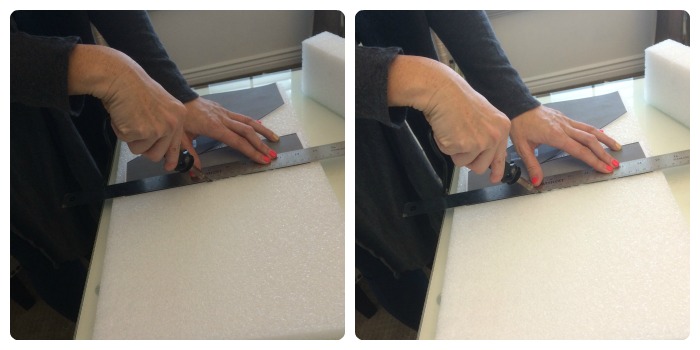
I then used a hot knife to cut out the letters. (A hot knife will make your foam cutting soooooo much easier.) I used a metal ruler to make the edges as straight as possible.
Next, I grabbed my light string (an inexpensive LED globe set) and roughly laid out the lights on the letters. I could see about where they needed to be to be centered on each letter, and how far apart they needed to be. For my letters, they needed to be centered , so about 1 1/2 inches from the edges but about 2 to 2 1/2 inches apart. I marked these in each foam letter using a pencil to poke a small hole.
Then I pushed through the foam with a pair of needle-nose pliers to make a big enough hole to fit the light sockets.
By laying out the lights, too, I could make sure I had enough lights to finish the job!
I then used some red spray paint to paint the letters and let them dry while I built the mounting board.
TIP: be sure to keep your spray paint at least 12″ away from the foam while painting. If you get much closer the paint will actually eat the foam. Yes, I tested it on a scrap piece. It was unfortunate.
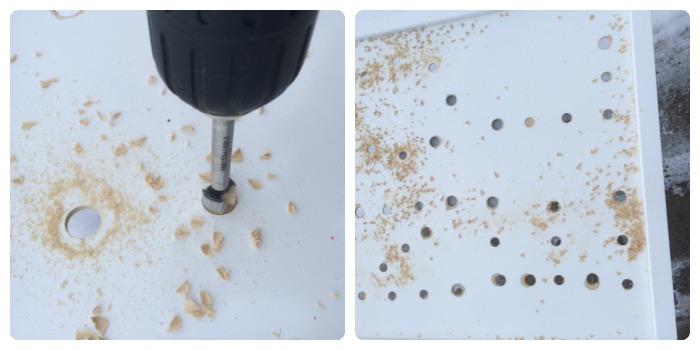
2. Assemble, mark and drill the mounting frame
You can do this however you like. I simply grabbed a $2.50 24×24 dry erase board and some pre-finished thin molding from the hardware store. I cut the molding with 45-degree mitered edges so that about 2/3 of the molding overlapped the dry erase board, then flipped it face down and used a staple gun to hold it in place. You can use whatever you like; glue, duct tape, small nails, that baby oatmeal that appears to turn to concrete when dried, whatever.
Once I’d assembled the mounting frame, I laid the NOEL letters on top of it about where I wanted them placed.
I used a permanent marker to mark the light holes on the board, and then drilled holes through the board so I could push the light sockets through the back of the board. (I tried some more complex wiring solutions and this appeared to be the best way to go.
3. Run the lights
Using whatever adhesive you find effective (in my case, looped duct tape), affix the letters to the front of the frame so the holes in the letters and the holes in the mounting board line up.
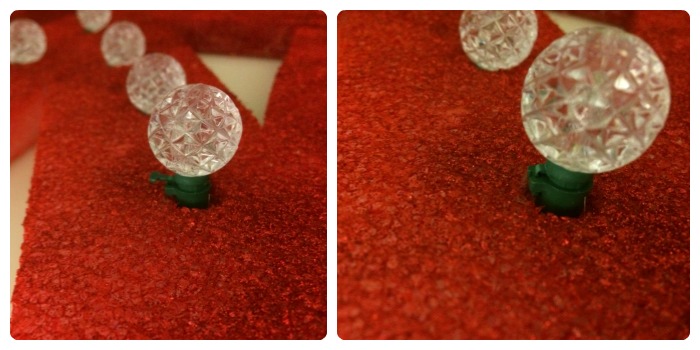
Starting at one corner as you did when you did your light layout “draft,” take the bulb out of one socket and push the bulbless socket from the back through to the front of the foam. Push the bulb back on. I found that I could do my bulbs in two ways: I could take the whole bulb assembly out, or just remove the plastic shell around the LED bulb. If you take the whole bulb out, try to make sure you’ve pushed it all the way back in and clipped the little clip on the side back on. (In the picture below, the left shows a bulb with the clip open; the right shows the clip closed.) The second time I ran my lights, having goofed them up the first time, I found it easier to remove the plastic shell than the whole assembly, and also I didn’t have to worry about accidentally getting foam bits in the light sockets.
Tips: you may find you need to touch up edges or scuffs with some red craft paint. It’s okay. You should do that, and not feel any guilt or shame. We all have to touch things up. I also found that I had to touch up the miter cuts on the prefinished molding I used; no matter how hard I tried I couldn’t cut them without getting some chips. (Might be time for a new saw blade, too.)
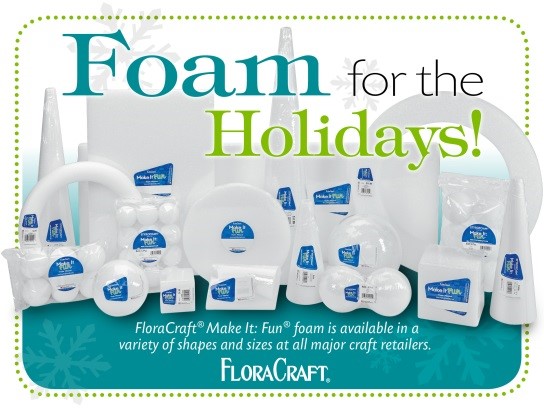
For more information about FloraCraft and Make It: Fun foam, visit the Make It: Fun Website and Crafts ‘n Coffee blog
Happy creating!
xoxo

PS: I’ve linked up this post to these fabulous blogs this week!


This post was sponsored by FloraCraft®. The ideas, projects and inspiration are all mine. See my disclosures.


If some one wishes to be updated with most recent technologies after that he
must be pay a visit this web page and be up to date everyday.
What a fun and clever idea! The lights make everything so festive! I love knowing I can do this simply with styrofoam….so much easier than wood! Again, another useful idea! Thanks Jen!
Very fun!! I’ll have to try that out for my son’s room!
Use “floral spray”, a spray paint that won’t eat styrofoam or other plastic. 🙂
So so darling!!
JEN JEN JEN!!!!
you are so clever! and your mantel is so fun!!!
xo
kellie
Seriously SO cute, Jen!
Thanks so much Chelsea!!
oxox
Such a cool idea Jen! I love it. Would make a perfect gift too.
Thanks Amy!! It was so fun to make 🙂
xoxo
Hi Jen! Thanks for the tutorial. You have done really amazing job. I am not sure if I can handle the job so good, but I cannot wait to try. Happy Holidays!
Thanks Rebeca!!
You can do it! I can’t wait to see what you make!
xox
What a cute idea. Your mantle looks awesome!
http://happinessiscreating.com/
Thanks Meg!! All of those bright colors make me so happy!
xox
These are just down right awesome! Great job, Jen!!
Oh thanks Kristyn!! Love u!
xox
You are incredible I am in love with this idea
Thanks so much Lisa. I cam home tonight and saw the letters all lit up and it just made me so happy 🙂
oxo
Love this idea! Oh my gosh. This is so cool!
Thanks Zoe!! It really is a happy mantel 🙂
xxo
Jen- how do you do it?? You must have a million ideas in your brain!! And all are amazing! love it!
Thanks Mique!!!
I feel the same way about you!! You are amazing!!
xoxoxoxo
Such a cute idea! I love all of the fun bright colors!!
Thanks so much Jamielyn!! I just love bright colors 🙂
xoxo
oh what a fun idea Jen~ I love it!!
Thanks Cheryl!! It makes me so happy to see that happy mantel. Thanks for the sweet comment!!
xoxo
Seriously the cutest thing I’ve ever seen. So freaking awesome…my head is spinning with ideas for this and different events, parties. You out did yourself!!!!
Oh you seriously made my night. Thank you Missy!!
xoxo
Oh, wow, this is so cool, Jen. I just love it! I am too intimidated to make marquee letters out of wood, but this I could do. So much easier. Fabulous!
Thanks Sharon!! This was such a fun challenge. I really enjoyed it!
xoxo