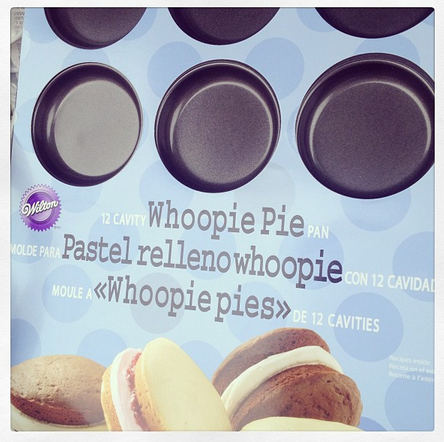
When we were at Michaels the other day, the girls talked me into this FUN Whoopie Pie Pan:
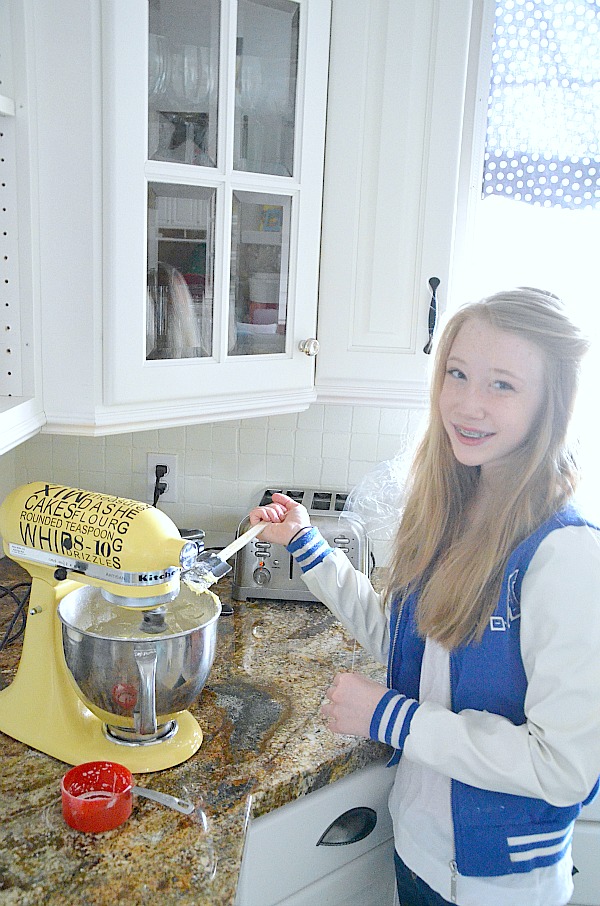
We were excited to go home and make some yummy creations!
I have been spending the week being creative each day with the Michaels and the Cre8time blogger challenge –and baking is not my usual creative thing. So I thought it would be a fun way to be more creative.
Immediately I thought of Lemon and Raspberries – two of my favorites for Spring!!
And to make it easier, I made the whoopie pies with a cake mix. Semi-homemade, right??
Here’s how we made our Easy Lemon Whoopie Pies with Fresh Raspberry Filling- yum!
To make the Whoopie Pies:
- 1 box of lemon cake mix
- 1 cup of flour
- 3 tablespoons of freshlemon zest
Directions:
- Make the cake mix according to the directions.
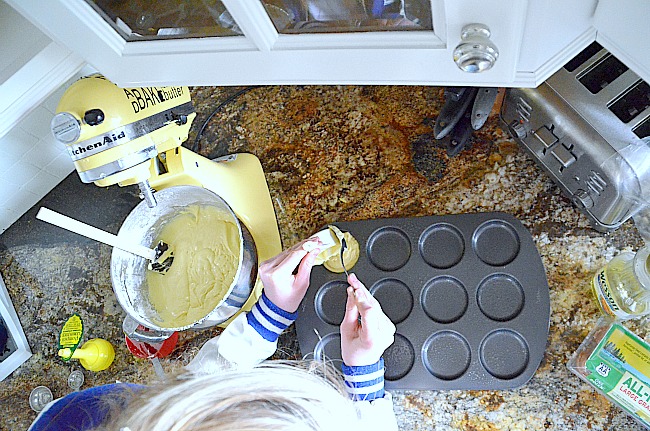
- Spray the whoopie pie pan with non-stick spray, fill each indentation 1/2 full with the cake mix.
- If you don’t have a whoopie pie pan, use a cookie sheet. Line the sheet with parchment paper. Then spoon small spoonfuls onto the parchment. The batter will spread, so little spoonfuls work best.
- Bake the whoopie pies in your oven at 350 for 10 minutes. Don’t overbake.
- Take out of the oven and let cool until completely cool.
Topping:
-
6 tablespoons butter, softened
-
2 cups confectioners’ sugar , sifted
-
1/8 teaspoon salt
-
1 jar (about 7 ounces) marshmallow creme
- 1 teaspoon pure vanilla extract
- 1 cup of fresh raspberries
Get creative!
Thanks Michaels for the gift card to buy supplies for this fun project. .
Share YOUR ideas with the Cre8Time community.
Get inspired by others’ easy-to-make projects!!
Have a Creative Day!
xoxo
PS — Speaking of “creative”,
the Weekend Wrap Up Party is coming up tonight.
I LOVE featuring YOU.
I hope you can stop by for the fun.
The party starts at 6 pm MST.











Hi! I had a Whoopie pie the other day in a cafe, and want to make them because they were so yummy. Does any cake mix work? Also, when you say flour, do you mean Plain flour or Self Raising flour? Thanks!
Hi, I’m Sonia, an Italian food blogger, sorry for my bad english, I want tell you that I have included the link of this recipe (which I liked very much) in the section on my blog dedicated to “10 ways to make” (“10 Modi di Fare”) whoopie pies.
The post is ‘Whoopie pies’ I hope not to bother you, have a nice day.
Sonia
These look great! About how many whoopie pies does it make?
Has there been an answer to the flour question? I was hoping to make these for Easter and don’t want to screw it up!
I made the cake/cookie part so far and if you add the extra ingredients in, they turn out great! I don’t really get what the extra cup of flour does, but they are good.
The recipe made enough for two of the whoopie pie tins plus two regular cupcakes (I didn’t want to throw any away) and I filled my cups a little fuller. I plan on cutting them each in half before filling them.
Thanks so much! I did see in other recipes that used a box mix they added 2/3cup so I was going to do add it. They look so yumm! Thanks for the reply I don’t want to screw up and serve them to the inlaws!lol
I just made these for Easter and added the 1 cup of flour to the cake mix plus about 3 Tbs. lemon juice since I didn’t have any lemons for zest. They came out nice and firm and hold up well. I did end up having to add quite a bit extra powdered sugar to the filling to get it not so runny. The filling is very sweet but yummy.
Me too Susie. I feel like I doubled the powder sugar! But they seem yummy. I will put them together tomm.
Me also!! Mine was still SUPER runny, even after refrigerating it like the recipe suggested. I didn’t want to add any more powdered sugar because it was SOOOOO sweet. Maybe my raspberries were super juicy?
If you are worried about that then try adding some cornstarch along with powder sugar. It’s works when I make buttercream icing 🙂
Thanks for backing me up, Libby and Becky! C’mon, Jen! Help us out here – – Easter is Sunday! Thanks. 🙂
I want to make these this weekend but want to know about the flour and lemon zest as well. I’m confused.
two (maybe dumb) questions: 1) In the “make the whoopie pies” section, you list a cup of flour and 3T lemon zest, along with the boxed cake mix, but in the directions, you don’t say to add the flour… does the extra flour – added to boxed cake mix – give a more “cookie / whoopie pie” texture to the cake? 2) do you think it would work to make the whoopie pies at the bottoms of large muffin tins – – using only a small spoonful of batter? Rather than get a special whoopie pie tin, or use cookie sheet & parchment paper?
Can you tell – I’m not a cook – and trying to branch out!?! 🙂 Thanks.
I also would like to know about the flour and lemon zest.
Oh they are so cute i wouldn’t want to eat them. They look amazing & i love how fresh your raspberries look/are.I love her jacket! I hope you guys have a great Sunday.
Nikki
http://www.TheCaftySideOfSarcasm.com
Looks so yummy! And so cute! What a great idea to do with your girls. Now I’ve got to go out and looks for that pan!
These look delicious. I will definitely try them out. Happy to see you using The Pampered Chef decorator 🙂 I’ve been pampering kitchens for 14 years now.
Loved this recipe..Thanks for sharing..:)
Android Developer
So, I realize that this wasn’t the feature of your post but I am obsessed….where did you get the fabulous decal on your mixer?!?!!! So cute-I really feel like my mixer needs one too! Thanks!!!
Hi Whitney!! I got it through Shelley at House of Smiths — http://www.thehouseofsmithsdesigns.com/
xoxo
These look soooo yummy! Can’t wait to try!
Oh my gosh, I’ll have to make that at Easter. It looks so good! So… looks like whoopie pies are the new cake pop, eh?
Hi Justine!!
Maybe!! I haven’t had much luck with cake pops. But these whoopie pies were fun to make 🙂
xxoxo
Those look yummy. I always wondered how people got their whoopee pie parts so evenly round.
I actually popped over here from East Coast Creative where I saw your Little League Lounger. I can’t believe you were eliminated. That is genius. But I bet whoever did the voting didn’t spend hours every weekend on uncomfortable bleachers as some of us did. Genius, really.
I know!! It was so sad. I thought it was a fun project. I am excited to see how the rest of the contest plays out. There is so much talent there!
xoxo
So pretty, and I’ll bet they taste amazing! Also, I rarely comment on your post, even though I love them–trying to change that 🙂
I mean “posts”
You are so sweet Steph!! I really do appreciate your comments so much. I am trying to get around and comment on blogs too – it’s so hard. I wish I had more time!
Have a wonderful weekend!
xoxo
I was at my mom’s the other day and she was just trying out her whoopie pie pan for the first time. I had never seen one before and after this post I might have to go get one. These look delicious and I can’t wait to try them!
You should try it!! Just be sure to only fill the whoopie pie indentions to about half way, that way they don’t get too full. And take them out before they start to brown.
xoxo
I’ve never had a whoopie pie but I love that combination! I would love if you linked this up on my #kidsinthekitchen post today since you have a ” kid in the kitchen” 🙂 http://lookwhatmomfound.com/category/kids-in-the-kitchen-series