Tatertots and Jello

COLORFUL HAPPY HOME -- Daily DIY, Decor, Craft and Recipe Tutorial

  • My Home
    • 1905 Cottage
    • Daybreak House
  • DIY
    • DIY Projects and Ideas
    • Organizing
    • Tutorials
    • Printables
  • Decor
    • Spring Projects
    • Summer Projects
    • Fall Projects
  • Crafts
    • Kids Crafts
    • Painting Projects
    • Paper Projects
    • Sewing
    • Wreaths
  • Holidays
    • Valentines Day
    • Easter
    • Halloween
    • Thanksgiving
    • Christmas
    • HAPPY Holidays Series!
  • Recipes

Explore

  • my home
  • diy
  • decor
  • crafts
  • holiday
  • printables
  • recipes

Connect

Home » christmas » Happy Holidays: DIY Stenciled Holiday Tea Towel

christmas, diy, guest tutorials, HAPPY Holidays, holiday · November 28, 2013

Happy Holidays: DIY Stenciled Holiday Tea Towel

Tatertots & Jello is a participant in the Amazon Services LLC Associates Program, an affiliate advertising program designed to provide a means for sites to earn advertising fees by advertising and linking to amazon.com.

Happy Holidays everyone!! I’m Cheryl, the self proclaimed neat freak and voice behind TidyMom.net. I bake, craft and clean while managing a camera in one hand and a cup of coffee in the other. I’m super excited to be a part of Jen’s Holiday event! I’m blown away by all the creativity and inspiration! When it comes to crafts, I like simple and easy. I’m here today to share a craft idea that is perfect for holiday decorating and gift-giving.

Stenciled Holiday Tea Towel

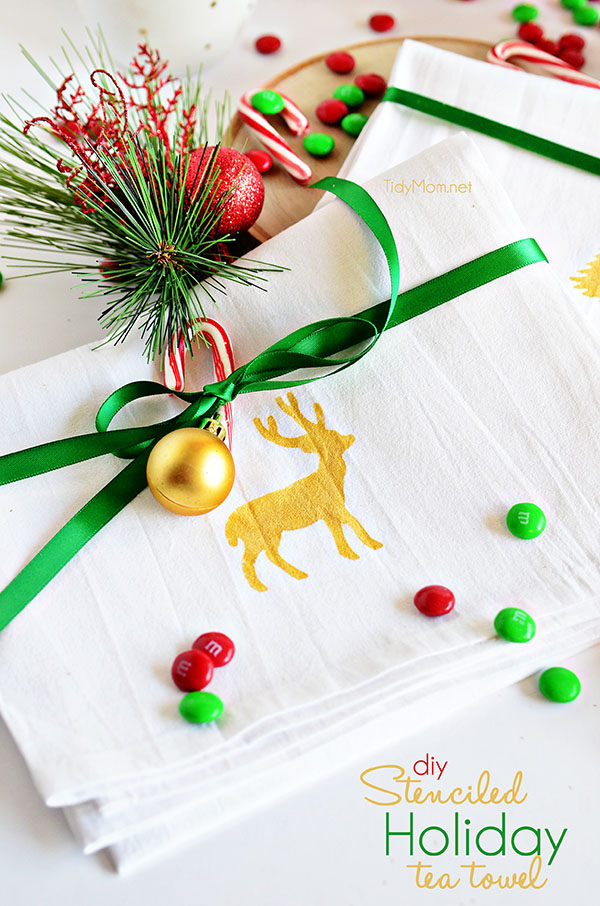
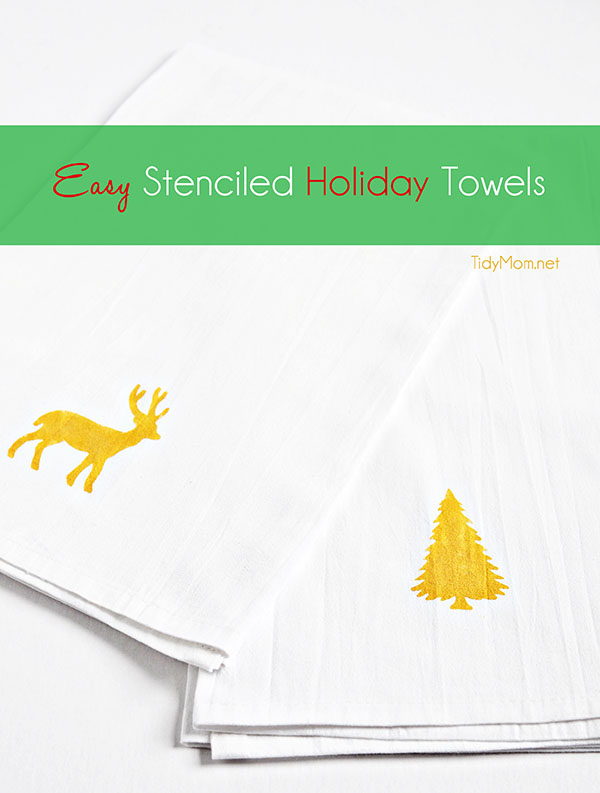
These Stenciled Holiday Towels can be made in minutes, and they require a only few easy-to-find supplies. Let’s get started!
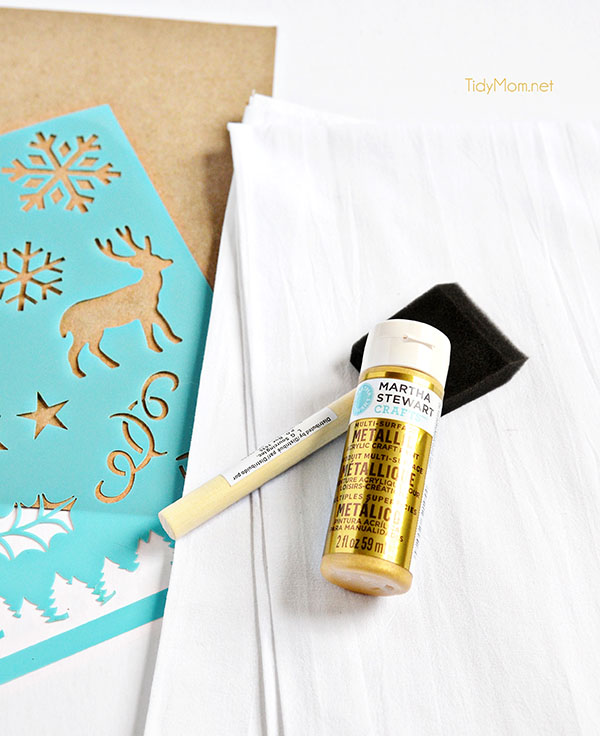
tatertotsandjello.happy_.holidays.2013


Stenciled Holiday Tea Towel

Supplies:

  • White cotton hand towels – I just ordered some flour sack towels from Amazon
  • Stencil – I used the Martha Stewart Holiday Stencils
  • a piece of cardboard to place under the fabric while stenciling
  • paint – I used Martha Stewart Metallic multi-surface acrylic paint
  • foam brush
  • spray adhesive (optional – but recommended)
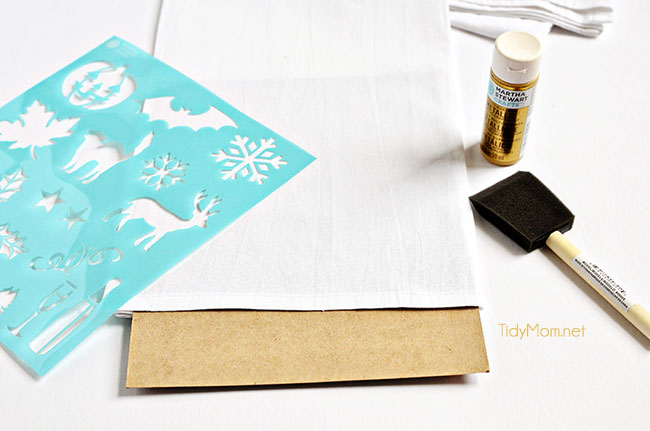
 

Stenciled Holiday Tea Towel

Directions:

Place a piece of cardboard underneath the towel so the paint doesn’t bleed thru the other side.

Stenciled Holiday Tea Towel

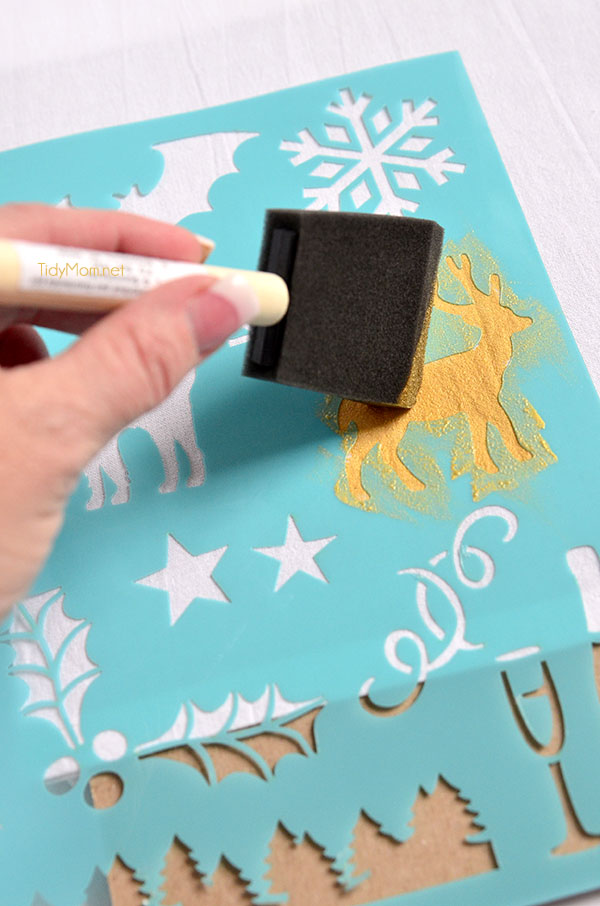
Next, lightly spray the stencil with some spray adhesive so the stencil stays in place (or you could use masking tape to secure the stencil to the fabric). Add a little paint to you brush and gently dab it around inside the stencil. (tip: you may want to place tape over the surrounding stencils so you don’t accidentally get paint in a spot you don’t want).

Stenciled Holiday Tea Towel

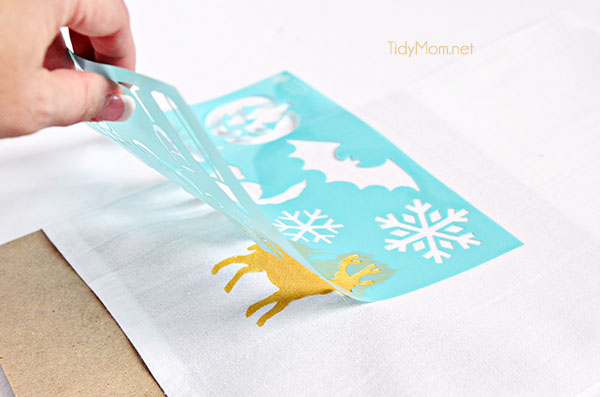
Carefully remove stencil and cardboard and you are done!! You could easily make several of these in a matter of minutes! Don’t you just love an easy craft?!

Set aside for a bit to dry (I’m not sure how long this took, I didn’t touch them for an hour or so, but they were probably dry sooner.

Stenciled Holiday Towels

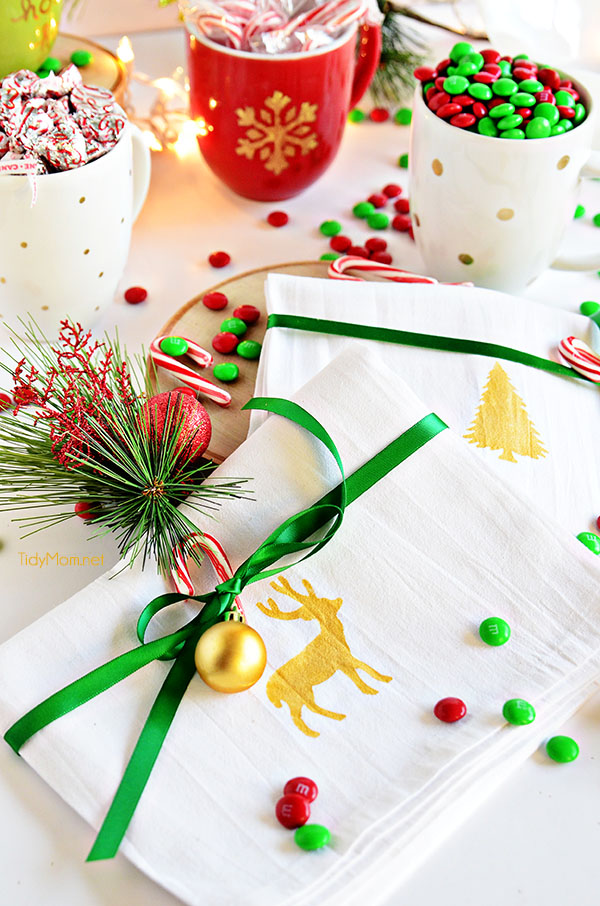
They would make a nice gift, just fold and tie with ribbon, garnished with a small ornament and candy cane! Gift with a loaf of homemade quick bread or just some holiday candy and a hand painted mug!!

Stenciled Holiday Towels

Thanks so much to Jen for having me over today! I’ve already been buried in holiday crafting and baking over at TidyMom.net and have lots more to share over the next few weeks! I would love for you to stop by and say hello!

*******

Thanks Cheryl! Those are just beautiful and something that would be a great gift for neighbors, friends or family!! Cheryl has amazing ideas on Tidymom.net. I’m always impressed with her projects! Here are a few of my favorite projects of hers:

Marbled Cheesecake Brownies with M&M's recipe at TidyMom.net

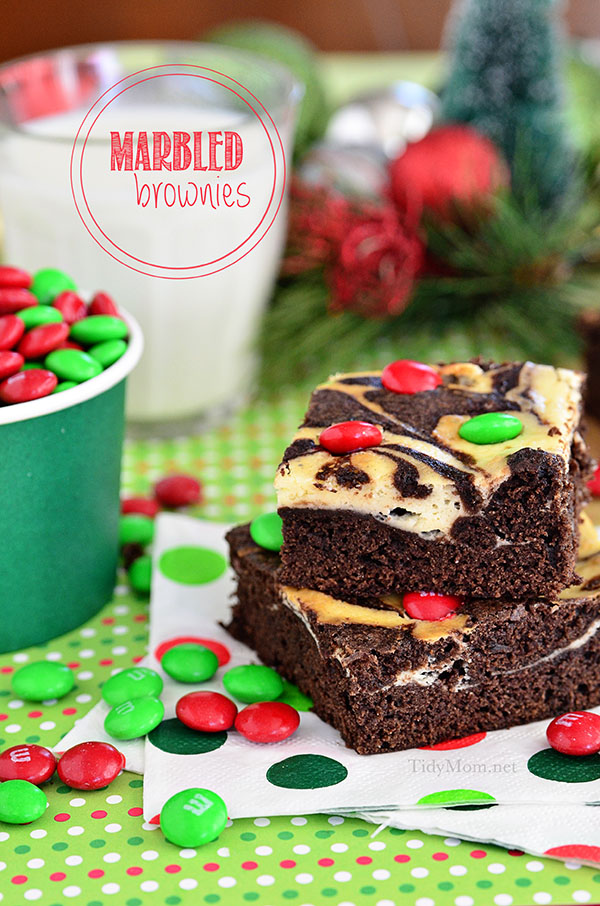
These Marbled Cheesecake Brownies look so yummy!! And, the red and green M&M’s give them the perfect Christmas touch!

Felt-Poinsettia-Pin

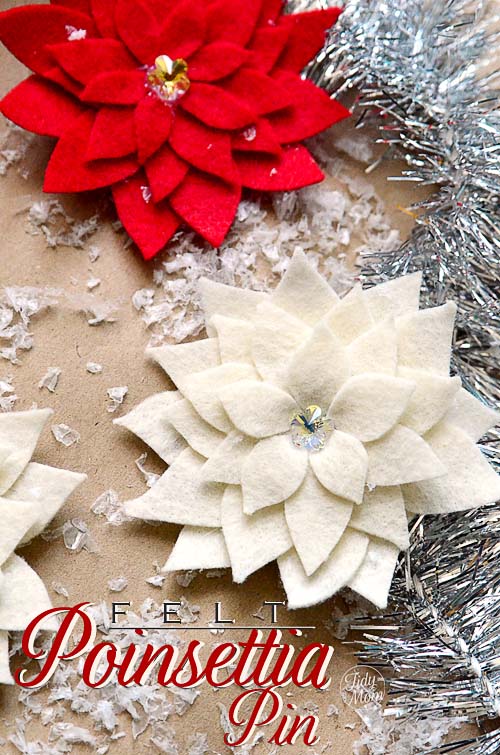
Follow her tutorial to learn how to make yourself a Felt Poinsettia Pin! Perfect to add a little of the holidays to anything you’re wearing!!

DIY-Tinsel-Wreath

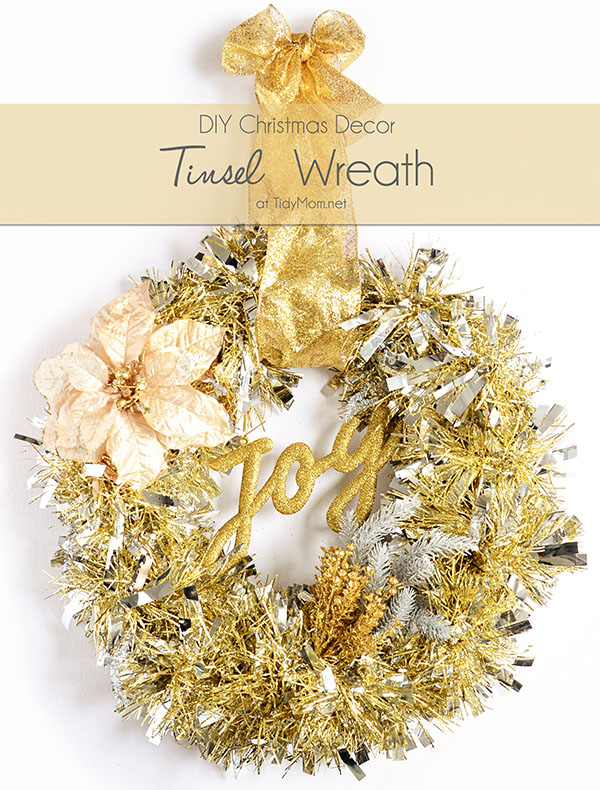
This DIY Tinsel Wreath is so beautiful!! Of course, I love it because it’s gold! Her tutorial is super easy too, so you will be able to put one together in no time!

Visit Tidy Mom and

pinterest.32x32.icon.circle
Follow Tidy Mom on Pinterest
instagram.32x32.icon.square
Follow Tidy Mom on Instagram
facebook.32x32.icon.circle
Follow Tidy Mom on Facebook
twitter.32x32.icon.circle
Follow Tidy Mom on Twitter

Happy Holidays projects and ideas featured on TatertotsAndJello.com

Follow the HAPPY Holidays Event at Tatertots & Jello
all through the holidays with awesome tutorials, recipes, decorating ideas and more from some amazing blogs!
xoxo
jen signature


Posted By: Jen · In: christmas, diy, guest tutorials, HAPPY Holidays, holiday

Awesome Silhouette Black Friday Discounts! {Nov 28-Dec 8}
Prepping Your Home for Holiday Guests {Win a $50 Lowe’s Card!}

You’ll Also Love

DIY Halloween Bat Mantel Ideas
make a dog playhouse out of a box. all the instructionsMake an Adorable DIY Dog Playhouse Out of a Box!
Make a DIY Marble Kitchen Pedestal

Comments

  1. TidyMom says

    November 29, 2013 at 4:14 AM

    Thanks so much for having me Jen!! Hope you had a wonderful Thanksgiving!

  2. Zoe says

    November 28, 2013 at 1:57 PM

    These are sooo neat! Love this post. Thanks for sharing! Happy Thanksgiving!

    xoxo Zoe
    http://thatszoe.blogspot.com

    • TidyMom says

      November 29, 2013 at 4:28 AM

      You can set the paint by ironing or tumble drying.
      Allow 24 hours for your towels to air dry; then heat set. Two heat setting methods are recommended:
      Dryer method-
      Turn garment inside out; place item in dryer for 30 minutes on highest setting allowed for the type of fabric used.
      Iron Method:
      Place decorated item right side up on ironing board; cover with dry pressing cloth. Set iron to highest setting allowed for fabric used. Place dry iron (no steam) on area pressing for 30 seconds, lift iron moving to another area until all sections are heat set.

      If you heat set it after painting, it can be washed in the washing machine on a gentle cycle. I would then hang it to dry.

  3. Andrea says

    November 28, 2013 at 8:20 AM

    What about washing them?

    • TidyMom says

      November 29, 2013 at 4:29 AM

      oops I meant the reply above for you Andrea – here you go incase you missed it:

      You can set the paint by ironing or tumble drying.
      Allow 24 hours for your towels to air dry; then heat set. Two heat setting methods are recommended:
      Dryer method-
      Turn garment inside out; place item in dryer for 30 minutes on highest setting allowed for the type of fabric used.
      Iron Method:
      Place decorated item right side up on ironing board; cover with dry pressing cloth. Set iron to highest setting allowed for fabric used. Place dry iron (no steam) on area pressing for 30 seconds, lift iron moving to another area until all sections are heat set.

      If you heat set it after painting, it can be washed in the washing machine on a gentle cycle. I would then hang it to dry.

      • Andrea says

        November 29, 2013 at 7:14 AM

        Thanks! Now I’m totally doing these for Christmas gifts!

Hi! I'm Jen Hadfield. I'm a mom of 5 restoring an 1891 home in the heart of Salt Lake City. I love being creative and sharing simple ideas to make your life easier and more beautiful!

Receive the Latest Crafts, DIY, Recipes and More in your INBOX!

Follow us on Pinterest! It's awesome!

Top Posts & Pages

Copycat Panera Spinach and Artichoke Egg Soufflés - SO good!
Spruce up Your Outdoor Space with a DIY Recirculating Fountain! (tutorial)
12 Must-Have Items to Pack on an Alaskan Cruise!
A New Deck in Under 30 Minutes!
DIY Fountains to Make Your Yard Amazing!
How to Change a Recessed Can Light into a Pendant Light with No Remodeling!


Popular Posts

  • Copycat Panera Spinach and Artichoke Egg Soufflés - SO good!
    Copycat Panera Spinach and Artichoke Egg Soufflés - SO good!
  • Spruce up Your Outdoor Space with a DIY Recirculating Fountain! (tutorial)
    Spruce up Your Outdoor Space with a DIY Recirculating Fountain! (tutorial)
  • 12 Must-Have Items to Pack on an Alaskan Cruise!
    12 Must-Have Items to Pack on an Alaskan Cruise!
  • A New Deck in Under 30 Minutes!
    A New Deck in Under 30 Minutes!
  • DIY Fountains to Make Your Yard Amazing!
    DIY Fountains to Make Your Yard Amazing!
  • How to Change a Recessed Can Light into a Pendant Light with No Remodeling!
    How to Change a Recessed Can Light into a Pendant Light with No Remodeling!
  • DIY Secret: How to Print on Post-It Notes (and Free Printable Template)
    DIY Secret: How to Print on Post-It Notes (and Free Printable Template)

As seen in


Amazon Affiliate

Tatertots & Jello is a participant in the Amazon Services LLC Associates Program, an affiliate advertising program designed to provide a means for sites to earn advertising fees by advertising and linking to amazon.com.
  • About Me
  • Advertising
  • Get Featured

Copyright © 2025 Tatertots and Jello · Privacy
This site is a place for positive discussion and ideas. Negative talk, comments that disparage others, and similar are not welcome and may be removed.