This is one of those pinch-me-I’m-dreaming moments. Am I really guest posting on Tatertots and Jello? Cue panic . . .
Okay, I’m back. I had to go to my happy place for a brief moment because right now I feel like the new kid in school . . . if you’ve ever been the new kid, you know what I’m talking about. That moment when you walk into the classroom and everyone stares at you and wonders who the heck you are and what in the world are YOU doing HERE.
So let this new kid introduce herself . . . I’m Elizabeth and I started up my little corner of the bloggy world, twelve crafts till Christmas, this past January. If you’ve never been there (and my guess is that you haven’t), stop on by for a visit. But let me clear something up before your visit. My blog has practically nothing to do with Christmas. Yep, that’s right . . . you won’t find Christmas decorating ideas, Christmas recipes, Christmas party tips, Christmas crafts . . . I think you get the idea. Twelve crafts till Christmas is all about my self-imposed goal of making all my girls’ Christmas presents and stocking stuffers for this coming Christmas. You see, two years ago (January 2009) I bought a sewing machine with this crazy idea that I would teach myself to sew. It was a crazy idea because apart from a four month home economics class twenty years ago, I had NO – zero, zilch, nada – sewing experience. The sewing machine sat idle, taunting me with its presence for a year. This past January I plugged it in with renewed conviction and started this blog to keep myself accountable. At some point, I also made it my mission to inspire others to make JUST ONE homemade gift for someone this year. There is so much meaning in a gift that has been labored over and loved on.
I like to figure things out for myself (yes, I’m one of those people), so there are a lot of tutorials and gift ideas on my blog. Here’s one fairly easy gift idea (and let’s be honest . . . if I can do it, it’s easy) that you can do with supplies you either have on hand or can buy for a few dollars.
The Accordion Ribbon Bracelet
I’ve been obsessed with soda cans, ruffles and ribbon lately, so grab the following stuff to begin:
-ribbon, ribbon . . . and more ribbon
-soda cans
-a hair elastic/ponytail holder,
-super glue or jewelry glue
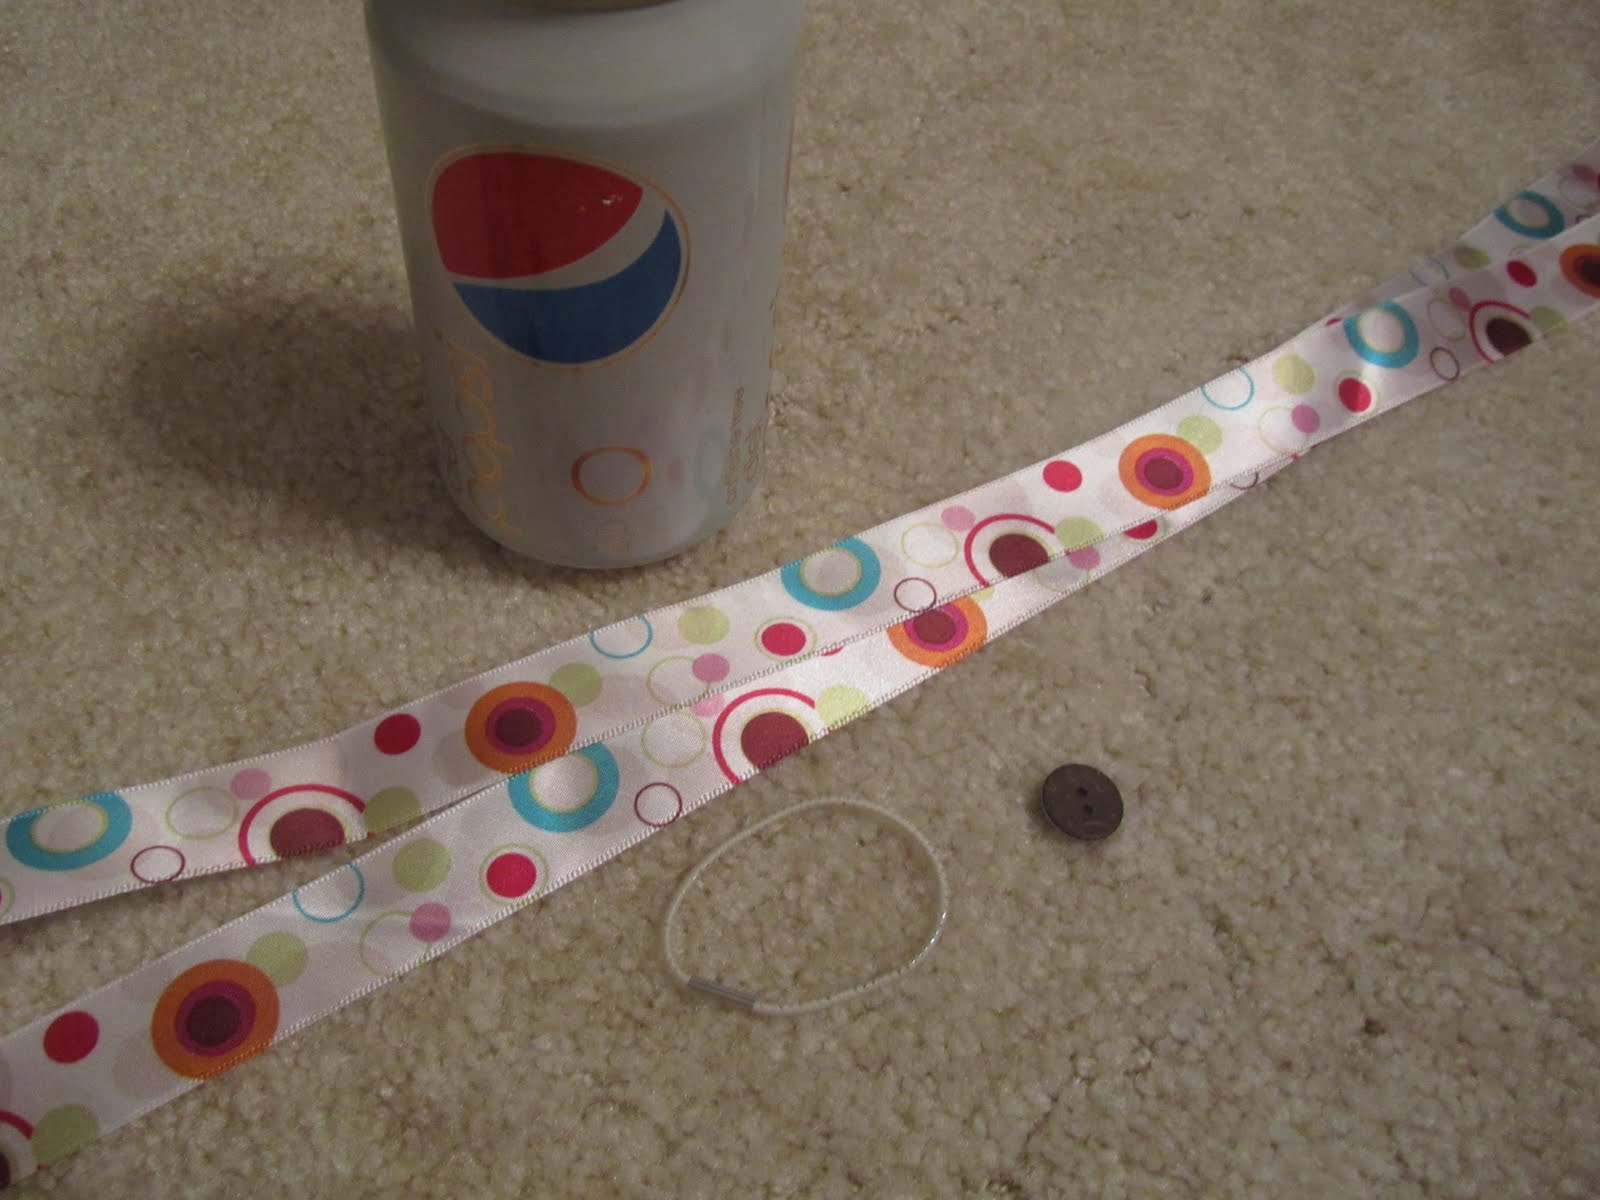
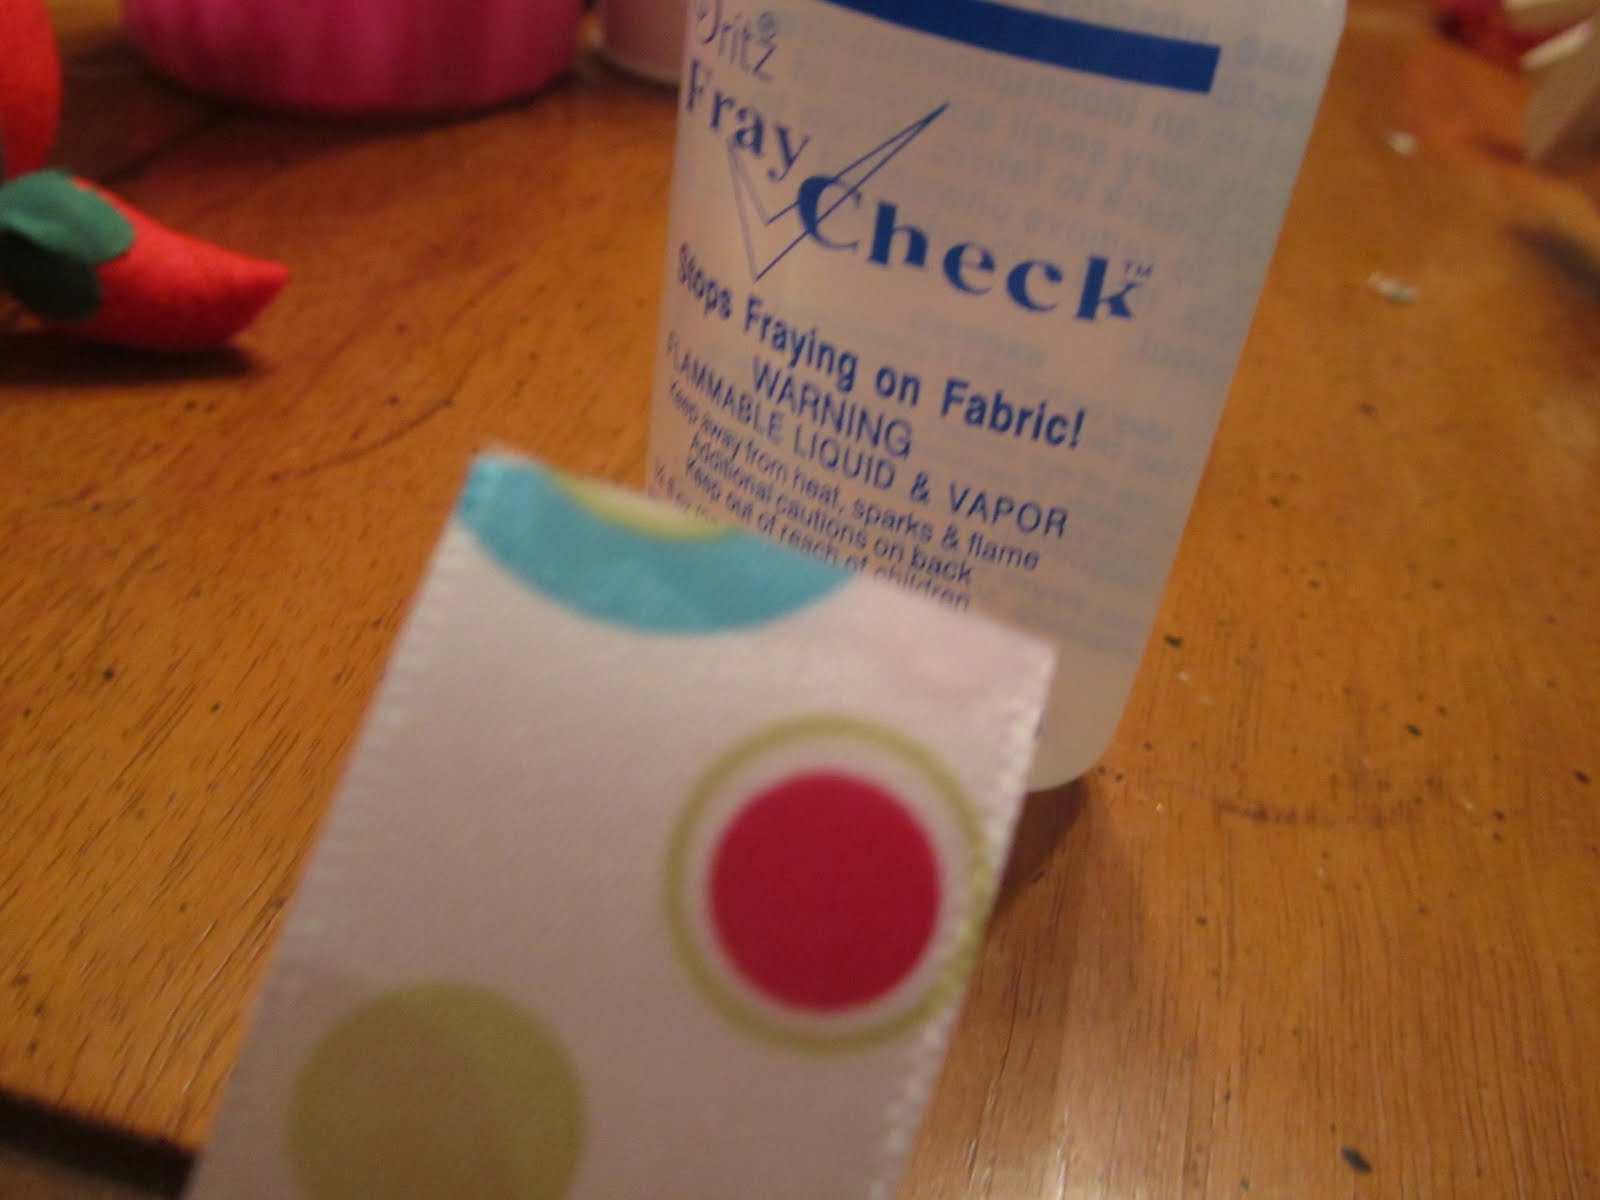
1) Cut two strips of ribbon the same length. For this bracelet, I wrapped the ribbon around the can twice for my measurement. (I have an aversion to measuring tape.) Vary the length of the ribbon depending on the look you want for your bracelet. Squeeze a little Fray Check on the ends of the ribbon now, so it will be dry by the time you start to sew.
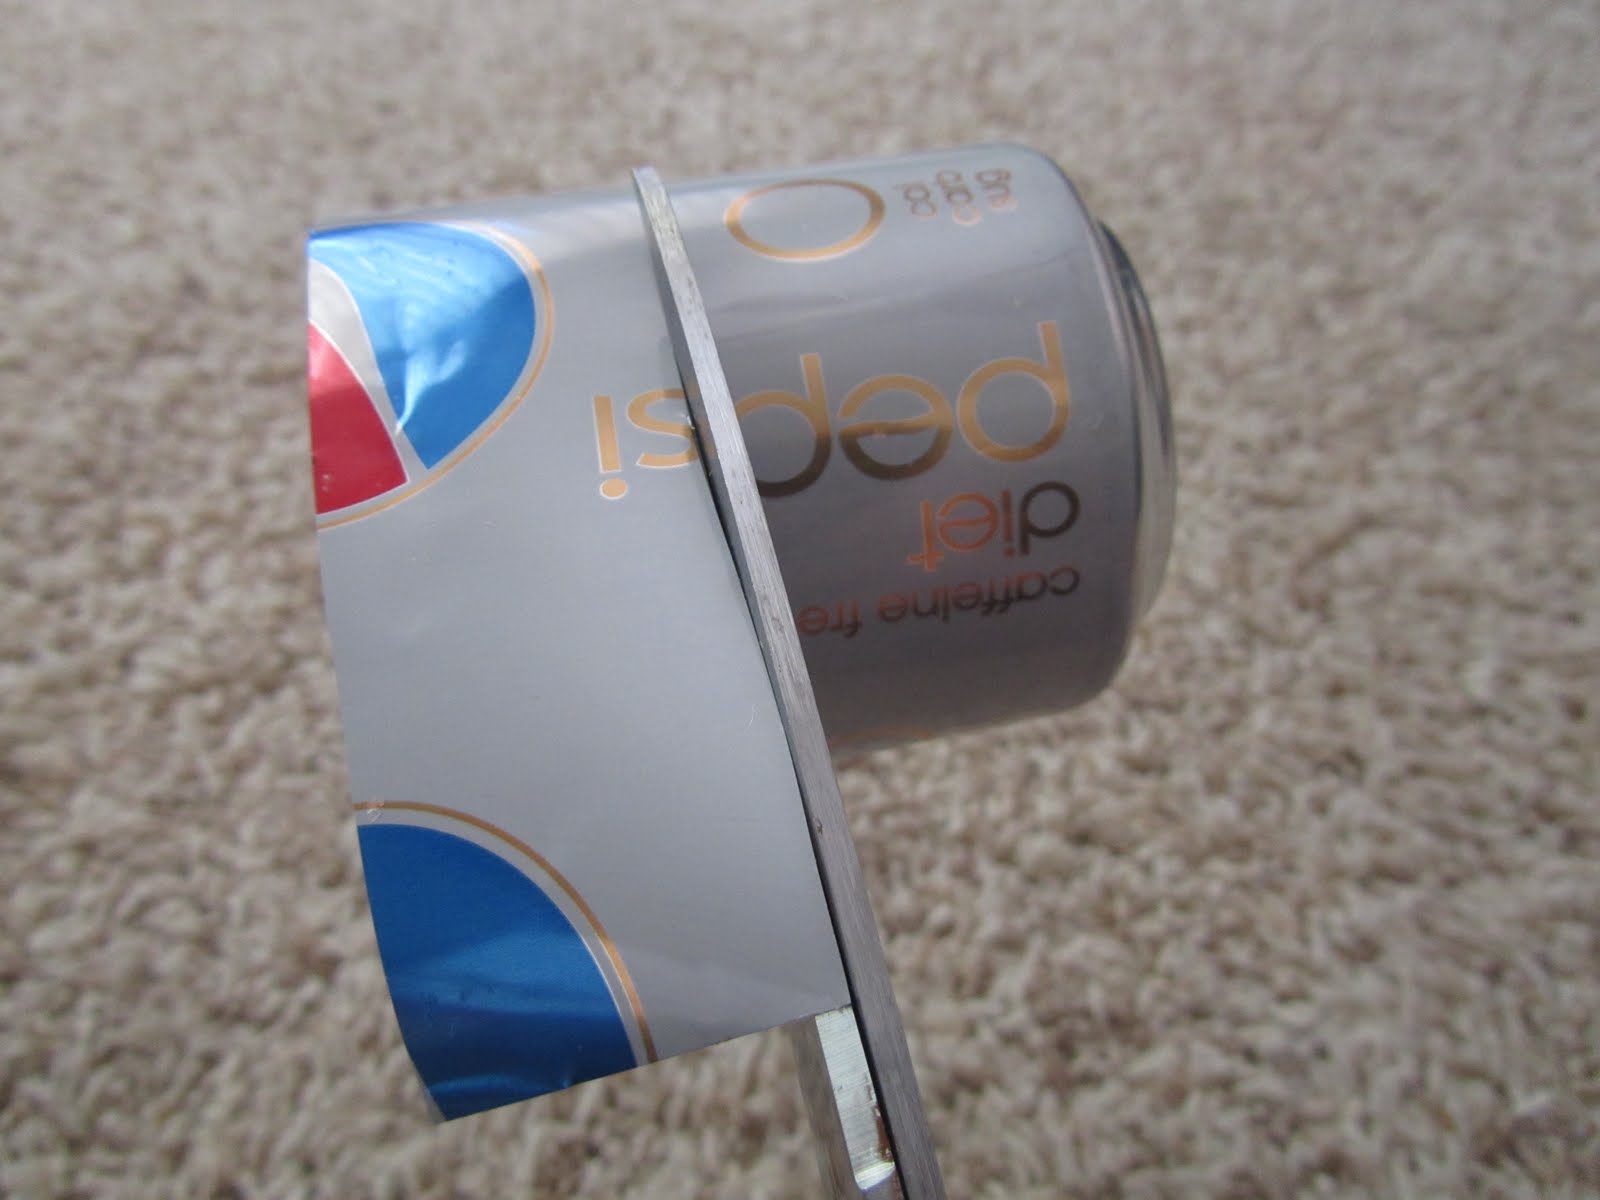
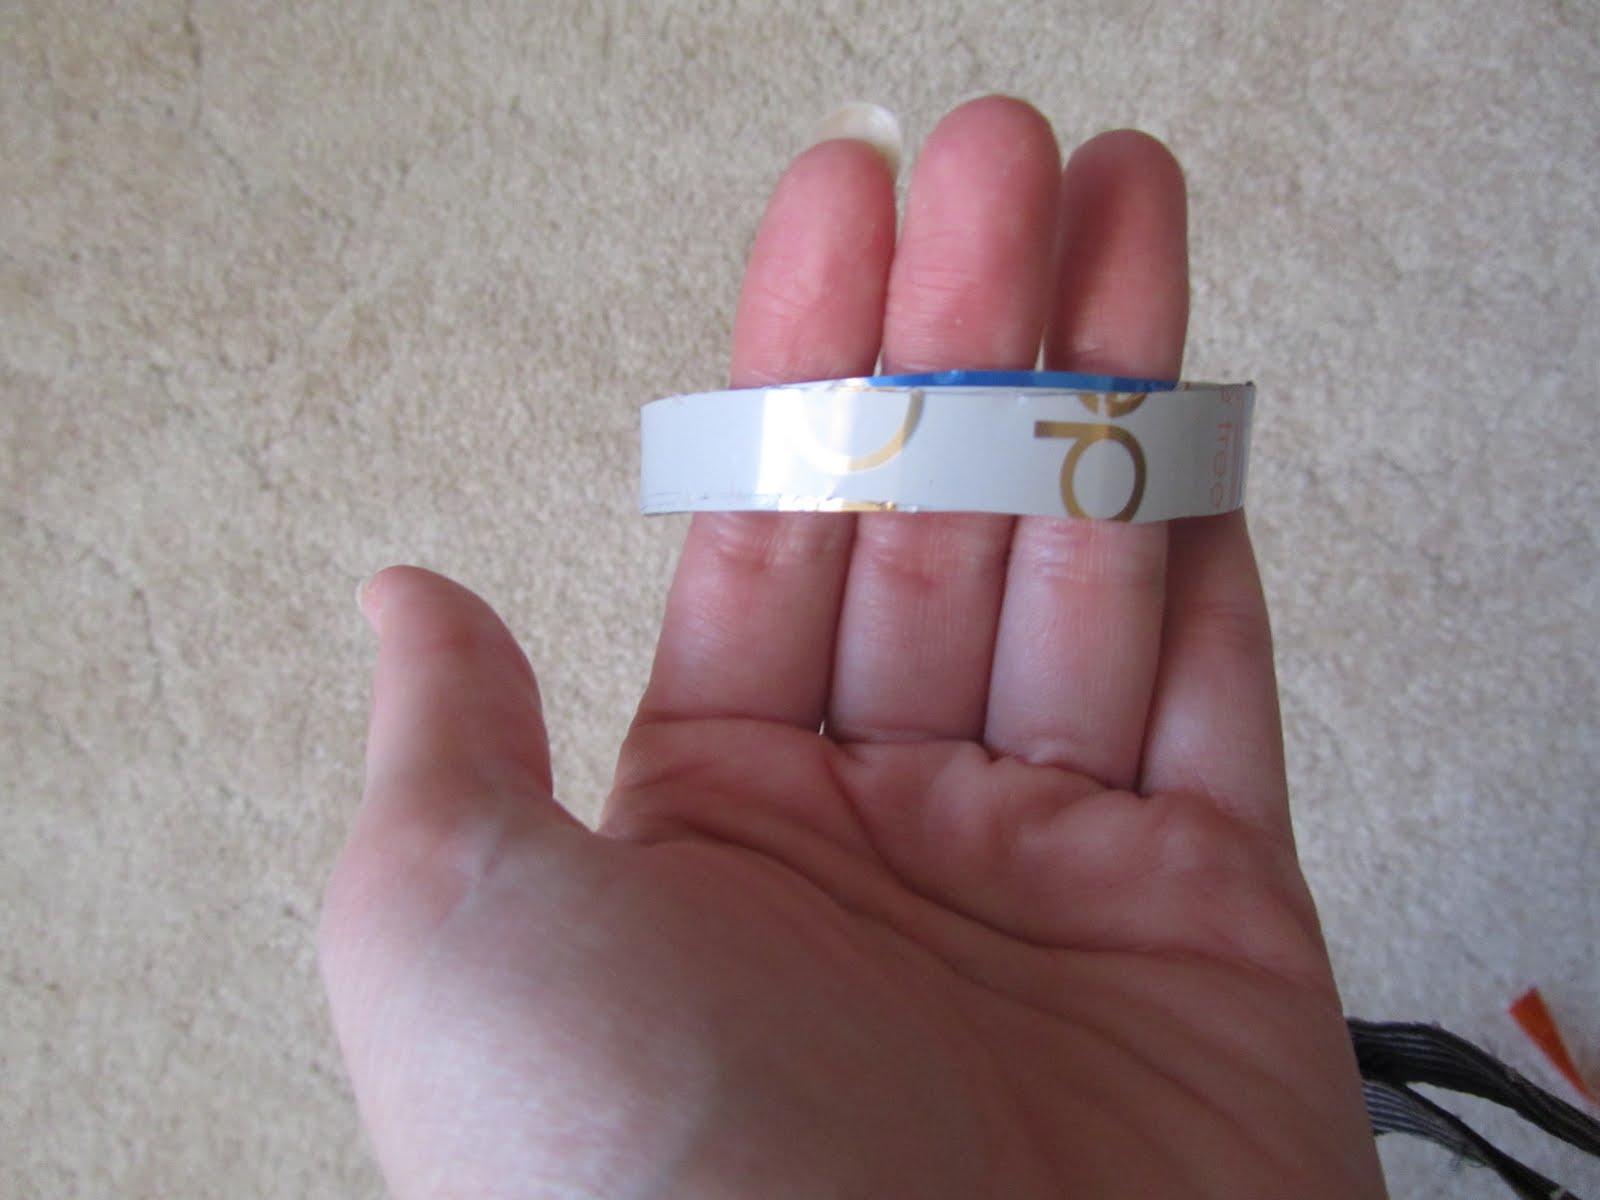
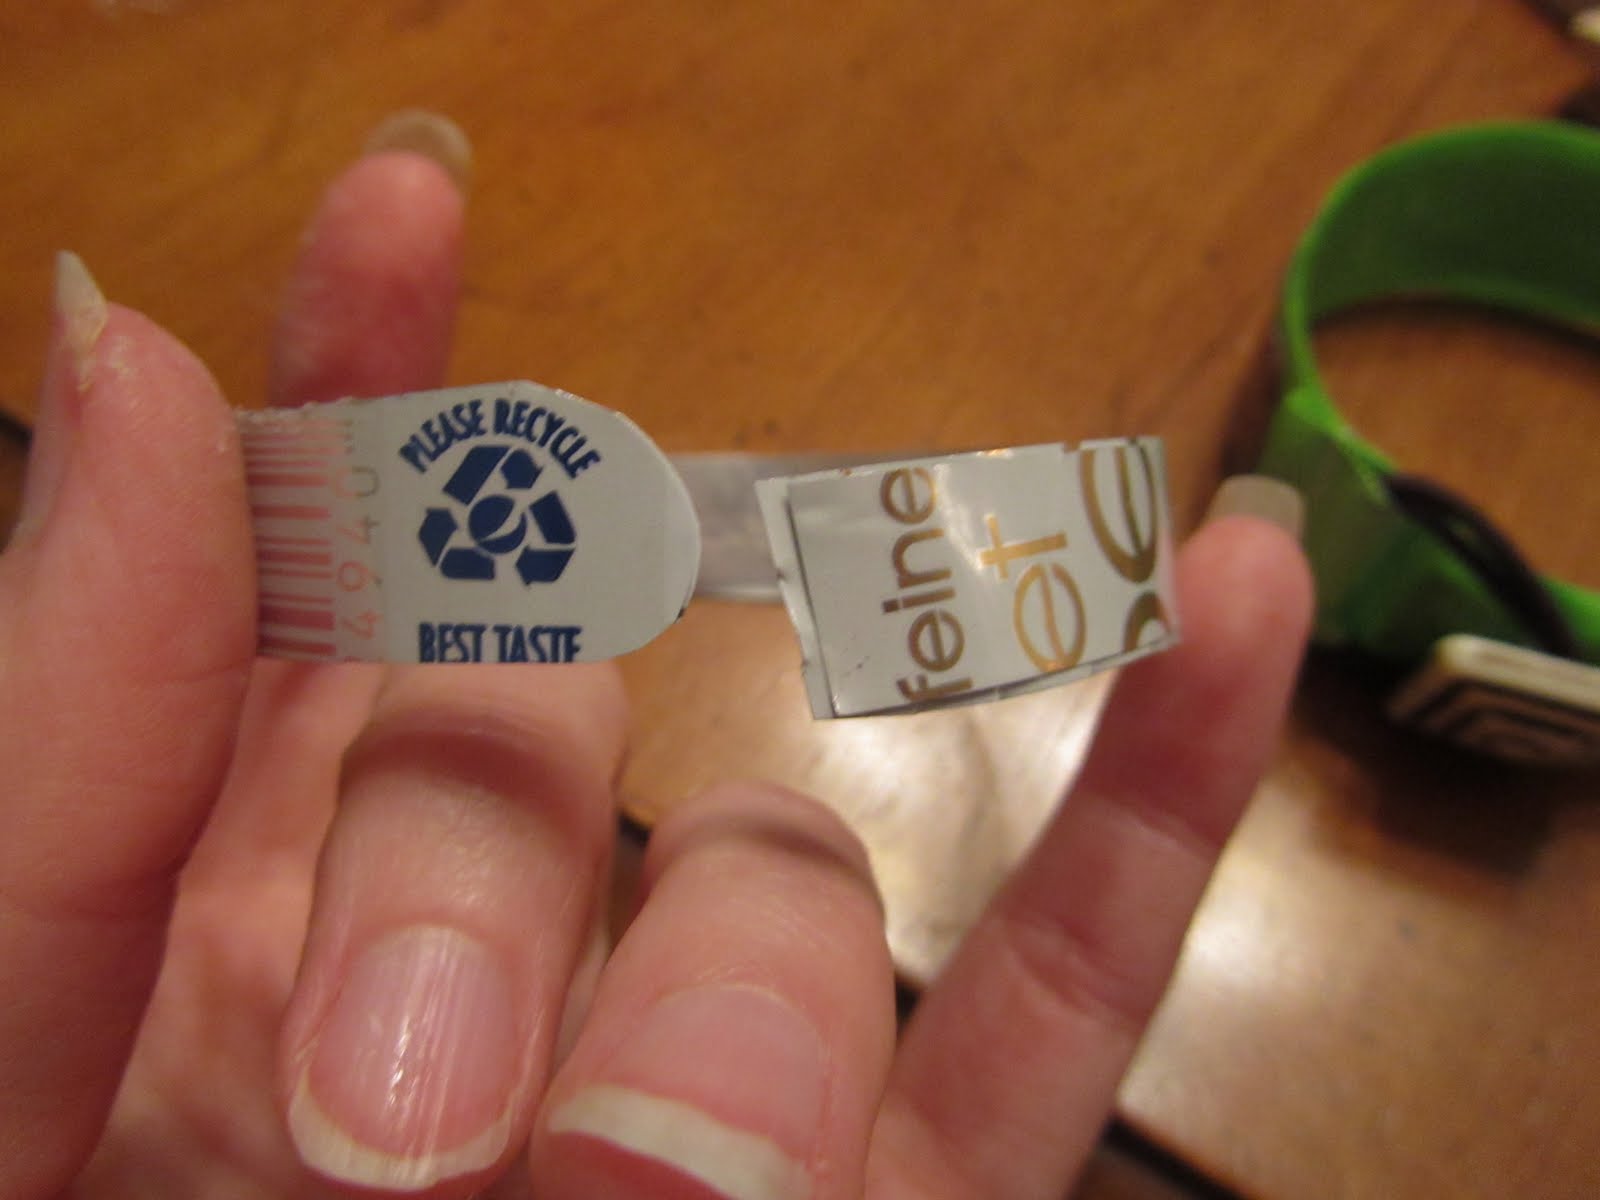
2) Cut two strips from the soda can and make sure these strips are narrower than the ribbon. (It’s easy to cut a soda can with scissors. Simply cut a slit in the can with a knife and then wiggle the scissors in and start cutting around.)
3) Use super glue or gorilla glue to glue the two soda can strips together one on top of the other. (This helps give the bracelet more structure.) Let dry.
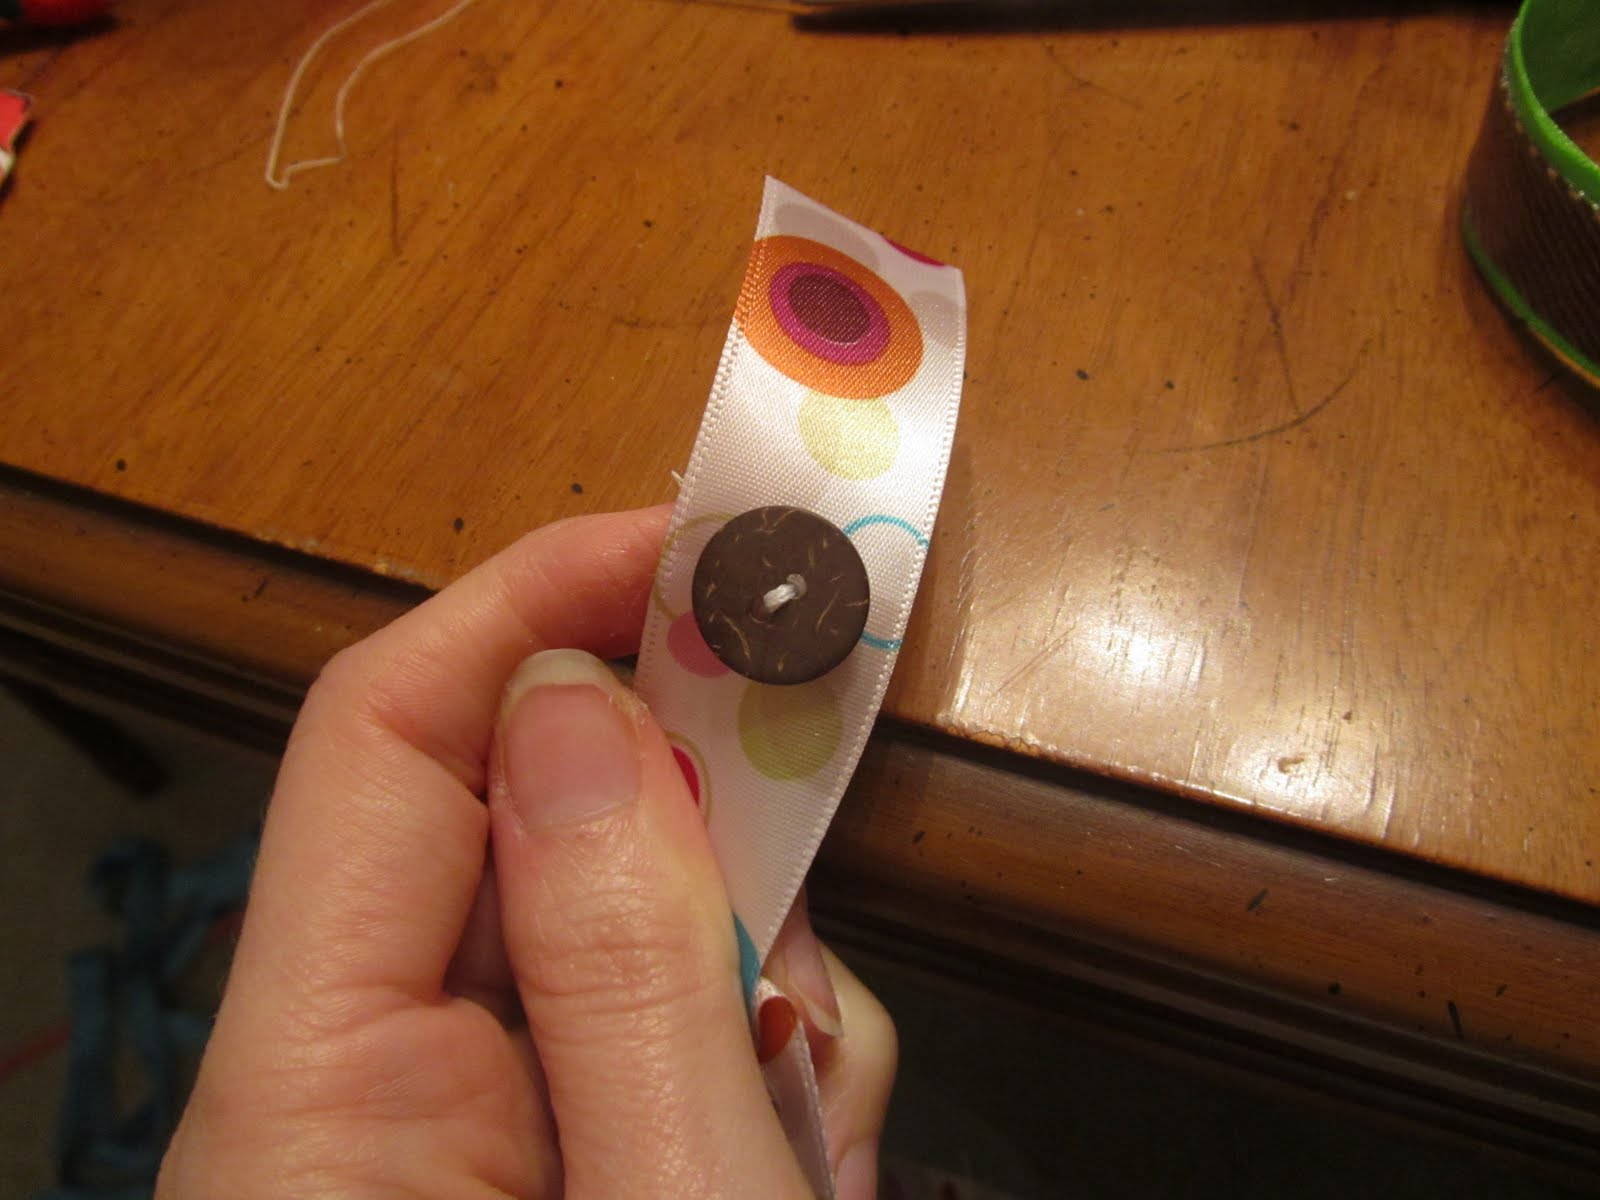
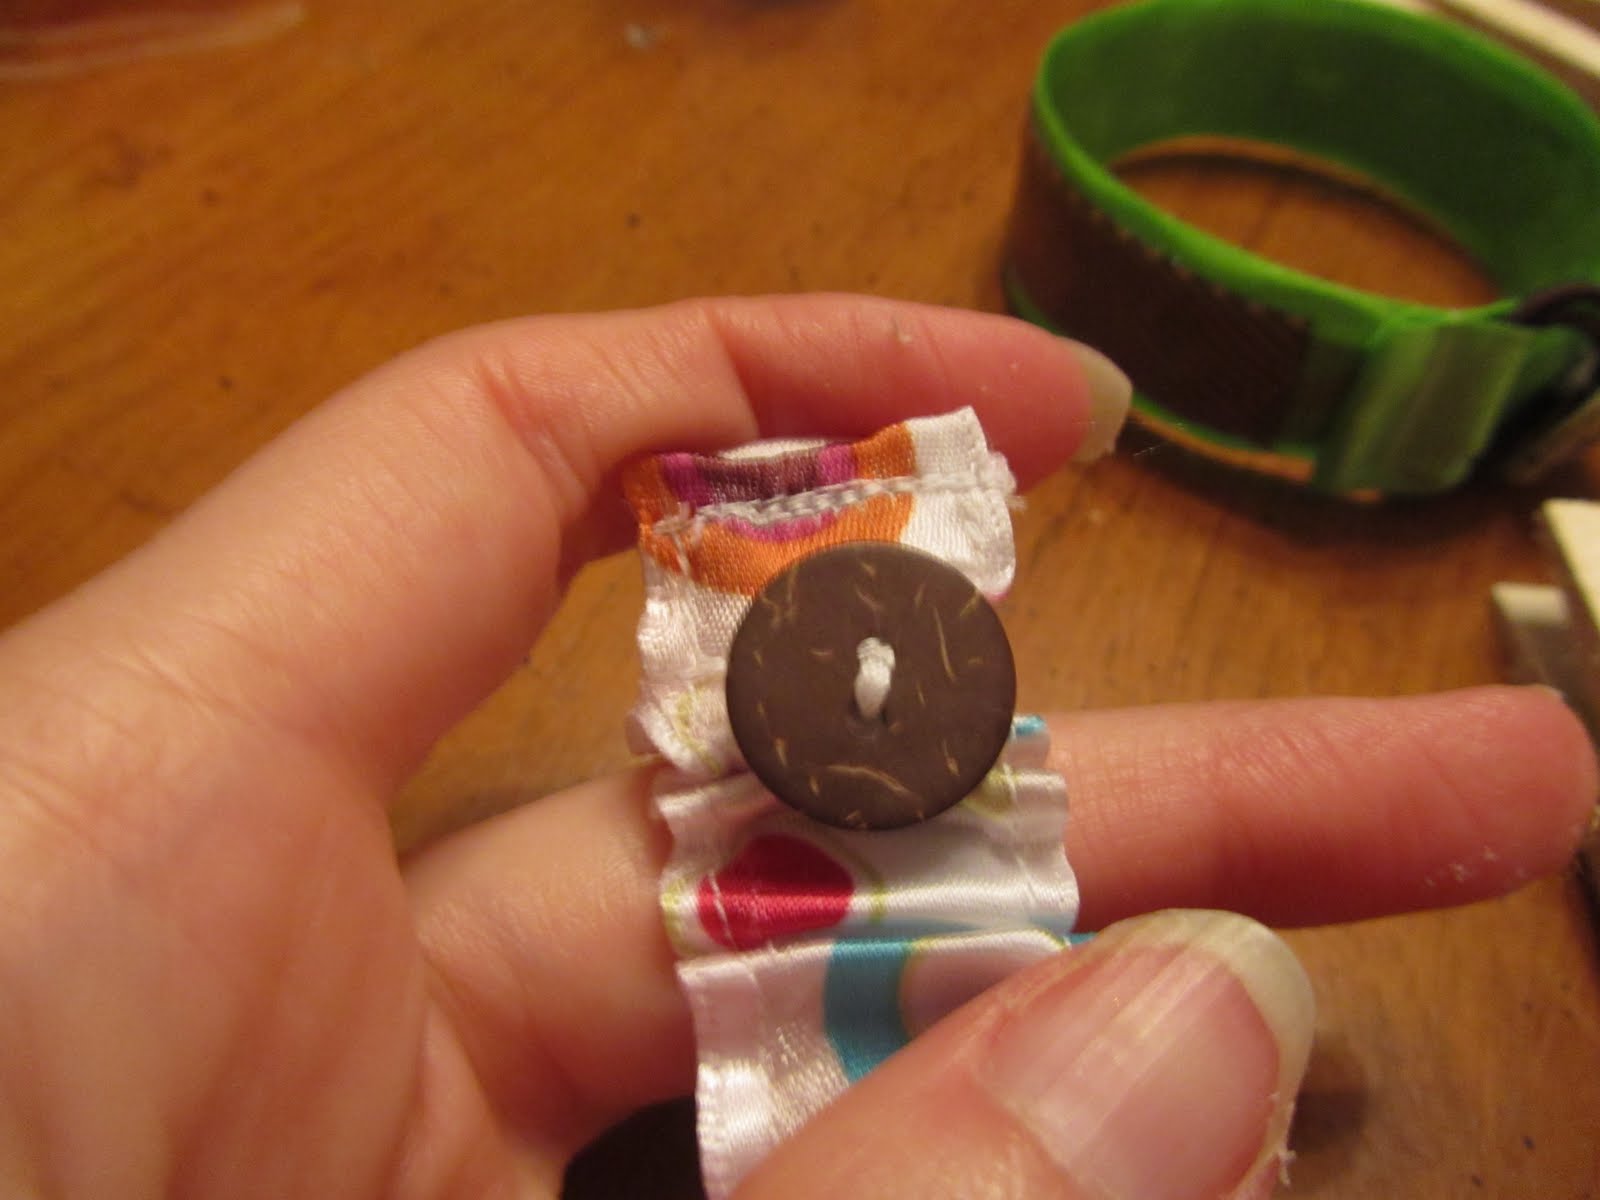
5) Sew button on one end of one ribbon about an inch from end. This will be the ribbon on top of the bracelet.
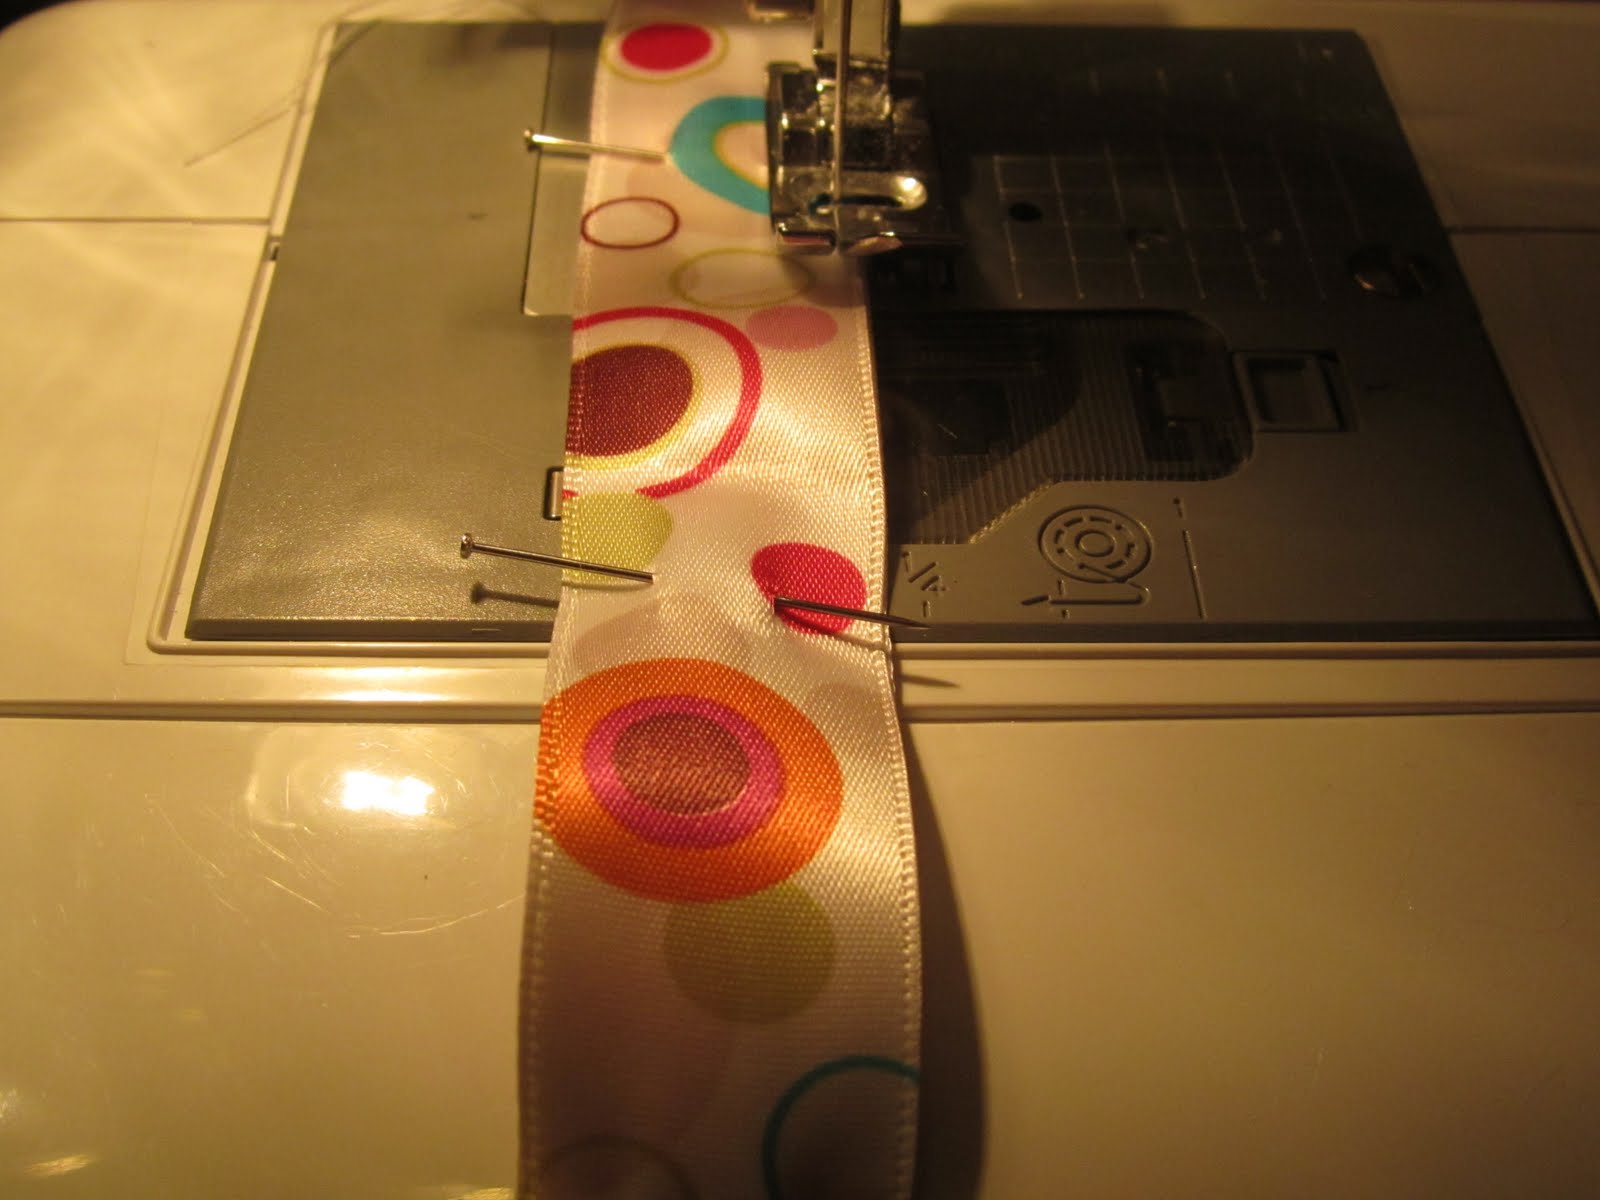
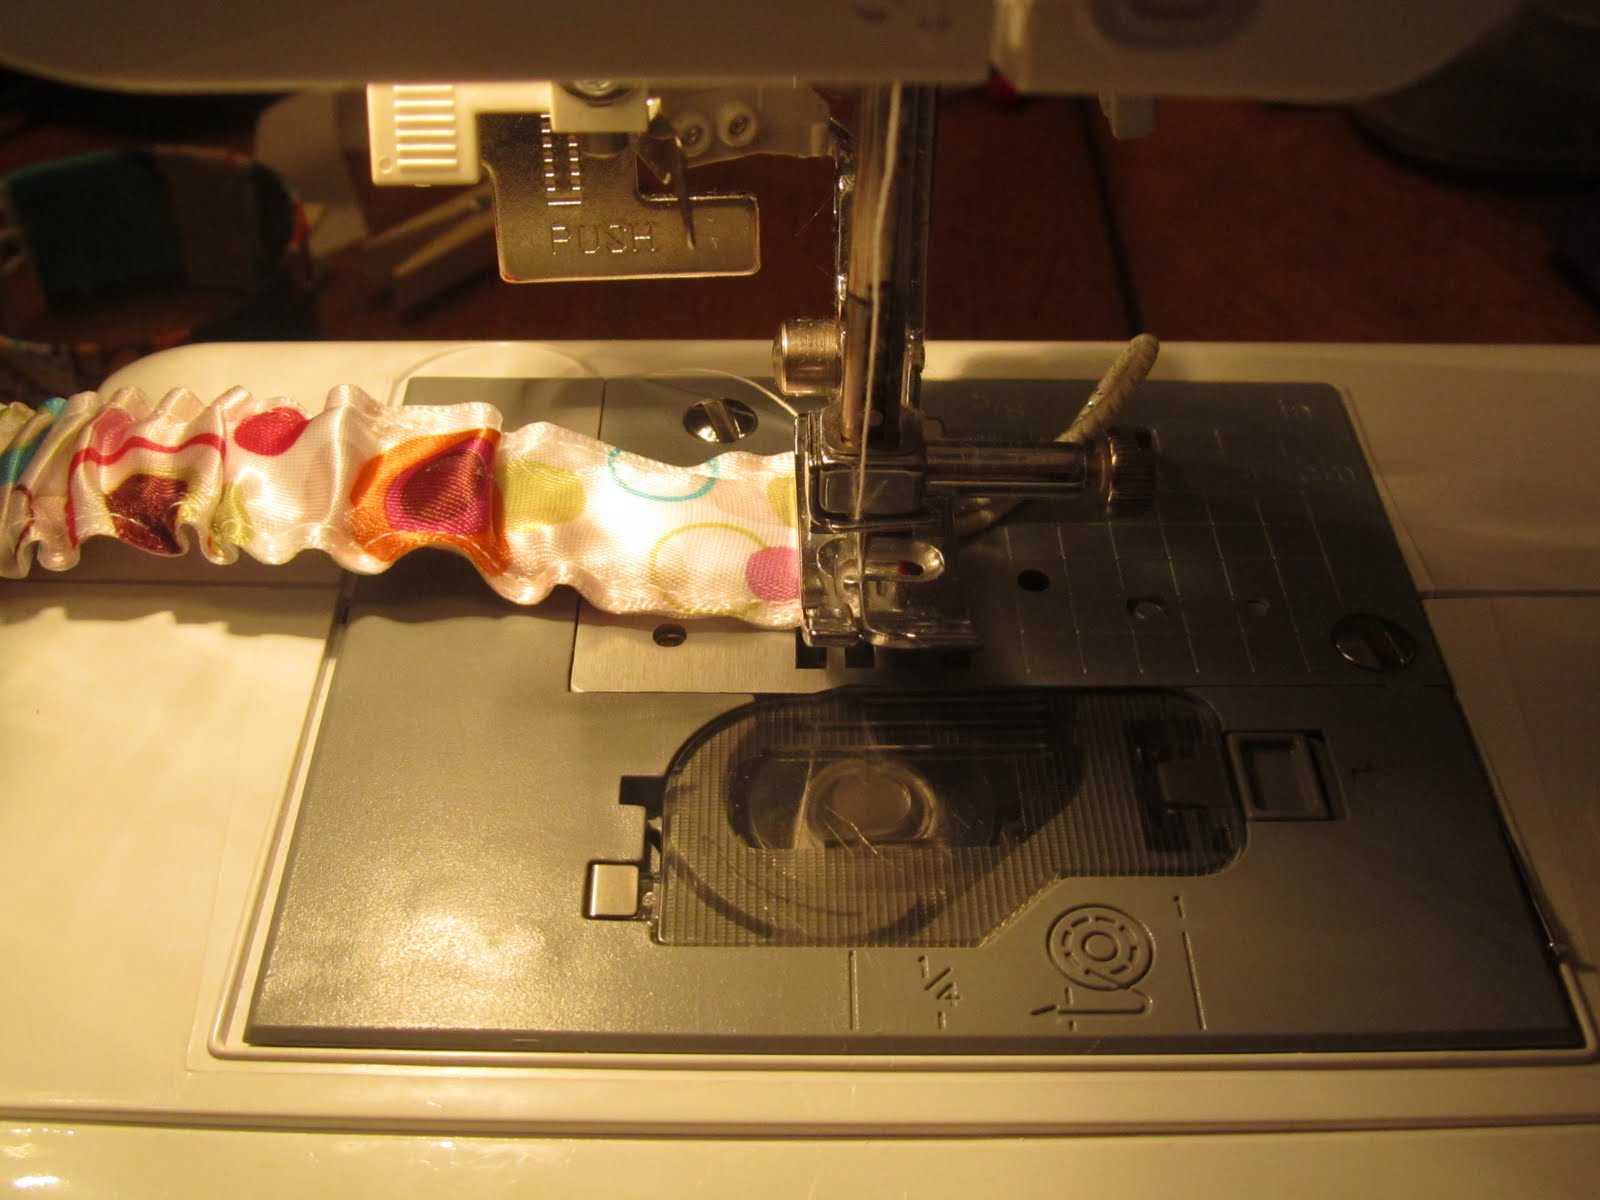
6) Pin ribbons wrong sides together and sew down each side stopping about a 1/2 from the end on each side.
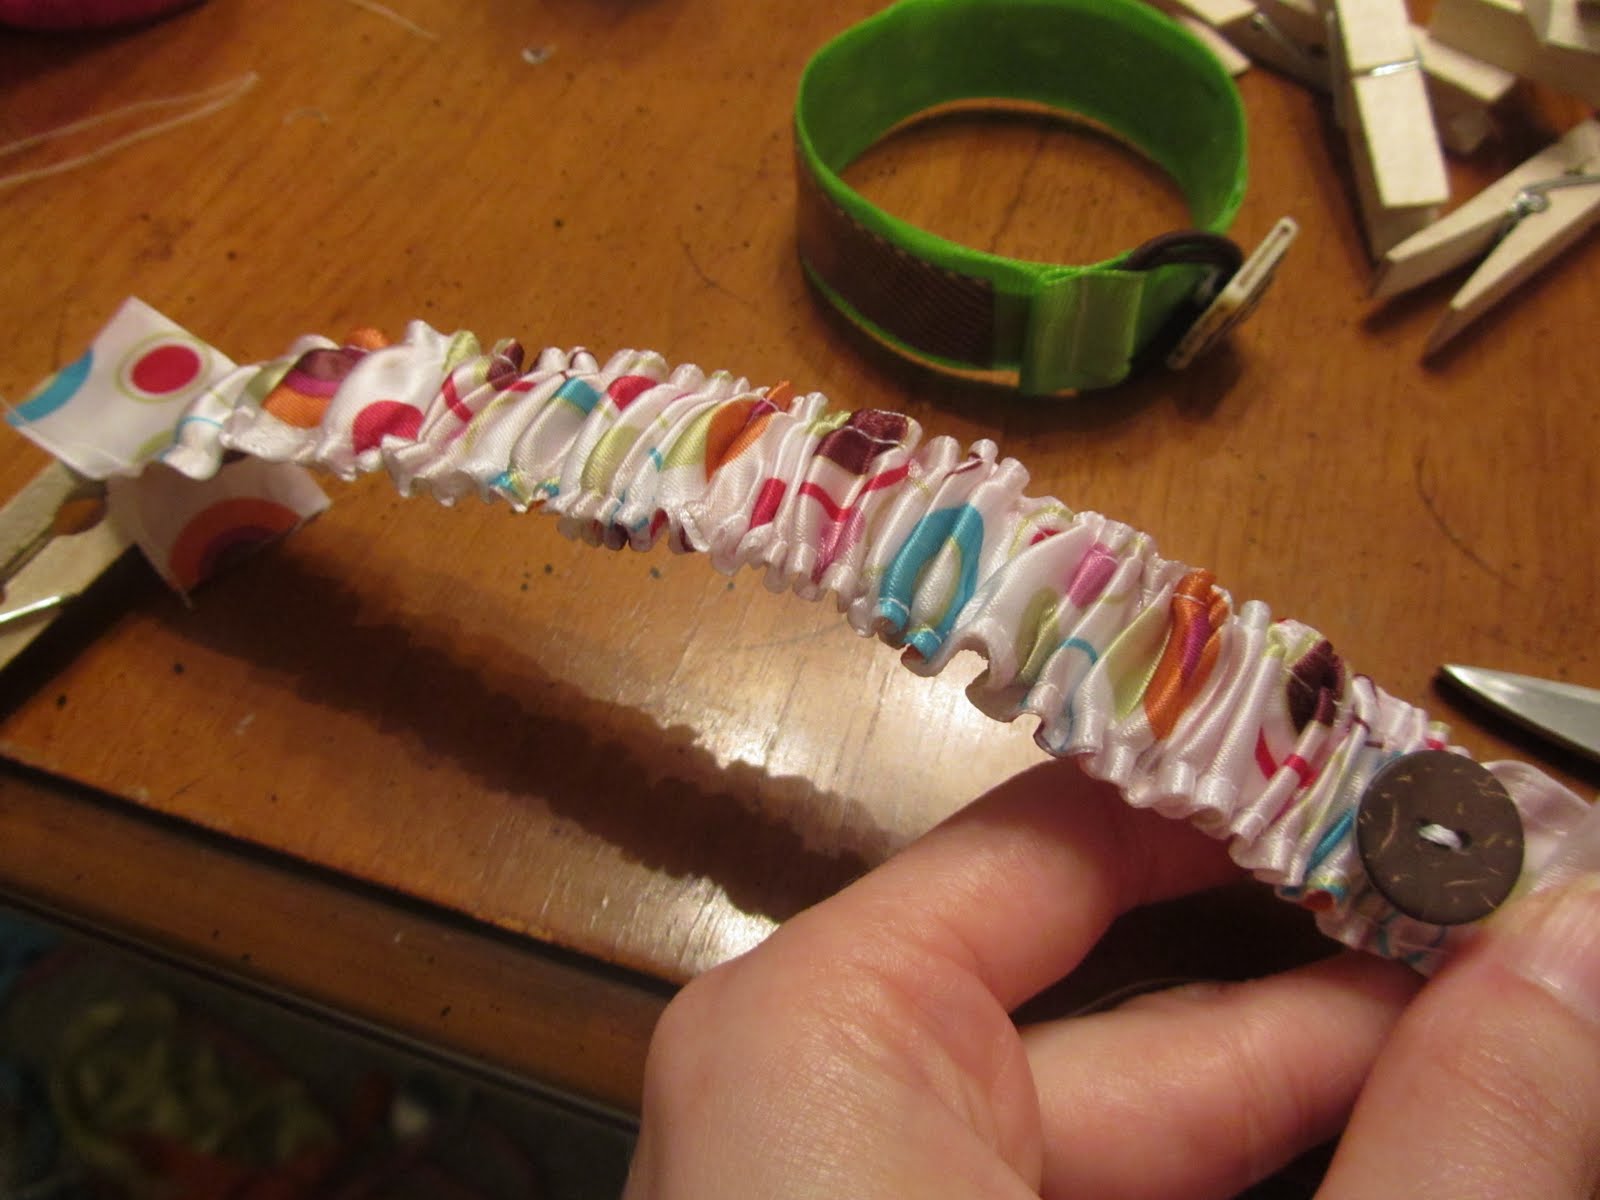
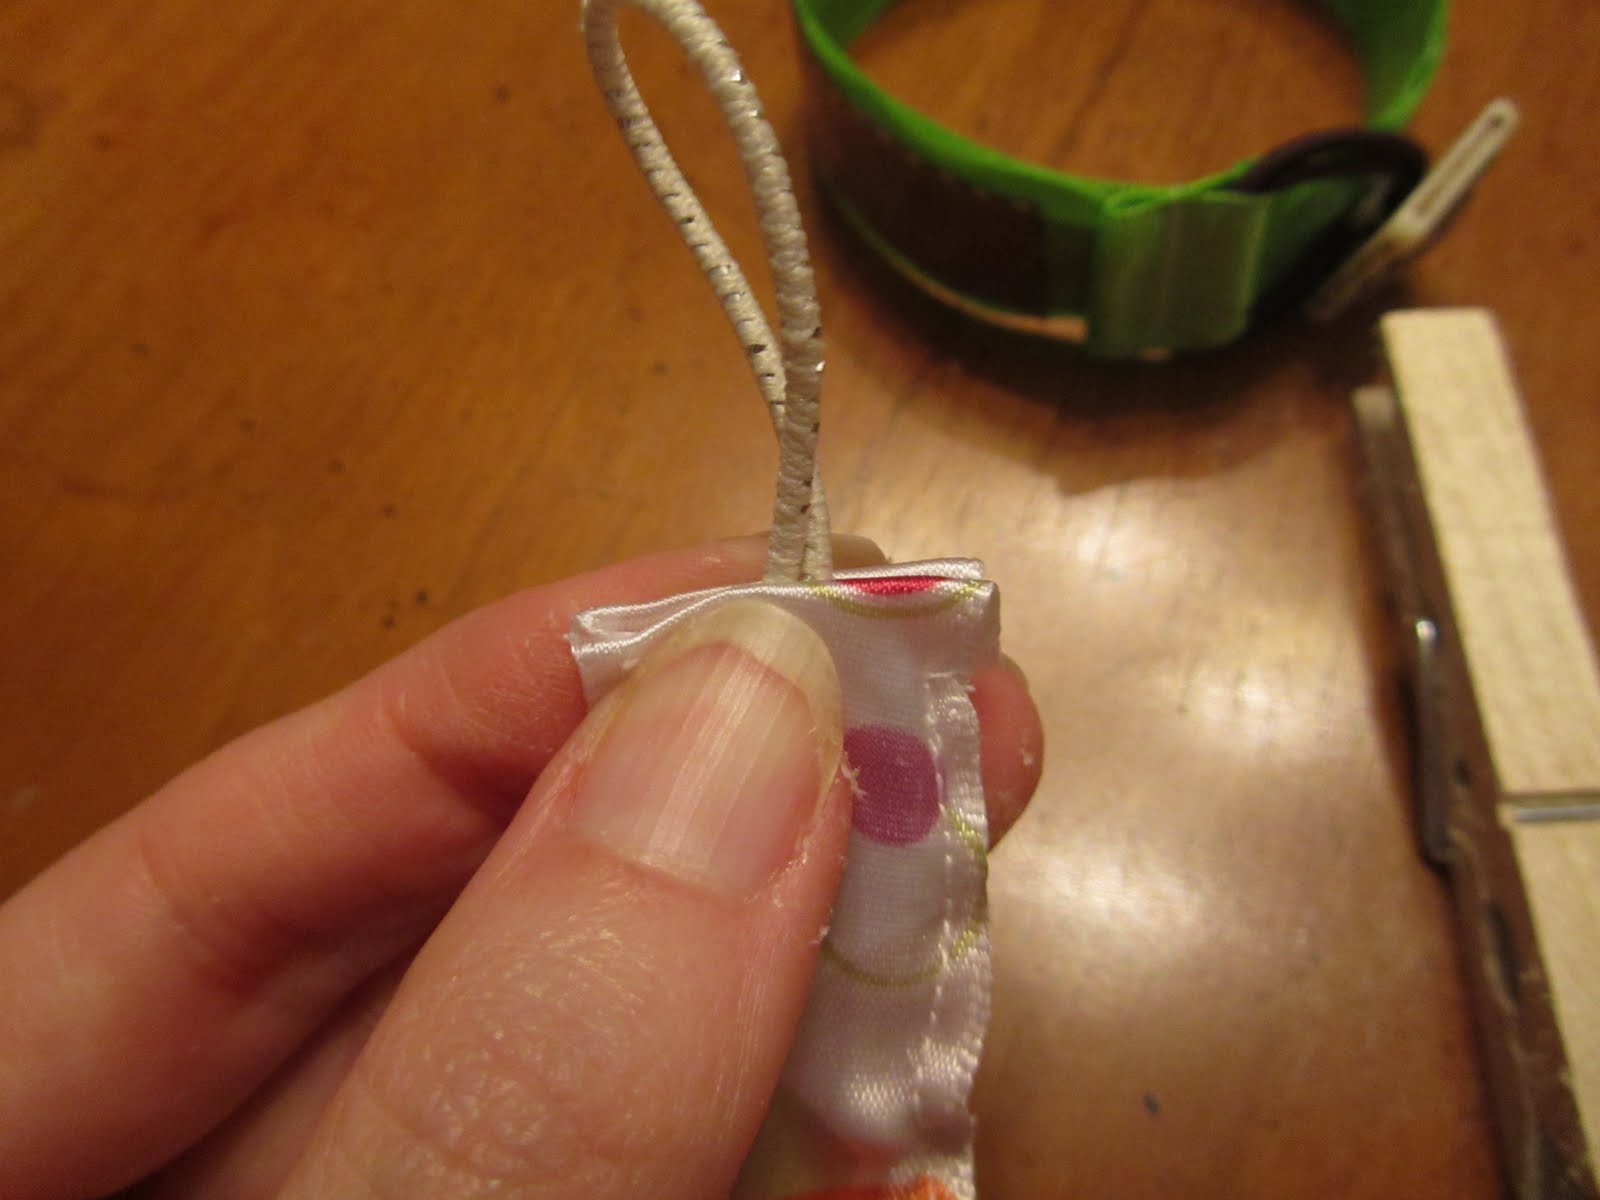
7) Round ends of soda cans and push through the ribbon, bunching the ribbon up as you go. (This is similar to threading elastic through a fabric band.) I recommend putting a clothes pin or small food bag clip on the end of the can to make sure you don’t lose the end inside the ribbon.

8) Working with the end that does not have the button, fold one end of the ribbon in tucking it over the can end. Fold the other ribbon end in. Stuff the elastic in between the two folded ends. And sew back and forth three times. (Yes, you can sew into a soda can. So fun!)

9) Working with the end the button is on, fold in the ends of the ribbon in the same way (minus elastic) and sew.
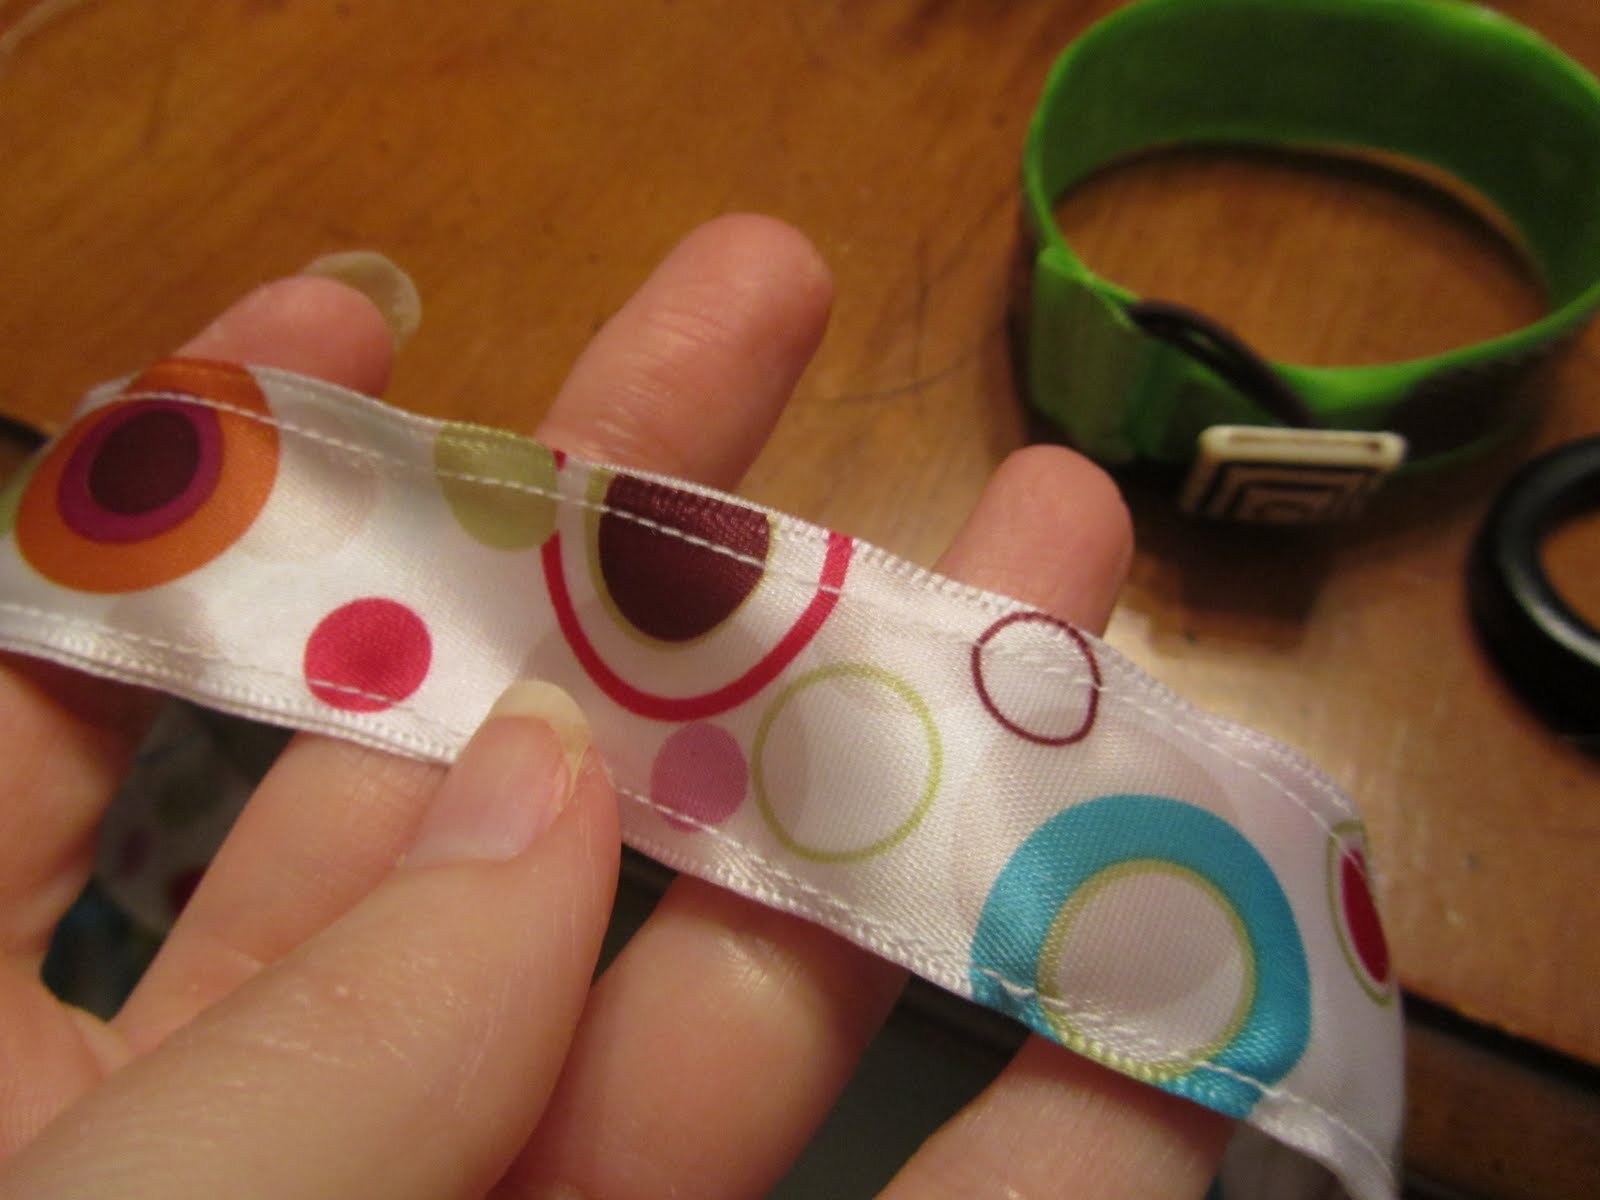
10) Evenly bunch ribbon around bracelet.
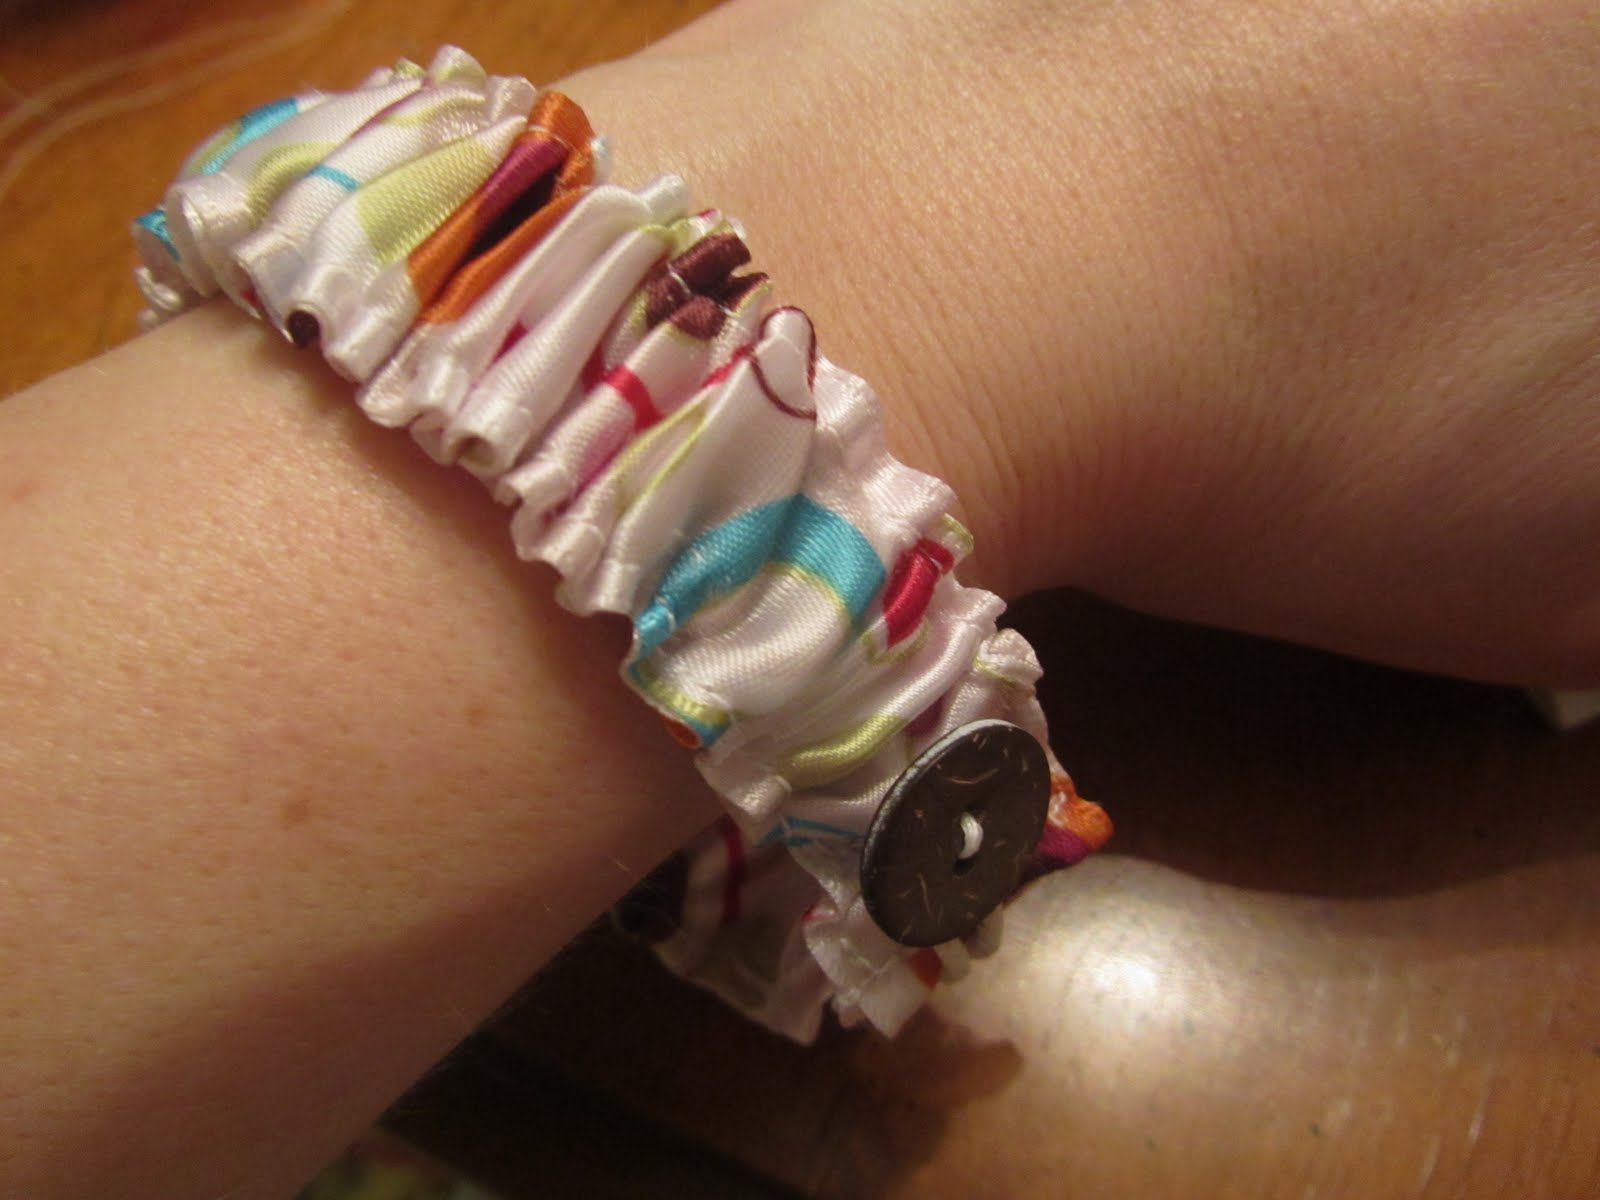
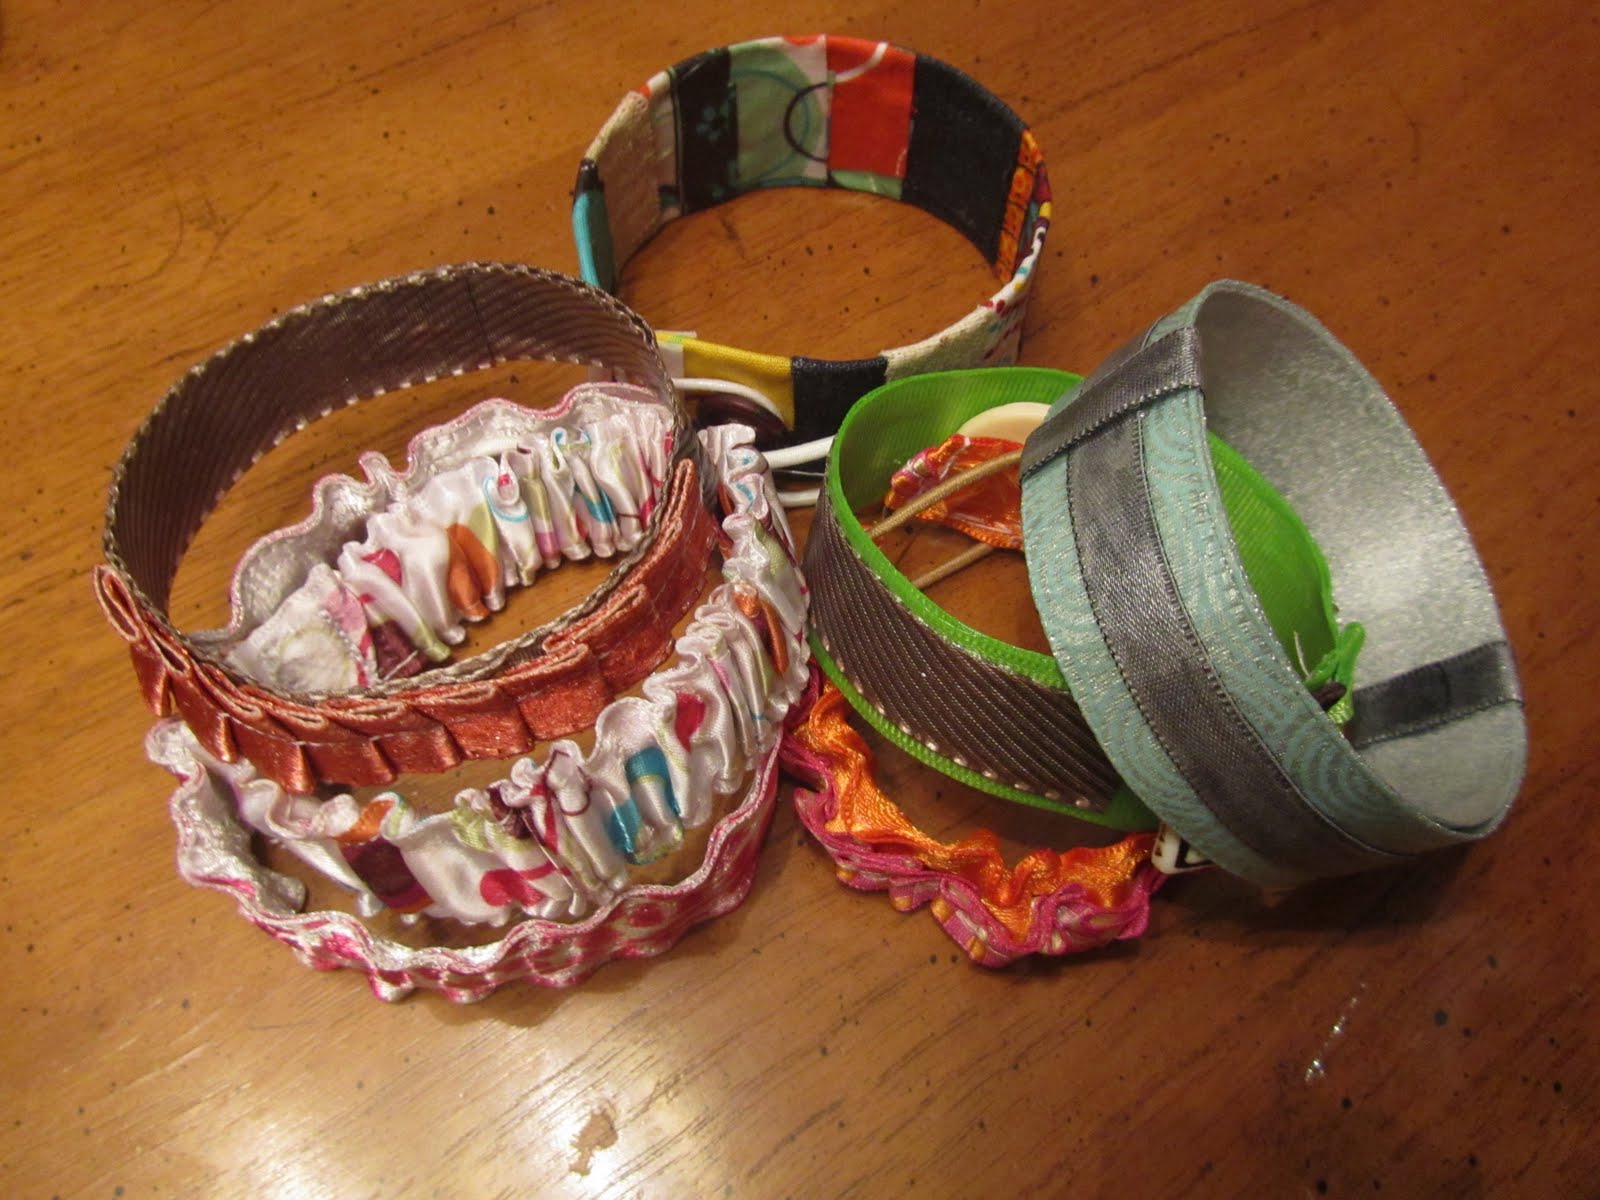
This is a basic version, but the possibilities are endless. Just experiment with ribbon lengths and widths, ribbon colors, layering ribbon, etc. If you don’t know how to sew, use Modge Podge and sandwich soda can strips in between ribbon like the green and brown one below.

If you stop by twelve crafts till Christmas, don’t forget to say “Hi”! I love responding to comments. And thanks, Jen, for being so kind to the new kid! Craft on!
Thanks Elizabeth!! I love making jewelry — I will have to make some of those bracelets with my girls this summer. Here’s a button for sharing your tutorial with us!
Be sure to check out Twelve Crafts Til Christmas! Elizabeth has a great blog with fantastic tutorials like:


She also has a Stocking Stuffer share along where you can link up your great Stocking Stuffer ideas! Be sure to link up!

Have a terrific Thursday!
My Bathroom Redo Reveal is coming up tonight 🙂
XOXO


Great bracelet tutorial! Thanks for sharing. I have linked to my blog :
http://www.beadinggem.com/2010/06/ruffled-ribbon-jewelry-tutorials.html
and will Facebook it too!
Cute idea! And a nice way of recycling too. 🙂
What a clever idea!
I'll be making some of these!
Hi Jen! LOVE these bracelets! I have the world's smallest wrists, so finding "big girl" bracelets is tough!.. But these look like so much fun to make in whatever styles and colors I want, I can't wait to try them! I just have to pick up some canned sodas first! I'm sure we'll drink them all up in no time, during our holiday weekend! Happy 4th of July to you, and thanks for sharing this tutorial! ~tina
Awesome idea! I love it! Great, great tutorial! You did amazing.
This is a brilliant idea! I don't have soda can around often but I'll try remembering to keep one next time I can!
I love how cute and simple these are, I'm definitely going to give them a try — thanks for sharing!
Those are too cute! I love using the soda can to make the ribbon sturdy…such a great idea! Thanks for sharing!
This is such a creative way to use an old soda can. I would love to try this!
What a fun craft! Thanks!
Soda cans? Are you serious? That's pure genius!
What the what?! I'm off to check her out. Amazing.
Thanks for the lesson! Great idea, the possibilities are endless
Very cute. My only question is what kind of needle do you use to sew a soda can? It boggles my mind that you could actually do that!
This is an adorable idea!! Very creative..think I might give it a try.