DIY Vintage Bottle Brush Star Tree Topper. Make a vintage-style star tree topper for an old-fashioned Christmas with five bottle brush trees, a mercury glass ornament, felt and evergreen pipe cleaners!
DIY Vintage Bottle Brush Star Tree Topper
An Old-Fashioned Christmas Craft Club project
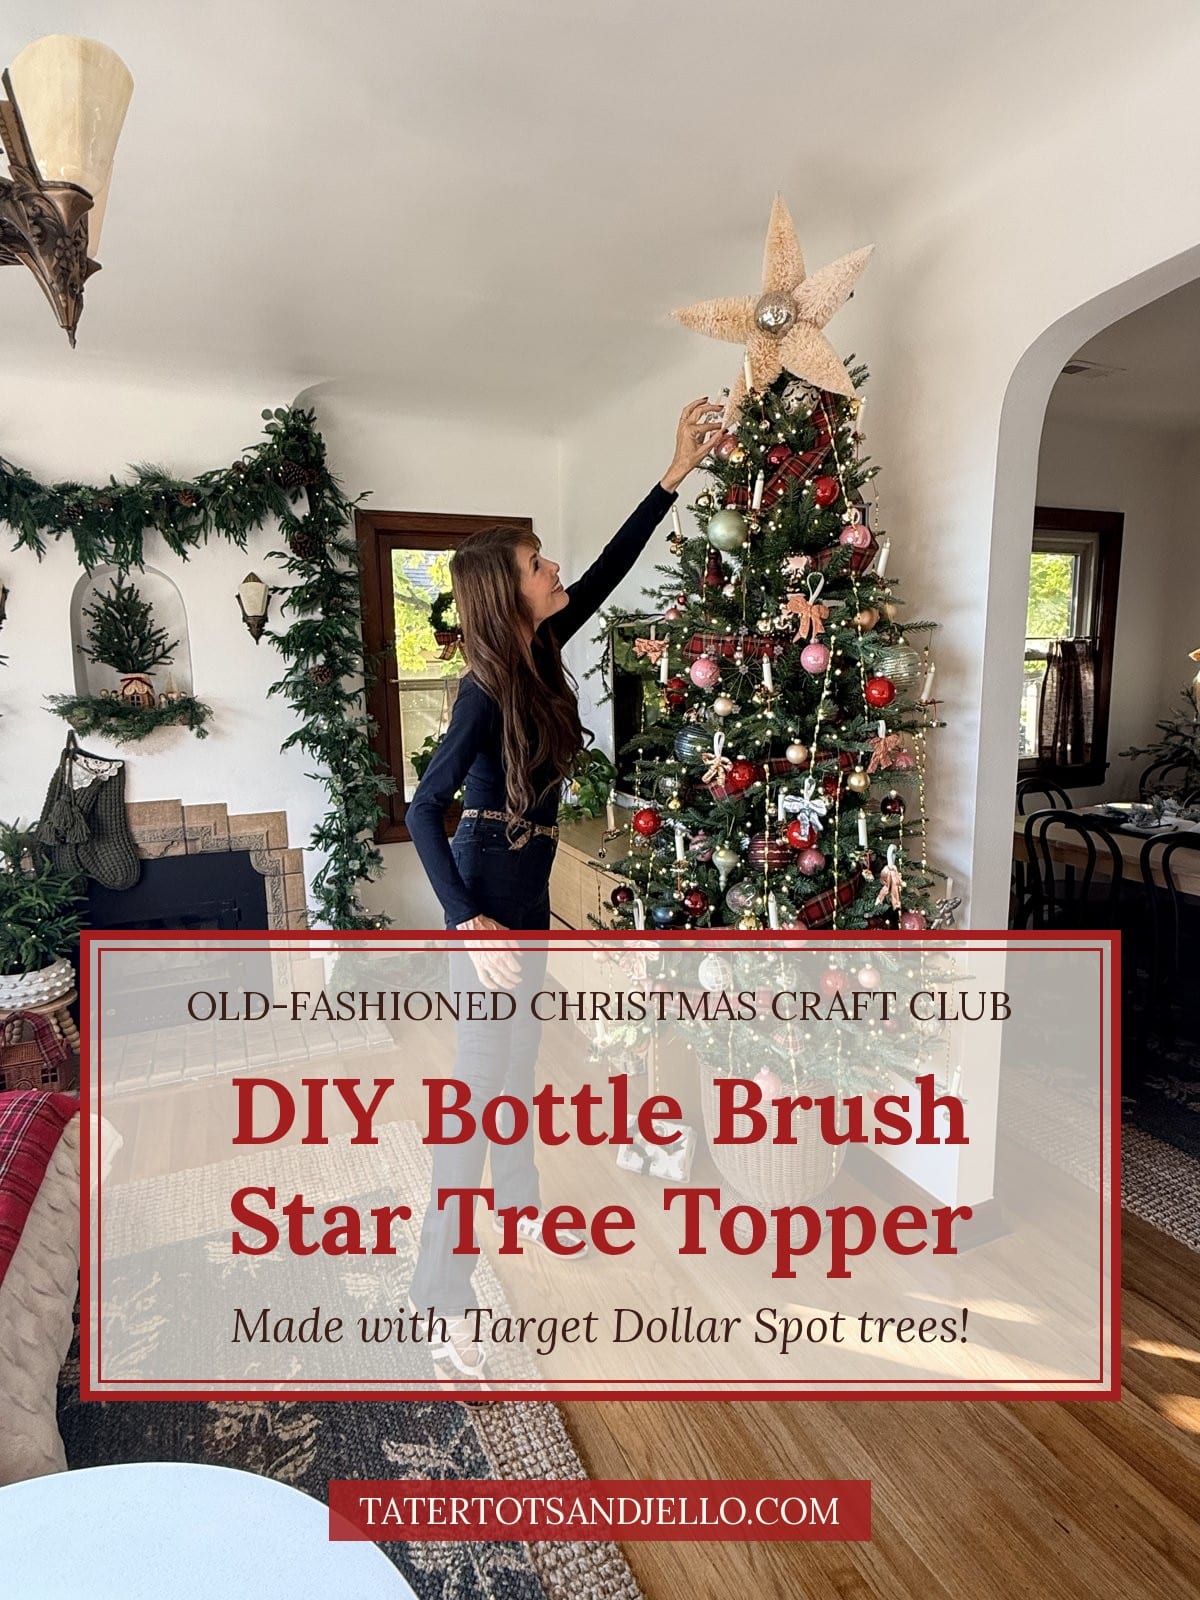
Welcome back to the Old-Fashioned Christmas Craft Club! I am SO excited to be decorating our 1932 Tudor for its first Christmas with us. This house has so much history and charm, and it has me really leaning into an old-fashioned Christmas this year. I keep picturing what Christmas looked like in these rooms back in the 1930s, and I want our holidays here to feel warm, nostalgic and a little bit magical. Today’s project is one of my favorites so far: a vintage-style tree topper made from bottle brush trees and a big mercury glass ornament.
This project was inspired by a tree topper I saw online, but I ended up putting mine together a little differently. I changed up how the trees are arranged and how the topper attaches to the tree, so I wanted to share a separate tutorial showing exactly how I made mine.
Where to Find Bottle Brush Trees for This Tree Topper
I found my bottle brush trees in the Target Dollar Spot! They are 8 inches tall, and I grabbed five of them. If your Target is sold out (they go fast!), I’ve rounded up some similar bottle brush trees you can buy online. You’ll find them in the supplies list below.

The idea for this topper came from Brittany at White and Woodgrain, who made the prettiest DIY vintage bottle brush Christmas tree topper. The second I saw it, I knew I needed one for our Tudor. Her version layers the tree bases a different way and attaches to the tree with floral wire, so if you want to see a couple of different ways to make this project, head over and read her tutorial too. It’s always fun to see how one idea can be made a few different ways!
The Inspiration
Supplies
- 5 bottle brush trees with wood bases, about 8 inches tall. I found mine in the Target Dollar Spot, but here are some similar ones you can buy online:
- 1 large mercury glass ornament. I used one I already had, but here are some you can buy online:
- Evergreen pipe cleaners (about 3). These look just like pine branches:
- Felt in a color that blends with your trees. I used white:
- Hot glue gun and glue sticks [ADD LINK]
- Scissors
How to Make a Bottle Brush Tree Topper
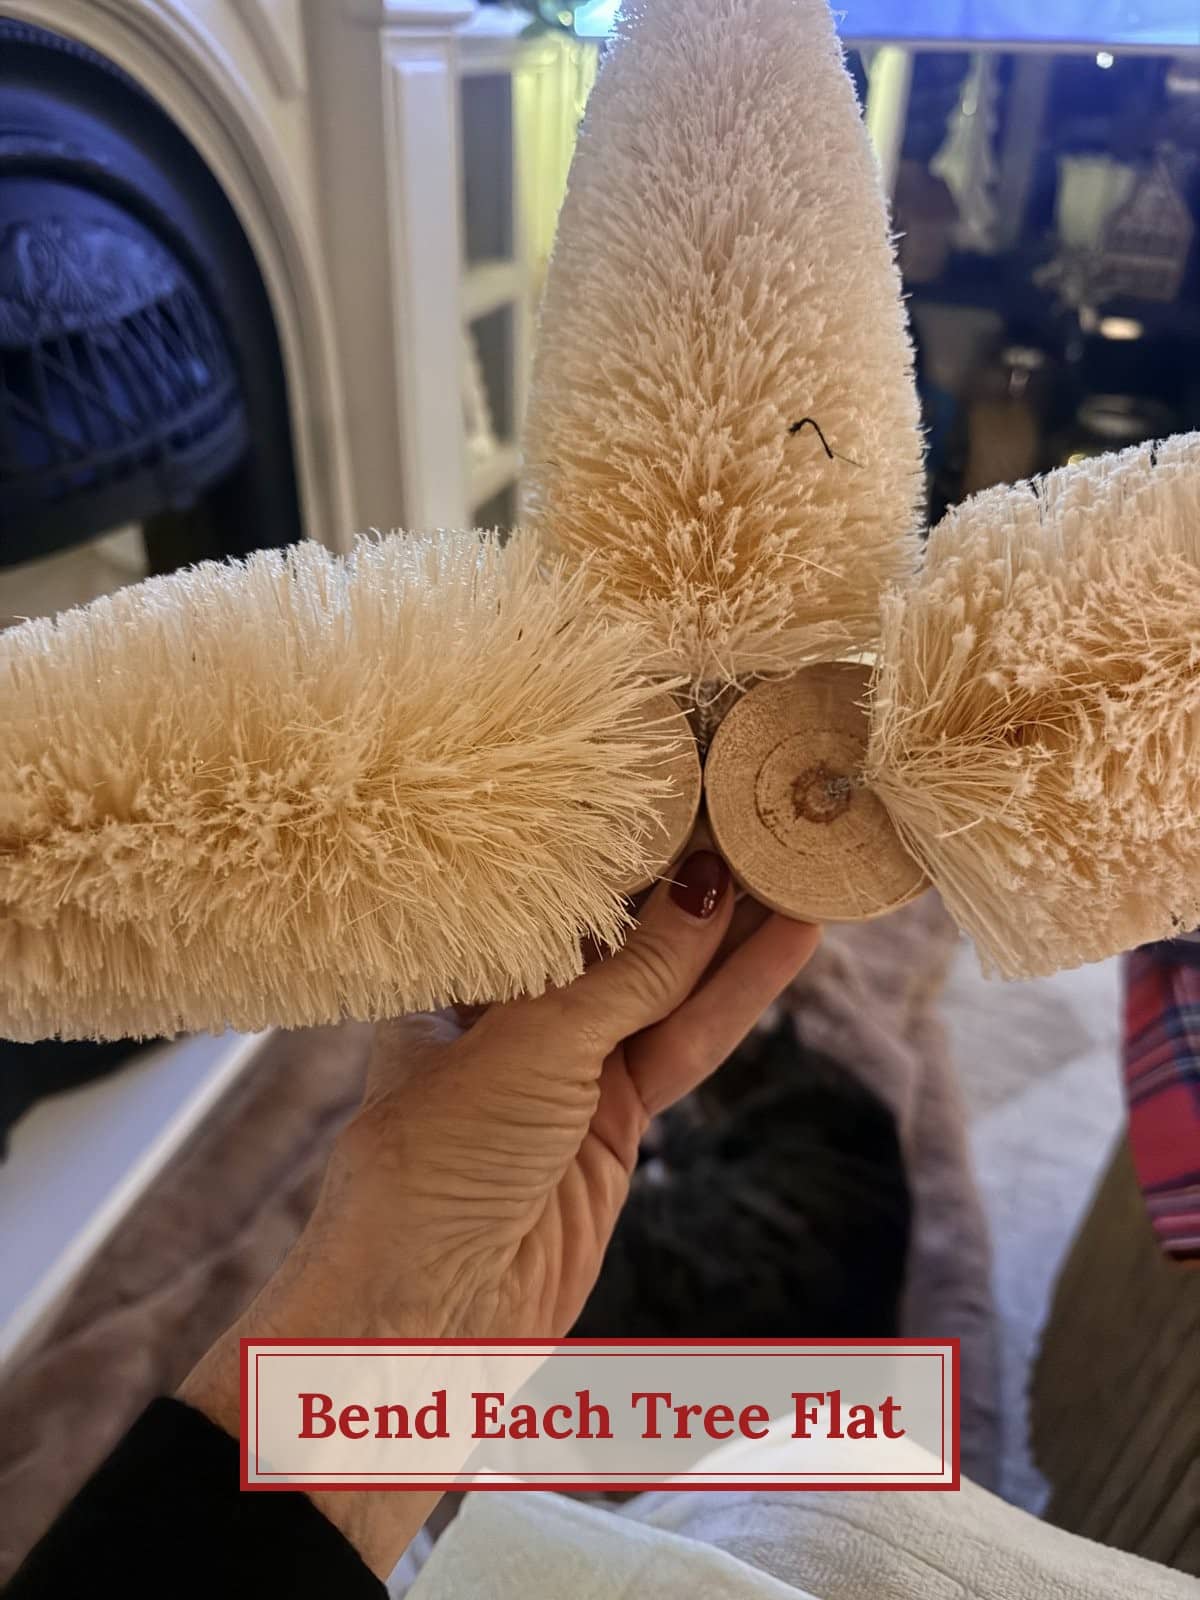
Step 1: Bend each tree flat.
The wire where each tree meets its wood base is bendy. Bend every tree over so it lies flat and sticks straight out to the side of its base, like the arm of a starfish. Do this to all five trees.
Step 2: Glue the two bottom legs.
Turn the trees so the bottoms of the wood bases face you (this will be the back of your topper). Set two of them side by side with the bases touching and the trees pointing down and out in a V. Hot glue the bases together where they meet. These are the two bottom points of your star.
Step 3: Stack the top point.
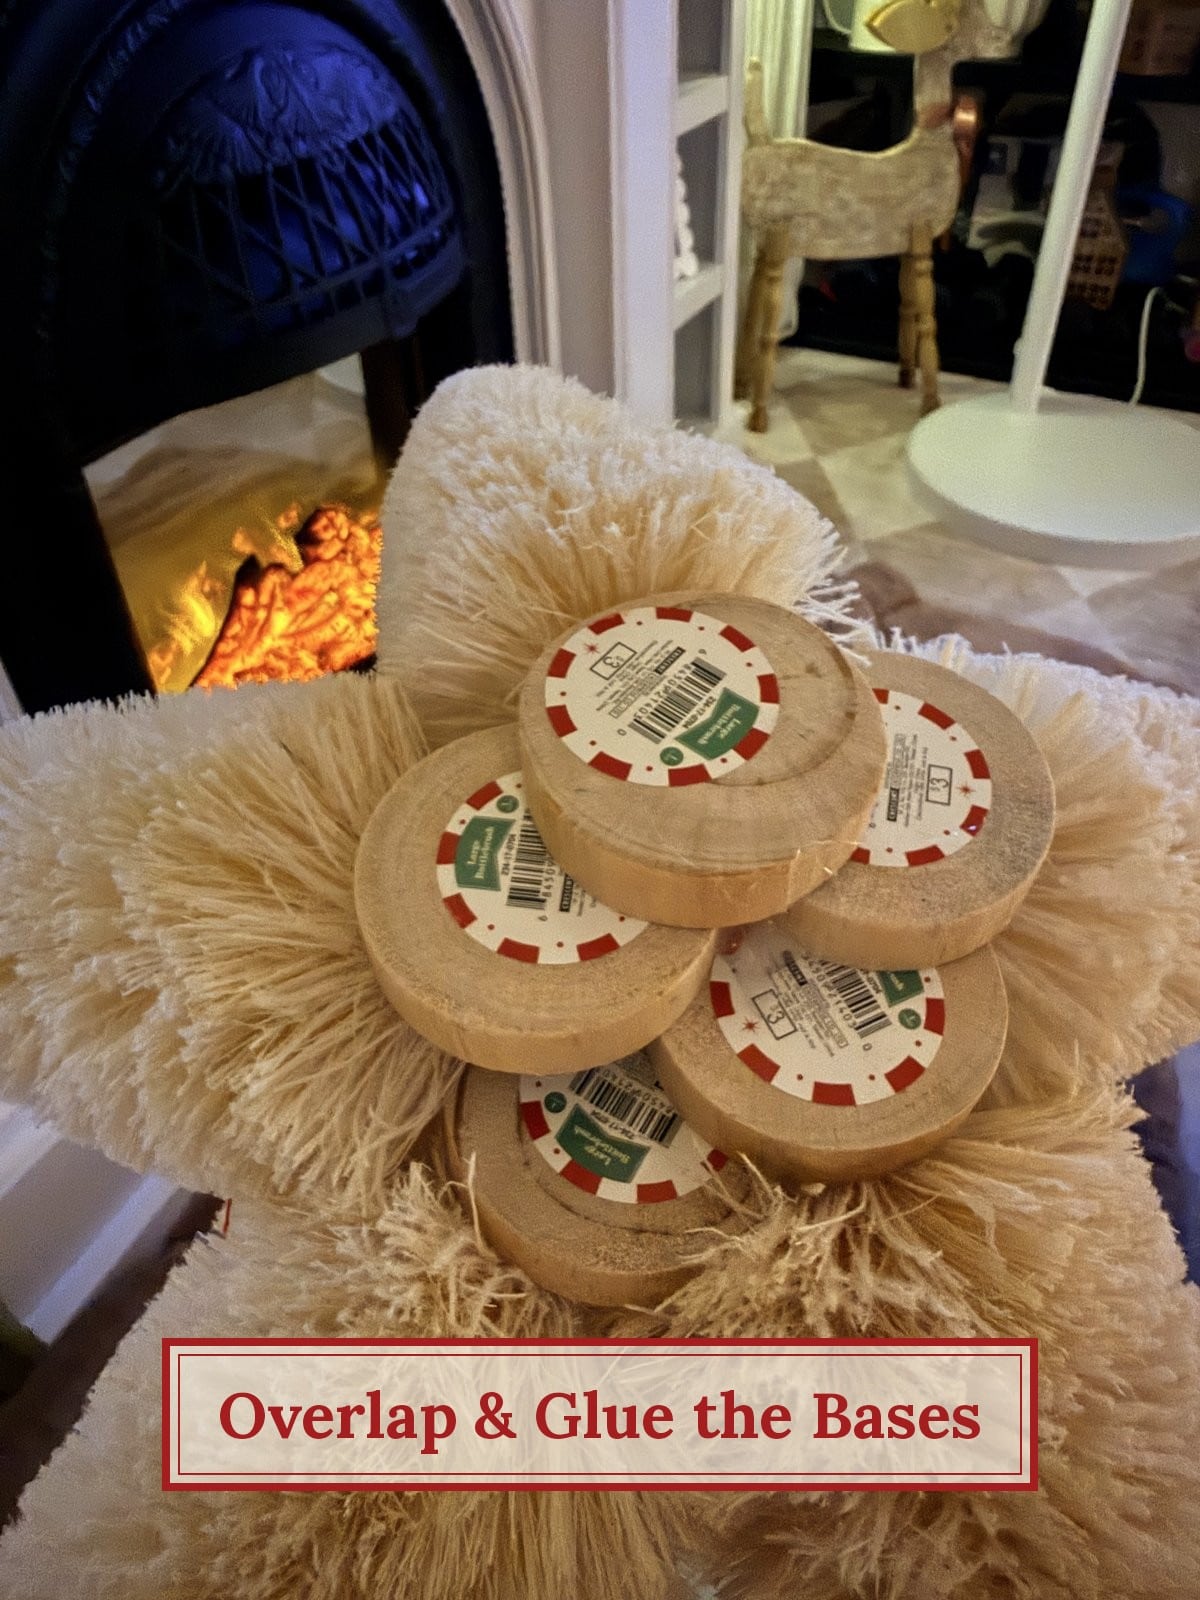
Set a third base on top of the first two, centered over the spot where they meet, with its tree pointing straight up. Hot glue it down. This is the top point of your star.
Step 4: Add the arms.
Tuck the last two bases in on either side of the top base, overlapping the edges of the bases below them, with the trees pointing out to the left and right. Glue them in place. Think of it like a little stack of overlapping coins. Overlapping the bases keeps the center of the star small, so your ornament can cover it. (This is where my version is different from the inspiration post. She glues three bases in a triangle first and layers two on top.)
Step 5: Bend the trees into a star.
Here’s my favorite part. The wire at the base of each bottle brush tree is really bendy, so you can easily adjust each tree until the five points are evenly spaced in a star shape. No need to be perfect when you glue. You can fine-tune the shape now.
Step 6: Reinforce the back with felt.
Cut a circle of felt big enough to cover the back of all the wood bases. Hot glue it on. This gives the whole topper extra strength and holds everything together.
Step 7: Make the tree attachment.
Twist evergreen pipe cleaners together at their centers so you have six ends sticking out, like spokes. Lay the twisted center against the felt on the back of the topper. Then cut a strip of felt, put hot glue on it and press it over the center of the pipe cleaners so it anchors them to the base. This makes everything super sturdy.
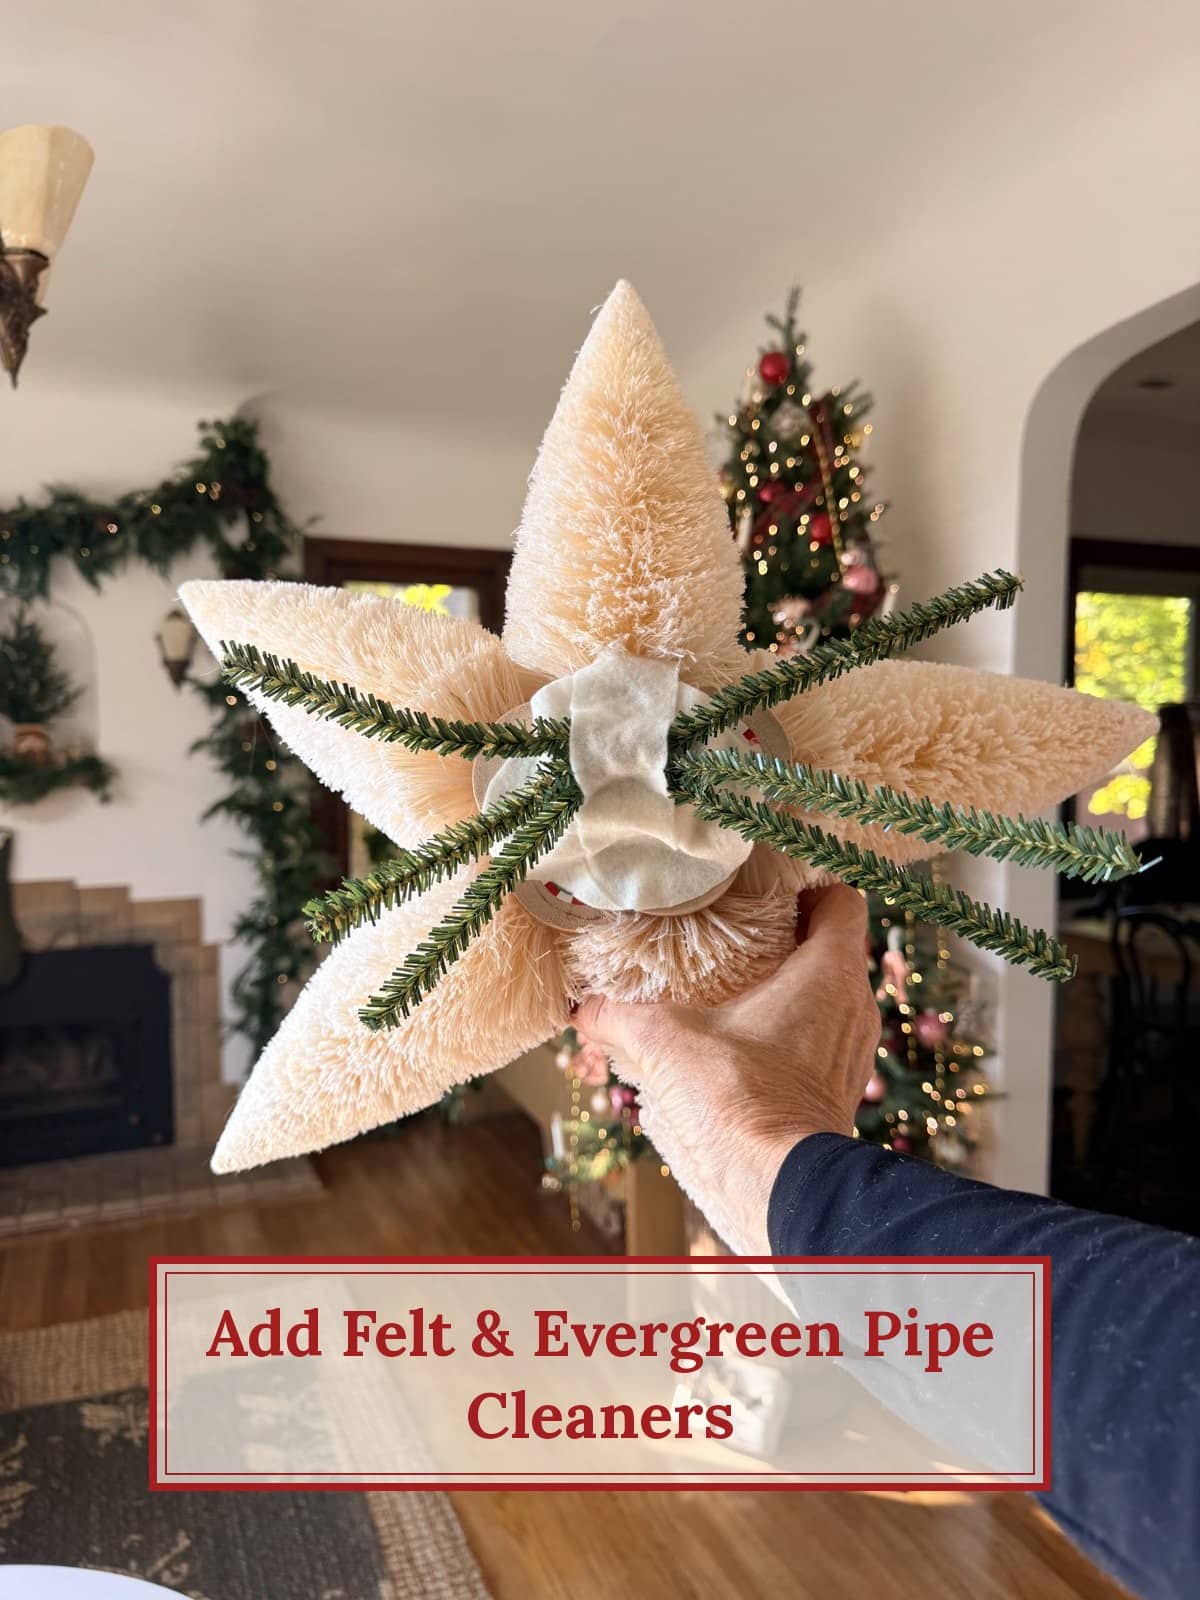
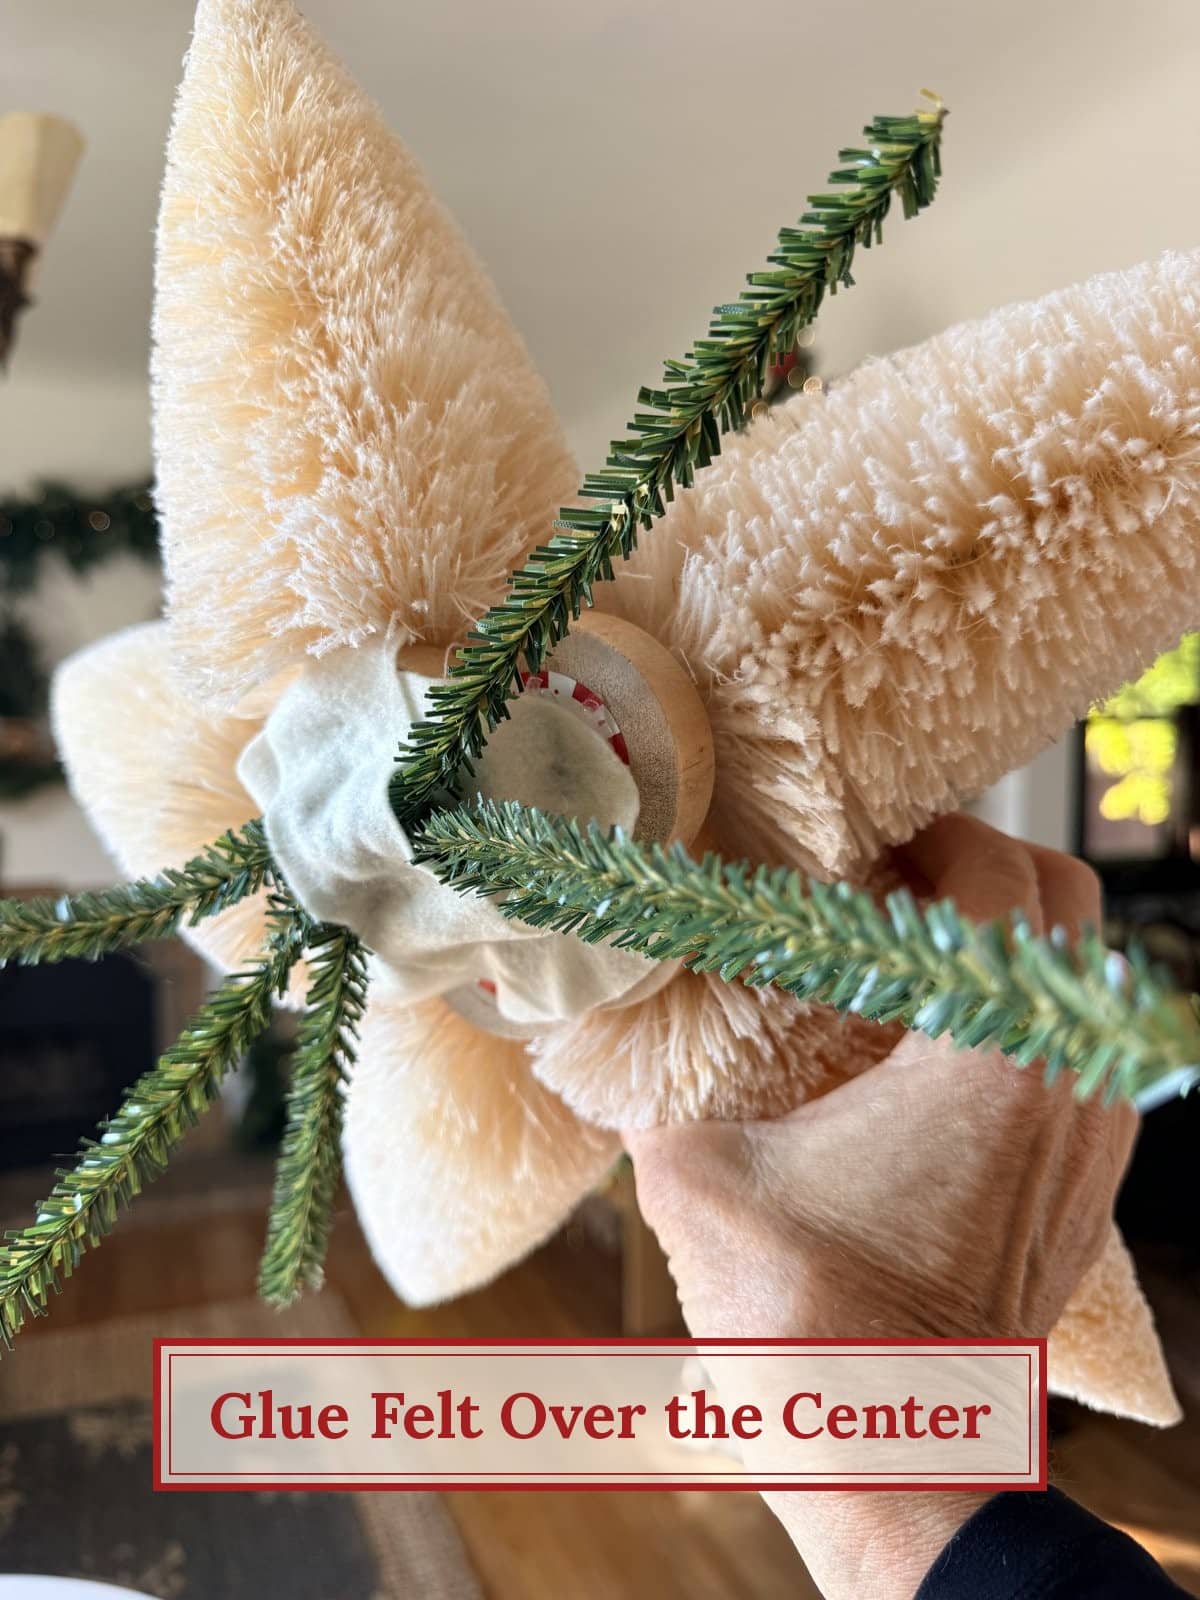
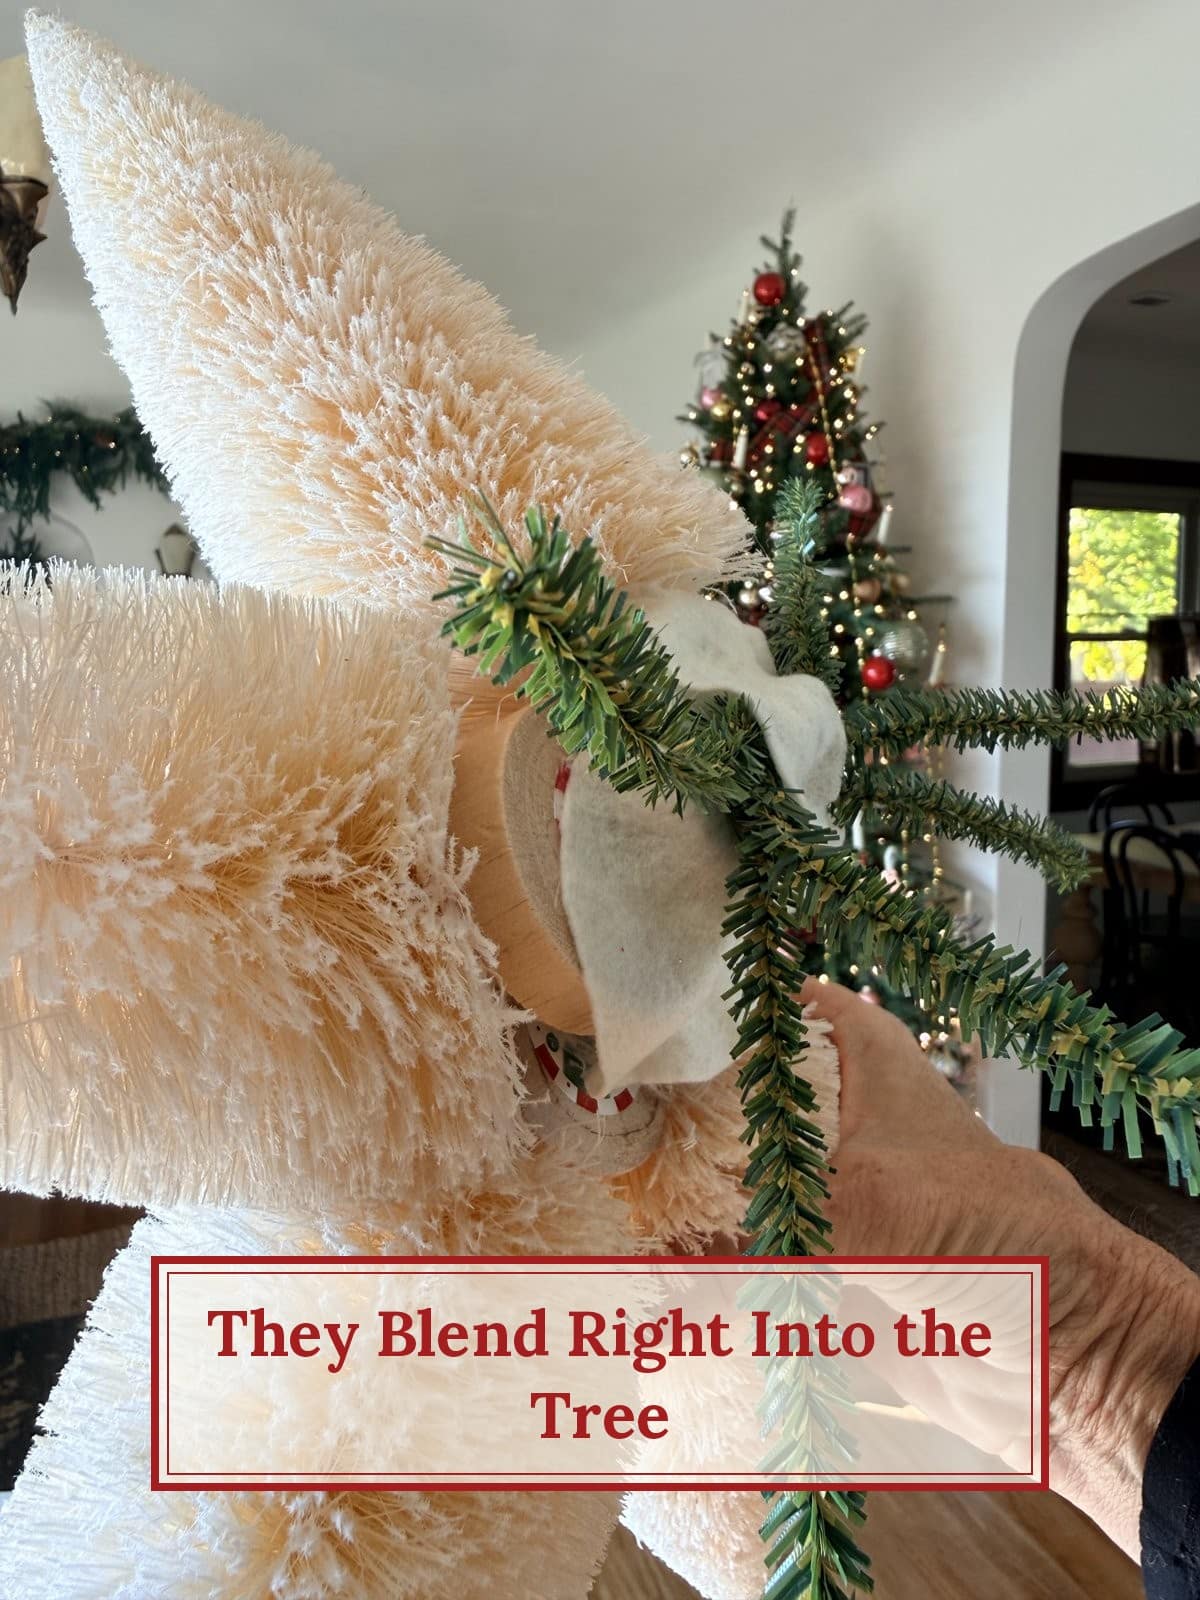
I love using evergreen pipe cleaners for this, because they look just like Christmas tree branches. When you wrap them around the top of your tree, they disappear completely!
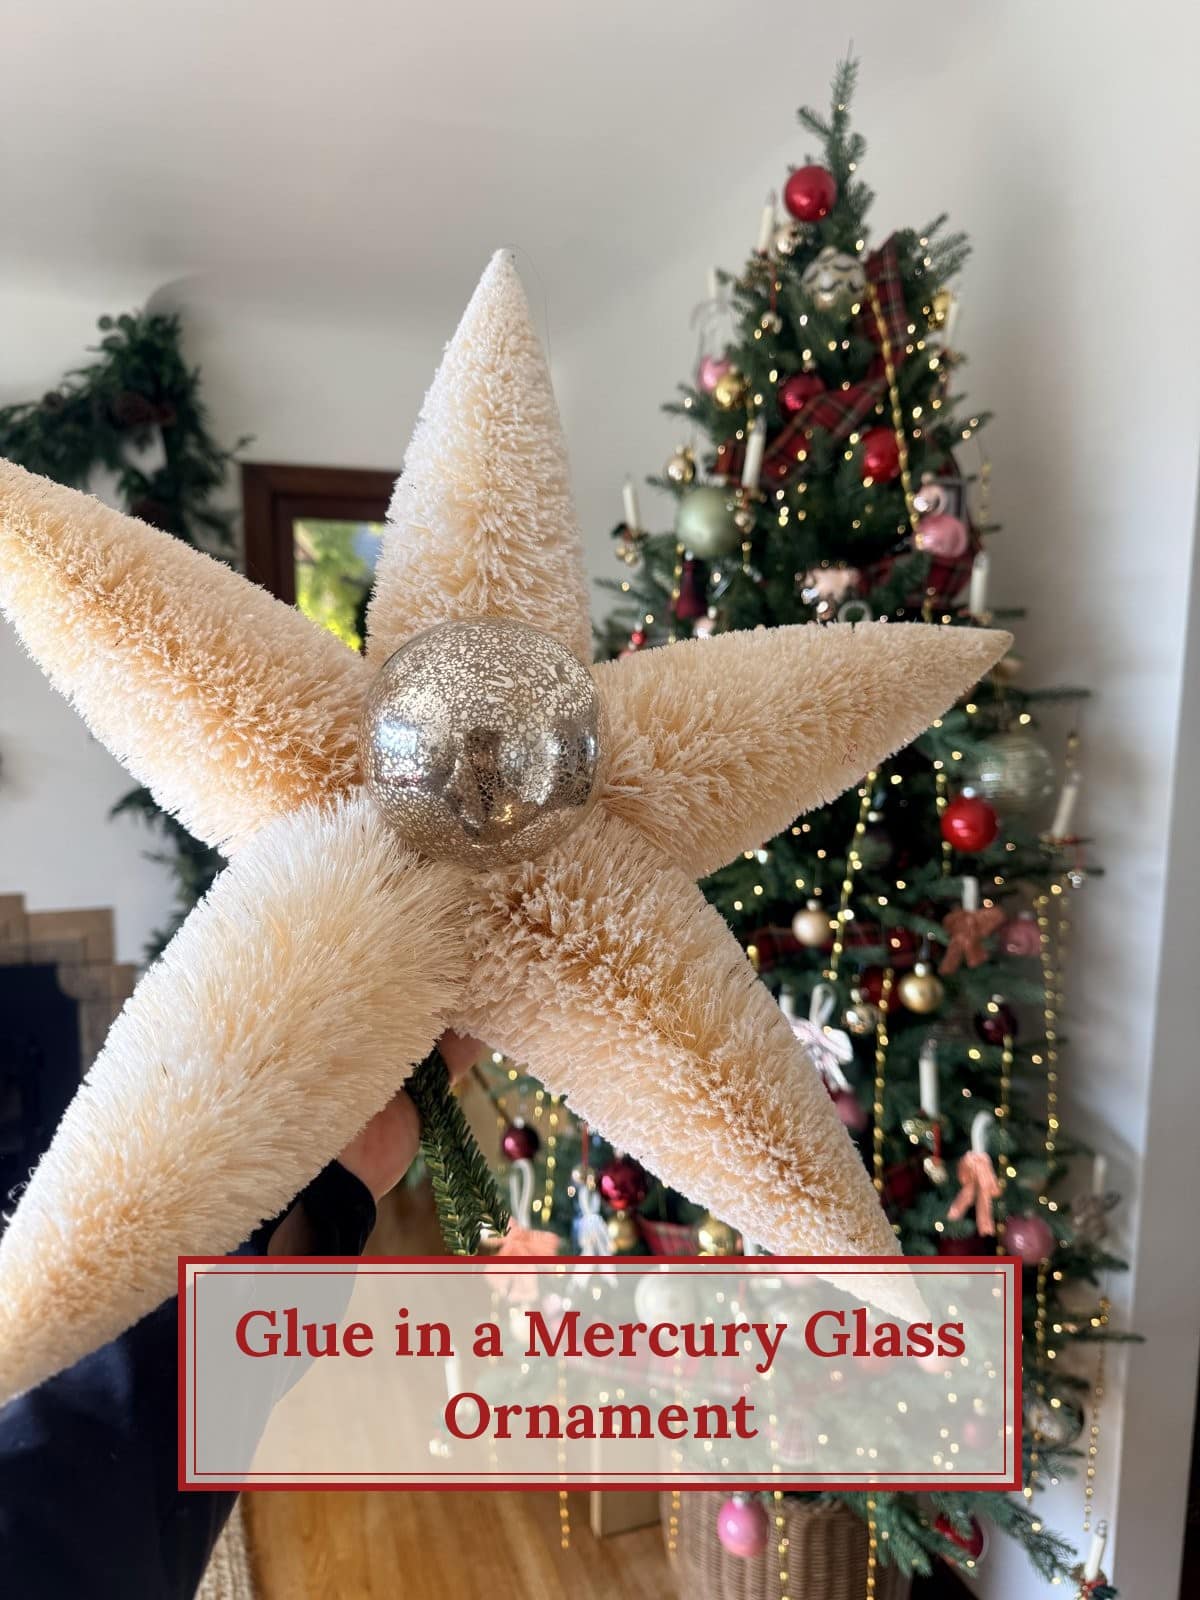
Step 8: Add the mercury glass ornament. Hot glue a big mercury glass ornament into the center of the star. I nestled the top of the ornament in between the trees and glued it there. Then I added hot glue around every spot where the trees touch the sides of the ornament, so it’s really stable and won’t wobble.
Step 9: Attach it to your tree. Hold the topper at the top of your Christmas tree and wrap the six pipe cleaner ends around the top branch. Then step back and admire!

I Love How This Old Fashioned Tree Topper Turned Out!
I am so happy with how this tree topper turned out! It fits the old-fashioned vibe I’m going for in our 1932 Tudor perfectly. The mercury glass catches the light from the tree, and the bottle brush trees feel so nostalgic. AND it was super affordable too. Dollar Spot trees and an ornament I already had? That’s my kind of Christmas project.

Join the Old-Fashioned Christmas Craft Club
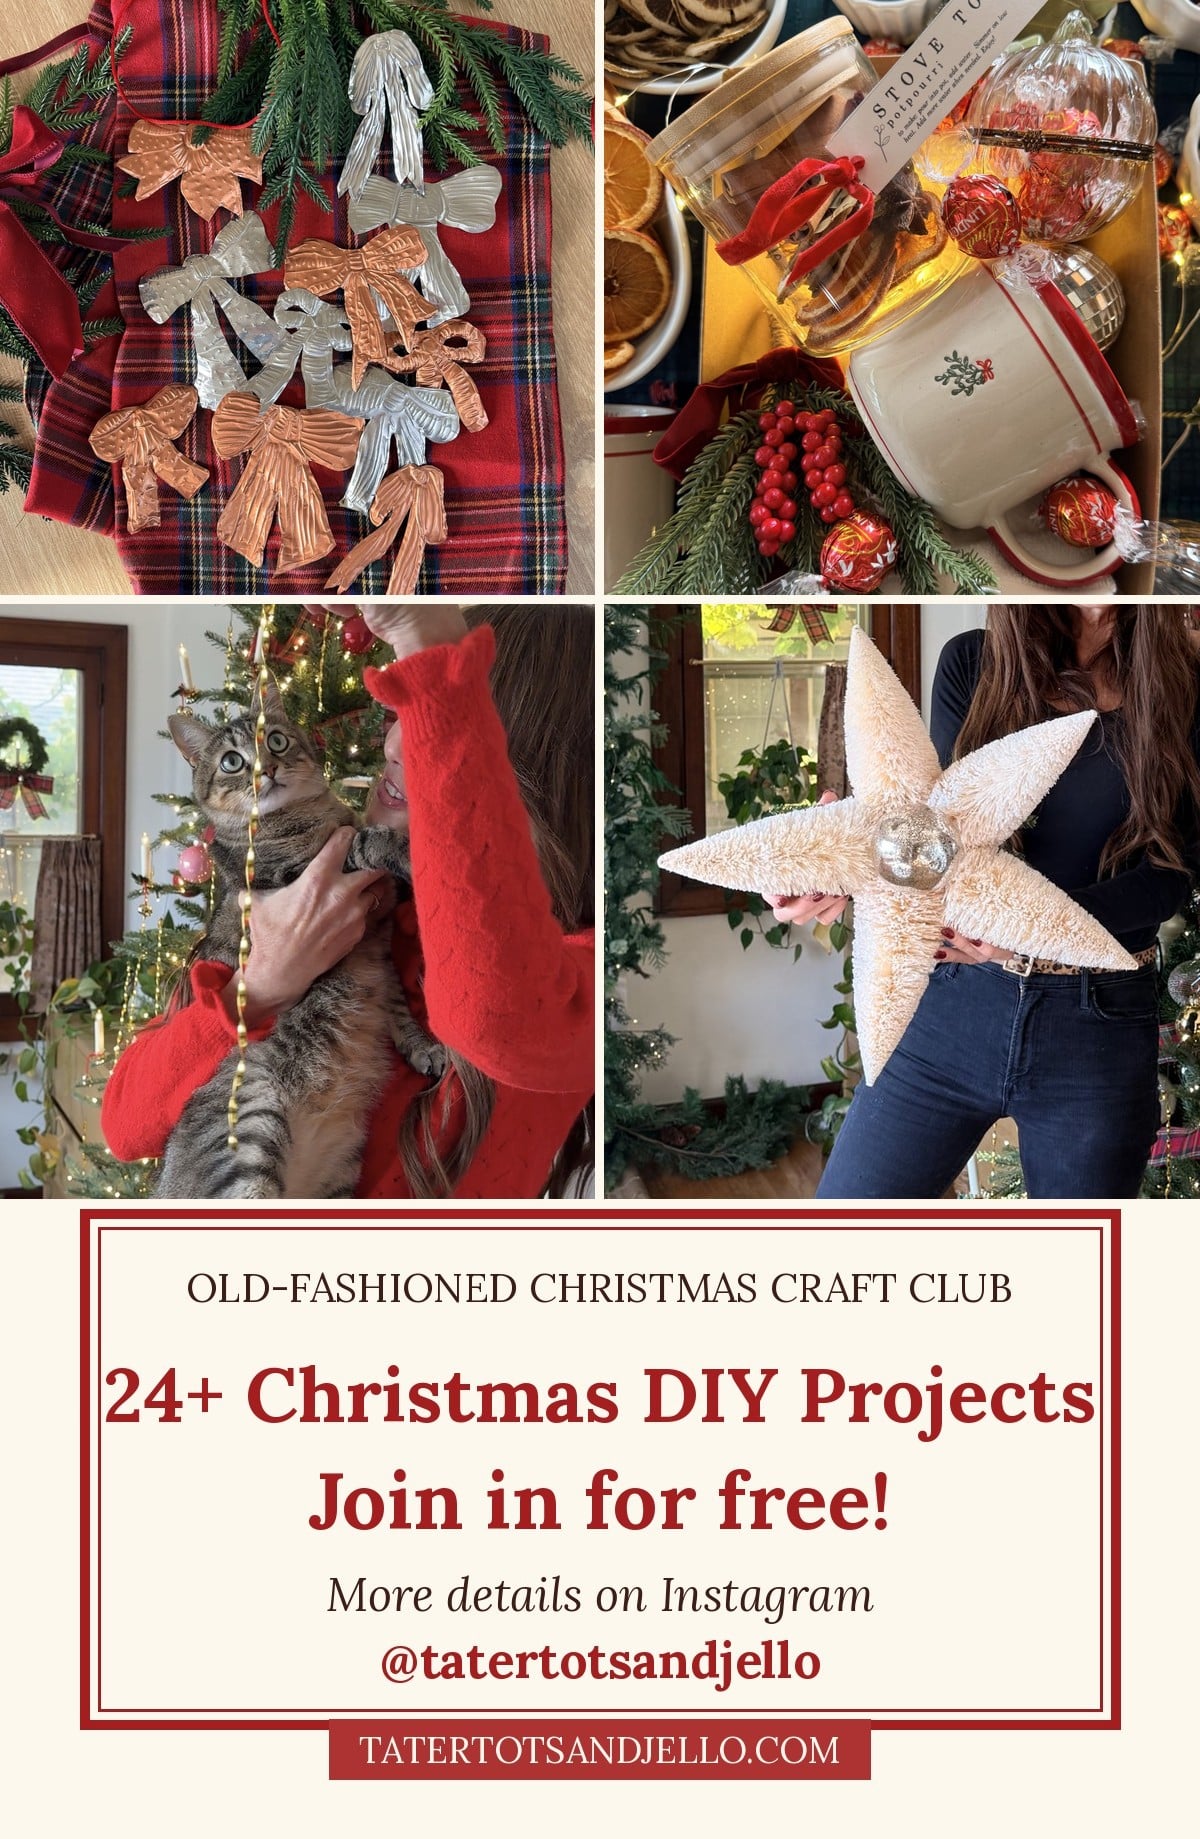
The Old-Fashioned Christmas Craft Club is my way of saying thank you for following along all these years. It’s completely FREE. There’s nothing to sign up for or pay for. I’m sharing 24 old-fashioned Christmas projects this season, with free tutorials and printables, all inspired by decorating our 1932 Tudor. It’s so much fun, and I’d love for you to craft along with me! Join me on Instagram at @tatertotsandjello for videos and behind-the-scenes of every project.
More Old-Fashioned Christmas Craft Club Projects
XOXO,






Liked it? Leave a comment! Thanks! xoxo