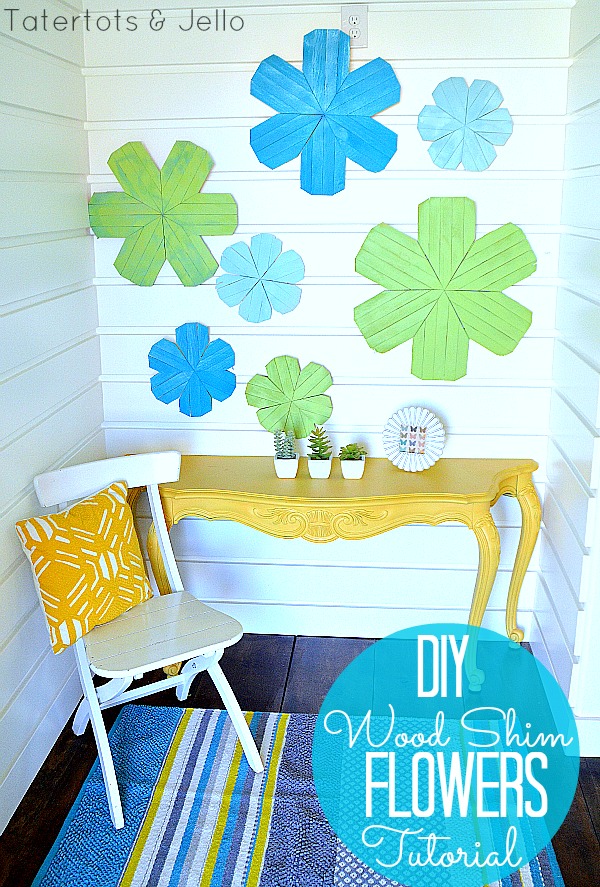
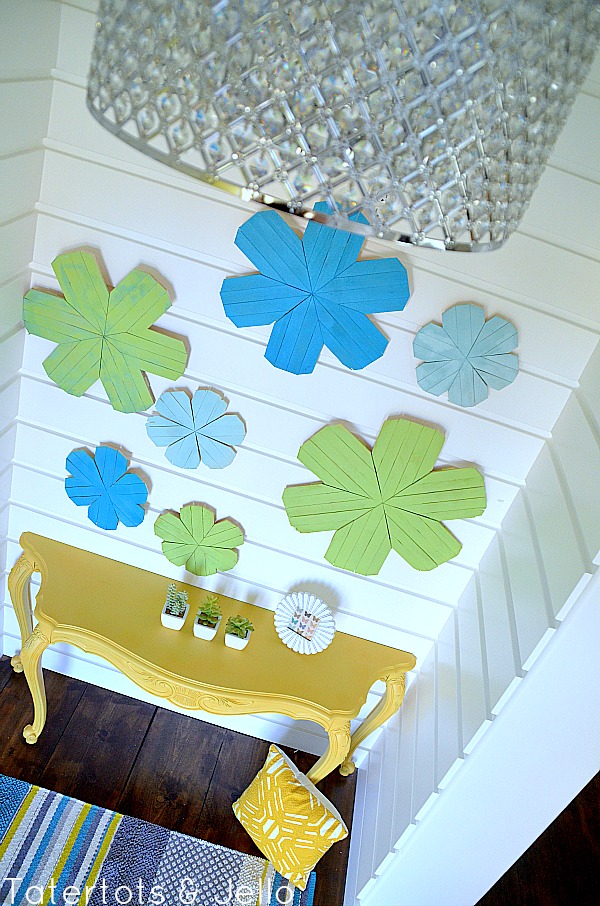
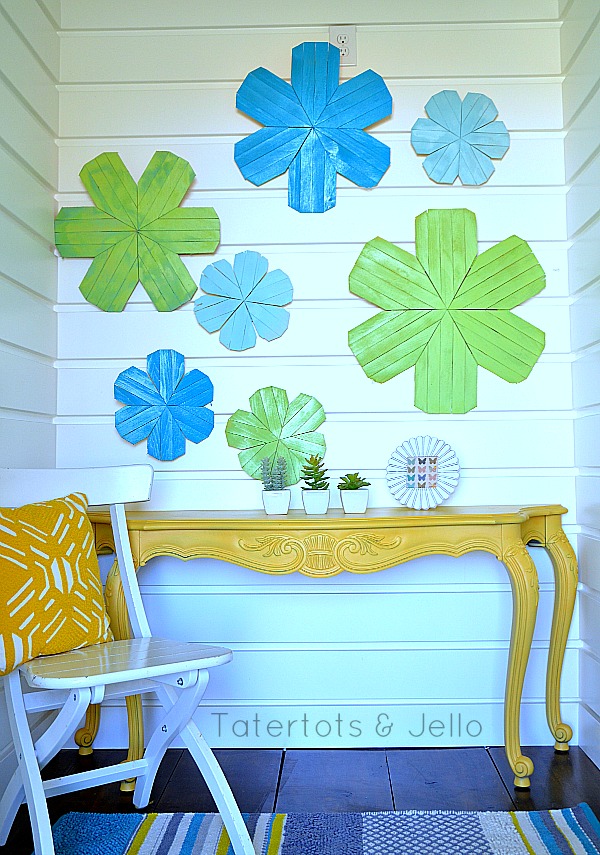
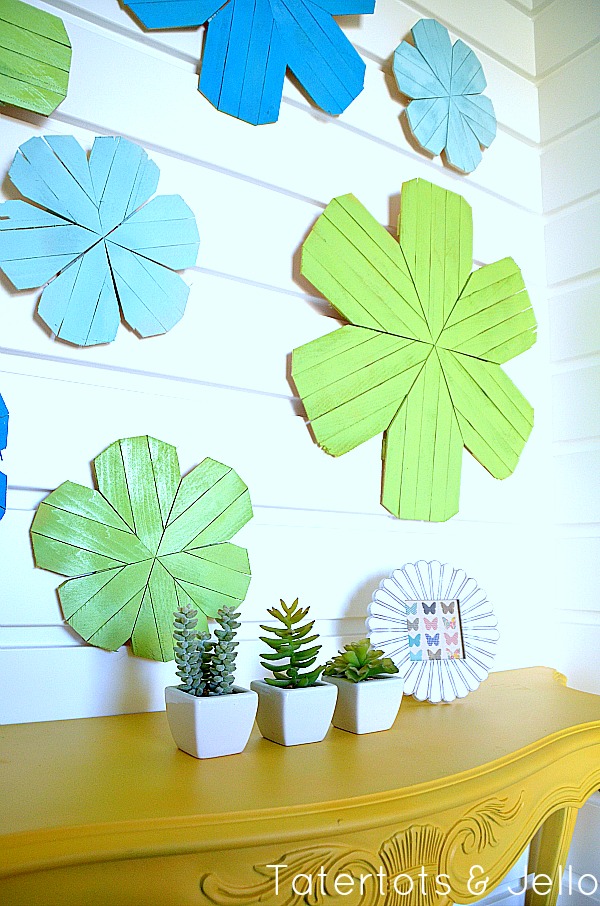
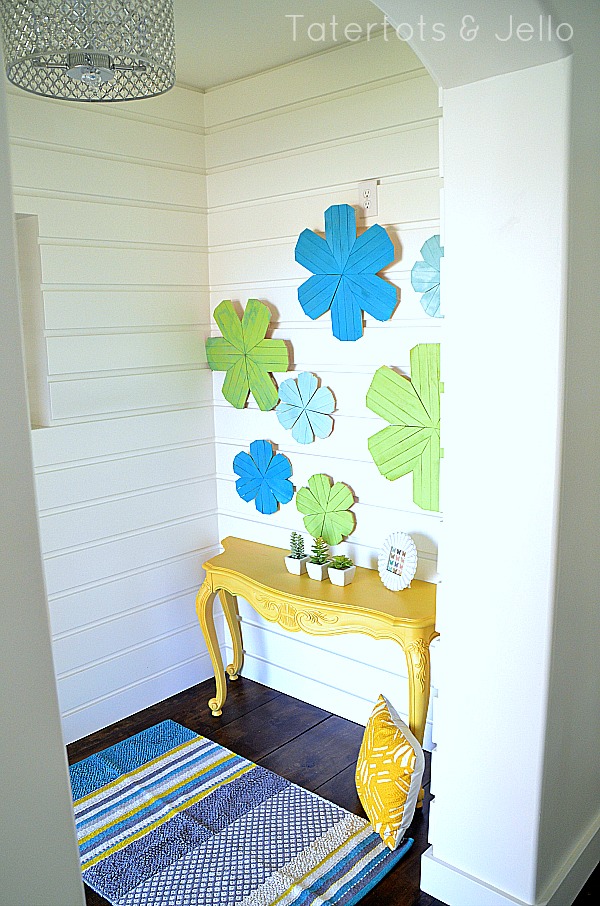
I have a slight obsession with making Wood Shim Flowers – they are so cute! For the #LowesCreator challenge this month, Lowe’s challenged us to bring the outdoors IN. And I thought these Wood Shim Flowers were perfect!!
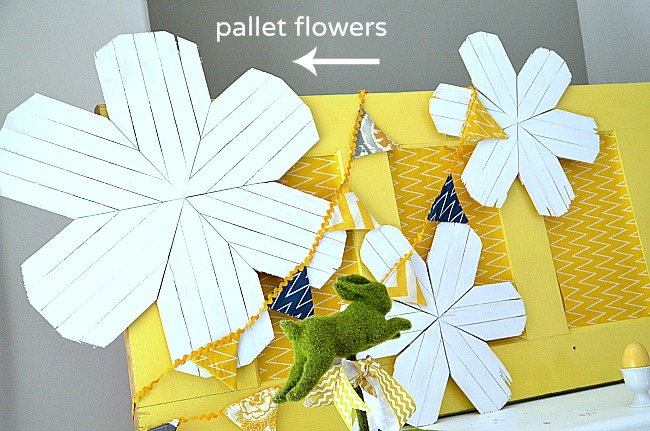
Here are the ones we made for my Spring Mantel:
We even figured out a way to make three different sizes of Wood Shim Flowers!
Here’s how to make the DIY Wood Shim Flowers:
- Buy some of the awesome shims from Lowe’s – the good contractor ones. They’re bigger and less brittle. Make sure you have plenty of glue or glue sticks.
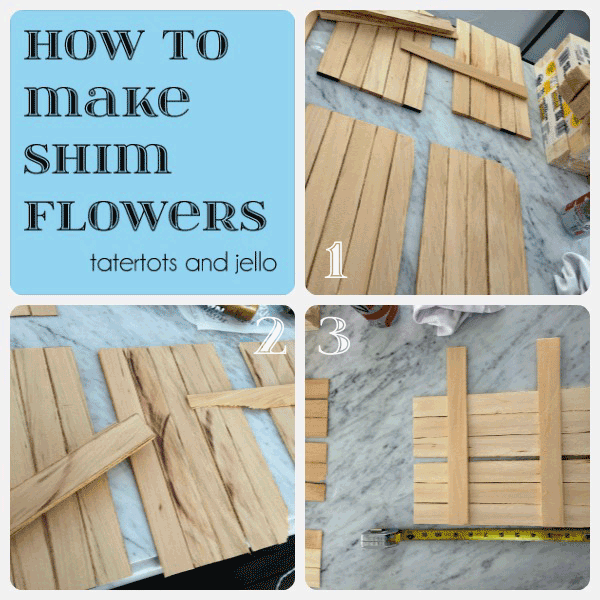
- For the large flowers, lay out six sets of five, lined up against the thicker end. For medium flowers, lay out six sets of four. For small flowers, you make these in pairs, so lay out six sets of three, but group them in pairs about an inch apart. See pictures 2 and 3.
Get the glue gun warming up while you lay out the shims. (Note: you can use wood glue instead – and it might be more secure, but it will take longer to dry.) - Glue horizontal shims across each set. As in picture 2, notice that you want to set the horizontal piece more than halfway up from the thick end of the shims because you’ll be cutting a fairly sharp angle. For the smaller flower pairs, see picture 3 – you’ll put two shims across those. Don’t be afraid to move those even a bit closer to the middle than I did. If you square up the left and right ends you’ll have fewer cuts to make later.
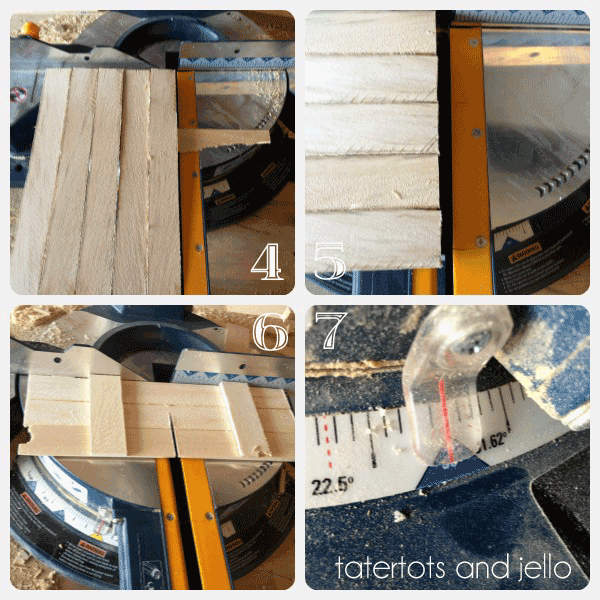
- Once your glue has hardened, take your glued shims to your miter saw. You should wear gloves and eye protection. With your saw set at the standard 90 degree angle, trim off the extra horizontal shim piece (the part that hangs off like a handle). Save the pieces you cut off; you can use them later. (See picture 4.) When you cut the small sets of shims, you’ll cut the middles off.
- (Optional: if you want to make your cuts extra smooth, you can quickly trim the thick ends of the shims so the ends are all even, but that just increases your odds of cutting your angles straight later. See Picture 5.)
- For the smaller flowers, you’ll need to cut them in half (see Picture 6) – you will make two flowers out of each set of three shims, which is why you put two shims across each. Cut each now. (For the medium flowers, you might want to trim 2 or 3 inches off of the thin end to make them more proportionately sized.)
- Set your miter saw on a 30 degree angle (see picture 7). (Our old compound miter saw that had seen us through three houses’ worth of crown molding, was acting up, so we picked up a new one a while back that’s a sliding compound miter, making the cuts even smoother.)
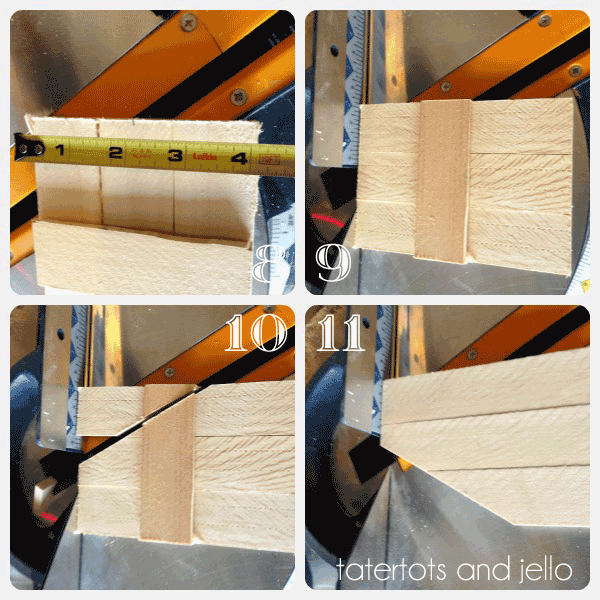
- Measure and mark the middle of your uncut shim block – whatever size it is – along the thickest end. (For me, the larger flowers are about 7” wide; the small ones about 4” wide. The medium ones are easy because they’re in sets of four – so the middle is between the third and fourth shims). If you have a saw that has a ruler along the back – and especially if it has a laser to show you where the blade goes – this will go faster, but it doesn’t matter. See Picture 8.
- Lay the shim block with the thickest end towards the back of the saw. Set the saw to cut at the 30-degree angle beginning in the middle where you made the mark (see Picture 9).
- Cut the shim block to make the first half of the bottom of the petal (see Picture 10).
- Flip the shim block over – we’re going to cut the other side of the bottom of the petal now (see picture 11).
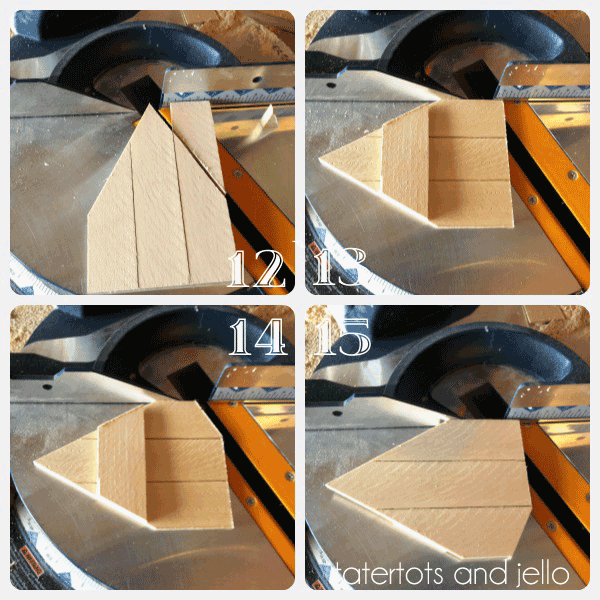
- Make sure the shim block is square against the back and that it’s lined up correctly and make the second 30-degree cut (see picture 12).
- Turn the petal so the longest part is against the back of the saw (Picture 13) – lowering the saw with it turned off to see that it’s lined up correctly (or using the laser line) – to cut the same angle horizontally across the back of only the end shim. When it’s lined up correctly, make the cut to look like Picture 14.
- Flip the petal over and repeat the last step to make the other side of the petal. (see pictures 15 and 16)
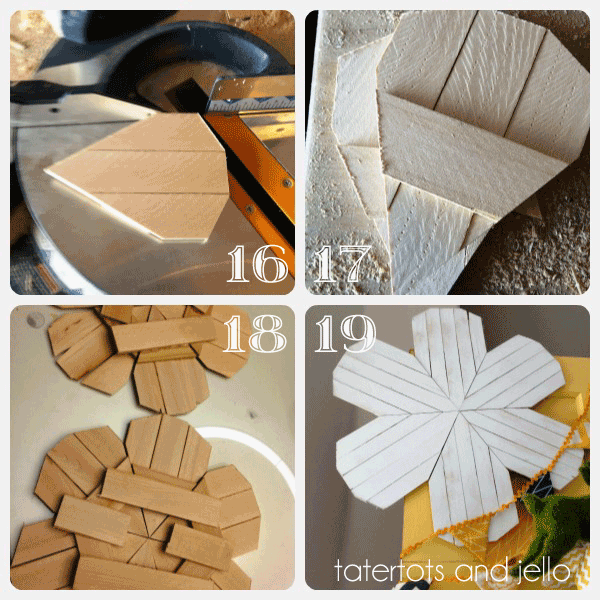
- You’re done with one petal (see Picture 17) – cut the rest in a similar manner. Note: if you’re like me, sometimes a shim will crack, split or just plain blow apart. Don’t sweat it – just glue some more. Other times one shim will come off from the petal – you can re-glue it later.
- After you’ve cut all of the petals for one flower, you can lay out the flower face-down and use the shims on the back in whatever way seems to work best to hold each flower together. (See pic 18).
- Paint however you like (see pic 19).
You can follow along with Lowe’s on Facebook for more great ideas and sign up for their FREE Creative Ideas Magazine with TONS of great DIY ideas and instructions!!
Have a CREATIVE Day!
xox
PS — It’s Friday!
My favorite day of the week.
Why?? It’s the time when I can see YOUR great ideas!
I hope you can stop by for the Weekend Wrap Up Party!
I love to feature YOU!
The party starts tonight at 6 pm MST.
Thanks Lowes for the gift cards to make this project.


whoah this blog is fatastic i love reading your posts. Stay up the great work!
You understand, many people are lookijng around for this info, you can aid them greatly.
So fun Jen!!
Thanks for linking up! I featured your post in my wrap up http://tidymom.net/2013/recipes-and-craft-ideas/
Hope you’re having a fabulous weekend!
These wall flowers are so cute. Who would have ever thought.
Love this idea!
These are so sweet!
It’s nearly impossible to find knowledgeable people about this subject, but you seem like
you know what you’re talking about! Thanks Boom Lift Rental
These look so cute! What a creative idea. Thanks for sharing,
Kate
These are absolutely adorable. What a clever idea. It’s just a happy space!
Very pretty!!
Ok seriously……do you ever sleep? Like, you are cranking out the projects over here!!!! I was thinking oh, maybe this is an old post? NOPE, a new one! Good grief, you are like wonder woman. Pinning! 🙂
How big are the shims that you get? I can only find the ones that r 6ft long.
Very cute Jen!!
I love the scale and how the bold colors pop. Very fun.
Great rustic barnwood style.
Deb@LakeGirlPaints
Thanks Deb!! I appreciate your comment so much!!
xoxoxo
What a super fun eye catching idea! I’d love this punch of color in my home! Thanks for sharing!
Thanks Donna!! I really do love it. Those colors really make me smile. Thanks for taking the time to stop by and comment!
xoxo
What a cute decorating idea. I love the colours.
Absolutely STUNNING! LOVE! I love how they stand out on your white paneled wall as well. Thanks for sharing!
Krista
Thanks Krista!! Have a wonderful Friday!!
xoxoxo
Is so lovely and the whole space look fantastic!!! Live it!
Hugs
Cami
Thanks Cami!! Have a wonderful Friday. Thanks for the nice comment!!
xoxo
Good tutorial! I just discovered these shims and wondered about what to use them for. My husband usually makes his own from his shop. What a good idea! So colorful and they have a lot of impact. I think this is a good craft to share with a teenager seeking a little color in her room.
Thanks Mardell!! And how cool that your husband makes his own shims. I think they would be SO cute on the wall of a teen or tween bedroom!!
xoxo
Those are so adorable! Love them! : )
Kayla
http://www.lovelucygirl.com
I TOTALLY Love these!!! This is such an Fabulous idea.. It would be adorable to turn one of these into a CLOCK, how cute would that be.. 😉 Thank you for sharing the step by step with us!
xo
Angelina
Thanks Angelina!!
I love the idea of making one into a clock. or I was trying to think of a way to use one on a door instead of a wreath. Thanks for the sweet comment!
xoxo
I love this! just love it!
Thanks so much!! I really love them too – the colors make me so happy. Thanks for stopping by!!
xxox
Oh how cute & I just LOVE the color choices. Exactly what I would choose.
Thanks!! I really do love the blue and green colors. There are so many great spray paint colors out these days!
xoxox
Touche. Great arguments. Keep up the great effort.
Hey there! This post couldn’t be written any better! Reading through this post reminds me of my old room mate! He always kept talking about this. I will forward this article to him. Fairly certain he will have a good read. Thank you for sharing!