Tatertots and Jello

COLORFUL HAPPY HOME -- Daily DIY, Decor, Craft and Recipe Tutorial

  • My Home
    • 1905 Cottage
    • Daybreak House
  • DIY
    • DIY Projects and Ideas
    • Organizing
    • Tutorials
    • Printables
  • Decor
    • Spring Projects
    • Summer Projects
    • Fall Projects
  • Crafts
    • Kids Crafts
    • Painting Projects
    • Paper Projects
    • Sewing
    • Wreaths
  • Holidays
    • Valentines Day
    • Easter
    • Halloween
    • Thanksgiving
    • Christmas
    • HAPPY Holidays Series!
  • Recipes

Explore

  • my home
  • diy
  • decor
  • crafts
  • holiday
  • printables
  • recipes

Connect

Home » Uncategorized » More Burlap Projects: Burlap Bracelets!

Uncategorized · November 18, 2009

More Burlap Projects: Burlap Bracelets!

Tatertots & Jello is a participant in the Amazon Services LLC Associates Program, an affiliate advertising program designed to provide a means for sites to earn advertising fees by advertising and linking to amazon.com.
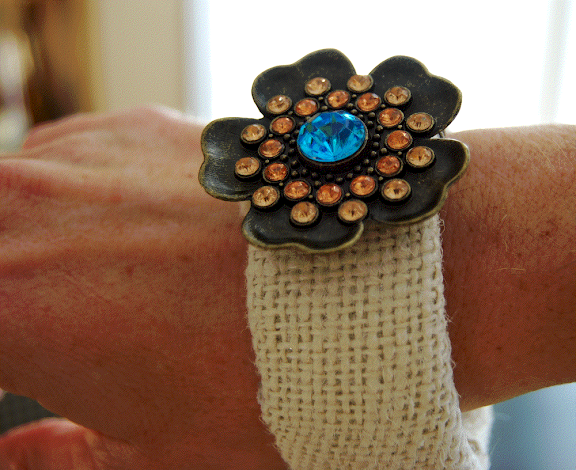
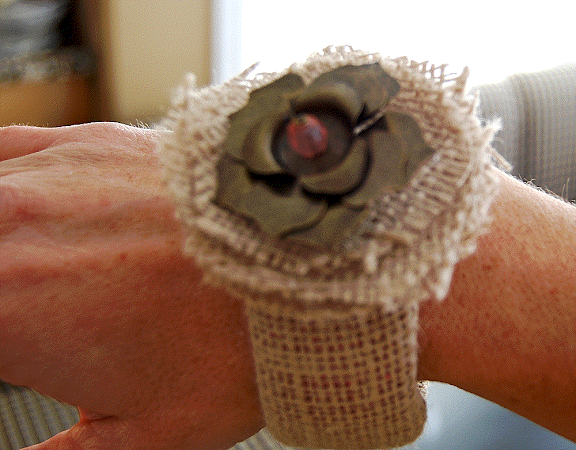
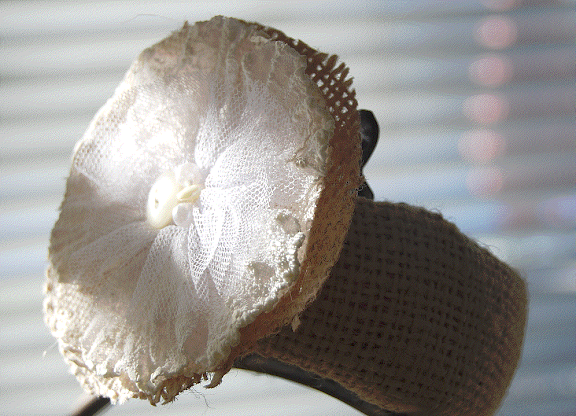
This is what I did last night when I was supposed to be getting stuff ready for the boutique 🙂
 
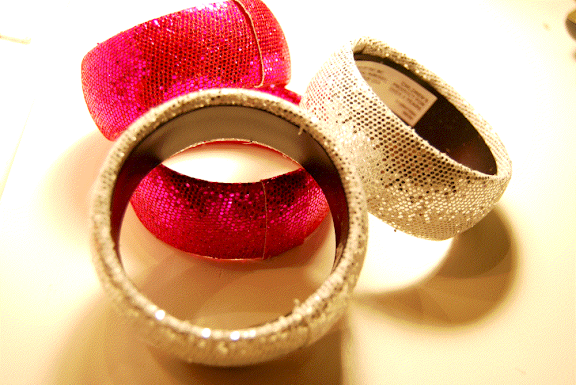
I bought these bracelets yesterday at the Target’s Dollar section, and I was so excited to see what I could make with them.


If you would like to make some, here’s the tutorial!
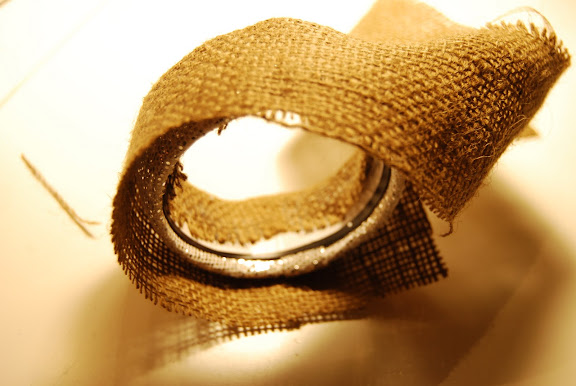
  • Measure the width of your bracelet and the length.
  • Cut your burlap to twice the width of the bracelet and to a little bit longer than the length.
  • Arrange your burlap in front of you. Stand the bracelet up in the center of the burlap strip. 
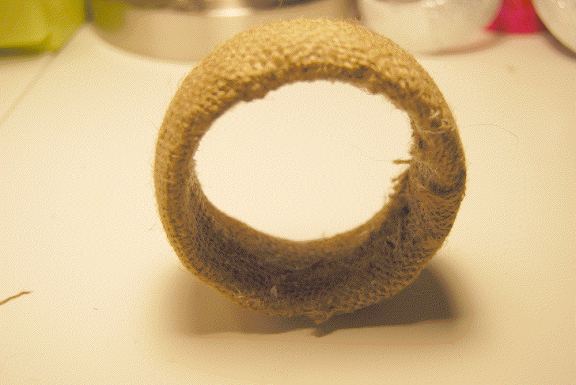
  • Do this step quickly: run a line of hot glue along one side of the inside of the bracelet.  Put the bracelet back in the same position as before and quickly take the burlap edges of that side of the bracelet and bring them toward the center of the bracelet. Roll the bracelet down the length of burlap as you go so that the bracelet stays in the center of the strip. This will help your burlap stay centered and keep the material from bunching up.  Continue until you come to the starting point.
  • Do the same thing on the other side of the bracelet. Pull taught as you go.
  • Trim the edges where the bulap meets. Then glue down this area. Don’t worry too much if it doesn’t look perfect. You will be gluing the embellishment over this area.
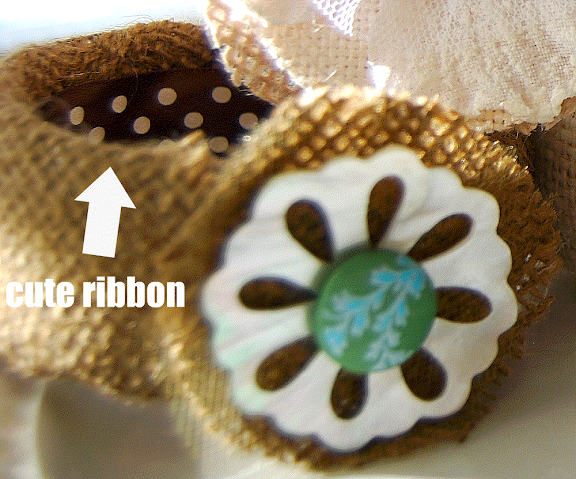
  • One the bracelet is completely covered in burlap, cut a length of ribbon that is longer than the circumference of the bracelet. So it’s not itchy!!
  • Run a squiggly line of hot glue down the center of the inside of the bracelet. Quickly take your ribbon and press it against the burlap. Do this all the way around the inside of the bracelet. Trim the edges where the two ends meet and glue that center down.
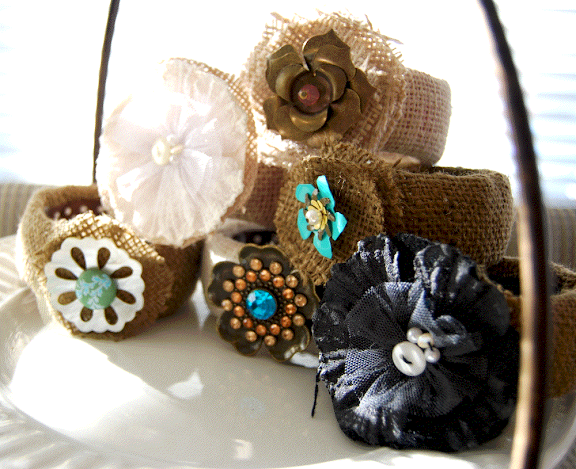
  • Now you can make the embellishment. There are many different embellishments you can make using fabric, beads and brooches. I found some brooches on clearance at Michael’s Crafts in the beading section a while ago. But you can also just use fabric and buttons.
  • Glue your embellishments down and you are done!
  • Note: this is a tricky project. It might take a few tries to get it right. And try not to burn your fingers with the hot glue. I used a popsicle stick to press the glue down onto the ribbon.
Thanks for stopping by! And thanks for entering my LA/New Moon Giveaway {ends Wednesday 11/18} and New Moon 2 Giveaway {ends 11/24}!
 Have a Wonderful Wednesday!
XOXO

Tweet

Posted By: Jen · In: Uncategorized

More Burlap Projects: Ruffled BurlapTablecloth
More Burlap Projects: make a Holiday Card Holder using a tomato cage?

You’ll Also Love

Great Ideas — 21 Halloween Projects!!
Weekend Wrap up Party– $75 Pick Your Plum Giveaway!!
Great Ideas — Free Printables {2}!!
Hi! I'm Jen Hadfield. I'm a mom of 5 restoring an 1891 home in the heart of Salt Lake City. I love being creative and sharing simple ideas to make your life easier and more beautiful!

Receive the Latest Crafts, DIY, Recipes and More in your INBOX!

Follow us on Pinterest! It's awesome!

Top Posts & Pages

Copycat Panera Spinach and Artichoke Egg Soufflés - SO good!
A New Deck in Under 30 Minutes!
DIY Secret: How to Print on Post-It Notes (and Free Printable Template)
Spruce up Your Outdoor Space with a DIY Recirculating Fountain! (tutorial)
12 Must-Have Items to Pack on an Alaskan Cruise!
How to Change a Recessed Can Light into a Pendant Light with No Remodeling!


Popular Posts

  • Copycat Panera Spinach and Artichoke Egg Soufflés - SO good!
    Copycat Panera Spinach and Artichoke Egg Soufflés - SO good!
  • A New Deck in Under 30 Minutes!
    A New Deck in Under 30 Minutes!
  • DIY Secret: How to Print on Post-It Notes (and Free Printable Template)
    DIY Secret: How to Print on Post-It Notes (and Free Printable Template)
  • Spruce up Your Outdoor Space with a DIY Recirculating Fountain! (tutorial)
    Spruce up Your Outdoor Space with a DIY Recirculating Fountain! (tutorial)
  • 12 Must-Have Items to Pack on an Alaskan Cruise!
    12 Must-Have Items to Pack on an Alaskan Cruise!
  • How to Change a Recessed Can Light into a Pendant Light with No Remodeling!
    How to Change a Recessed Can Light into a Pendant Light with No Remodeling!
  • The 12 BEST Patriotic Flag Fruit and Veggie Platters!
    The 12 BEST Patriotic Flag Fruit and Veggie Platters!

As seen in


Amazon Affiliate

Tatertots & Jello is a participant in the Amazon Services LLC Associates Program, an affiliate advertising program designed to provide a means for sites to earn advertising fees by advertising and linking to amazon.com.
  • About Me
  • Advertising
  • Get Featured

Copyright © 2025 Tatertots and Jello · Privacy
This site is a place for positive discussion and ideas. Negative talk, comments that disparage others, and similar are not welcome and may be removed.