Hello there Tatertots & Jello readers! My name is Melissa and I’m the girl behind the Polka Dot Chair Blog. I’m very excited to be back here with you again sharing a simple sewing project perfect for summer.

I love simple sewing projects that have a big impact. Even though I love to sew, sometimes I can be a bit lazy. I wanted new pillows for my couch for summer but didn’t’ want to go to all of the trouble of making all new pillow covers. Instead of making all new pillows, I designed a simple DIY pillow sleeve that I could easily attach to a pillow to change up the look! It is SO easy to sew there are ONLY 2 seams, trust me you can do this!
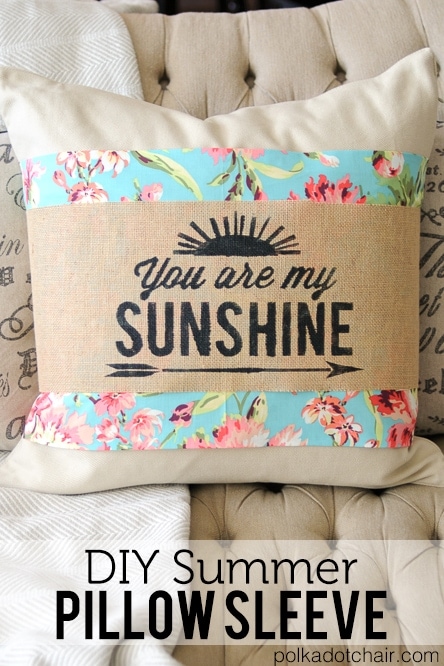
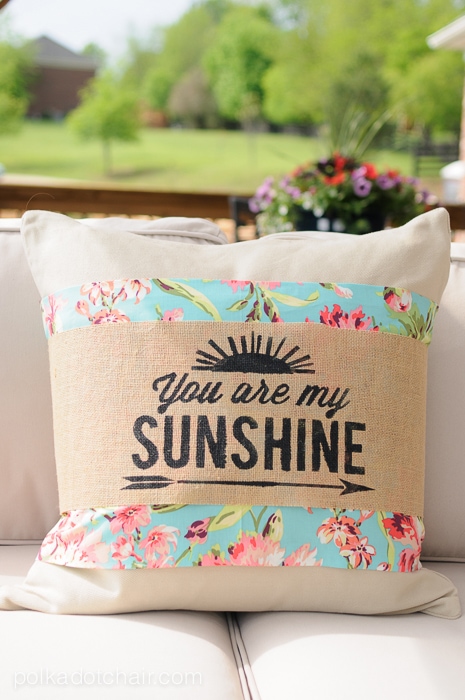
To add just a bit more punch, I freezer paper stenciled this “You are My Sunshine” saying onto a piece of burlap and layered it over some fun colorful fabric. I think that these would be so fun to make and change out for the seasons and Holidays!
If you’d like to make your own, I’ve included the file for the “you are my sunshine” graphic on my blog’s templates page that you can use with your favorite e-cutting machine. Stop by and pick up the free download.
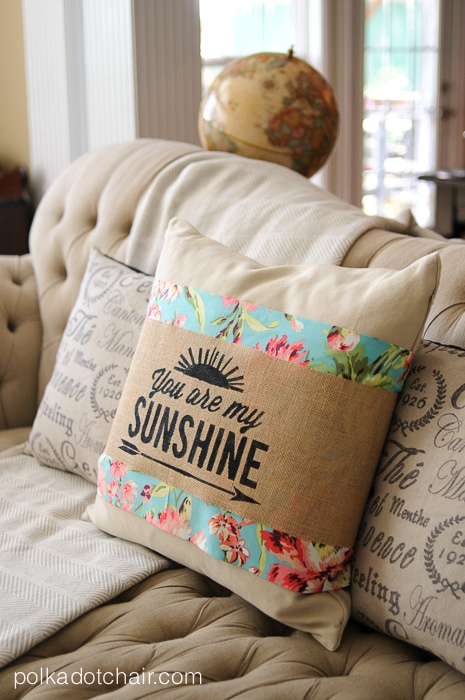
I love how the pillow adds a fun pop of color to my otherwise neutral couch. This pillow sleeve would also work great if you’re looking for something to cover a stain on an existing pillow.
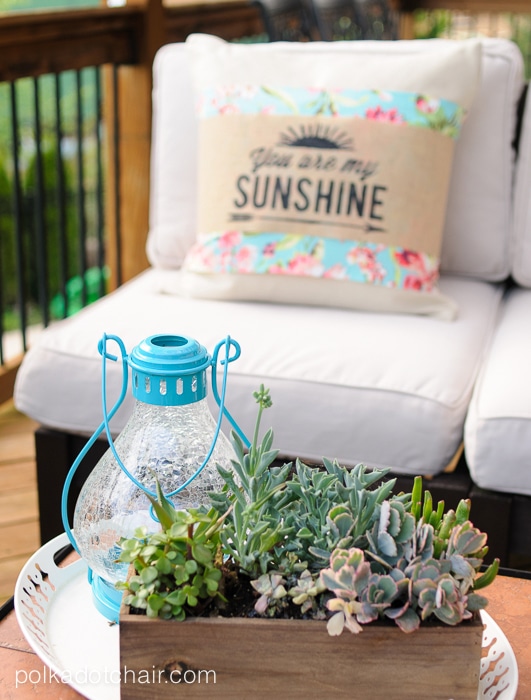
I also love the idea of this type of pillow on an outdoor sofa. Just keep in mind that if you decide to use this pillow outdoors you need to either take it in when it rains, or make the entire pillow from outdoor fabric.
There are TONS of beautiful outdoor fabrics in the stores right now, I know that you could find something fun and fantastic if you wanted to.
Okay, now let’s make one, you’re going to need:
An existing pillow
Piece of Burlap (I bought mine at the craft store on a roll, it has a coating on the back to keep it from fraying, you can also use burlap by the yard)
1 -2 yards Ribbon
about 1/2 yard of fabric
Freezer Paper
e- cutting machine
Fabric Paint
Fusible Seam Tape
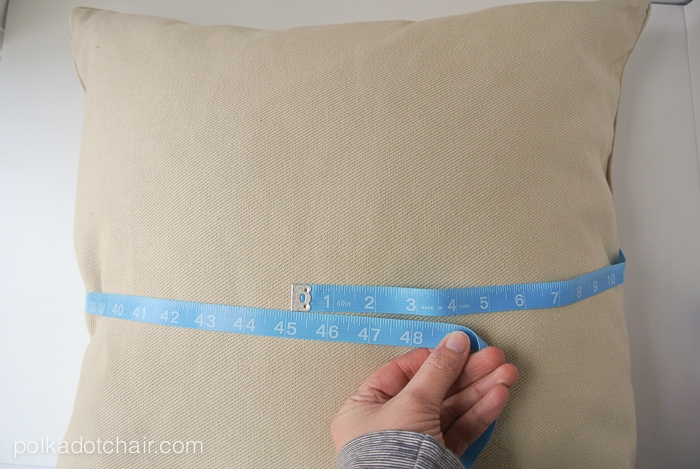
First measure around the center of your pillow. Note this measurement. This will be the length of your pillow sleeve piece (the piece cut from the colorful fabric).
On the front of the pillow measure how much of the pillow you want covered by the colorful fabric, this plus 2” will be the width of your pillow sleeve piece.
For example my pillow as 45” around and I wanted 13″ of the front of my pillow covered by the fabric so I cut my fabric 15″ x 45″ – now in actuality my fabric was only 44″ wide and I didn’t think it was worth sewing two pieces together, so I just went with the full width of my fabric instead- it ties in the back so a bit of gap is not a big deal at all.
Next cut your burlap to the same length but a few inches less wide than the colorful fabric. On my pillow the burlap piece is 8” wide.
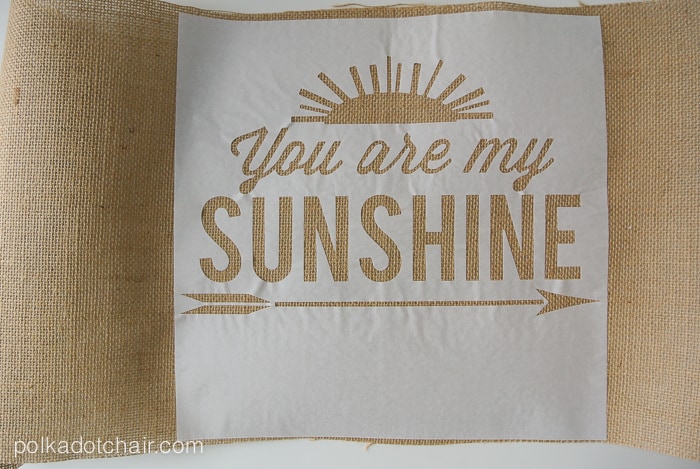
Cut out the “You are my Sunshine” art onto freezer paper using an electronic cutting machine. The shiny side of the freezer paper will be facing down on the cutting mat. Peel the freezer paper off of the cutting mat and center on your burlap piece. Using an iron, iron the freezer paper onto the burlap. You will need to make sure you also iron on the small pieces of freezer paper that make up the centers of the letters.
Iron a second piece of freezer paper to the wrong side of your burlap directly behind the piece on the front. (this piece helps keep the fabric paint from running).
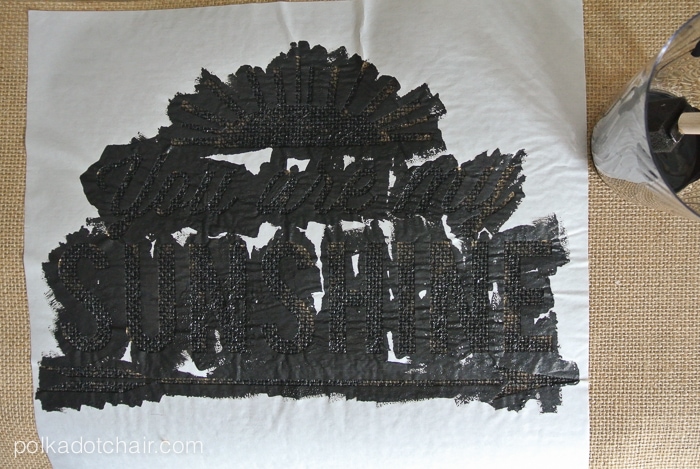
Using fabric paint and a sponge brush dab the paint onto the freezer paper stencil. Let it dry completely, remove the freezer paper and set the ink with an iron. Set aside.
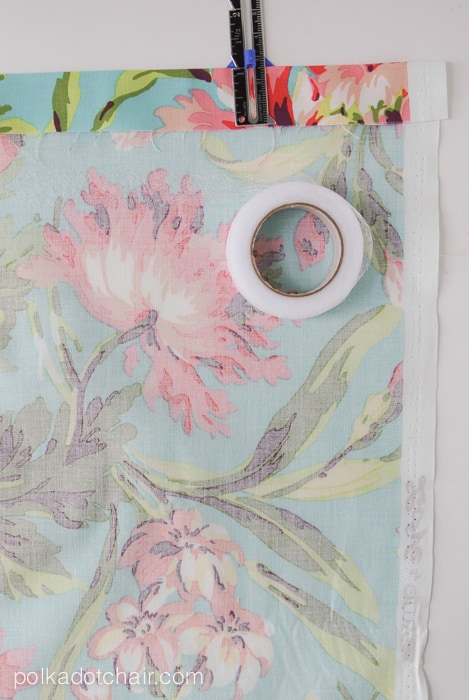
Turn under the two long edges of your fabric piece 1” and press. Apply fusible seam tape under the fold and press, this will hem your fabric so you don’t have to sew a hem.
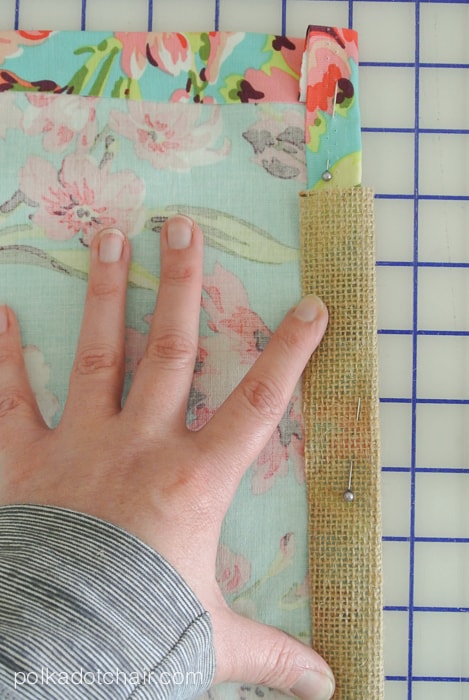
Lay the two pieces on top of each other (the fabric piece and the burlap piece). Fold over 1” on the wrong side each end and pin.
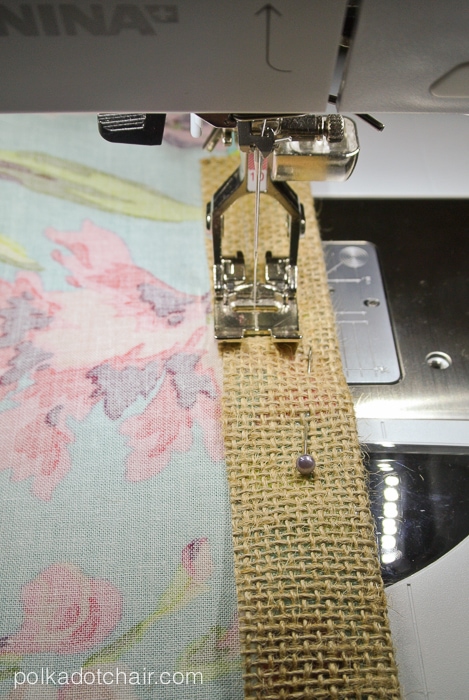
Stitch a long the edge of the fabric to hem. Cut two pieces of ribbon to 18″ long. Fold under the raw edge of the ribbon and stitch on top of this seam in the center of the sleeve.
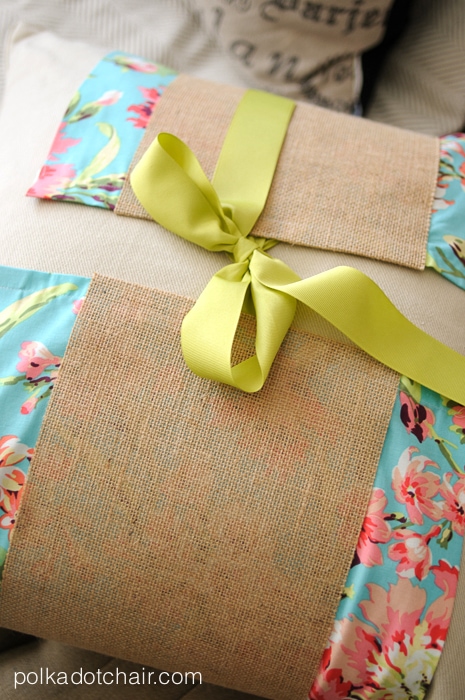
Put the pillow sleeve over your pillow and tie with a ribbon on the back to secure!
I hope that you’ve enjoyed this tutorial! Please stop by my blog for more fun DIY projects and creative ideas!!
***********
Thanks Melissa! That is such a pretty, clever way to spruce up your pillows for summer! I love that burlap with the words on it too! Melissa has great ideas on her blog. Here are a few favorite projects of hers that I love:
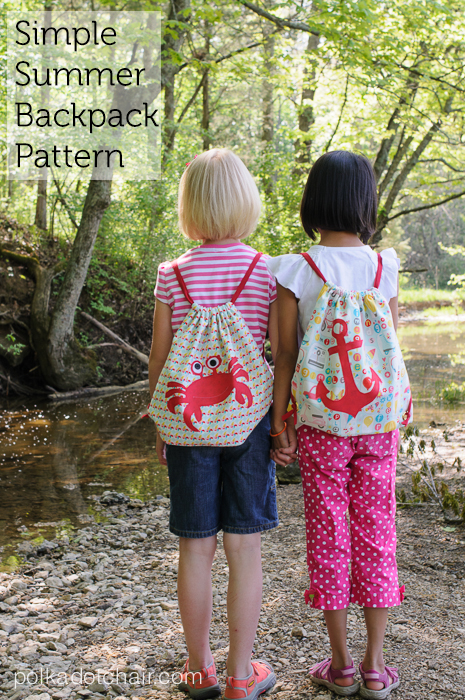
This Simple Summer Backpack Sewing Pattern is so adorable! I can see tons of great uses kids can get out of these cute bags all summer long!
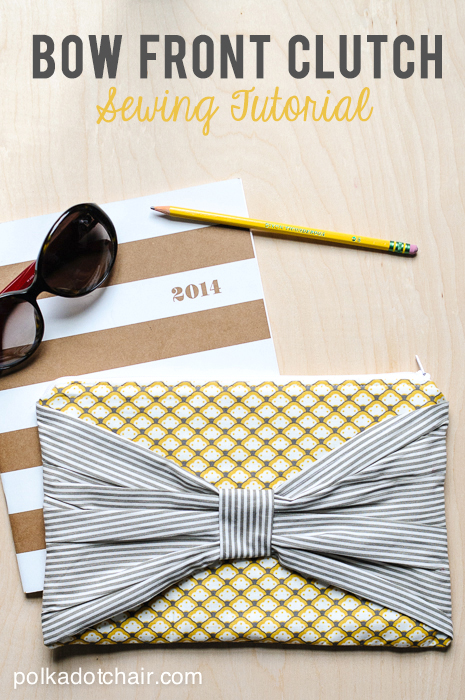
Melissa has some fabulous sewing skills. I love this Bow Front Clutch she made! She has the tutorial on her blog for you to follow.
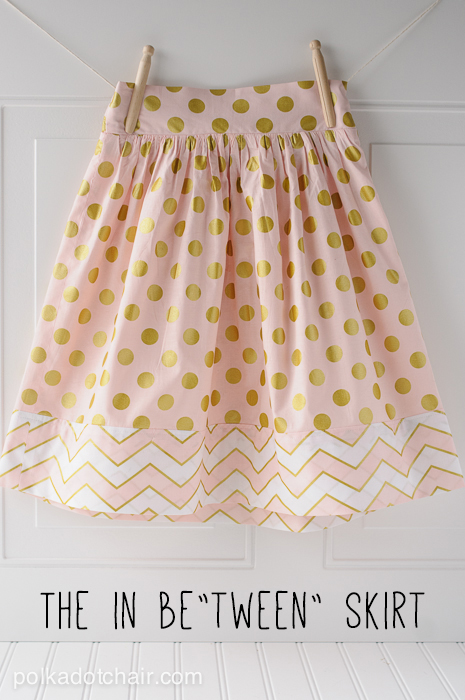
This In Be”Tween” Skirt is so adorable also! Perfect for a young girl who is changing her style all the time! Isn’t Melissa amazing? I’m so lucky to have her sharing her talent on my blog this year!
Visit Polka Dot Chair and


What an incredible idea! I will definitely be using this!
Thanks for sharing this, Melissa. Super cool. Gonna try this whenever I have time. It will make my sofa more attractive.
This is awesome!! I totally love this idea Melissa – I made a little sleeve with just some printed burlap ribbon (you know, the 6″ thick patterned stuff you can get at Michaels) but I didn’t think about adding the extra pretty fabric behind the burlap… and I love how you stencilled yours!!
I LOVE this, Melissa!
I love the idea of a pillow sleeve! I’ve not seen that before, and seems like such a great way to update quickly! I love it!
Kristy @ 3 Peppers Recipes – Crafts, Cooking & Color
A pillow sleeve?! What a genius idea!!!! Super cute, too.
Great idea
L x
http://workingmumy.blogspot.com
Darling! Love this idea!