Happy Friday, TT&J friends! I am super excited to be here today on one of my all time favorite blogs! I am Cassie from Primitive and Proper, and today I have a project that is relatively quick and easy. And if you live in an area that was pummeled with snow this year like I do, it’s a great way to bring some fresh green into your home since it’s taking a little longer to pop up outside.
With just a few supplies and a less than a couple hours, I created a hanging gold leafed vintage insulator succulent garden for my dining room window.

Recently, I tried my hand at gold leafing milk glass and some old clear glass bottles, and I loved how it worked out. I love the pairing of white and gold, but do you know what else I love? Aqua and gold- be still my aqua and shiny loving heart! So when I found these aqua insulators at a yard sale right after that, I knew I had to add some gold to them.
I started by gathering all of my supplies.

Aside from the glass insulators, I also worked on some jars.
Additionally, I used….
Artisan Enhancements Gold Leaf Foil from Catfish Studios (FYI, they don’t list it on their website but you can email them for it- they have it!) Also, as a note, this comes in a roll rather than those little squares you buy at the craft store and is much easier to use and there is less waste.
Artisan Enhancements Sizing (this is a liquid adhesive)
Mod Podge (any finish will work)
Foam Brushes
Twine or Cording (whatever you wish to use)
Beads- optional
Screw hooks
Succulents
I am going to break this all up into steps for you. It may sound complicated, but trust me when I tell you this girl does not do crafts that are too involved or complicated!
1. Using a foam brush, brush the sizing onto your insulators only in the places You wish to gold leaf. Allow it to sit for 30 minutes, and then test for stickiness.

2. Once it is sticky, apply your gold leaf. You will apply it by sticking the matte side to your piece, shiny side out. The shiny side is actually a plastic sheet that holds the gold in place until it is adhered. Below you can see the matte side about to be stuck to my insulator.

And here it is pressed onto the insulator, shiny side out.

3. Peel away your leaf sheet. When you peel away your piece, the gold will be left where your piece was originally sticky. Keep working your way around until you have gold everywhere you want it.

4. With a foam brush, Apply Mod Podge to seal away the gold and sizing.
Your sizing will remain tacky forever and ever and ever until you seal it. Artisan enhancements makes a topcoat that they recommend. However, I did not have it on hand, so I used my trusty Mod Podge.

The Mod Podge will appear milky where you brush it, but it will dry clear. Here you can see the right side has been Mod Podged.

5. Once the Mod Podge is dry, use your twine to hang your insulator. FYI, I am no macrame-er, knitter, or the like, so I just played around creating knots until I had mine hanging as I wanted.

I also added beads to a couple of mine.

6. After you have your insulators ready to hang, drill lead holes into the inside frame of the top of your window. I drilled 3 lead holes, and then screwed in 2 small metal hooks.
7. Fill the insulators with their succulents (mine were from Home Depot) hang, and enjoy!
Now, let’s see how mine turned out in the window! Here are all three hanging….

This one is one of my favorites. I love his spikes, and his aqua bead.

I love that this one had a great surface to gild. Aqua and gold forever!


And this one has a more rustic look with a wooden bead.

I love how easy this project was, and how easy it will be to maintain this little indoor garden!
Jennifer, thank you so much for having me here today to share this project with your readers! Come see me any time at Primitive and Proper, and have an awesome weekend!

***********
Thanks Cassie! Those turned out so pretty! It is always so fun to see new spring ideas popping up to add some color to our lives after a long winter! Cassie has some great ideas on her blog! Here are a few recent projects of hers that I love:
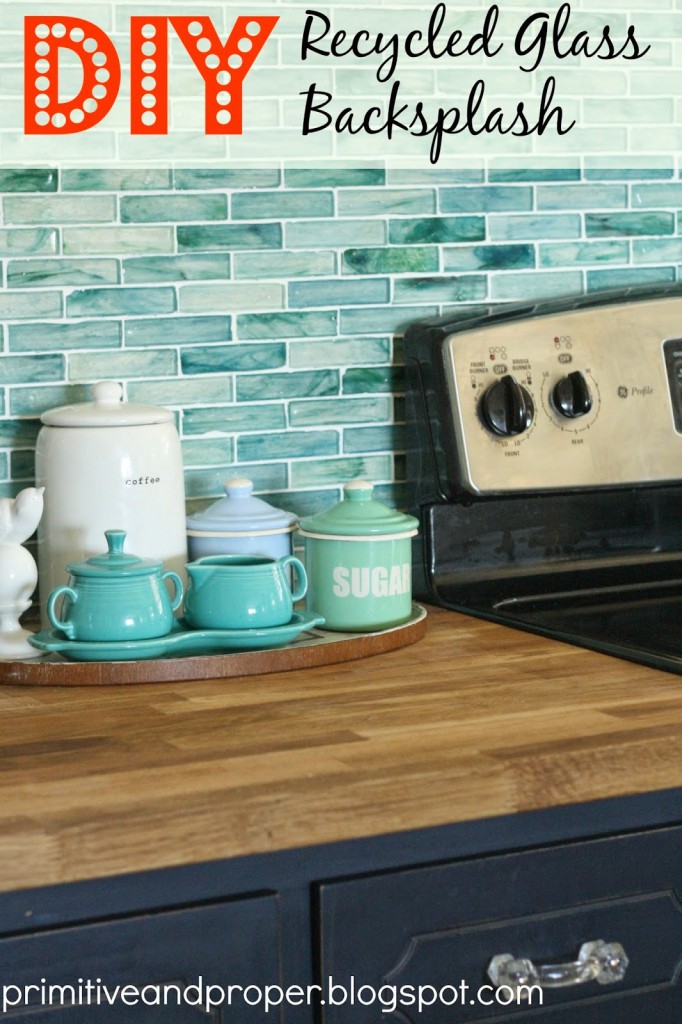
If you are thinking of a DIY backsplash in your home, you should check out her DIY Recycled Glass Blacksplash tutorial! What an awesome transformation of her kitchen!!
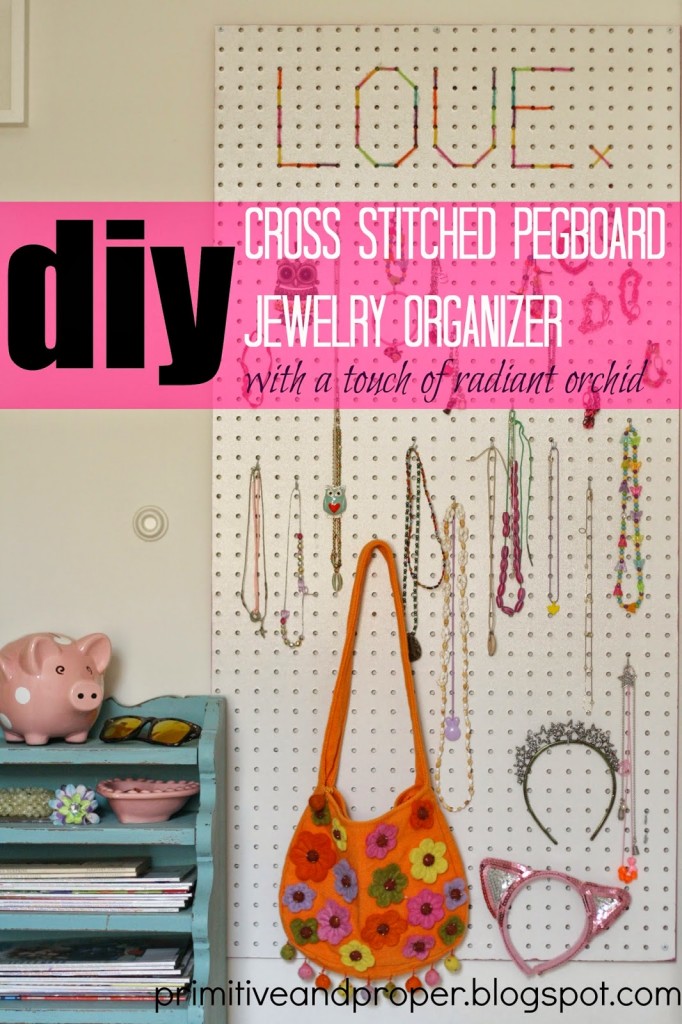
This DIY Pegboard Jewelry Organizer she created is such a fun idea for a little girl’s room to keep all their precious things organized!

And this furniture makeover is so beautiful!! I just love the Duck Egg and Copper Chest!
Visit Primitive & Proper and


I just wanted to let you know that this post was featured on my Father’s Day Inspiration post. 🙂 Thanks for the inspiration!
I saw some of these insulators at St. vIncent’s thrift store and although I loved the color, I couldn’t think what I would ever do with them. Now I know–planters! Great project, so clever.
I like the way you have decorated your windows. Plants are hanging and it looks very unusual and stylish. In addition, I think that such position is useful for them because they receive more light.
These are so cute. I love the gold and aqua together. I still need to try gold leaf – one craft I’ve never attempted.
Cassie these are so cool!! I love the gold with the aqua-ish color… and what an amazing re-use of insulators! Aren’t they about the coolest things??
love this idea! very fitting for my game of “keep-the-plants-from-the-cats” haha
Oh wow! This is such an awesome project 🙂 Great post, as always. Have a great weekend Jen! xx
I’m becoming such a sucker for gold lately, which shocks me because I’ve always been a silver kind-of-gal. Beautiful!
We’ve got some of those insulators floating around the house… I may have to give this a try!
They turned out awesome Cassie! Plus if they’re anything like your gold leafed bottles they probably look even better in person.
Aqua and gold forever indeed! Love Cassie’s blog, and this is such a fun project!
What a creative idea, Cassie! I love the gold leafing on them too.
This is such a charming project. I just love everything about it. The gold leafing just adds that extra bling. Love everything Cassie does 🙂
Those are very cool Cassie! I love the gold added too 🙂 xo Kristin
thank you so much for having me here today, and for sharing all of the other projects as well! MUCH appreciated! Happy weekend!
Love Cassie and this is such a fabulous project once again. I never used the gold leaf on a roll but it sounds like I have to try it. Hate wasting so much all the time with the little squares 😉