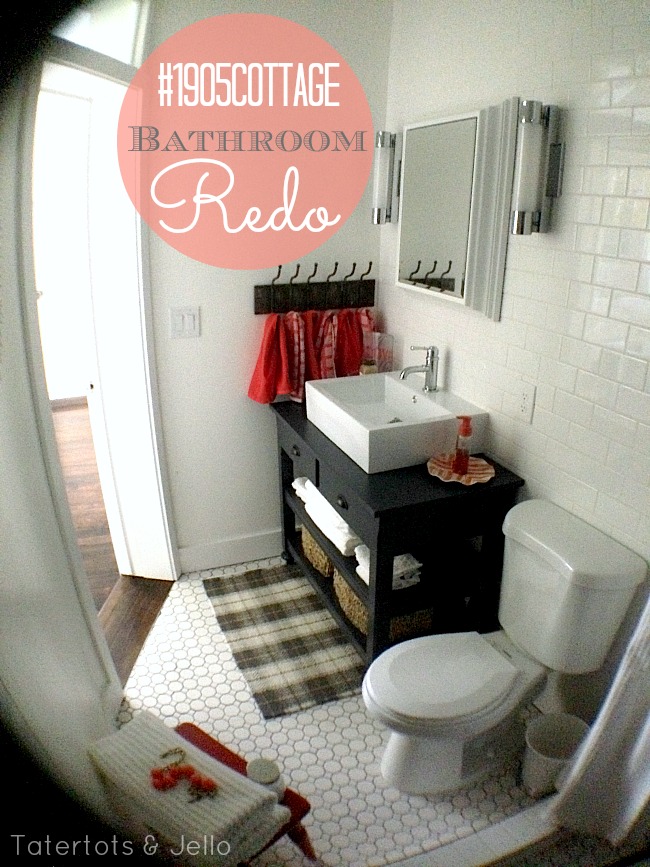
It’s time to share one of the biggest parts of the 1905 Cottage renovation … the bathroom!
We knew it was going to be one of the biggest projects. A bathroom is a major project in any house, but in this nearly 110-year old house, it was extra exciting. We knew we’d have some unpleasant surprises, but we didn’t expect what we found …
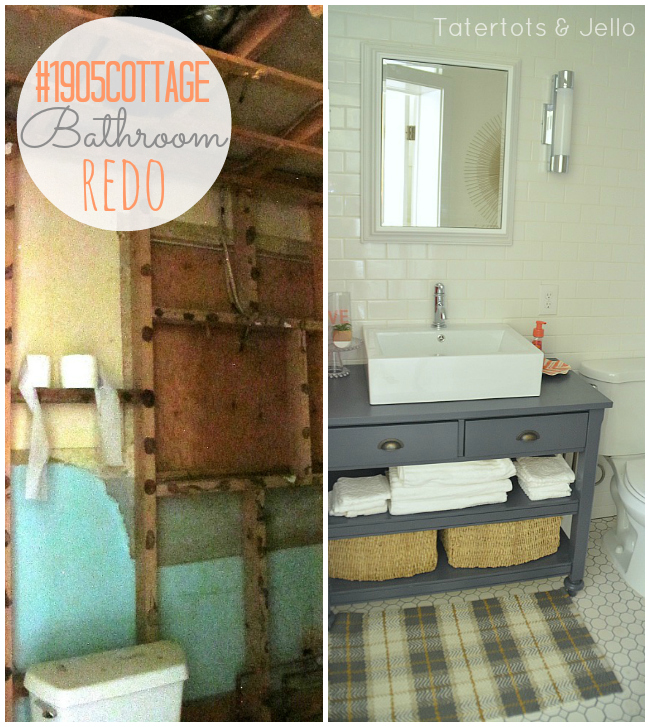
So here’s what we did to renovate this bathroom from top to bottom, some of the surprises we encountered, and some of the unique pieces we did that might inspire your bathroom DIY renovation!
![]()
Here’s my short video tour … and then read more about it!
Here’s what the bathroom looked like when we bought the cottage:
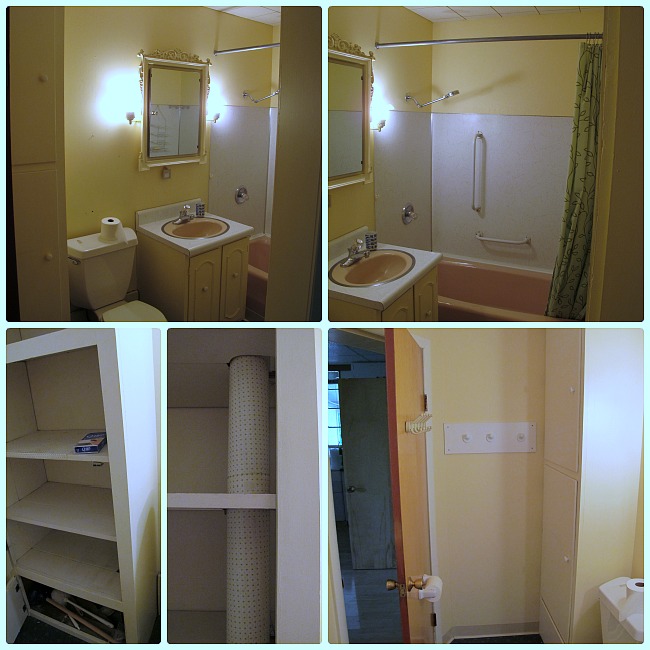
Everything worked, but it was very dated (pink!). It had a drop ceiling and unfortunate carpet over a spongy floor. There was a strangely placed sewer vent through the corner cabinet. And the door cleared toilet by about 1/4″, not to mention the toilet paper dispenser on the back of the door. And you couldn’t open the door all he way – it ran into a cabinet at the end of the room – whoops!!
Tearout and Unwelcome Surprises
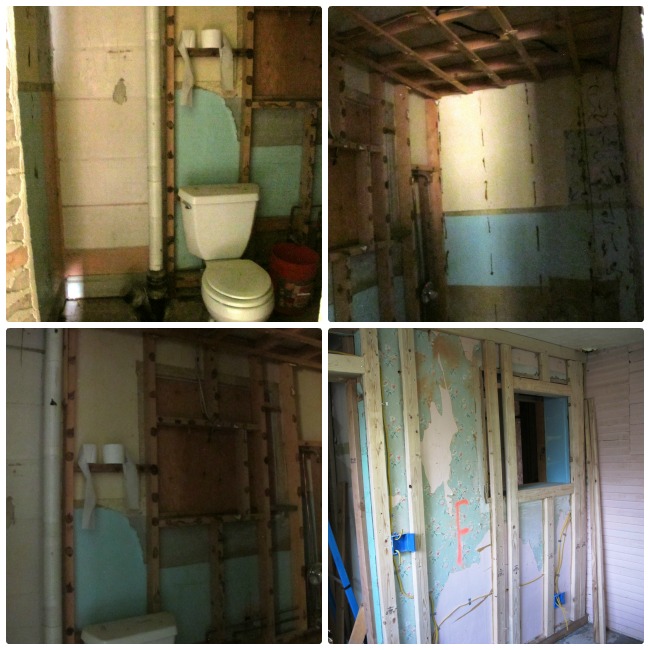
Clearly, like the rest of the house, it was time to tear this bathroom down to the walls and see what we could find.
We ripped everything out of the bathroom — everything down to the brick on two walls and the drywall on two sides. The first thing to go was the dropped ceiling — it went from less than 7 feet tall to 10 feet! We learned that the bathroom had been carved out of a larger room in the house, and had a window covered over in the wall that opened into the small back bedroom. The small back bedroom was the original porch on the house, so this window must have overlooked the porch.
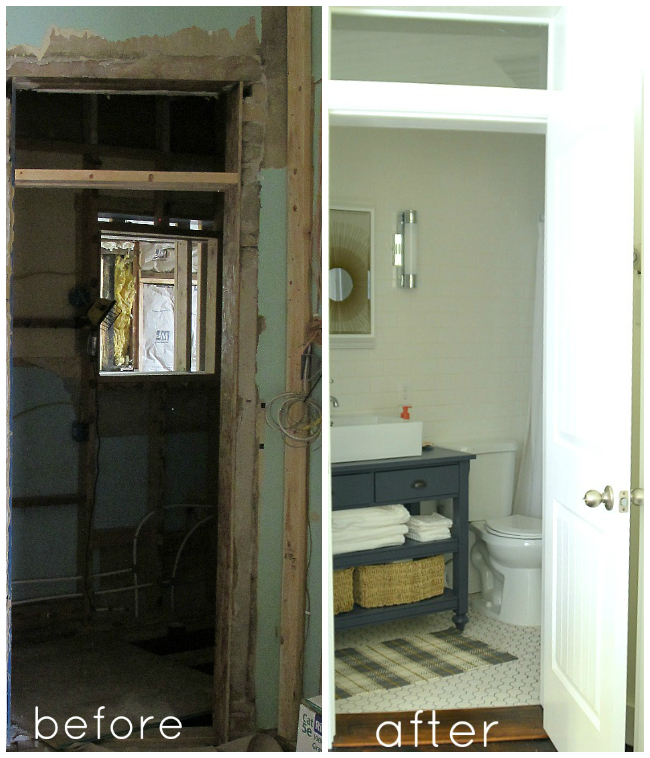
Here’s what it looked like after we stripped it to the walls:
Then, since the floor was spongy, we knew we needed to put in a new subfloor, so we took the floor out. We discovered more than we wanted to discover — we found out that the house’s sewer pipe was cracked, and had even collapsed in some places. It was kind of like an open Roman sewer! Yuck. Obviously we had to replace it. We have an excellent plumber who has done some great work for us over the years, and we had asked him to help with plumbing in the house. He took one look at that and said, “That has to go … and let’s run a scope down it to see if there are any other problems.”
Guess what: there were. The iron sewer pipe in the crawlspace underneath the house led outside to a larger clay pipe leading to the curb … and the beautiful, large pine tree in front of the house had insinuated its roots through the seams in the pipe … and there was barely a finger’s width of space left in that pipe. So, this was an expensive surprise we could have done without, but we had to replace all of the sewer line all the way to the street. Our plumber wisely suggested that we spend just a tiny bit more and run a full new water line to the house as long as we had to dig a big trench in the front yard, so we did!

To save some money, my husband, father-in-law and nephew dug out part of the foundation to let the new pipes in, and then took the old pipes out and filled the hole with concrete to keep out any curious critters. We also figured out that the foundation is made from the same granite that the Salt Lake City LDS Temple is built from — since the quarry is just up the canyon from us. I have more history on that I will share another time. They said that digging through a granite foundation from a crawlspace is inconvenient to say the least.
We even found some newspapers from 1919 and 1927 underneath the bathroom floor! (“Have you been neglecting your home to assemble your Easter costume?”)

So something you’ll never see in the house now is that it has all new water and sewer lines, just like it has all new electrical wiring (a subject for another post).
(As an example of the gift that keeps on giving, we still haven’t quite gotten the sprinkler lines figured out since we had to dig them up in the trench — even though we tried to be careful.)
Rebuilding
But once the water and sewer lines were all done, we could start building this bathroom the way we wanted. We moved the horrible giant sewer vent pipe from the corner of the room and hid it in the wall, venting out the roof. We moved the water lines to accommodate the sink moving closer to the door, the toilet moving between the sink and the shower, and for a walk-in shower.
We of course used all of the right waterproof/resistant boards and subfloor around the shower. We made sure the subfloor was extra sturdy, adding some supports underneath as well. Note that we did not keep the old window, since we couldn’t figure out a good way to make that architecture work. We filled the former window with insulation to help block noise.
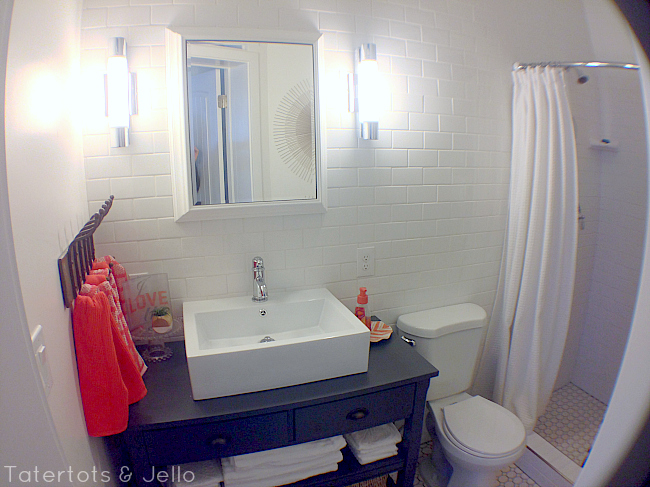
I wanted to stick with a modern, white look to this small bathroom to help it look bigger, and I love subway tile, so we tiled the shower and the largest wall — the one you can see from the door — all the way to the ceiling. We put in a wall-mounted vanity and modern lights on each side.
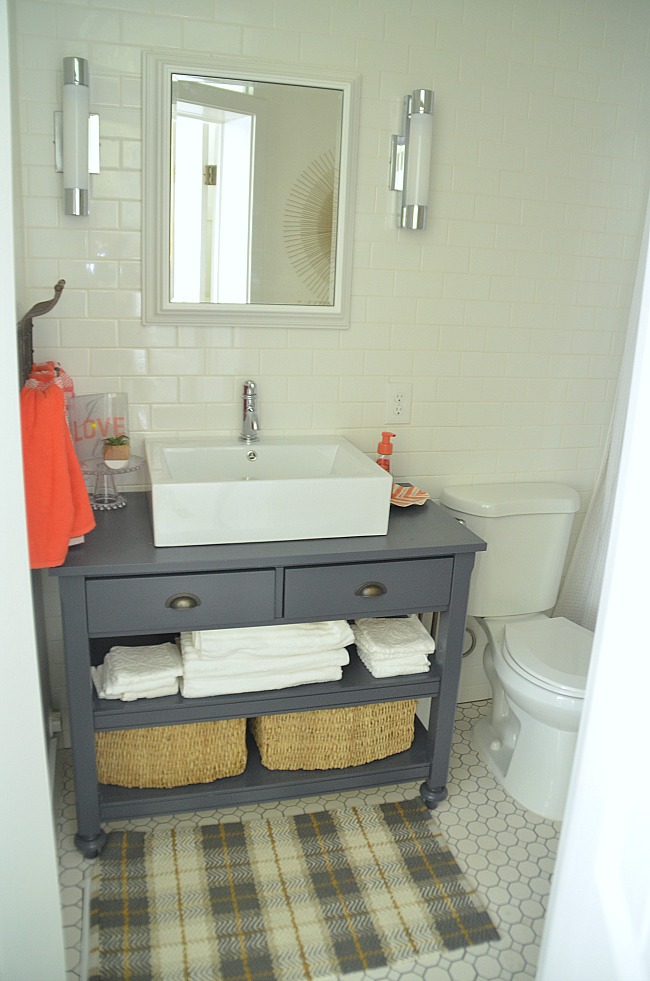
I couldn’t find a vanity that I liked, so we ended up building one from an inexpensive kitchen island I found. We used a vessel sink and adapted the vanity to accommodate the plumbing, including adjusting the height and rebuilding the drawers. (I’ll do a separate post on how we did it.)
You may even notice that not only did we raise the ceiling, but we cut out the door to be a larger, standard-size door with a glass transom above it — both echoing period architecture and allowing more natural light into the bathroom.
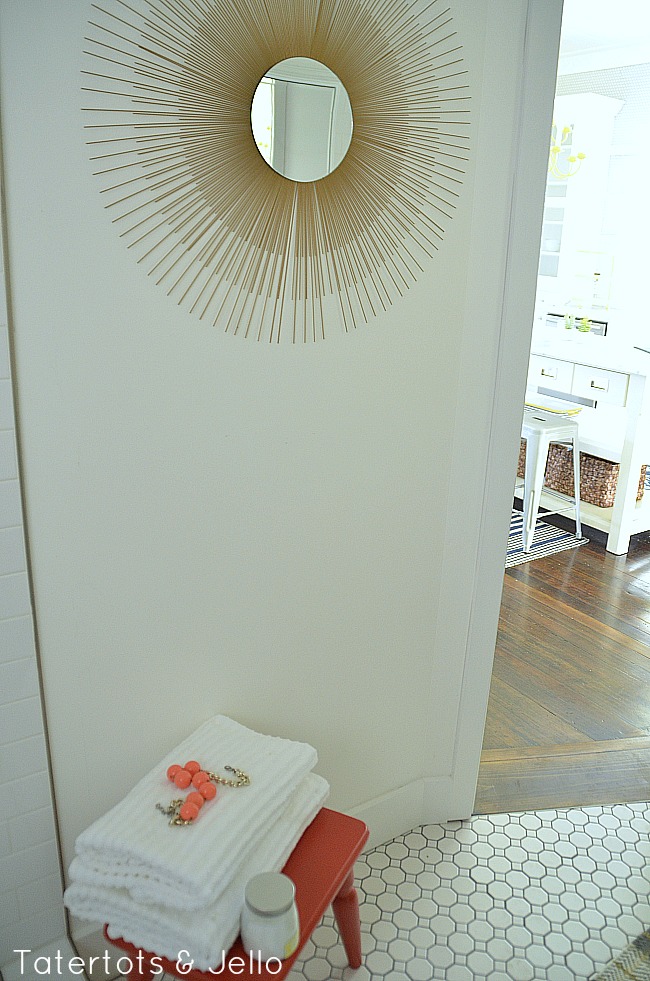
I added some touches like the towel rack and the sunburst mirror, too.
And possibly one of our favorite features is the bath fan (the bath fan!). What makes it so cool? It has a Bluetooth speaker in it. The folks at Homewerks were kind enough to send me a fan to try — it’s a Homewerks Bluetooth® enabled ventilation bath fan. Not only is it a quiet, high-capacity bath fan, but it includes a Bluetooth speaker so you can enjoy your tunes in the shower! How awesome is that? And you can turn the speaker on without turning the fan on.
It’s easy to install as long as you have attic access, which we did. We replaced the smaller fan we had in the bathroom — and cut a larger hole through the drywall and the lath and plaster on the ceiling. We just measured it first, tried hand-cutting and gave up, pulling out the RotoZip (as you can see in these pictures):
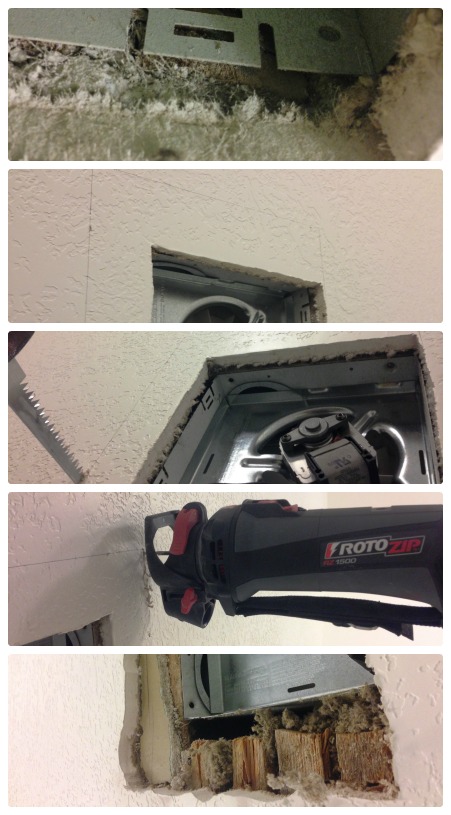
Once you have the hole the right size, the rest is super simple to put in — it’s an easy DIY project. For us, the hole took about an hour (including cleaning up all of the dust) and the fan installation took about 15 minutes! Yours would go much faster if you weren’t sawing through so much stuff (see the top picture).
Then, once it’s in, it’s easy to pair with your phone:

You just find it in your Bluetooth settings, pair it, and then play your favorite songs!
The girls think it’s a perfect excuse for a bathroom dance party, even without taking a shower:

You can find out more about the Homewerks Bluetooth bathroom fan on the Homewerks web site — and it’s available at home improvement stores, too! (It retails for about $149.)
Plus, you can win your own Homewerks fan!
Like Homewerks on Facebook for a chance to win a Bluetooth Bath Fan. Homewerks will be giving away one fan per week through October 15, 2013.

So, what’s next for the bathroom? Well, we want to put a light tunnel in to add more natural light. And we think we have figured out how we can put in a barn door … along a curved wall! But I’ll save those for a future post when I figure them out.
![]()
What’s your bathroom renovation story?
Share YOUR ideas in the comments!!
xoxo

This post is sponsored by Homewerks Worldwide LLC; the opinions, content and bathroom renovation stories are all mine. See my disclosures.


It gets tougher and tougher to get around the house, absolutely the bathroom, as it is one of the spots with a demanding run of development.
You will more than likely save time, money, and you will save an otherwise good tub from ending up in a landfill.
Do you need to provide a better bathing experience in your household.
Heya i am for the first time here. I came across this board and I find It truly useful & it helped me out a
lot. I hope to give something back and aid others like you aided me.
You have done really a great job. You have turned your bathroom into a beautiful place. Bathroom renovation is a very important project and there are many important decisions you need to make when renovating your bathroom.
Wow, the page keeps jumping around. It is so nice to have a $ from Lowel’s this time of year to make a house special for Christmas parties. Thanks for sharing the chance to win. Bless you over the holiday’s. Thank you.
I LOVE IT!!!! I can’t BELIEVE the work that has gone into this cottage! It’s AMAZING!! You did SUCH a beautiful job. It looks HUGE now! You should totally have a show on HGTV. 🙂
Wow, Jen! Now that is some renovation. It looks amazing! It’s so true you never know what you will find when you start ripping out walls and floors – those newspapers are a riot! Pinning this!
xo
I loved seeing your reveal! We are in the middle if a bathroom reno right now as well. We are at the walls ripped out and just replaced the subfloor stage. We also moved an ugly sewer pipe that was in between the toilet and the sink. It has been in this condition as we have needed to get some things done outside for about three months and we are ready to tackle it again. Your post gave me some motivation to jump back in! I’m amazed at your before and after photos and found ideas to copy! Thank you!
what color gray did you use on vanity? Thanks
Your bathroom came out great! You had a lot of work, but totally worth it! Congratulations for the patience to finish the project. You made an amazing job. It’s great that you kept the traditional look of a cottage.
Christine @ Bondera TileMatSet
http://www.bonderatilematset.com
Great job!! Love the grey vanity.
That indeed calls for a bath dance party! 🙂 You did a great in the renovation. It’s like a totally different bathroom. Thanks for sharing!
Oh Jen!! It looks so amazing!! You are so talented!
It turned out so fabulously Jen – I love everything you chose. The tile on the floor and the whole wall of subway tile… the vanity and vessel sink. It is gorgeous. Brand new and yet still suits the character of your cottage so perfectly.
Okay- I just love that you didn’t do a traditional vanity. I love even more that you made the drawers still useable. So clever my friend. When we finally decide on a house I’m sure we will have many diy projects. I will definitely need you to come up here & make me think outside the box & not take the easy way out. You always tackle these challenges & make them awesome. I would totally freak & just do something else. I would definitely need you to push me.
Thank you for providing so many “in progress” pictures of your bathroom remodeling project. It’s nice to be able to see the development of things.
Brent Simmons
Classic Clawfoot Tubs
http://www.classicclawfoottubs.com/
I’m curious about the vanity color as well!
Beautiful! What brand/color paint did you use for the vanity? I’m getting ready to paint our bathroom vanity a charcoal grey this weekend, and I love the color you used!
Amazing! I love love love it. And I so want a dance party in my own bath.
Love the changes you’ve made so far! It looks great!
Love that floor tile. A simply amazing transformation!
LOVE IT! I love how you’ve mixed vintage and modern in there and made the most of the space you have available in there. Sorry it came with the surprise of a crack sewer line…that kinda stinks! (I wasn’t going to for a pun but, there you go)
Wow, that is fabulous! We had to replace our sewer line when we installed our pool this Spring and it was an unexpected large expense for us as well. Luckily the city was already replacing our water lines at the same time! I love what you’ve done with this cottage!
This is lovely and beautiful! The shower looks amazing and who doesn’t LOVE a ‘sing in the shower’ dance opportunity!!
~Be Sweet
Christina at
SWEET HAUTE
Thursday SWEET HAUTE Share Link Party
Join Us…:)
Thanks Christina!!
xoxooxox