Hello, lovely Tatertots & Jello readers! This is Linda, from burlap+blue, and I have a fun and quick tutorial to share with you all today!
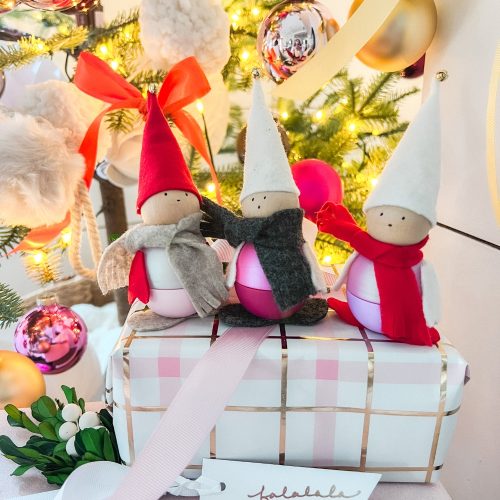
 Typography Ornaments


Use them as ornaments, gift toppers, or just display them in a pretty bowl (or maybe on a pretty pedestal?) for easy holiday decorating.
Materials:
felt
white cotton fabric
stamps and ink
embroidery thread and needle
poly fiber-fill to stuff
felt
white cotton fabric
stamps and ink
embroidery thread and needle
poly fiber-fill to stuff
Step 1: Make a template for your hearts, and cut these out of felt. They can be any size you desire, mine are about 4″ wide at the widest point. Then, using alphabet stamps (or even your own handwriting!), stamp out your words onto cotton fabric (I used Kona Cotton). Some suggestions? Noel, Merry, Bright, Angel, Celebrate, Joy, Peace, Hope…or, if using as gift toppers, stamp out the recipients and the date. Wouldn’t that make a fun keepsake? Cut these out as well.

Step 2: Using your sewing machine (fabric glue will work if you don’t sew), take each word, and sew it onto a felt heart. I used red thread because it contrasted nicely with the white (oh who am I kidding? It was what was still on my machine after sewing my son’s Halloween costume together–but, you have to admit, it does look good with the white (smiles)).

Step 3: Now you should have your words sewn into half of your hearts. Take the other half of your hearts, fold a length of jute twine in half, and sew it onto the inside of the heart.

Step 4: Take two of your felt hearts (one with a word on it, and one with the twine sew in), and start to sew a running stitch, leaving a gap for stuffing. Never done any embroidery or hand sewing before? Not a problem, there are many, many tutorials out there. Basically, you just pass the needle in and out of the fabric, making the surface stitches of equal length. For your first stitch, make sure to come up in between the two pieces of felt to hide the knot.

After stitching most of the way around the heart, stuff your heart, and stitch it closed, tying your knot on the backside of your heart.


Thank you so much for letting me come share with you all today!
Please check out my blog for more tutorials and holiday inspiration, and my shop for those last-minute holiday gifts!
xoxo
xoxo

Thanks Linda!!
Those ornaments would also be so pretty with someone’s name on them and tied onto a present!!
If you don’t know Burlap + Blue — be sure to check out Linda’s fabulous ideas, like:


 And check out Linda’s Advent Calendar
Plus, Linda has an amazing shop:
 Linda makes the most amazing cake plates
Be sure to check out Linda’s shop and blog!!
xoxo
 PS —I hope you will join me TONIGHT — December 7th @9-9:45 pm EST for a FUN twitter chat and linky party — where we share will talk about messy moments and craft fails and surviving the holidays.
There will be gift baskets, $100 Target Gift Card and a $25 VISA gift card given out at the twitter party AND another $100 Target gift card, a $25 VISA gift card given away at the the linky party!!
I think it will be a great time to connect, share great ideas and funny messy moments. I hope you will join in!!

You can find out more about the Clorox Messy Moments contest here or on the Clorox Facebook page.
I hope someone I know wins!!!


That is so cute!!! What a sweet project!
These really would make perfect gift tags. Thanks for sharing!
I love the typography ornaments – I might just use that idea!!! 🙂
Those ornaments are so cute! I might make some to go with people’s Christmas presents!
These are great! Can’t wait to make some asap! Thanks for sharing.
Sencillos, bonitos y llenos de corazón!!! Me gustan estos tutoriales que nos ofreces, son estupendos!!!!
Those are cute! I love her cake plates!!
These are really cute! My son would have a lot of fun making this and it’d be perfect for valentine’s day!
i love this idea!
i’ve been thinking of how to make something other than ornaments for an idea i’ve had using fabric & thread. this is exactly what i needed to see.
have a super day!
xo
kellie