
I love the silhouette revival that’s been going on! I had some cute silhouettes that I had brought home from Disneyland many years ago. I thought it would be fun to combine my older silhouettes with new ones that are bright and happy looking.
before:

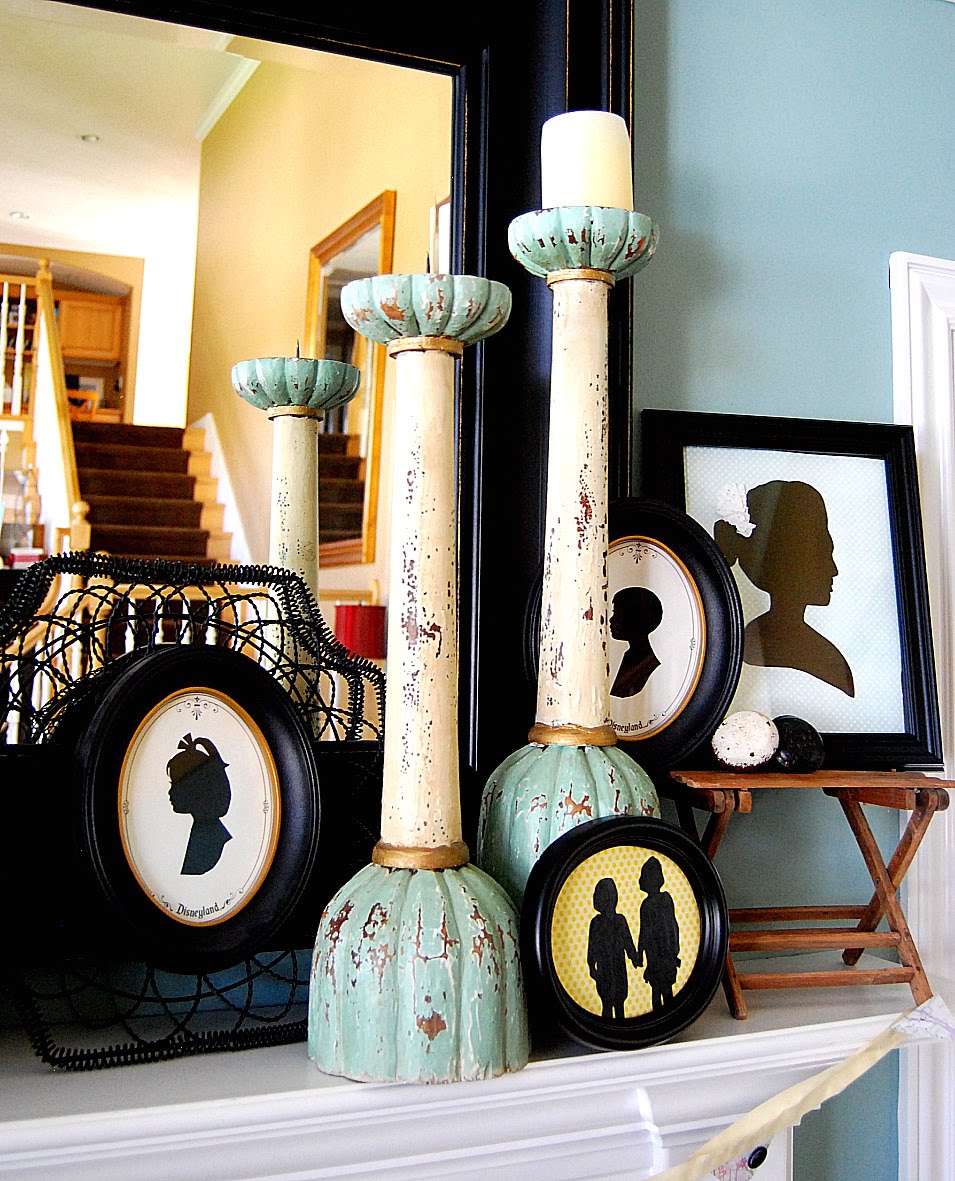
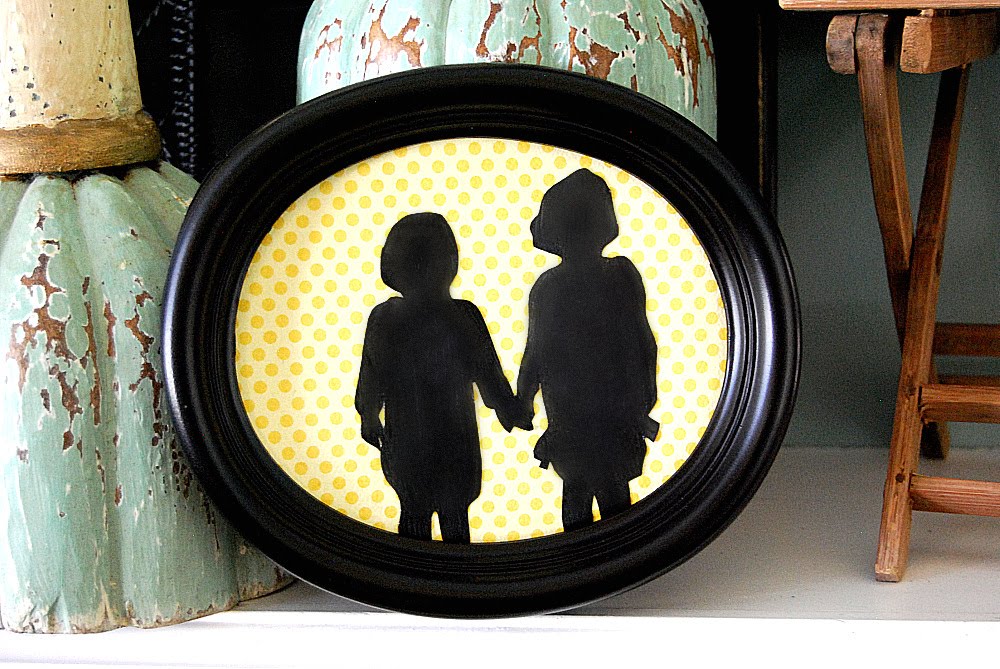
After:
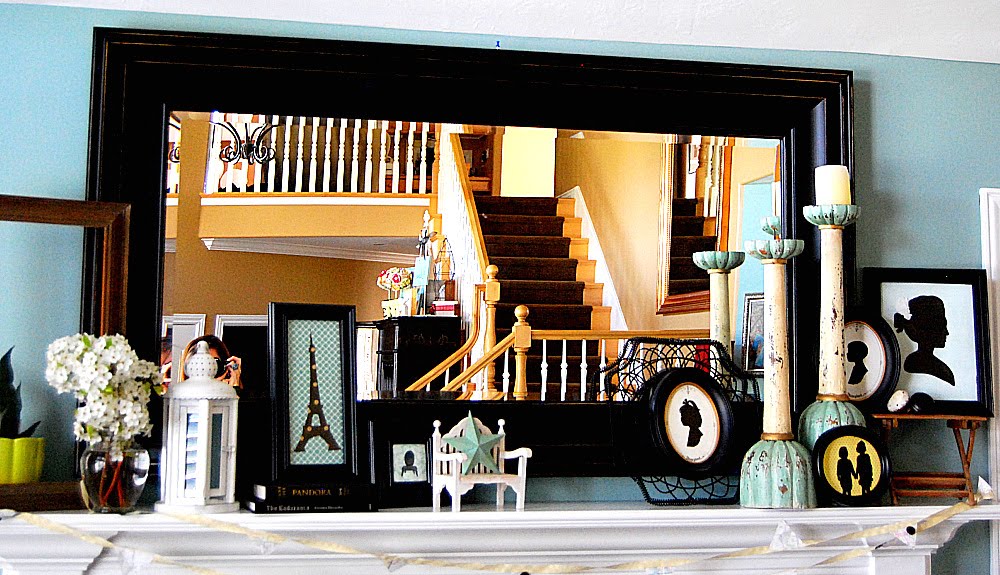
I had them all on my mantle, but it was a little too crowded. So I did a little edit and put some of them on my console table too.
I am sure you have all seen the tutorials where you take a picture of your child’s profile, print it out and trace it onto paper and then cut the silhouette from that paper.
I did mine a little differently.
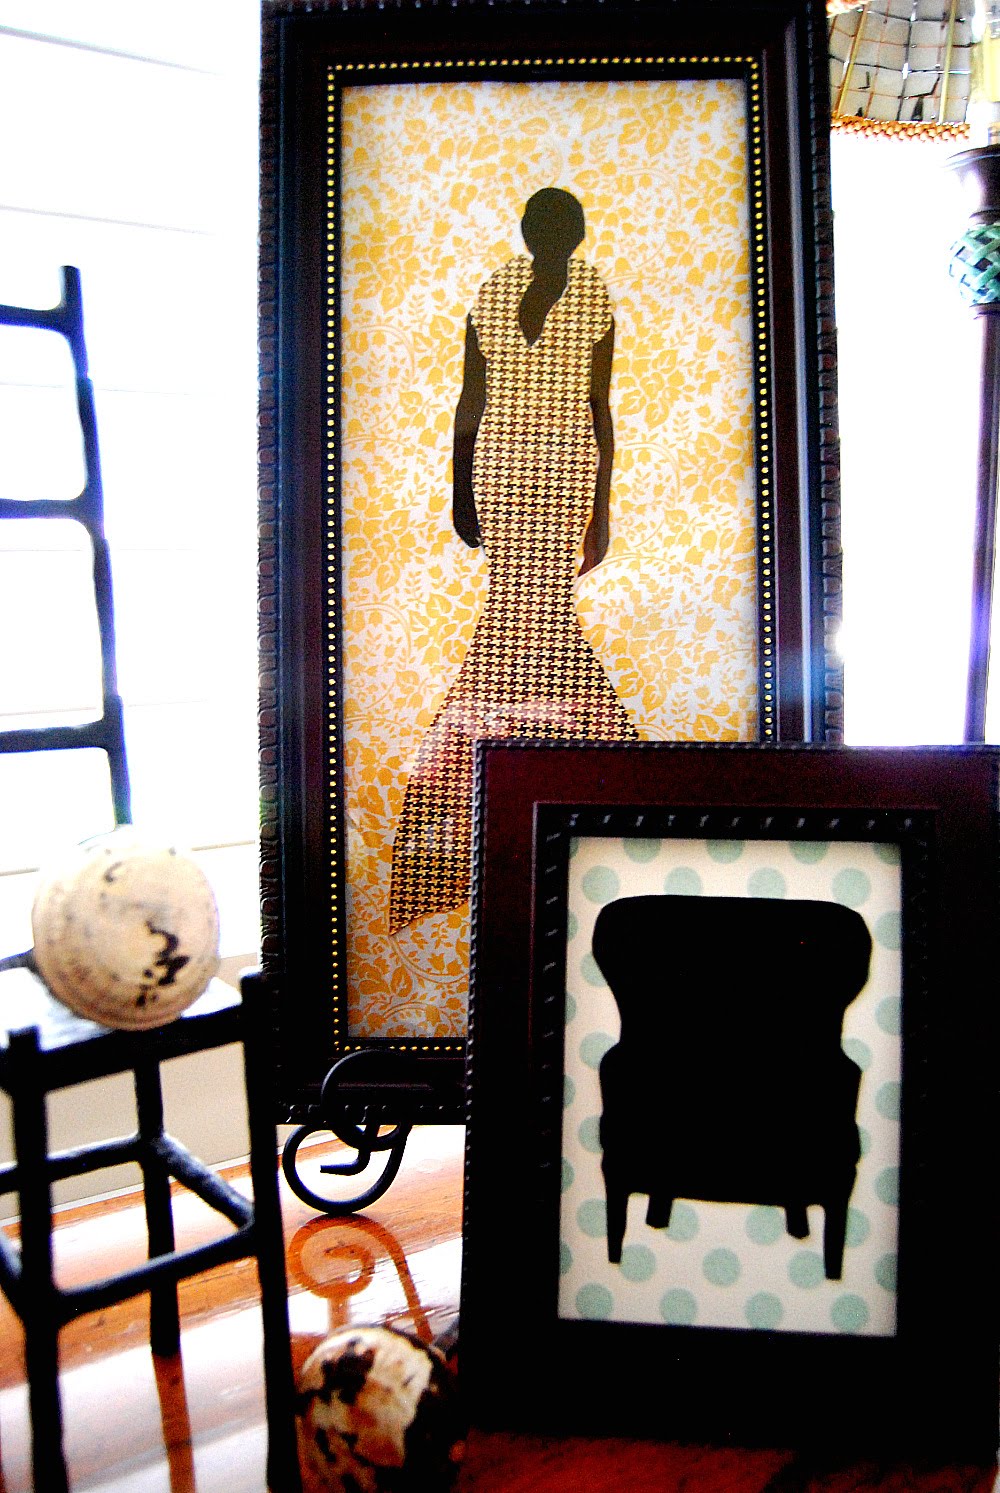
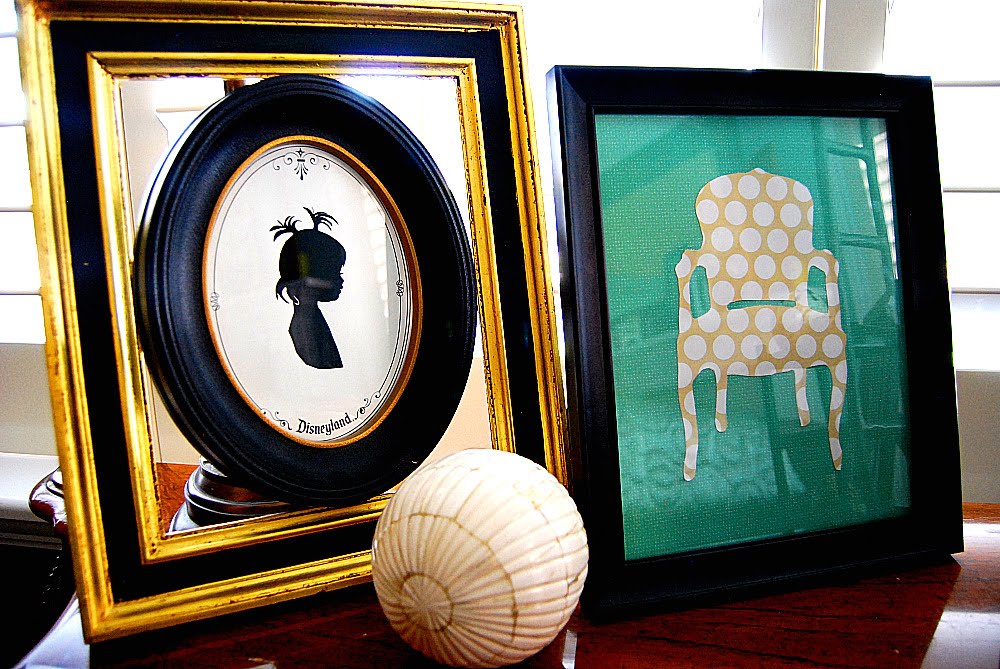
- I found pictures online of things I wanted to make a silhouette from — like the chairs, and the Eiffel Tower. I printed them off and then cut them out.
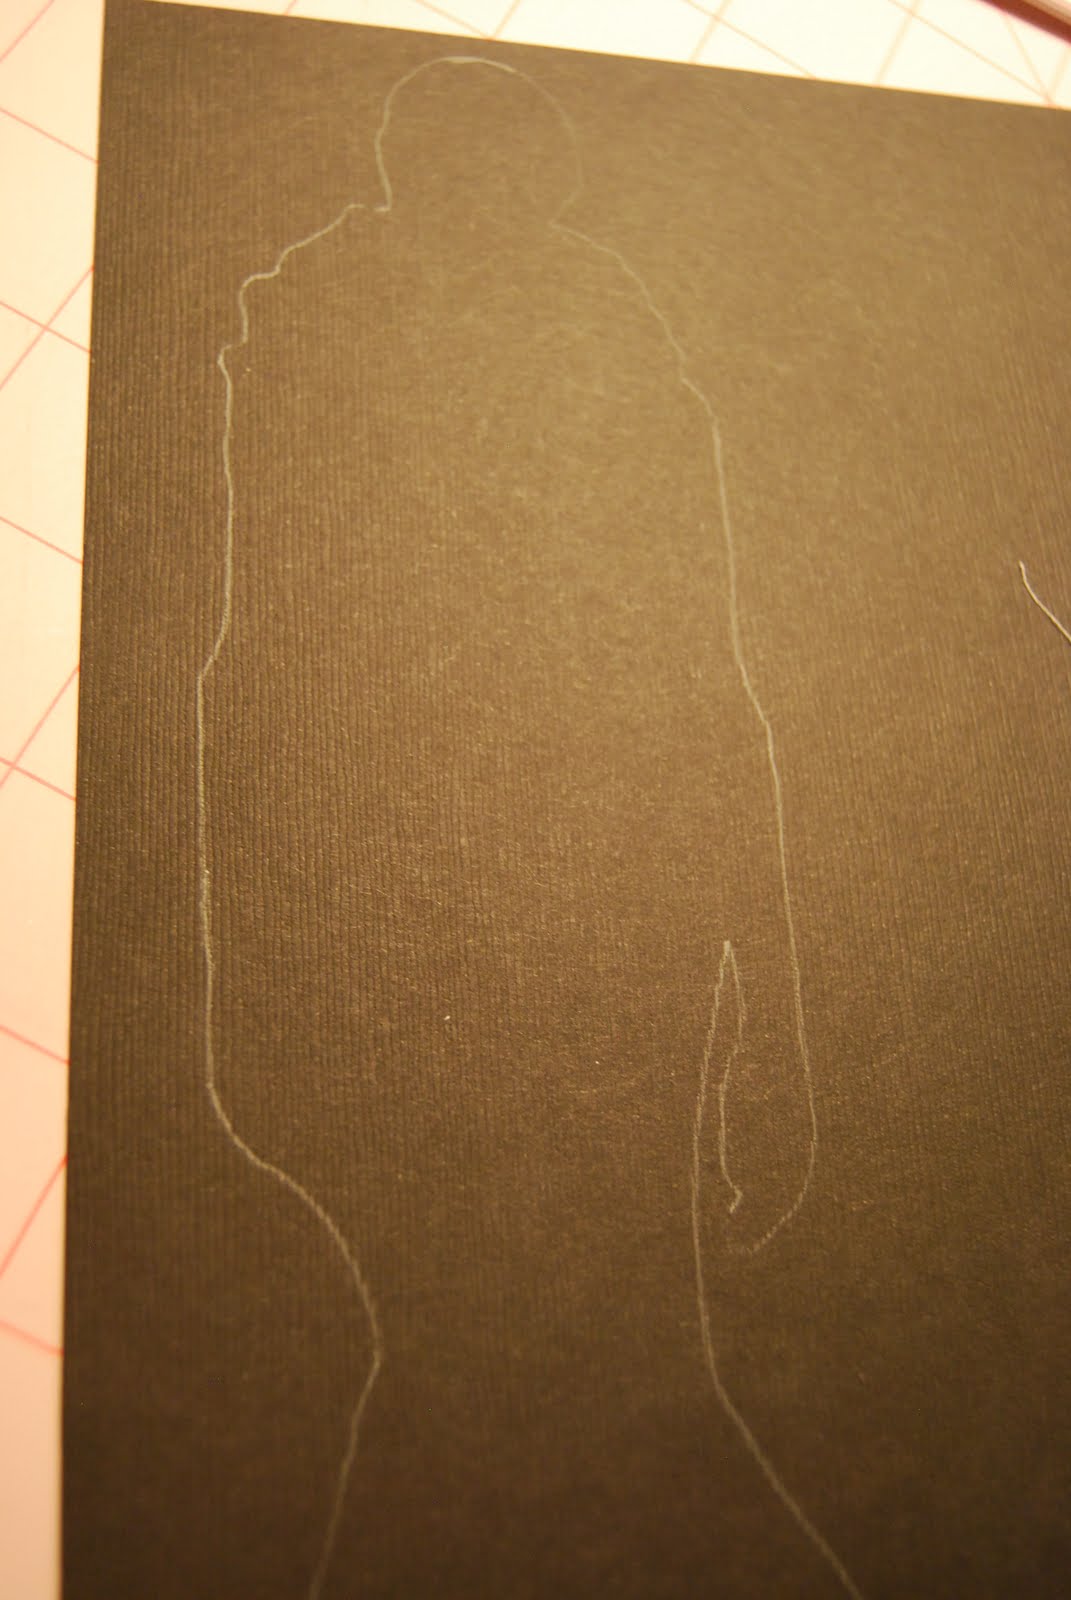
- Then I traced around the cutout onto the paper I wanted to use for the silhouette.
- Then I cut that silhouette out. I am sure either way would work. I did most of this project at night so this version worked best for me with no sunlight.
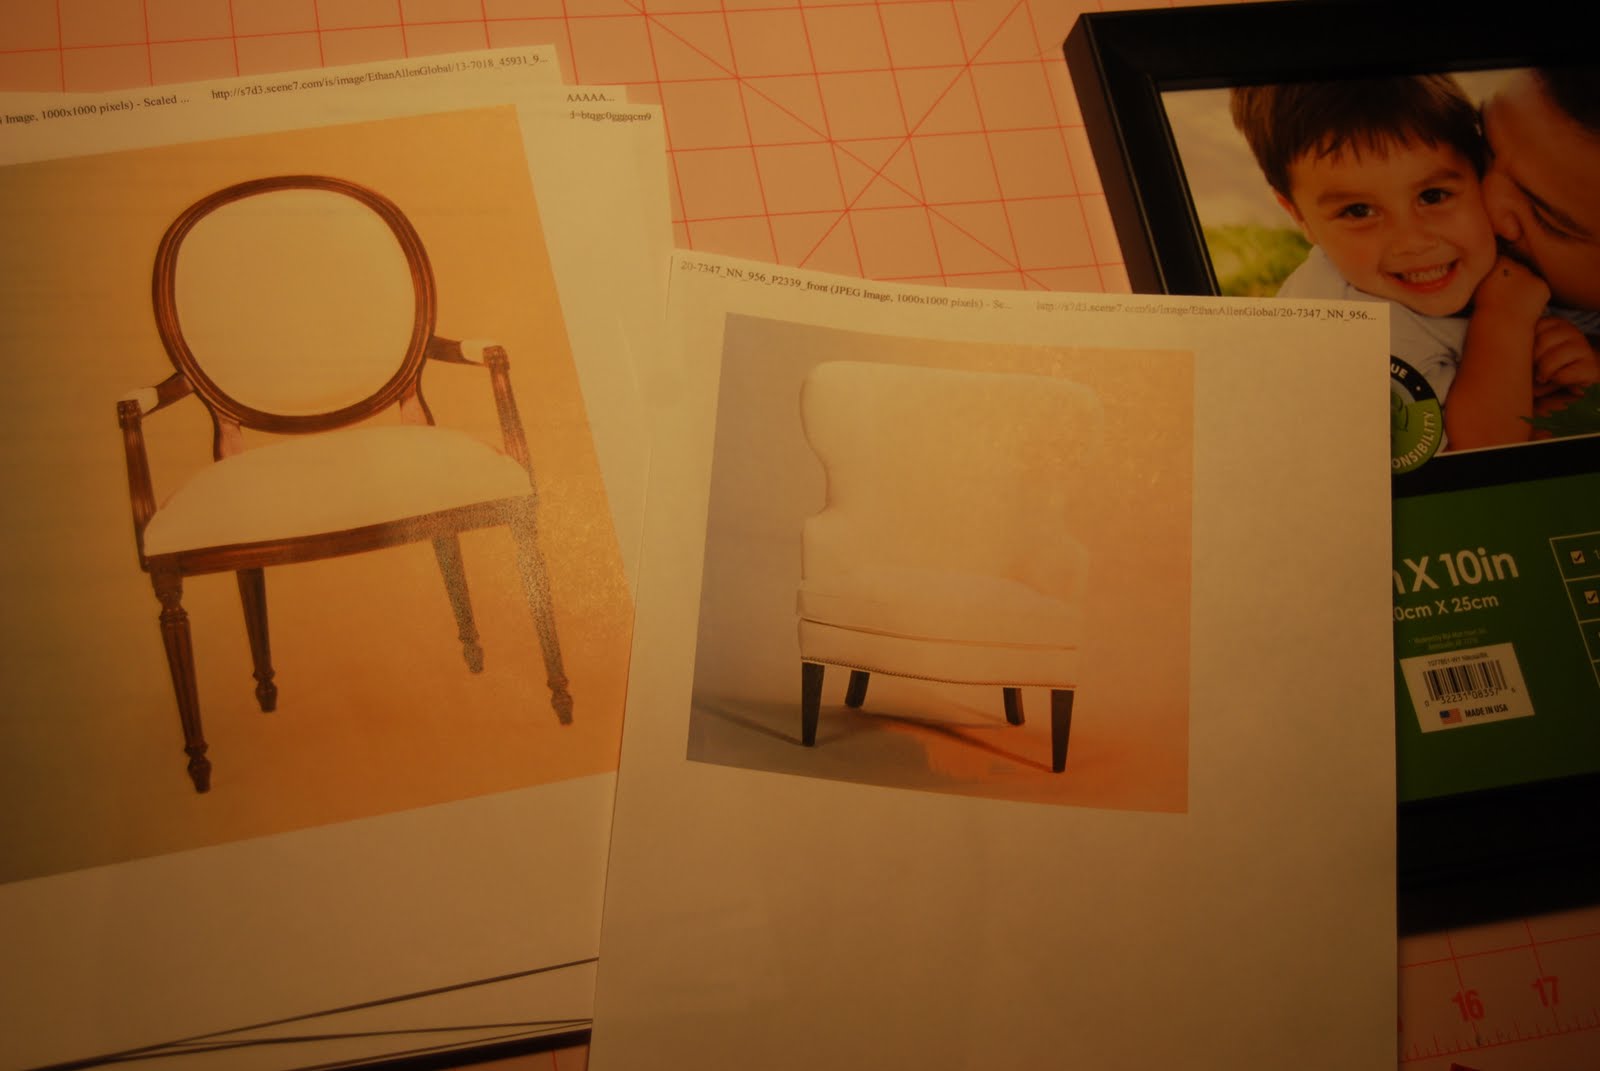
{I found these on Ethan Allen’s website}


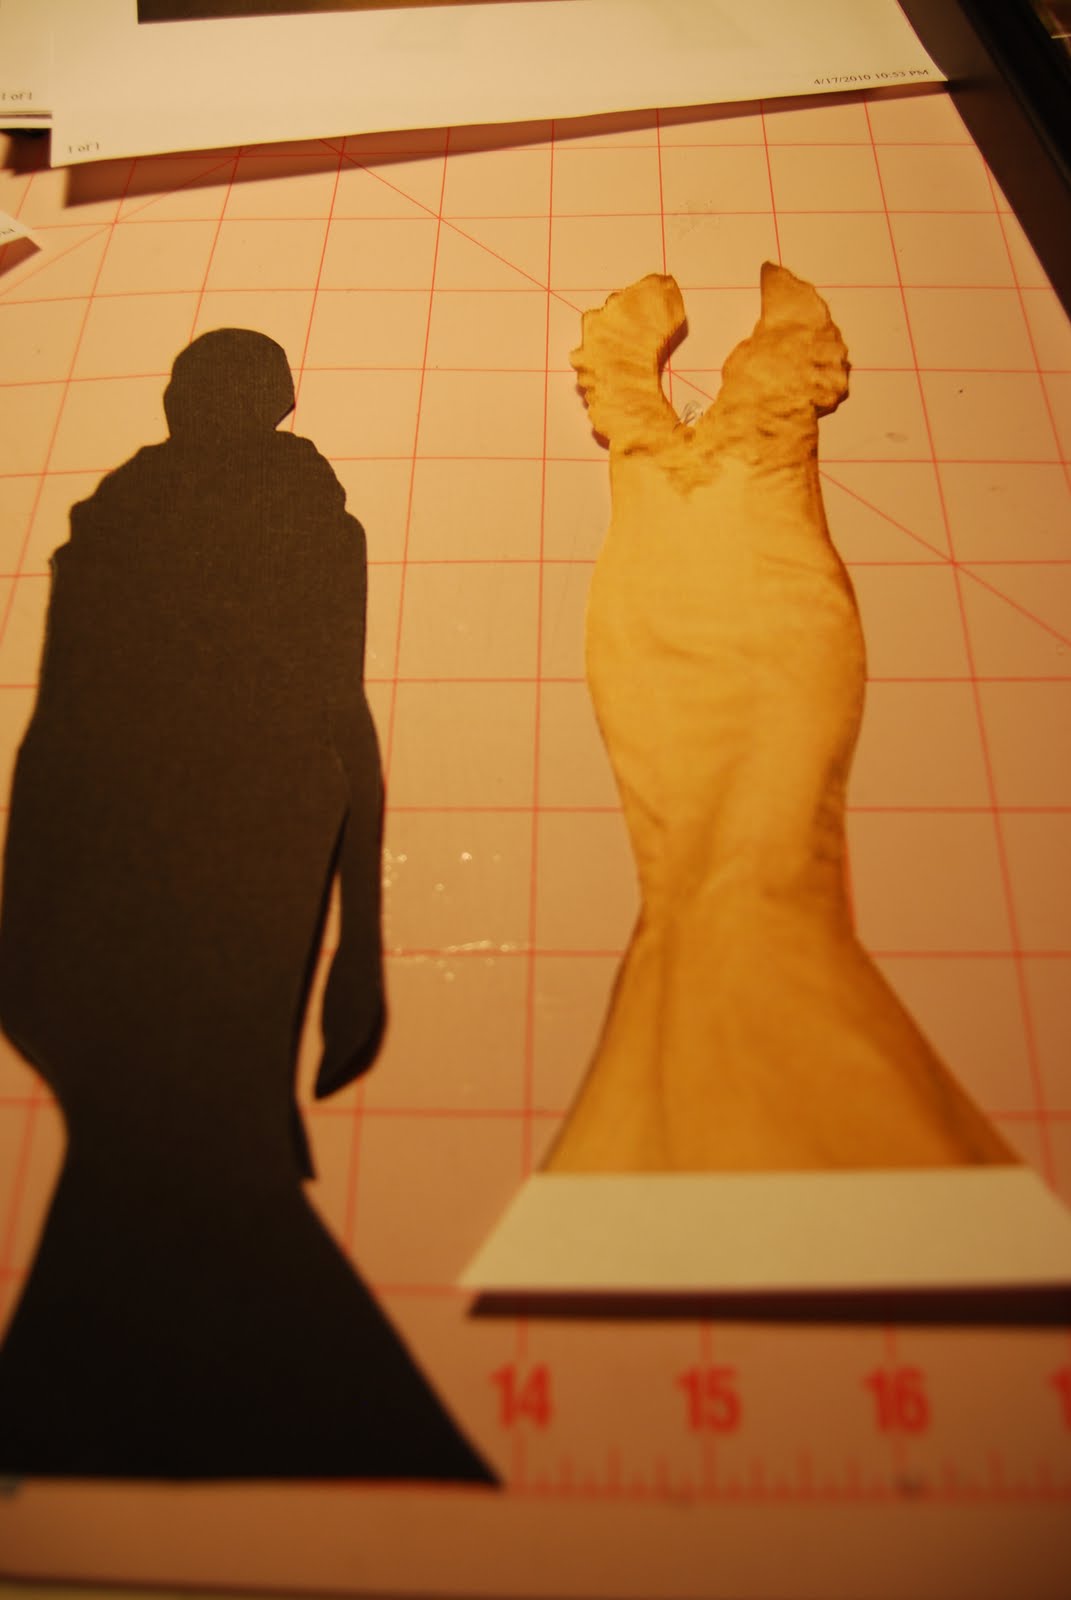
I cut them out using small scissors. On a couple of the silhouettes I needed to use an exacto knife to make small cuts.
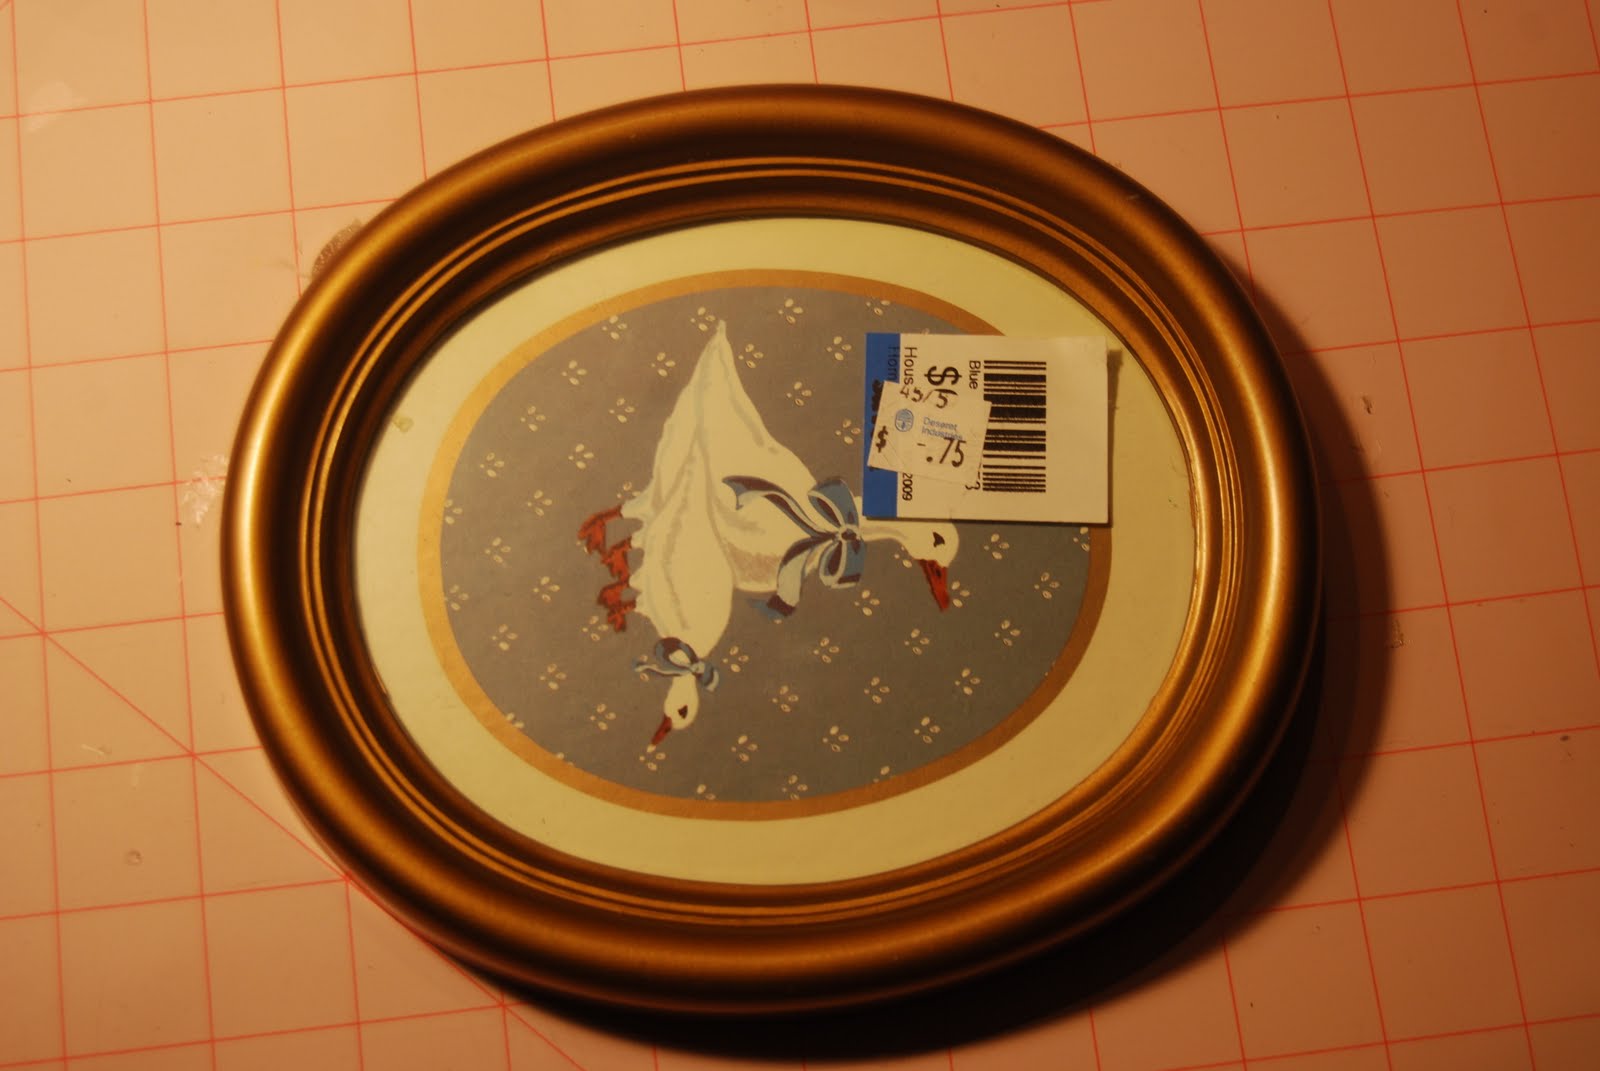
For the frames I used some Dollar Store ones I had around the house, a couple from Walmart and this one I found at the thrift store. They gave it to me for a quarter.
I also added a few little details to some of the silhouettes this doily to the woman’s silhouette:

To finish it off, I made a little pennant out of MAPS. I hot glued some buttons on it. It adds a little festivity to the mantle!


Now that the mantle is done, I need to work on getting the house cleaned up!
I am linking this project up to:
The Fabulous Beth’s — Ready Set Vignette Party!

And These other Amazing places. Go on over to see such creative energy:


And tomorrow I will start the How Does She Birthday Board Giveaway!

Don’t forget to enter to win one of
TWO awesome scrapbooking kits from Bad Girls HERE!

Have a Terrific night and Tuesday!
XOXO


wowza! i adore the silhouttes:)
good job!
:)gina
What a great tutorial!
LOVE these… the map bunting is the perfect finishing touch!
We have a friday fun finds party that's still going- we'd love it if you'd link up. 🙂
Just wanted to let you know that I featured this.
http://thespeckleddog.blogspot.com/2010/04/weekly-faves_30.html
I love how you did these! Such a great idea using the patterned papers too, fabulous!
I have to say that I love adding the color to silhouettes. I know they are the "in thing" right now, but sometimes I think they are boring (sorry)! Adding the color to them really makes me like them! If I ever make a silhouette, I am adding color or a patterned paper. Very cute!
LOVE!
hi jennifer – from another jennifer! – i love this – i've seen ones done in photoshop and i'm too impatient to take the time to do that — so this! so easy!!! i'm your copycat today. thanks for sharing.
This mantle is INSANE!!! I love it, all I can say is " I WISH " !!!
That is super cute! I'm going to have to try this. Thanks for the tutorial.
What a great tutorial! I love this idea. The little chair with the mini blue barn star on it is an adorable touch and I am loving the map banner! You are amazing as always Jen!! Thanks for taking the time to link up.
dang it, now i've got to add this to my crafty to do list. i need a few of these for the staircase makeover i'm planning.
Hi there,
This is my first visit at your blog and I love it! Love all your wonderful projects! We have a lot in common! And I'm definately going to make these silhouettes of my kids!! I know I'll be back 🙂
Kristi
LOVE, LOVE LOVE. Favorite thing I have seen in a while! Love the polkadot chair and tower ones. It makes such a beautiful statement! I am going to be HOOKED now!
Those are awesome. Great job.
Love. Simply love!
Thanks for the tutorial!!
Jen-loving this! I like your way to do it. I am thinking that your idea would look fabulous on my sofa table!! Thanks so much!! Also-you were fabulous on tv! (as always) hope you are having fun with the birthday stuff. Can't wait to see the pics of the whole event!!!
I NEED that Eifel tower one! I'm gonna make one. 🙂
I'm curious about the candle sticks in the picture. I recently found a super beat up/distressed wooden candle stick and want to paint it but keep the distressed look. I thought about the crackle glaze (never used it though) but not sure how that would work…these candle sticks have knicks in them.
Jen, this is a GREAT project!! I love how you gussied the silhouettes up. 🙂 The doily is a great touch!
I loooove your mantlescape! It is absolutely delightful and full of charm! great job!
I'm *loving* the doily addition! Great tutorial.
I LOVE your mantle. {I want a mantle, sigh.} Those silhouettes are just gorgeous. Love the pop to them!!!
awesome i love the idea! Totally going to do this with the frames i have!
Wow! The colorful backgrounds really make the silhouettes pop. Finally something I might have the confidence to try, ha!
wow – what a great post! I have been looking for new stuff for my frames! Thanks for all the ideas.
I LOVE this! We are working on my daughter's room and this would be so perfect in there. Thanks so much for sharing!
thank you so much for the tutorial! I have been wanting to do this but hadn't found a tutorial that made it easy enough, I need to get to work on this one soon!
They're all so pretty! Thanks for posting this tutorial.
Thank you for this tutorial! I have been looking for something like this, but never thought of this approach!
I love everything about this! I will be copying this very soon. 🙂
I love the silhouettes, but the map banner is my favorite!!!
Morning, You always make my days and give me a new challenge every time I come to visit. I look forward to my visits and even if I am in a hurry, I at least look.
Thanks for being such a kind and sharing person.
Barbara
Stunning!
I love those! 🙂 Another fantastic post by you! XO
Love, LOVE the silhouettes Jen! It used to be quite an art once upon a time. I was watching Cranford again the other night and Miss Mattie was swooning over the silhouette of her lost love. Oh my but we take so much for granted these days, like photos . . . we are so lucky!
Ok seriously you are amazing! Can I just be you please…? jk!!
~Morgan
Meet Virginia!
Meet Virginia!
Meet Virginia!
gah! you are killing me! I can't wait to unpack and decorate!
just lovely tutorial DAH-LING 🙂 tee hee hee
these are fabulous.
i'm going to scour my house for photos worth silhouetting!
and then i'm gonna get bargain hunting for fab frames like those!
:)ty for the how to's!
So cute Jen! I love them all! You did great today on Studio 5 again! You are such a natural!
I love these! I think my daughter would really enjoy making one for her room. I'll have to show her tomorrow. 🙂
Silhouettes have been on my to-do list for a while! I LOVE yours! Great job! I am SO ready to make mine after seeing yours! Awesome!
Ohh, I'm all into the COLORS of your mantel right now! Your creative mind never slows down Jen! 😀 You're amazing. <3
P.S. I Love the BEFORE mantel.. and totally thought magazine WOW! I like the balance of hight low high (frame in middle) low again.. that is just me! both look great! 😉
Darling Jen… love all the colors the frames and silhouettes. I didn't know it was the easy to make a sillhouette… well it sounds easy.. I will have to try. You are so smart cutting pics. tracing and cutting again.. Love it. Love the mantil and those darling candle sticks.. to to cute! Hope all is well.. busy lady! Hugs, Jenn
UH where did my comment go…I hate my internet. But anyways, I LOVE THIS! I can actually do this, so I'm going to! lol… I love that you found the pics online. I love the one of the woman with the patterned dress….these would SO inspire me when I'm sitting in my "office" (family room) editing pics for hours and hours…give me something to look at and decorate my walls. 🙂 Thanks so much for sharing!
I have absolutely NO silhouettes in my house! What is wrong with me? I love your mantel….how much do you charge to come decorate ones home? lol 🙂 I'm serious. You are one talented lady!
I have been on a serious silhouette kick lately, too! Yours are absolutely lovely!
Wow, these are fabulous. I really want to do silhouettes of the kiddos once Lila gets here. Thanks for the ideas.
Have a fabulous day!
I had them done at Disneyworld when my kids were young…hmm, now where did I put those? I love the ones you created, clever. I also love those aqua and white candlesticks!
You are seriously so cool! How do you come up with all of this fun stuff that I have to do too!? My to-do list keeps getting longer everytime I get on your blog!
Thanks for sharing how you made them!
Have a delightful day!
Jenn {redberrybarn}
I love you mantel and all the silhouettes! Looks awesome. I remember doing silhouettes for a mother's day gift when I taught
1st grade. Who knew they would be popular today?
Have a great week girl!
LOVE it with the bright backgrounds! What a great idea. I am going to HAVE to add this one to my to do list!:o)
I love how your silhouettes came out! especially the eifel tower!
thanks for the how to's
gail
OH, I just love silhouettes! I've been trying to get my kiddos silhouettes for a while now… and yours & a few others posts as of late are making me want to finish them up!! I can't wait! 🙂 Thanks for being such an inspiration, as always.
Blessings!
-Sarah
Those are stinkin cute Jen. I had to reread twice that that was your mantle! It looks like something out of a magazine. WOWSERS!
I LOVE silhouettes too! I plan on doing a silhouette craft this week. Thanks for some inspiration!
I do like the less crowded mantle….and those are just adorable! you are so, so talented!
Suzanne
Well, clearly those are awesome and I feel the need to dig out my scrapbook paper now and make some ASAP! The chairs are my favorite! You did a really nice job 🙂
These are great, Jen! I love the background and silhouette papers you used. I haven't jumped on the silhouette train, but I do love the ones you did of the chairs and Eiffel Tower. I could see doing the chairs {and maybe other furniture} and, maybe, one day when I get that home office, I could hang or display them in there!
K, I want to know what DI you shop at that you can get them to discount anything. My DI are total sticklers and they sure don't have any frames for $.75!
Also, I loved your "How many days til my birthday" I had to show it to DH because I put a reminder on his phone to buzz him once a week for about three months counting down to my birthday next week, but hey, it worked! He actually bought me a gift BEFORE my birthday this year instead of saying "Oh, I didn't get you anything yet, we will have to go shopping…" =0P
LOVE, LOVE, LOVE!!! They look amazing and perfect on your mantel. I really like the mix of fabrics, colors, and subtle textures and patterns. You have a gift, my friend!
~Amanda
Those turned out so cute! They look great on the mantel, too.
Nancy
It must be so fun for guests who come over to your house – there's always something new to look at!
Wow! I love how those turned! Especially the eiffel tower…nice job! 🙂
i love it! if i can get my 1 year old to sit still, i am all over this one!