Tatertots and Jello

COLORFUL HAPPY HOME -- Daily DIY, Decor, Craft and Recipe Tutorial

  • My Home
    • 1905 Cottage
    • Daybreak House
  • DIY
    • DIY Projects and Ideas
    • Organizing
    • Tutorials
    • Printables
  • Decor
    • Spring Projects
    • Summer Projects
    • Fall Projects
  • Crafts
    • Kids Crafts
    • Painting Projects
    • Paper Projects
    • Sewing
    • Wreaths
  • Holidays
    • Valentines Day
    • Easter
    • Halloween
    • Thanksgiving
    • Christmas
    • HAPPY Holidays Series!
  • Recipes

Explore

  • my home
  • diy
  • decor
  • crafts
  • holiday
  • printables
  • recipes

Connect

Home » tutorial » Teresa Collins Stampmaker — Make your own Custom Stamps!! {tutorial and information on the giveaway}

tutorial · July 1, 2011

Teresa Collins Stampmaker — Make your own Custom Stamps!! {tutorial and information on the giveaway}

Tatertots & Jello is a participant in the Amazon Services LLC Associates Program, an affiliate advertising program designed to provide a means for sites to earn advertising fees by advertising and linking to amazon.com.
Happy Friday!! 
I’d love to tell you about something really cool.
The custom Photocentric Stampmaker from Teresa Collins.
This was one of my favorite products I saw at the CHA show in February. 
You make custom stamps!!
{One of my goals this year is to share some of my favorite things. 
Here’s another one. 
More information on how to win a Stampmaker at the bottom of this post} 

If you are getting married, you can design a “save the date stamp”, you can make your own address stamps, or sweet would it be to make a stamp from your child’s artwork or handwriting? Or another cute idea would be to make a book plate stamp with your child’s name — the sky’s the limit!!! 

So when the the Stampmaker people contacted me and offered to send me a machine, I was so excited about the possibilities! I have just started to experiment with it, but seriously — it’s so easy to use.

The Stampmaker machine comes with artwork from Teresa Collins that is already done, as well as sheets that you can run through your ink jet printer and make your own stamps. 
I made a little plaque for my little puppy!  
She is the queen of the house, so I thought it was fitting to use the crown artwork that comes with the Stampmaker. 

Here’s a tutorial on how to use the Stampmaker: 


1. Plug the Stampmaker machine in. You need to let it warm up for a minute before you use it.


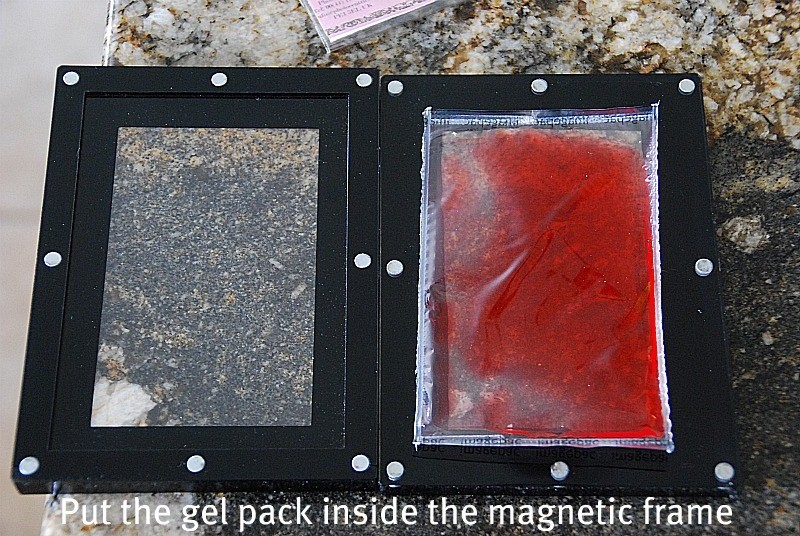
2. Open the Frame Clamps and insert one of the gel packs.

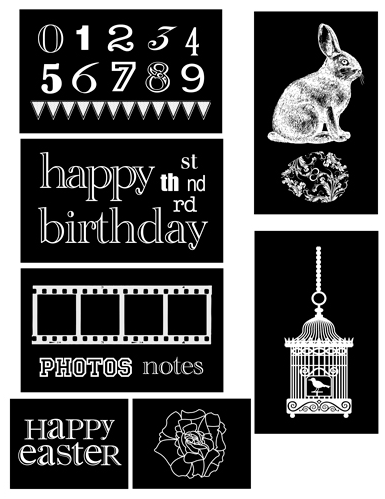
3. Then put your negative image artwork on top.

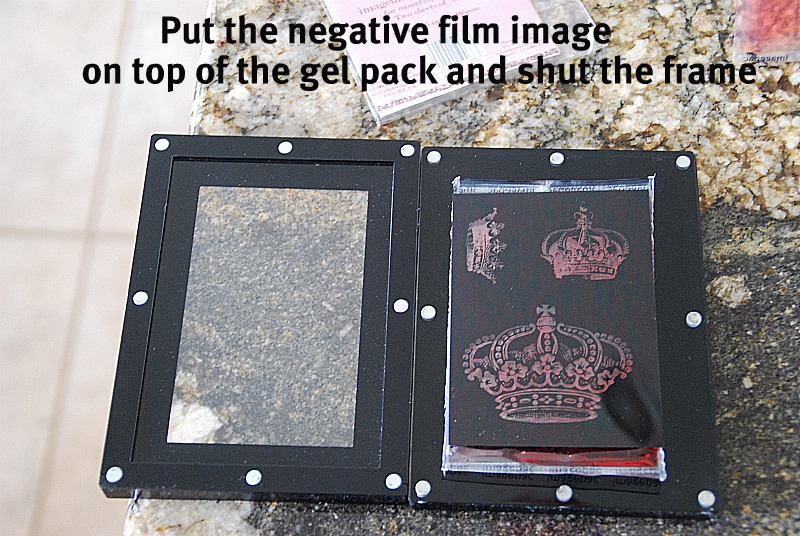
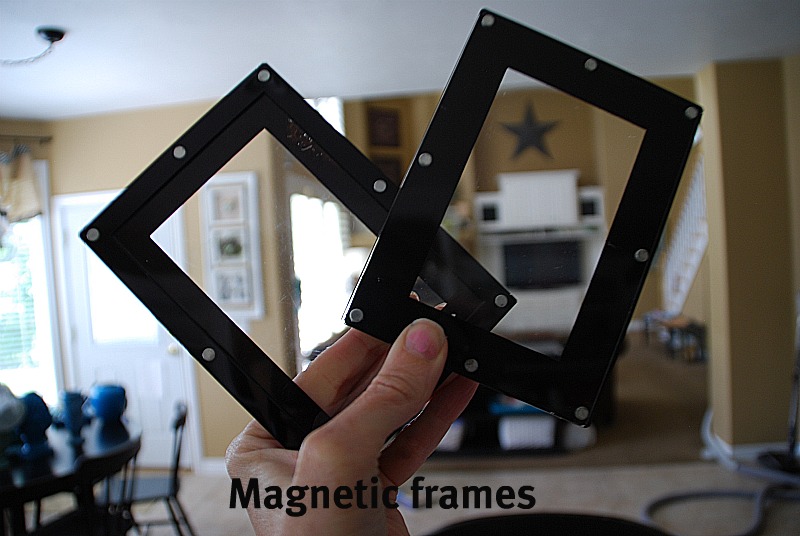
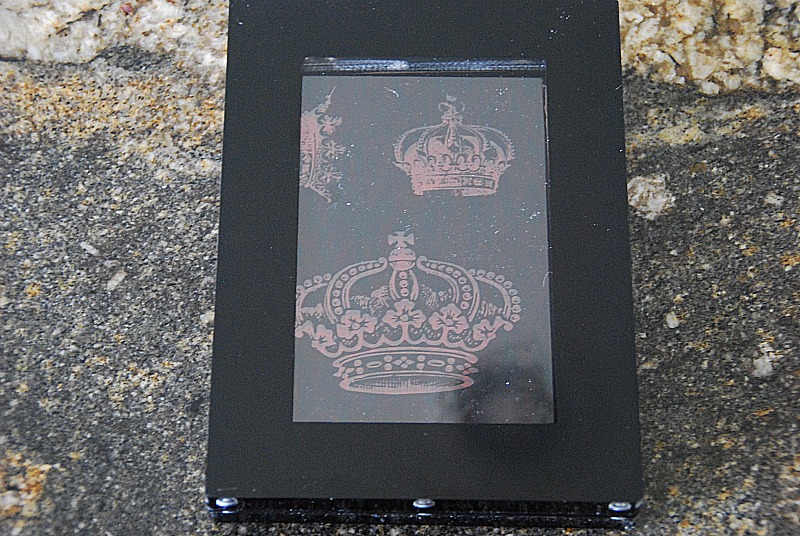
4. Shut the magnetic frame and put the frame inside the Stampmaker.

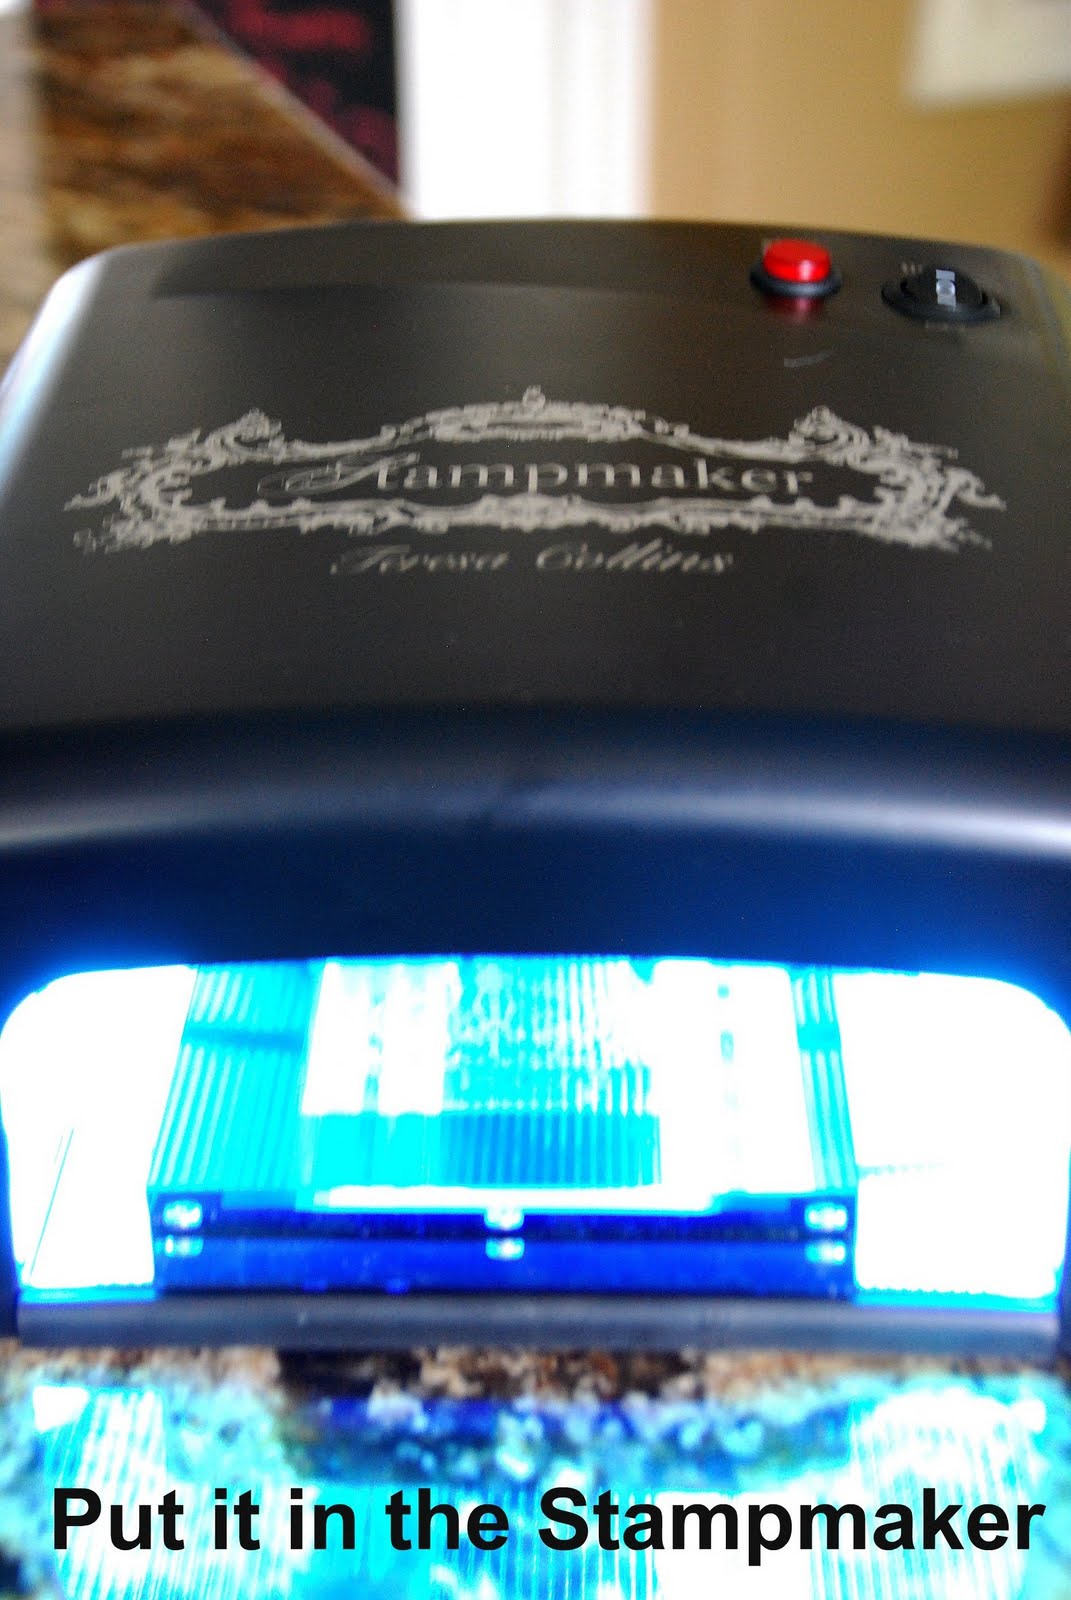
5. Leave it inside for THREE minutes — time it.

6. Take it out and cut the gel pack out of the plastic.

7. Scrub the excess gel off with soap and water.

8. Then put the stamp in the exposure tray and cover with a layer of water.

9. Put the tray inside the Stampmaker for TWO minutes. Time it.

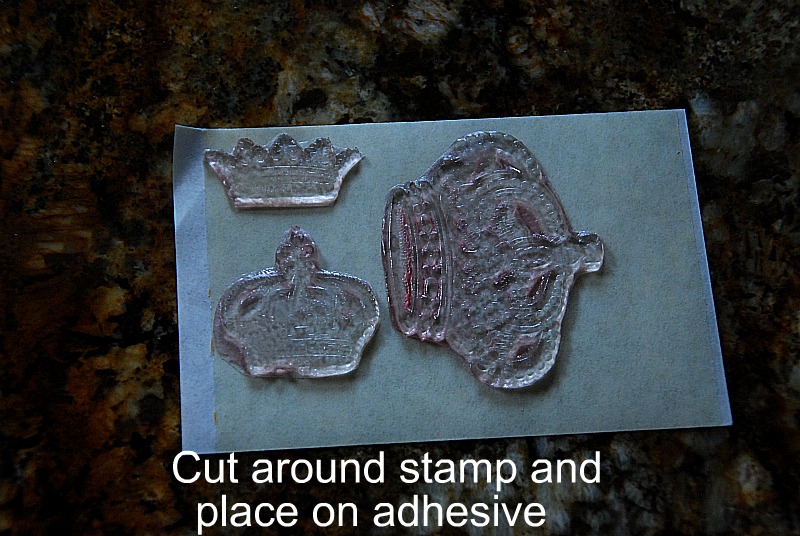
10. Take it out and trim around the stamps. Then mount the stamps on the adhesive paper. Cut around that.

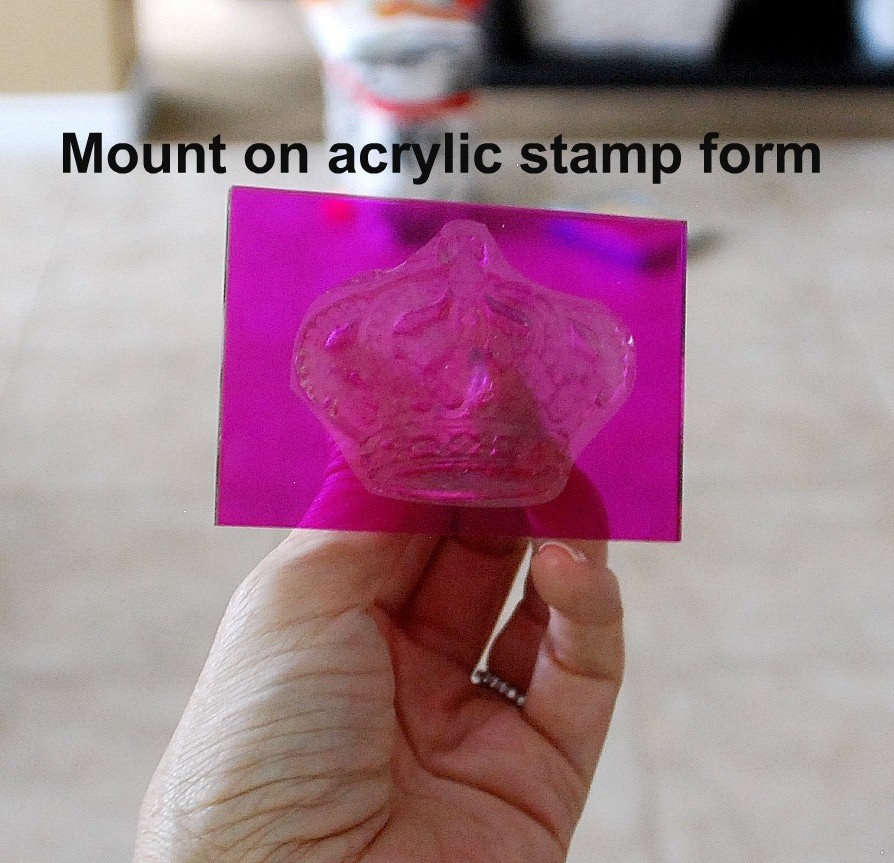
11. Mount the stamp on the acrylic stamp acrylic block.

Then use and enjoy! 

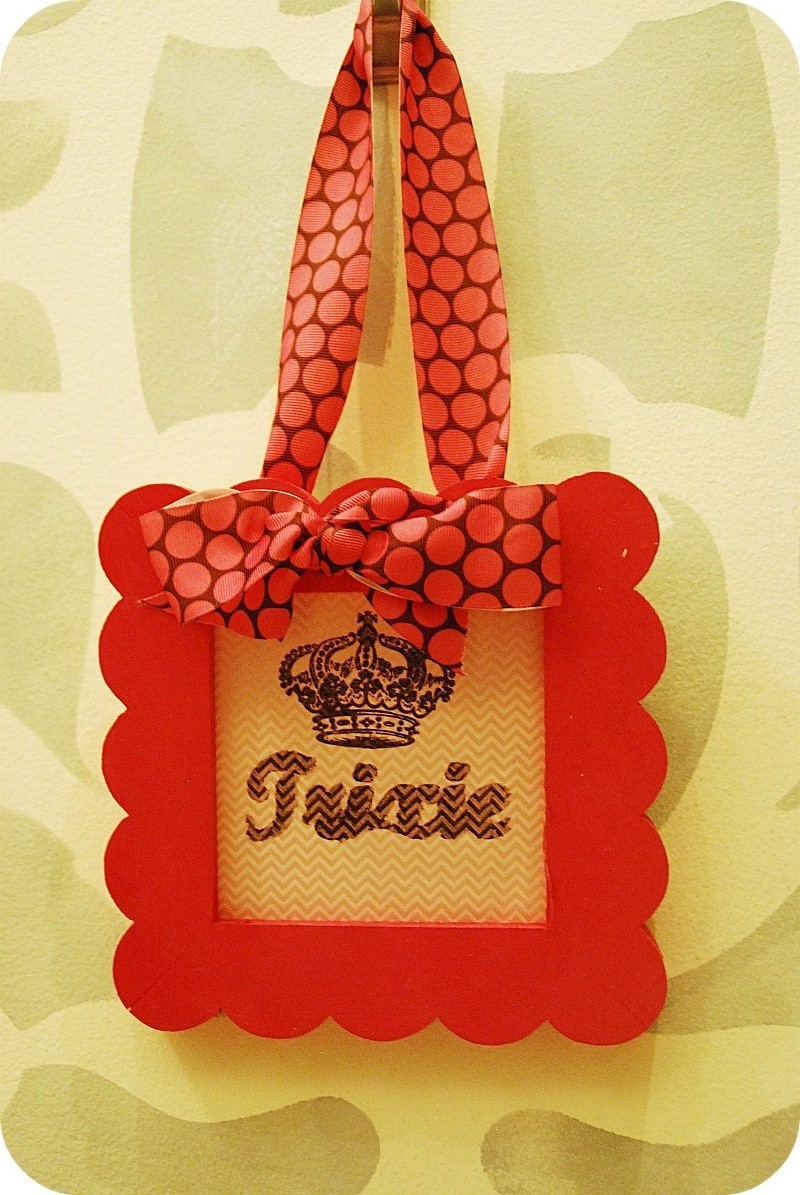
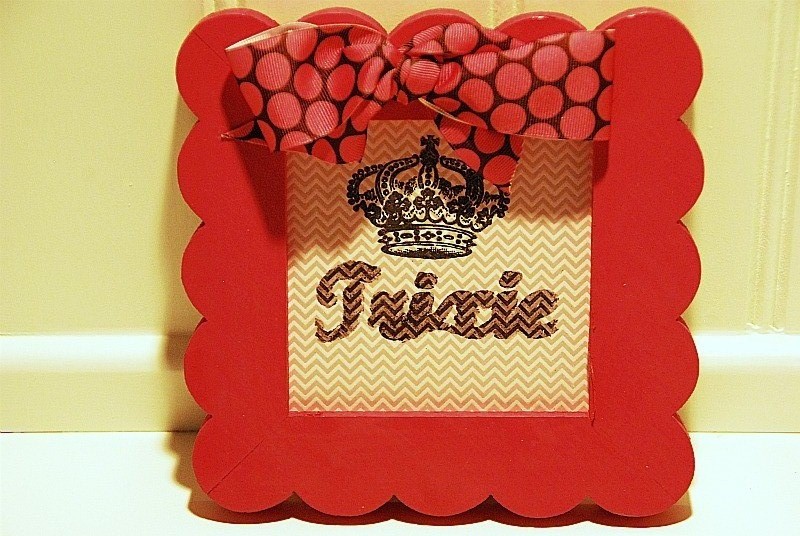
I also made my own stamp — the name of our puppy — TRIXIE. I designed the name in the software and then printed it off on the special negative film. You need to use an inkjet printer for this. Then I followed the rest of the steps to make the stamp.
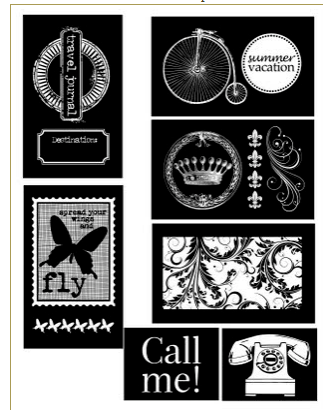
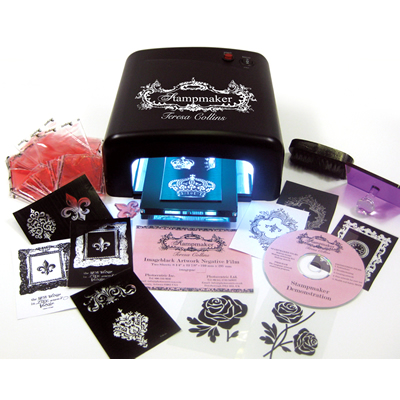
I used Command hook to hang the little TRIXIE frame over her little dog bed. She loves it 🙂 
The possibilities are endless with this Stampmaker. Plus, check out the Photocentric blog where they have free image downloads so you can make even more stamps!! These are the free June downloads  — 
aren’t they cute?
 
And here are the free April downloads: 

I am so excited to use these stamps for some fun projects!!
And guess what??? 
Photocentric is giving a complete Teresa Collins Stampmaker kit away to a LUCKY Tatertots and Jello reader!!!  
Check back at the Weekend Wrap Up Party tonight where you can enter to win one of these fantastic machines. 
Here’s what it will come with: 
  • Stampmaker light unit
  • magnetic clamp
  • 5 x Large and 5 x Small stamp pacs
  • 2 x Emboss and 2 x Stencil pacs
  • acrylic block, small stamp border
  • rubber mat for emboss and stencil making
  • wash brush, post exposure tray
  • CD with the easy to use imagepac artwork modifying program and many exclusive Teresa Collins designs (ready to print)
  • 2 x sheets of negative film for inkjet printers
  • 2 x 4" x 3" sheets of Stampmaker Cling (for mounting stamp to acrylic block)
  • 8 pre printed samples of exclusive Teresa Collins designed artwork negatives plus written and video instructions

 And here’s Stampmaker video tutorial:
 

xoxo

PS — I am over at Sew Dang Cute today — sharing a Tube Top to Skirt refashion. Come on over and say hi!

PPS — I can’t wait for tonight to see YOUR ideas!! I hope you will come link up to the Weekend Wrap Up Party — where I feature YOUR ideas!! The party starts at 6 pm MST.


Posted By: Jen · In: tutorial

"Summer Social" Guest Project — Mason Jar Kiddie Picnic!! {and printable recipe too}
Weekend Wrap Up Party — and Photocentric Stampmaker Machine giveaway!! {$169+ value}

You’ll Also Love

DIY Gingerbread Christmas Wreath
make a dog playhouse out of a box. all the instructionsMake an Adorable DIY Dog Playhouse Out of a Box!
Make Your Home Cozier with Boucle!

Comments

  1. Becki says

    July 28, 2011 at 6:38 PM

    I love my stampmaker! I just have to buy more packets, they are hard to find at a good price. I would like to buy more than five at a time. Kind of expensive plus the cost of the machine.

    Happy Card Encouragement Factory

  2. All Boys and Me says

    July 2, 2011 at 10:38 PM

    I am new to giveaways – Thanks for hosting a great one!!! I have liked Photocentric on FB, I have shared them and you on FB. I have tried more than a dozen times to leave a comment on their blog (which I am now a follower for yours and theirs). Their blog keeps bouncing me out :o( Hope I can still be entered for max times. Thanks!

  3. Shari B. says

    July 2, 2011 at 12:53 AM

    How fun is this!!! 🙂

  4. ferrellgraph-x says

    July 2, 2011 at 12:41 AM

    Oh be still my heart! How wonderful would that be!

  5. Jensen says

    July 2, 2011 at 12:27 AM

    wow – I can imagine so many projects to use this for! 🙂

  6. Jessa says

    July 1, 2011 at 11:40 PM

    I think I'm in love.

  7. Two Broads Design says

    July 1, 2011 at 11:21 PM

    I want one of these! 🙂

  8. Joel & Clarissa says

    July 1, 2011 at 4:32 PM

    Wow! This is so cool and original! I would love to win one 🙂

  9. Ruth says

    July 1, 2011 at 12:26 PM

    I would love one of these. I have to find something to link up now. Time to get busy.

    Ruth

  10. K. the Littlest Crafter says

    July 1, 2011 at 12:20 PM

    That's so cool!!

  11. Bellenza Wedding Bistro says

    July 1, 2011 at 9:25 AM

    Wow, talk about a crafter's dream machine (or a mom's, for that matter)!!!

  12. Shannon says

    July 1, 2011 at 7:11 AM

    Just yesterday decided to order a stamp ($35) for my biz logo, luckily I haven't done it yet. After reading this post I am going to do my own stamps. I have so many ideas. It will so pay for itself. Thanks!!

  13. AllisonandKyle says

    July 1, 2011 at 6:47 AM

    Holy moly!!! I HEART this!!!!! I kept going back through a looking at the pics 😉 Great idea!!

Hi! I'm Jen Hadfield. I'm a mom of 5 restoring an 1891 home in the heart of Salt Lake City. I love being creative and sharing simple ideas to make your life easier and more beautiful!

Receive the Latest Crafts, DIY, Recipes and More in your INBOX!

Follow us on Pinterest! It's awesome!

Top Posts & Pages

Spruce up Your Outdoor Space with a DIY Recirculating Fountain! (tutorial)
A New Deck in Under 30 Minutes!
12 Must-Have Items to Pack on an Alaskan Cruise!
Copycat Panera Spinach and Artichoke Egg Soufflés - SO good!
DIY Secret: How to Print on Post-It Notes (and Free Printable Template)
How to Make a T-Shirt Quilt!


Popular Posts

  • Spruce up Your Outdoor Space with a DIY Recirculating Fountain! (tutorial)
    Spruce up Your Outdoor Space with a DIY Recirculating Fountain! (tutorial)
  • A New Deck in Under 30 Minutes!
    A New Deck in Under 30 Minutes!
  • 12 Must-Have Items to Pack on an Alaskan Cruise!
    12 Must-Have Items to Pack on an Alaskan Cruise!
  • Copycat Panera Spinach and Artichoke Egg Soufflés - SO good!
    Copycat Panera Spinach and Artichoke Egg Soufflés - SO good!
  • DIY Secret: How to Print on Post-It Notes (and Free Printable Template)
    DIY Secret: How to Print on Post-It Notes (and Free Printable Template)
  • How to Make a T-Shirt Quilt!
    How to Make a T-Shirt Quilt!
  • 15 Between the Studs Bathroom Storage Ideas
    15 Between the Studs Bathroom Storage Ideas

As seen in


Amazon Affiliate

Tatertots & Jello is a participant in the Amazon Services LLC Associates Program, an affiliate advertising program designed to provide a means for sites to earn advertising fees by advertising and linking to amazon.com.
  • About Me
  • Advertising
  • Get Featured

Copyright © 2025 Tatertots and Jello · Privacy
This site is a place for positive discussion and ideas. Negative talk, comments that disparage others, and similar are not welcome and may be removed.