Hello, all of you fabulous Tatertots and Jello fans! I’m so honored to be sharing my tutorial over at Jen’s awesome blog today! I just love Jen and all of her wonderful ideas-I think if we knew each other in person, we’d be friends : )
In case you’re wondering who the heck I am, my name is Courtney and I blog over at Scraps and Scribbles. It’s where I share my crafty endeavors, adventures in cooking and sewing, make-up and beauty finds and pretty much whatever else strikes my fancy! I’m a stay-at-home mommy to one feisty little boy and wife to my smokin’ hot hubby 🙂 If you’d like to find out more about me, head on over to my blog and check out my About Me page.
A little while back, I did a post on my love of Mod Cloth and showed some of the things I loved. Well, one tee in particular caught my attention.
Photo courtesy of Mod Cloth
I fell in love and knew I needed one for my very own. Then I got to thinking, I could probably make it for less than I would pay for it from Mod Cloth (sorry, Mod Cloth.)
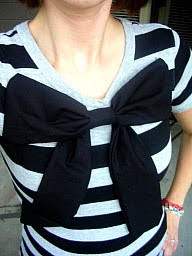
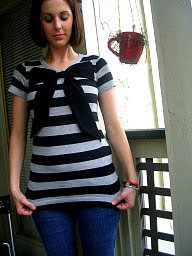
Not bad, eh? Best part, it was super-easy AND it was under $5 to make. And I’m going to show you how!
To make your own, you’ll need:
Tee shirt
Matching fabric, preferably a non-stretchy cotton material
Matching thread and needle
Cutting mat and rotary (or just a measuring tape and scissors)
I got my striped tee at Forever 21 for just $3.50! I was so happy, not only because of the price but also because it was exactly what I was looking for.
To determine how big I would need to make the bow, I measured from shoulder to shoulder just under the neckline and for the ties, I measured from the center of the neckline down to where I wanted the ties to end. Remember to double the width when you cut out your pieces since you will be folding them in half.
If you want to make a bow the same size as mine, here are the measurements:
Bow: 8 inches by 12 inches
Ties: 4 inches by 26 inches
Center loop: 4 inches by 4 inches
Using my momma’s super cutting mat, ruler and rotary, I quickly got all of my pieces cut out (I so need a cutting mat and rotary! It saved me SO much time!)
Like so. The next step is to piece your bow together.
I started with the smallest piece and worked my way up. I folded the piece for the center loop inside out and stitched along the side, leaving the ends open. Then I turned it right-side out, formed it into a loop, with the seam on the inside and in the center, and folded the raw edges under about 1/4 of an inch, and had the ends overlapping about 1/4 of an inch.
Then I stitched the ends together, forming the loop, like so.
For the bow, I did the same thing, only instead of leaving the ends open, I started sewing at each corner and worked my way to the middle, leaving about an inch wide opening in the center to use to turn it right-side out, then stitched closed the hole. I did it that way because the loop will cover the stitches.
Once the bow was done, I accordion-folded it, length-wise and slid on the loop.
Then I stitched together the piece for the ties, in the same way as the bow, starting in the corners and working in towards the middle, leaving a 1 inch opening. But before I began sewing, I angled one end by folding the outer corner in towards the raw edge, creasing it and using the crease as a guide, cut it at an angle.
Once the tie was finished, I threaded it through the back of the loop, like so. I had the un-angled side 2 inches longer than the other, since I was going to be turning it up at the end.
I laid the bow flat on the shirt, with the loop just under the neckline in the center, pinned it all in place and stitched down the sides of the bow, and the corners of the tie, folding up the un-angled side. By just tacking down the corners, it gives you room to move without tearing or pulling at the shirt.
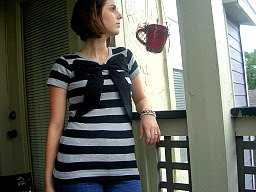
And there you have it! I wore it the very next day, I was so happy about it!
Thanks so much, Jen, for having me today!
Thanks Courtney! I love Courtney’s blog. She has great ideas! Some of my favorites are:
She came up with a way to make wreath embellishments Interchangeable! Love that!
Courtney is a girl after my own heart with her Anthro-inspired clothing tutorials!
I love her Photo Collage Star too!
Hand Screen Printed Tee
Courtney also has a really fun Friday series called Fashion Fridays where she shows off all sorts of great deals, fashion themes and new stores.

Be sure to check out Scraps and Scribbles – you will love getting to know Courtney!
xoxo
PS — Come on over for the Weekend Wrap Up Party tonight!! We had a wonderful time last week and almost 400 projects were linked up. I can’t wait to see what YOU have been working on! The party starts at 6 pm {MST}.
And, don’t forget to enter to win my giveaways this week:
THREE sets of Halloween Countdown Blocks!
and
Your choice of ANY Ruffle or Tie Tee from lilsteinstyles!
and
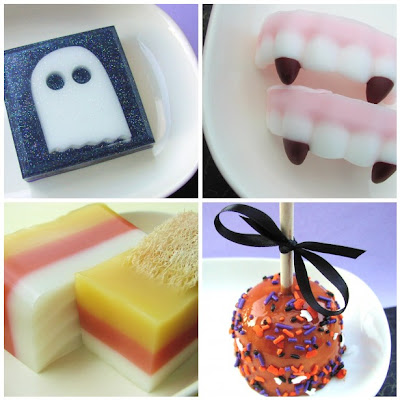
A $20 Gift Certificate to Sunbasilgarden Soaps (TWO Winners)






Thanks for having me visit, Jen! I'm truly honored!
Hi! I am one of your newest readers!! I love your blog! Way cute! Hope you come check out and follow me on my page! Simple as 1-2-3!
http://simpleas1-2-3.blogspot.com/
=)
Ooh, I think I just found a new blog to follow 🙂 I LOVE LOVE LOVE Mod Cloth! All the projects look great!
Great project! Thanks for introducing us to a fun new blog! LOVE LOVE!
Dang! That's soap at the bottom?! I wanted to eat it! 😉
I love it!
I really love this!!!
Great Tutorial. Looks nice, easy and fun!