I love to stencil. And I was so thrilled when I learned that one of my VERY Favorite people in the world – Amy from Mod Podge Rocks – was coming out with her own line of Mod Podge Rocks Stencils!! And not only stencils, but repositional stencils. They are sticky and that makes all the difference when you are stenciling, PLUS you can wash them off and they stay sticky. I love that you can use them again and again!!
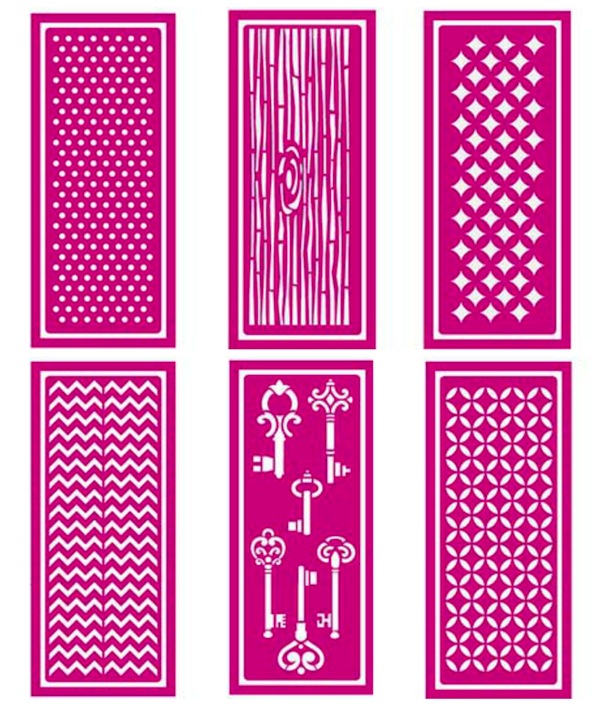
And check out the cute patterns that Amy created! Love!
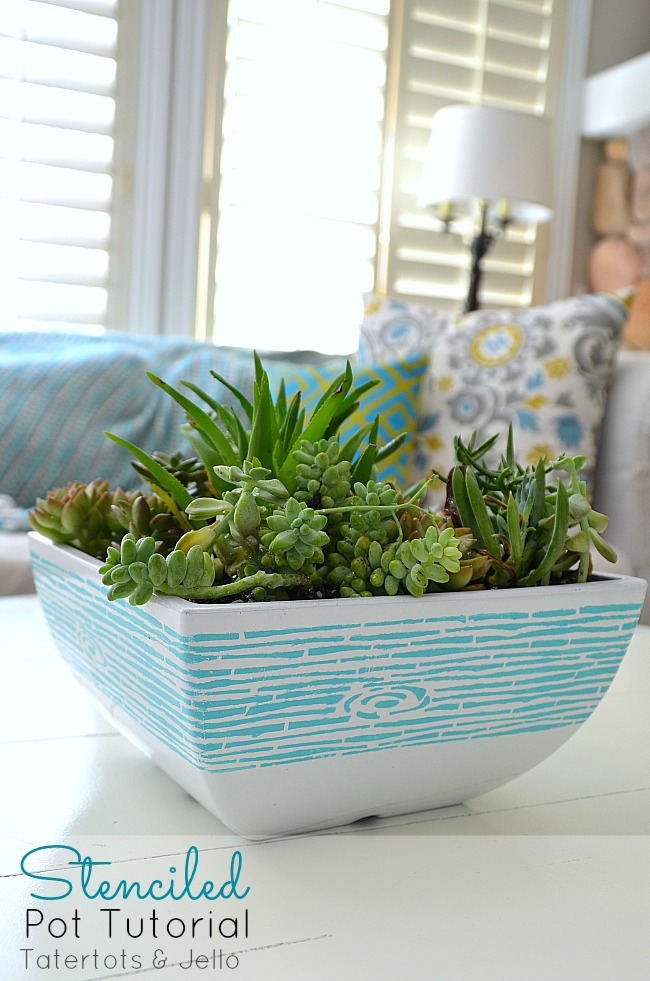
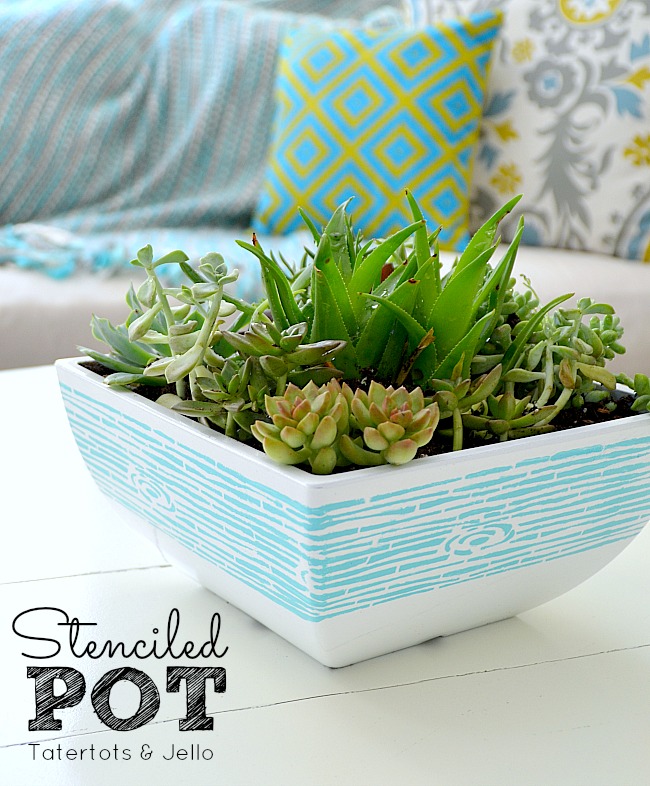
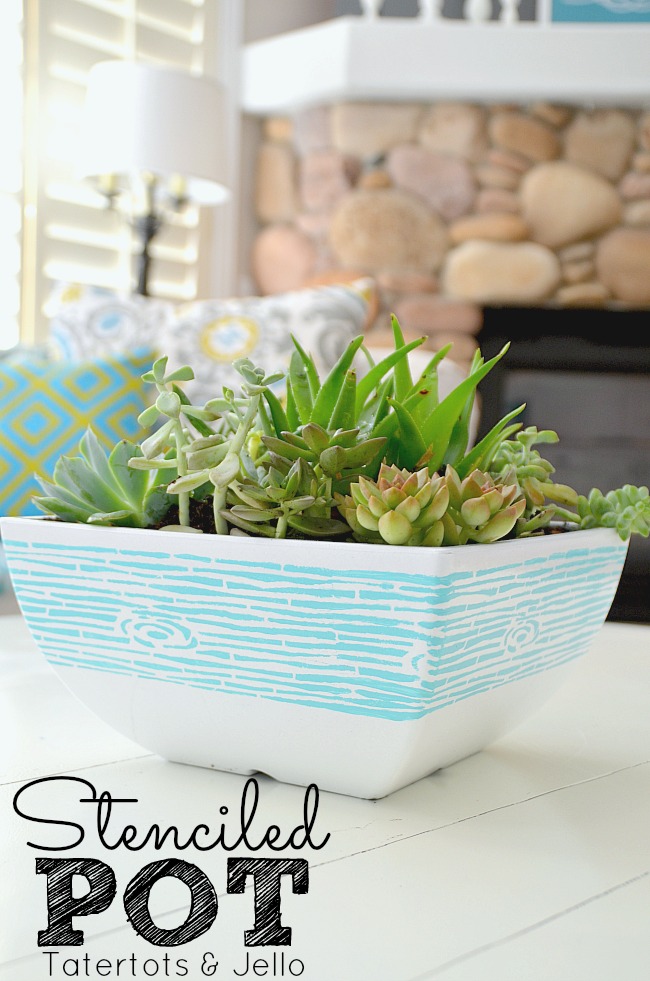
And since I am so anxious for Spring, I knew I wanted to stencil an outdoor potto go on the porch of the #1905Cottage. So I picked one up from Target and got to work.
Here’s what I did:
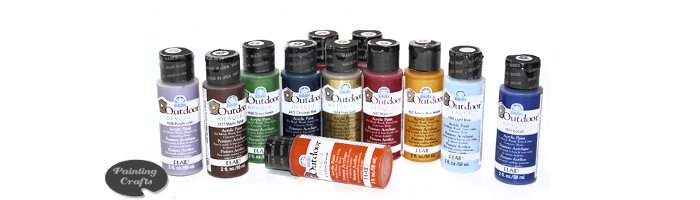
Now the trick with outdoor stenciling is to use a paint that is made to withstand the temperatures and conditions outside. Plaid makes an outdoor craft paint which is perfect.
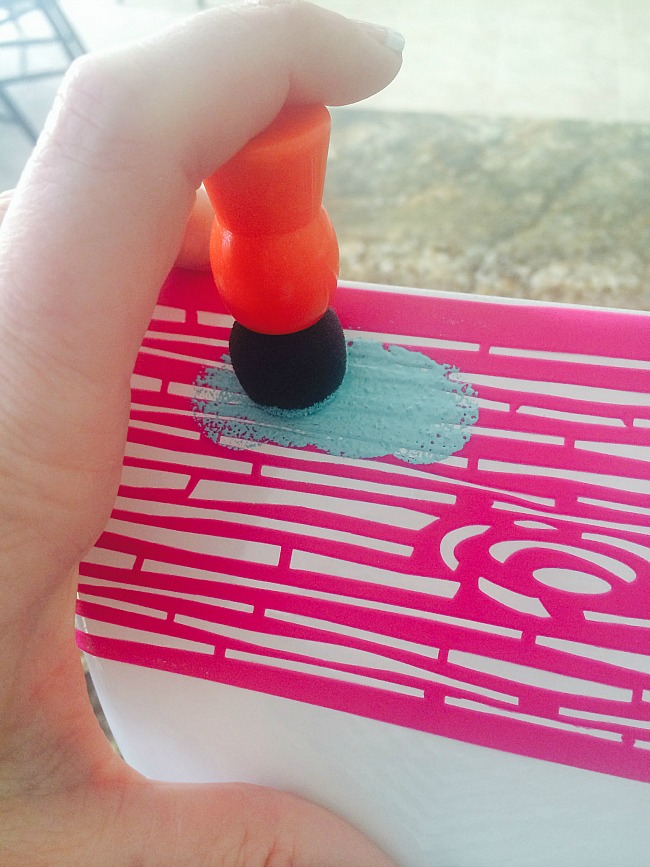
- The first thing I did was I stenciled each side of the pot with the sticky stencil. The stencil was not long enough to cover the whole side, so I knew I would need to go back and stencil the other side. I washed the stencil off in the sink in between each side. That way paint wouldn’t get underneath the stencil and make the lines blurry.
- I dried the stencil off on a kitchen towel and stenciled all four sides of the pot.
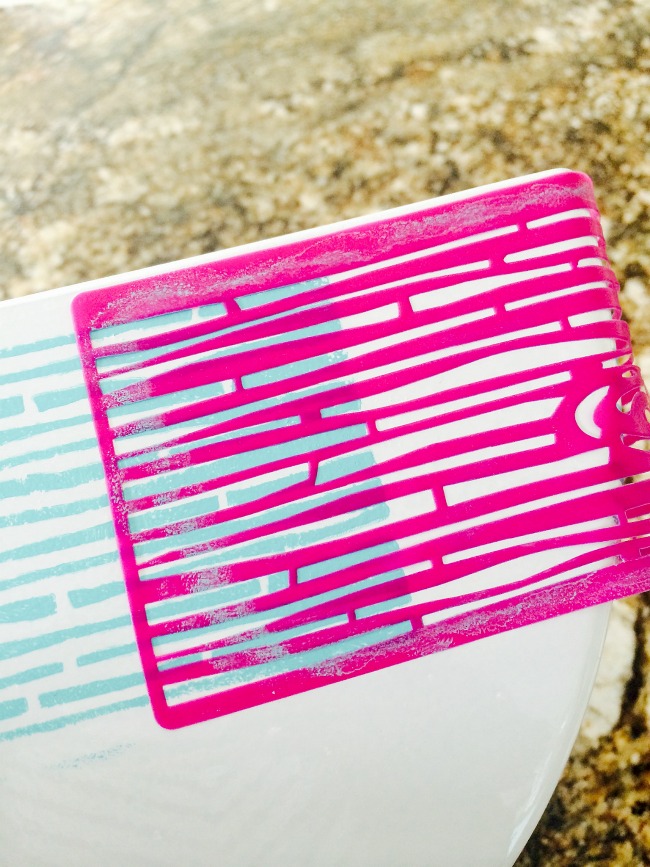
- When the sides were dry, I matched up the stencil to the painted parts, overlapping the stencil and finished off each side.
- To make sure there wasn’t a noticeable line where the old stencil and the new stencil started, I used a sharp knife and scraped off any extra paint or lines that didn’t line up exactly. Scraping very lightly. You can also take a fine paintbrush and touch up any lines or imperfections.
- Then I planted some succulents in the pot and I was done. The outdoor paint is very durable and should withstand the elements.
This project has got me in the mood for Spring. I can’t wait to stencil some more pots for my porch!!
What project are YOU most excited to make for Spring?
Let me know in the comments!!
Have a Happy Day!
xoxo

PS: I’ve linked up this post to these fabulous blogs this week!


Oh Jen this is too cool! Love how you decided to use them! Perfect time of year too, I’m ready for some greenery in my life!
Thanks for the tips! Can’t wait to try them. Just now stoppin’ by from last Friday’s Link Party Palooza over at Today’s Creative Blog! Have a great week!
I featured you on my blog at my first ever “Best of the Internet”! Head over and check it out! http://mommylikewhoa.com/2014/03/best-of-the-internet-volume-1/
I just won this stencil from another blogger, and thus far, this is my favorite idea for it! I can’t wait to try it for myself! Thanks for the fabulous idea!
I am just getting ready to do some sprucing up outside. My porch has been on my to do list for over a year! Ha. This is a great idea for some of the old pots I already have. And I love that you can wash those stencils and they stay sticky! How cool is that? Thanks for the inspiration Jen.
How/where can we get the stencils?
You can find the stencils at Michaels.
So cute! I love the turquoise on white, with the beautiful succulents. And those stencils are pretty rad too.
XOXO,
Erin
http://www.thevaughnlife.us
Oh my goodness,, this jumped out at me on Pinterest. Great tip on lining up the stencil. Thanks for sharing, can’t wait to get the stencils and start looking for solid pottery. Gorgeous succulents. xo
I absolutely love how this turned out Jen- what a pretty collection of stencils! But somehow that faux bois makes my heart pitter patter. So pretty!!
Hey! YOU are one of my favorite people! I love this pot – so pretty! I can’t wait to combine my stencils with your new line! Thank you! xoxox
Love you, my friend!! I am so thrilled for you. These stencils are awesome. Thank you for letting me post about them!
xoxox
I just love that stencil, what a cute way to display your succulents!
Love the colors and all the succulents! Beautiful!
IN LOVE! That is one gorgeous pot! I really need to get those stencils, I fall in love with the wood grain one over and over again!